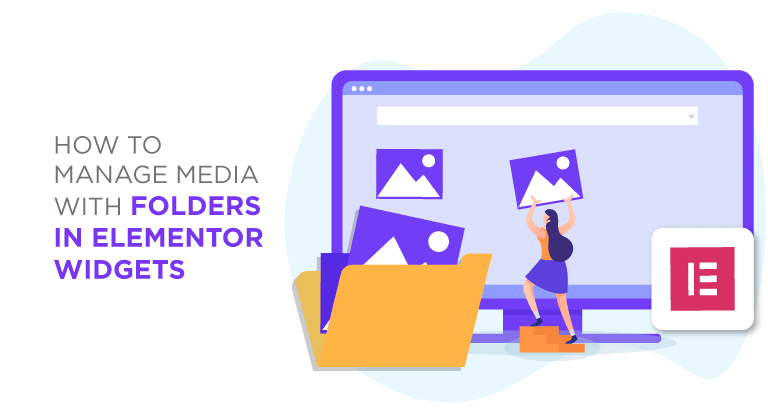
How to manage media with folders in Elementor widgets
Elementor is one of the most known page builders for WordPress as it makes easier the post and page creation with a lot of widgets but it doesn’t really help when we try to find a file in order to insert it into the post or page.
That won’t be difficult anymore as with WP Media Folder you are going to be able to create folders inside the media library and on Elementor :)
You will have the best of these two tools, Elementor to create awesome posts and WP Media Folder that allows you to organize your media library and create galleries.
Table Of Content
Looking for a powerful file management solution for client websites?
WP File Download is the answer. With advanced features like file categories, access restrictions, and intuitive UI.
Impress your clients with top-notch file organization!
Let’s use Elementor and Media Folders
For this tutorial, we will create some folders using WP Media Folder in the process of the post creation.
First of all, we are going to go to Posts > Add New and click on Edit With Elementor this will load the page builder.
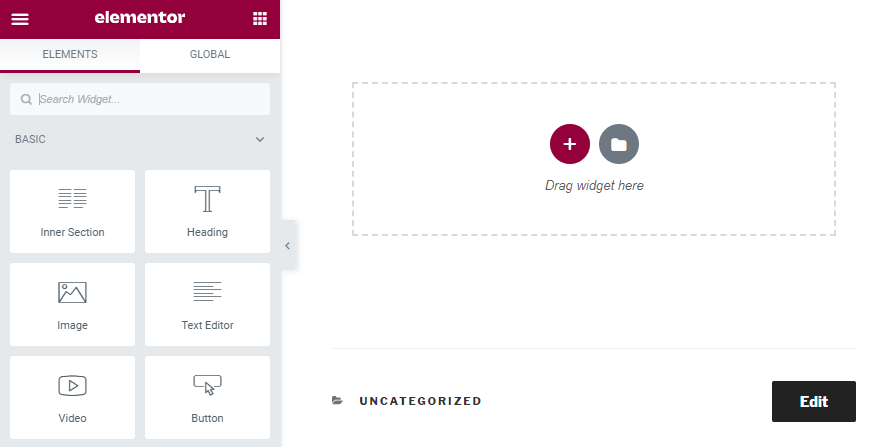
It looks exactly the same, yes but we will see the difference when we create a new gallery or add an image.
Now drop the “image” widget into your post to add an image.
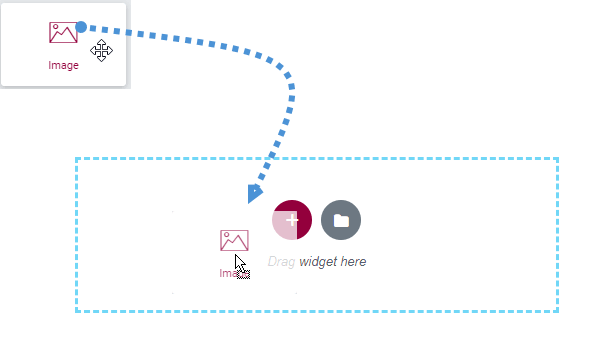
Now that you have placed the image widget, just click on “choose image”, here is where we are going to see the magic, now you are going to be able to see a lot of options to create folders that will make easier the image organization process.
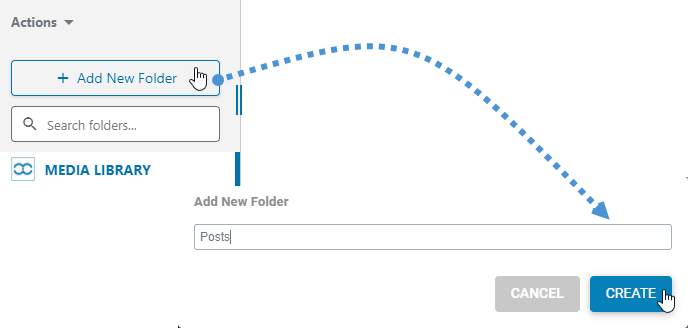
Let’s say we are going to create a post related to dogs, it could be a good idea to create a folder per post, also we could divide our main library into folders for posts and pages for example.
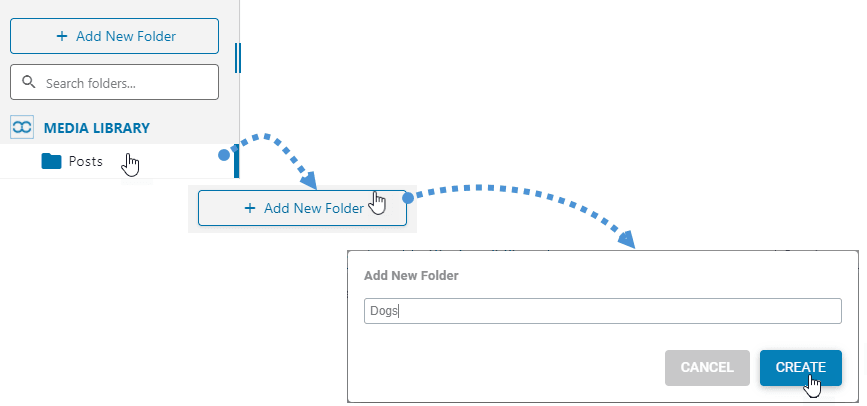
So first of all, we are going to create a folder called “posts”, in order to achieve this, we just have to click on +Add New Folder and now, type the name of the new folder, in this case, we will type “Posts” and click on Create.
You will see a new folder created called “Posts” and now, inside of this folder, we will add a new subfolder with the name of the post that we are going to create, for this case, I will use “Dogs” but you can type the name that you want to ;)
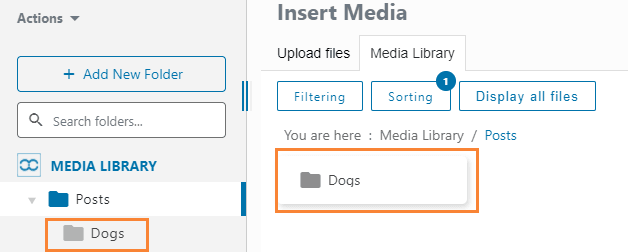
In order to create a new subfolder, you just have to go to the parent folder by clicking on it and, then select +Add New Folder, the plugin will automatically create the new subfolder.
You will see a new subfolder created just below the parent folder, there is also an option to go to the subfolder inside the parent folder at the top.
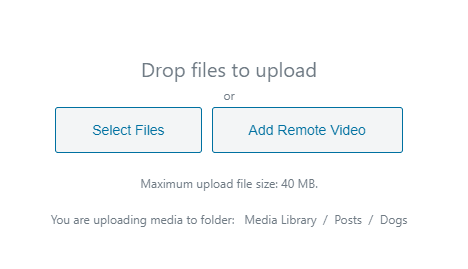
Now the next step is to start uploading the images for your post, just click on the “upload files” section and drop a file or select it from your computer.
Now that you have added your images and organized it, the process to create the post is going to be really easy as you will see only the images that you need to and not all other images that are not necessary for the post that you are creating :)

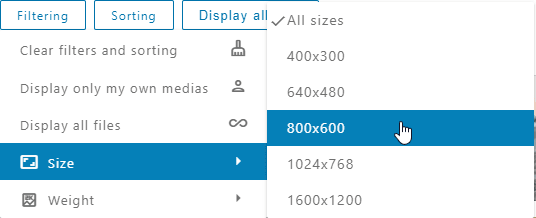
If you think that this one is the only option that you have with WP Media Folders then you are wrong as there are a lot of filters and sort options that you have to look for the image that you are looking for ;)
On filters, you have the size and weight options that will allow you to filter images using parameters.
You also have the option to manage these parameters by going to Settings > WP Media Folder > Media Filtering.
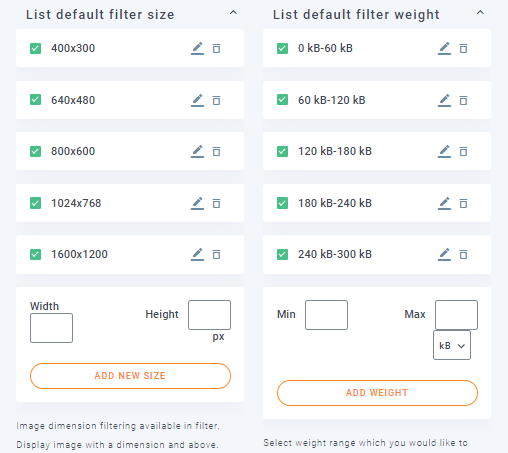
As you can see, there are really easy to use options to create, edit, and remove these parameters.
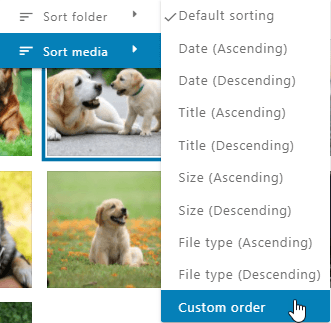
You can also sort the images inside the folders by using the following parameters:
- Default
- Date (Ascending and descending).
- Title (Ascending and descending).
- Size (Ascending and descending).
- File type (Ascending and descending).
- Custom order: this option allows you to order the files inside the folder by dragging and drop it.
Now, what happens if you are looking for an exact image by the title? The answer is the search field.
This search field will allow you to search for an image by typing the file name.
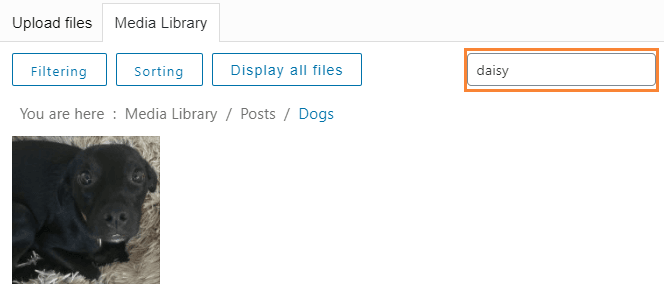
For example, if we look for the daisy picture, it will automatically filter it ;)
Now that we have found daisy in order to insert this to the post we just have to click on the image, and, at the lower right corner, you will see the “Insert Media” option, just click on it and the image will be automatically inserted to the post.
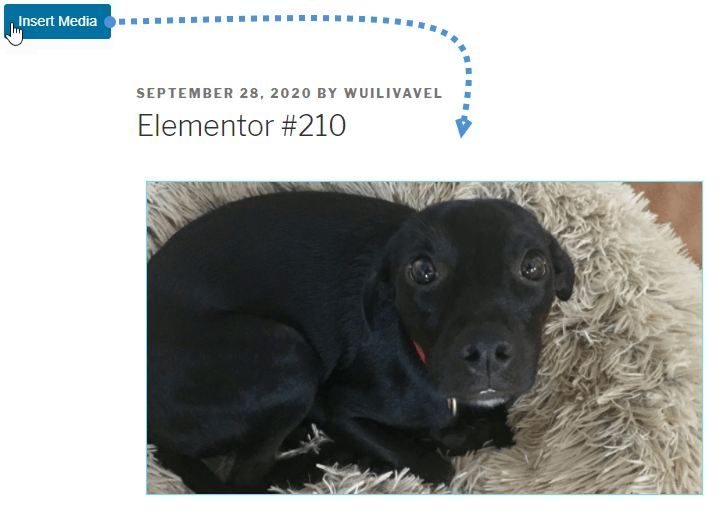
As you can see, daisy has been successfully added to the post and you have a lot of options to use directly into the Elementor widget.
Obviously, that’s not the only widget that we have to use when we are creating a post but there is good news!
All the widgets related to images have the same options that we showed before, you can manage and use folders and images from every single widget related to images like “image box”, “image carousel” and all other galleries :)
It is good to note that you can also use the WP File Download and Elementor integration to manage downloadable files directly from Elementor!
Calling all webmasters!
Save time and boost productivity with WP Media Folder. Effortlessly organize client media files, create custom galleries, and provide a seamless user experience.
Upgrade your website projects now!
Start to Use Elementor Folders Right Now
These are just a few options of all those offered by WP Media Folder, you are going to be able to create really professional posts and pages with this awesome plugin so what are you waiting for? Go here and get your membership now!
When you subscribe to the blog, we will send you an e-mail when there are new updates on the site so you wouldn't miss them.


Comments