Joomla Extension Documentation
Joomla Extension FAQ
-
 Speed Cache Install
1. Install
Our component is compatible with Joomla 3.9 and 4.x. All the features and 3rd party integrations are included in all memberships.
In order to install our component, you have to download the extension .zip file and use standard Joomla installer.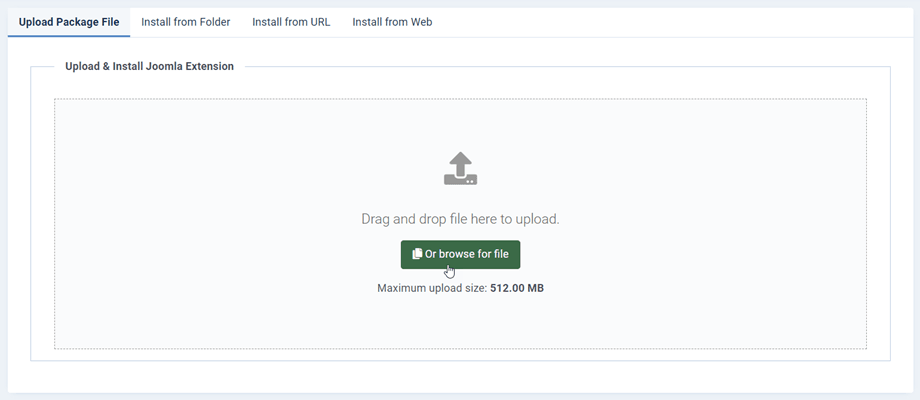
2. Update & automatic updater
In order to update the extension, you can install a new version over the old one by downloading the ZIP file from JoomUnited or using the automatic updater (recommended).

The automatic updater, which pushes the update notification, is embedded in the Joomla extension you've installed. So you'll get notified like any other extension in the dashboard or using the menu: System > Update > Extensions.
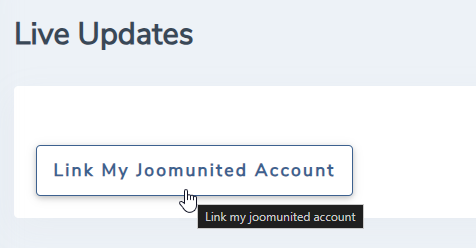
Login to your account to update
You need to login to your JoomUnited account to update all your JoomUnited Joomla extensions. In order to login access to the main configuration of the component then clicks on the Live update tab. At the bottom, you'll find a login button.
Enter your JoomUnited credentials, the same you use to login here @ www.joomunited.com
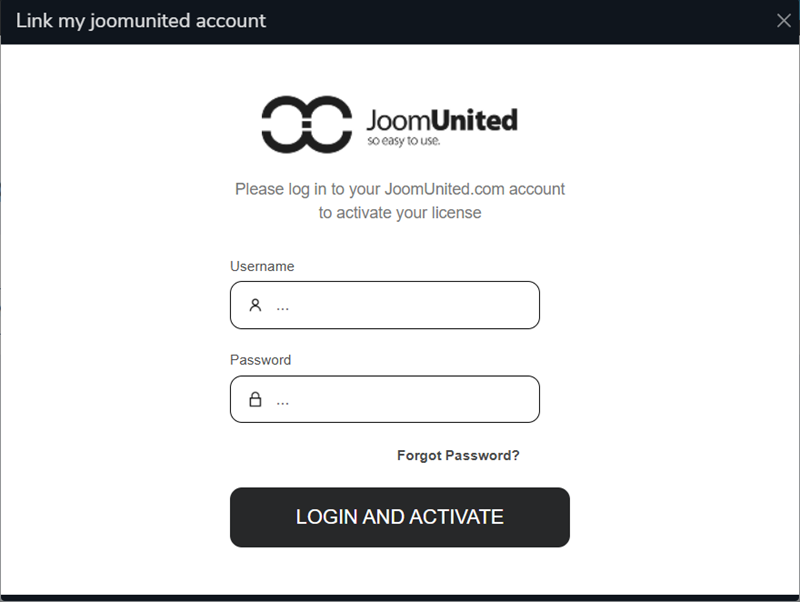
The button will turn to connected status, congrats! You can now update all the JoomUnited extensions on this website! If your membership is expired you'll get a renew link and a text that explains that.

-
Speed Cache Performance Dashboard
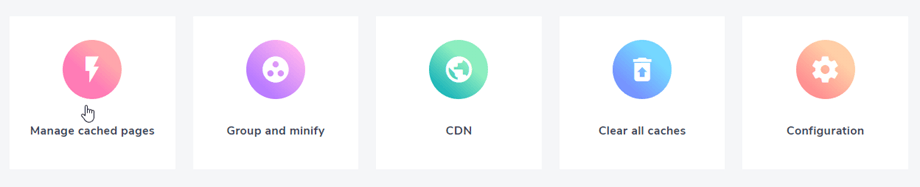
After installing the component a dashboard will be accessible through the menu Components > Speed Cache.

The dashboard checks all the performance issues and enhancements you can apply on your Joomla website. All the parameters, except for Browser cache, can be fixed in one click using the buttons Fix it now.
Parameters checked:
- Check for Joomla cache activation and duration: check if the joomla cache is activated and time is at least set to 30'.
- Check for Joomla Gzip compression.
- Minification: check you have minified files loaded on your site or not.
- File group: check you have any file types have been grouped.
- CDN: check if you configure any CDN server.
- Expire Headers presence and duration in the htaccess file.
- Speed cache URL Autoindex activation: check if the URL automatic indexation in activated in Speed Cache configuration.
- PHP version: check if PHP7+ is in use.
- Browser cache activation: check if the Speed Cache browser cache is activated.
- Auto Clear cache activation: check if the automatic cache cleaner is enabled.
- Expires module: check if the module mod_expires on your server is activated.
-
Speed Cache Cached Pages
1. Add URLs to the cache system
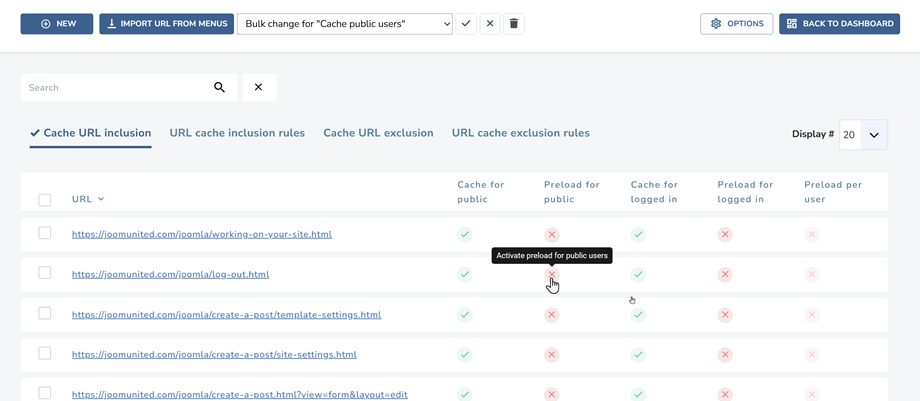
To apply Speed Cache static cache and browser cache you need to add your website pages (URL) to the Speed Cache list. From the dashboard click on Manage cached URLs.
From here you'll see the URL list that are already in the cache system.
To add some URL to the cache, you've got 3 solutions:
- Use the button Import URL from menu
- Click on the Add new button add paste a custom URL
- Use some rules to include a set of URLs
The button Import URL from menu will open a lightbox, from which you can import one or several Joomla menu.
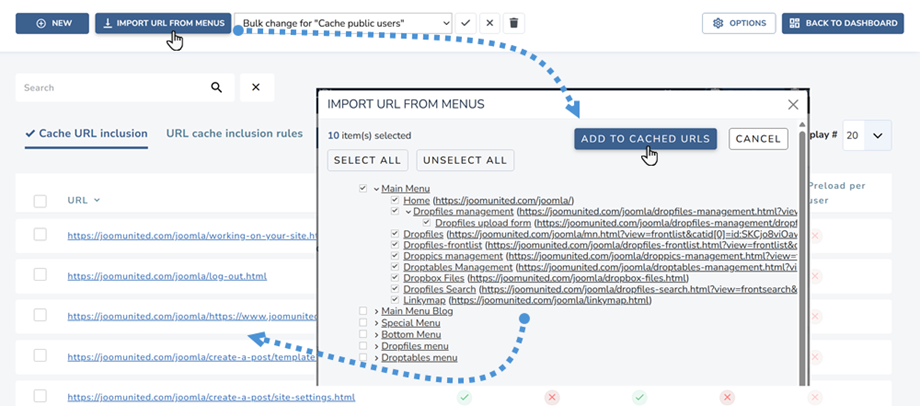
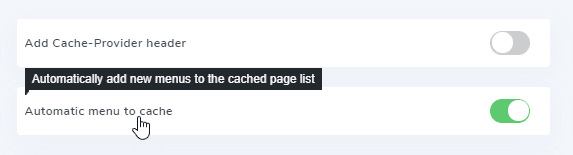
From the settings, you can also enable an option to add new menu elements automatically to the cached URLs list. In the case the default configuration values applies.
To add a custom URL to the cache, use the Add new button.
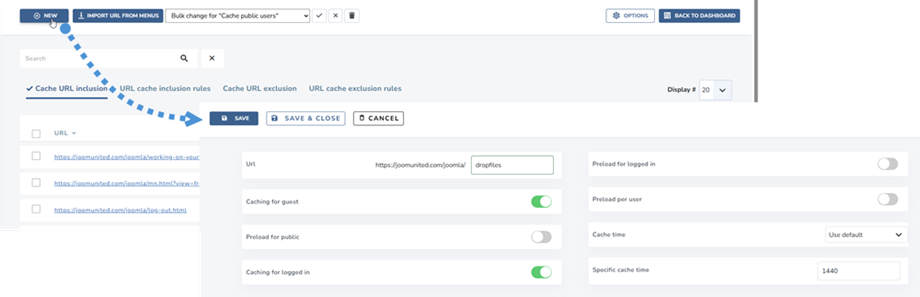
Finally just hit the button state to "publish" (add to cache) the URL (page). Adding a page to the cache will activate static cache and browser cache to the page.
The inclusion rules will help you to add a set of URLs to your cache system. For example, if you want to put in Speed Cache system all your news section where URL is starting by /news you can add the following rule:
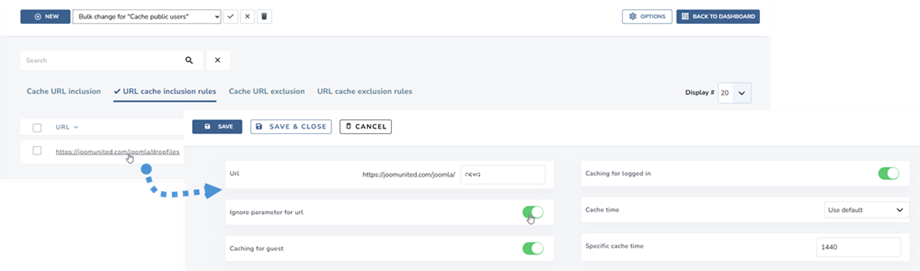
The URL inclusion rules offers the possibility to use stars in your URLs, so you can put in cache thousands of URLs with a single request. Here's some useful example of usage
- Add a rule to include all URL based on a prefix (including this prefixed URL): www.domain.com/news*
- Add a rule to include all URL based on a prefix (excluding this prefixed URL): www.domain.com/news/*
- Include a part of an URL from cache: www.domain.com/news/*/themes
2. Exclude URLs from cache
The URL exclusion from cache is working in the same way, you can exclude URLs one by one or using rules. To exclude an URL open the tab Cache URL exclusion then New.
The URL exclusion rules offers the possibility to use stars in your URLs, so you can exclude from cache thousands of URLs with a single request. Here's some useful example of usage
- Add a rule to exclude all URL based on a prefix (including this prefixed URL): www.domain.com/news*
- Add a rule to exclude all URL based on a prefix (excluding this prefixed URL): www.domain.com/news/*
- Exclude a part of an URL from cache: www.domain.com/news/*/themes
3. Cache by page and user status
As you have noticed, in the URL list you can activate the cache for guest users and/or for logged in users. Indeed, Speed cache is able to handle the cache even for logged in users and therefore for all dynamic contents.
This is something that you can't handle with the Joomla - Page cache plugin.
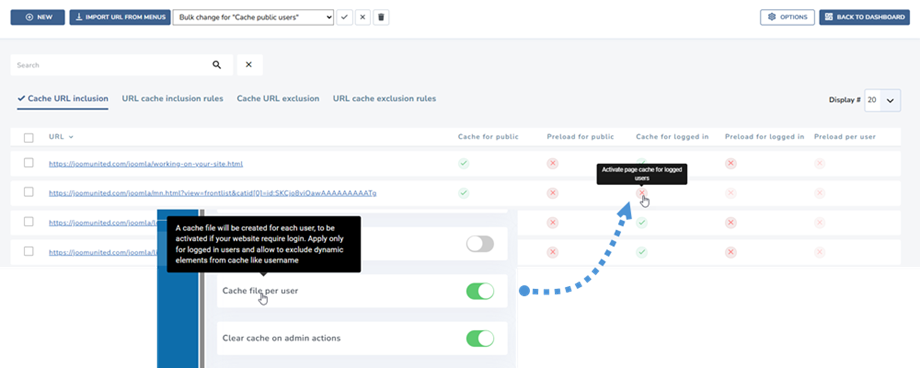
The fact that you can activate cache for logged in users per page is very flexible and we recommend to run some test on frontend with users accounts on all dynamics content.
4. Clean all Joomla caches
Once a page is added to the cache, Joomla will create some cache files, Speed Cache generates static cache (HTML file), and file will be stored in user browser (browser cache).
The Speed Cache cache cleaning can remove all those files and cache in one click, you don't need to clean the Joomla cache separately.
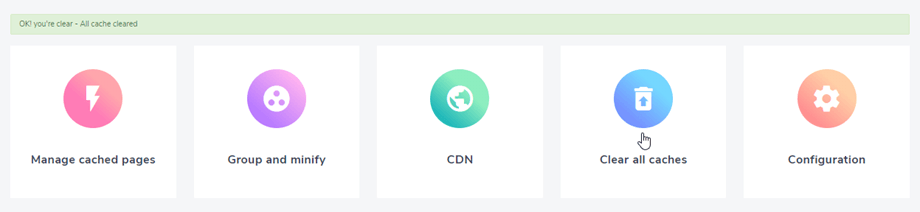
In the setting you can also activate a parameter to clean automatically all those cache on actions. Indeed, on backend/frontend actions like save a content, all cache can be cleaned.
Plus you got a button available all over the Joomla administration to clean all cache in a click.

-
Speed Cache Resources Minification
Minification refers to the process of removing unnecessary or redundant data without affecting how the resource is processed by the browser - e.g. code comments and formatting, removing unused code, using shorter variable and function names, and so on.
From the dashboard click on Group and minify, then enable options or paste the URL to exclude in the text area.

You can group all your JS, CSS and fonts files in a single click. The group file feature includes
- HTML minification: Minification refers to the process of removing unnecessary or redundant data without affecting how the resource is processed by the browser - e.g. code comments and formatting, removing unused code, using shorter variable and function names, and so on.
- CSS minification
- JS minification
- Group CSS: Grouping several CSS files into a single file will minimize the HTTP requests number. Use with caution and test your website, it may generate conflicts.
- Group JS: Grouping several Javascript files into a single file will minimize the HTTP requests number. Group all scripts present in body and the ones from your head. This is the better option for ultimate performance research but beware and test your website, it may generate conflicts.
- Group fonts and Google fonts: Group local fonts and Google fonts in a single file to be served faster.
- Defer CSS: Call CSS files at the end of the page load to eliminate render blocking elements.
- Defer JS: Call JS files at the end of the page load to eliminate render blocking elements.
- Exclude inline style: Exclude inline style from minification.
- File exclusion: Put each path to file in one line to exclude files from minification and grouping.
- Page exclusion: Put each page URL in one line to exclude a page from all optimization that is listed above.
-
Speed Cache CDN Integration
The use of CDN (Content Delivery Network) has been proven to be efficient especially if you have an international audience. It helps serving website media from a local source all over the world. A CDN integration is available with all the major CDN on the market like Cloudflare, Amazon Cloudfront, MaxCDN, KeyCDN and others.
To access, just click on CDN from the dashboard. Then you can add your information there.
-
Speed Cache Settings
1. General parameters
Speed cache got some settings accessible from the Dashboard > Configuration link

- The cache life time: Cache life time in minutes. After this delay the cache will be automatically cleared then regenerated
- Use browser cache: Use browser to cache page content. Increase page speed a lot by caching heavy page content, like images, on your hard drive. It can also be be cleared
- Cache file per user: A cache file will be created for each user, to be activated if your website require login. Apply only for logged in users and allow to exclude dynamic elements from cache like username
- Clear cache on admin actions: The cache will be deleted on certain actions on Joomla administration: save, apply, publish, unpublish or trash a content
- Clear cache on front actions: The cache will be deleted on certain actions on Joomla frontend: save, apply, publish, unpublish or trash a content
- Clear also Joomla's cache: In addition to the SpeedCache cache, the Joomla cache will be cleared too
2. Automatic cache preloading
The latest parameters are about the automatic cache regeneration. After being cleared, the cache can be automatically preloaded based on the URL list (require cURL extension to work, usually installed).
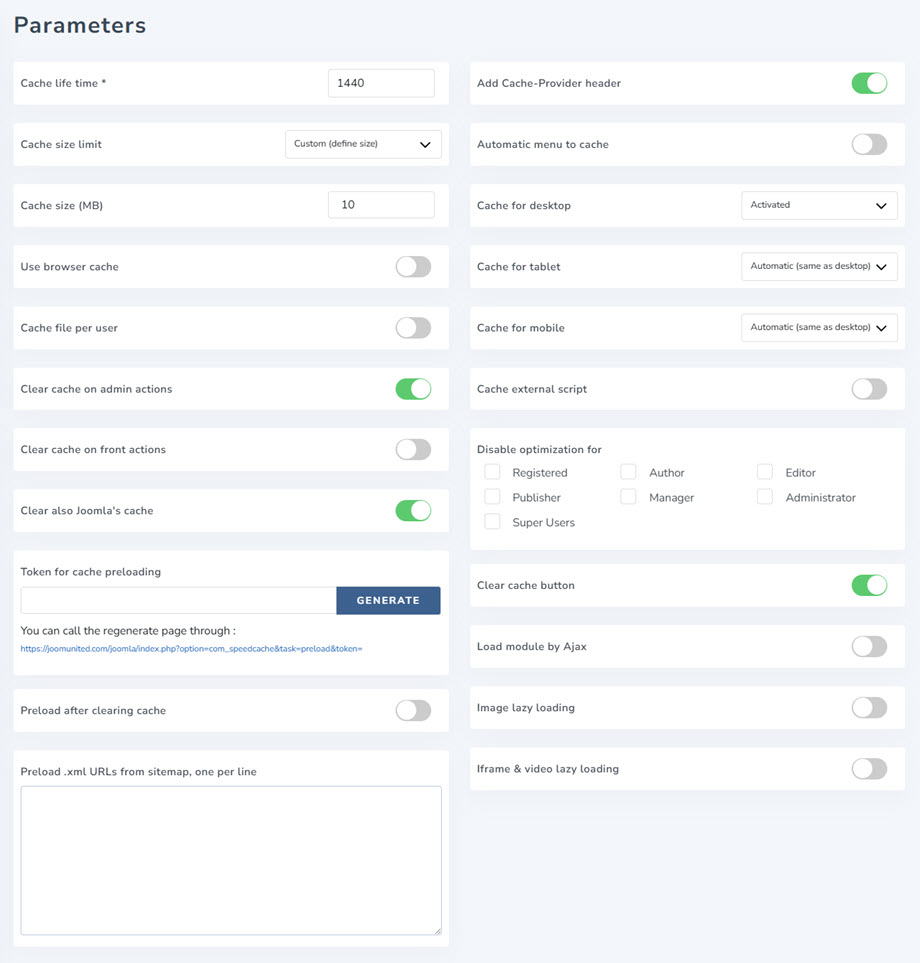
- Token for cache preloading: The token for cache preloading is used to authenticate the request to regenerate cache. You have also the URL you can use with you crontab to reload it regularly.
- Preload after clearing cache: After being cleared, the cache can be automatically preloaded based the URL list (require cURL extension to work, usually installed).
- Add Cache-Provider header: it is in response when the response is provided by Speed Cache. It can be used for debugging purposes.
- Automatic menu to cache: Automatically add new menus to the cached page list.
- Cache for desktop: Serve the cache for desktop for all devices: Recommended, unless wrong cache version is served
- Cache for tablet: Serve the cache for tablet: Recommended ONLY if you're experiencing wrong cache version served
- Cache for mobile: Serve the cache for mobile: Recommended ONLY if you're experiencing wrong cache version served
- Cache external script: Cache external resources such as script served from Google. Warning: make sure you monitor the performance before and after activation, in some cases, you may experience performance loss when activated!
- Disable optimization for: Disable cache and optimization system for those user roles (when loggedIn)
- Clear cache button: Display a clean cache button in the top bar and in the footer bar to clean all the website cache
- Load module by Ajax: Add an option in every module to activate AJAX loading (asynchrone), to be configured by module.
When "Load module by Ajax" is enable, you will see the parameters at Modules > Advanced tab.
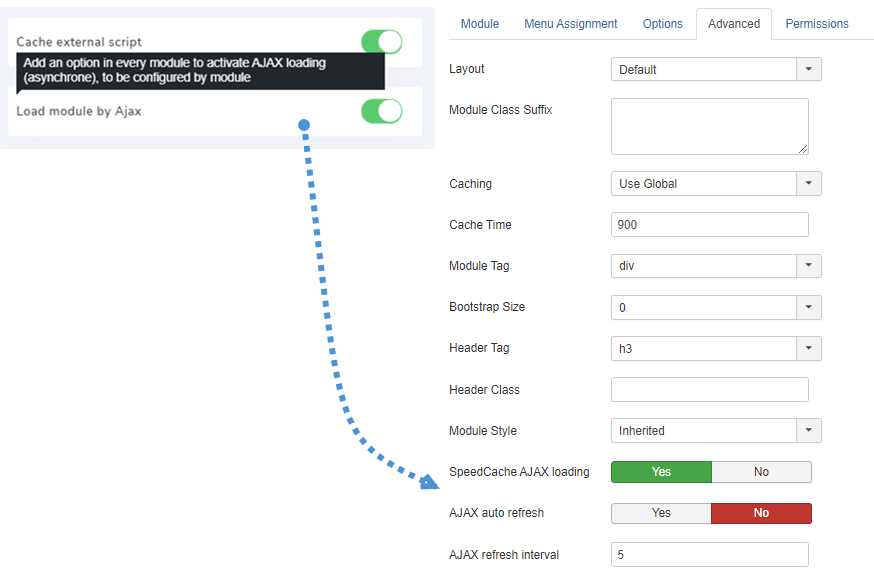
- SpeedCache AJAX loading: Activate the module loading in AJAX (asynchrone) to avoid cache problems with this module
- AJAX auto refresh: Automatic module AJAX refresh period to avoid cache problems with this module
- AJAX refresh interval: Select the AJAX refresh interval for this module (minutes)
3. Lazy loading
To access Lazy loading, please go to Dashboard > Configuration > Parameter. These contain 2 parameters: Image lazy loading and Iframe & video lazy loading.
These features will help you load progressively images, iframes or videos when user scrolls down the page, useful if you have a long page with a bunch of images, iframe or HTML5 videos inside. First, you should enable this parameter, and then you will see these settings below:
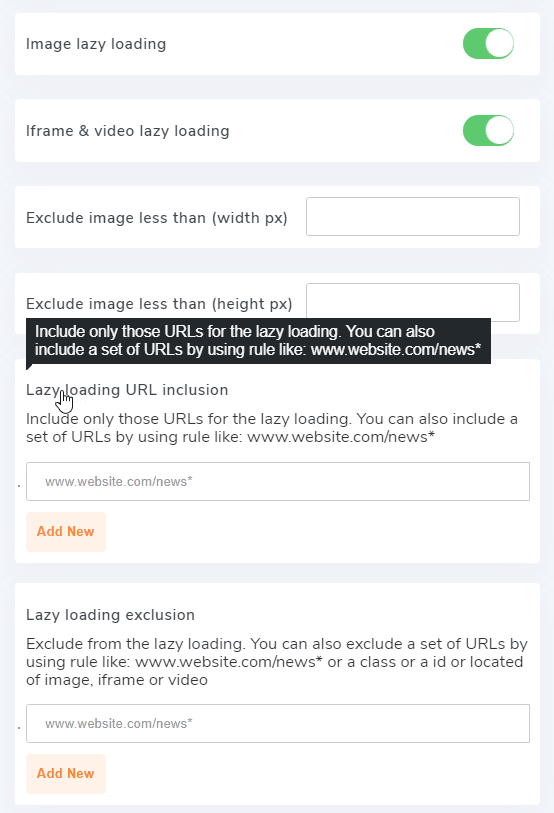
- Exclude image less than (width px): Exclude from image lazy loading all images that have less than this width in pixel value. Useful to exclude small icons or logos
- Exclude image less than (height px): Exclude from image lazy loading all images that have less than this height in pixel value. Useful to exclude small icons or logos
- Lazy loading URL inclusion: Include only those URLs for the image lazy loading. You can also include a set of URLs by using rule like: www.website.com/news*
- Lazy loading URL exclusion: Exclude URLs from the image lazy loading. You can also exclude a set of URLs by using rule like: www.website.com/news*
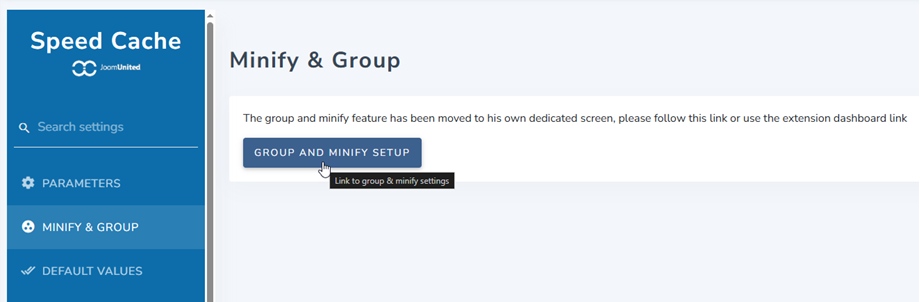
4. Minify & group
From now, to access Minify & Group, you can see it on the Dashboard. Or go to Configuration > Minify & Group tab, then click Group And Minify Setup button. You can go here for more information about the settings.
5. Default values
To access Default Values, go to Dashboard > Configuration link. These are the default values that apply to new URL when added to the Speed Cache system.
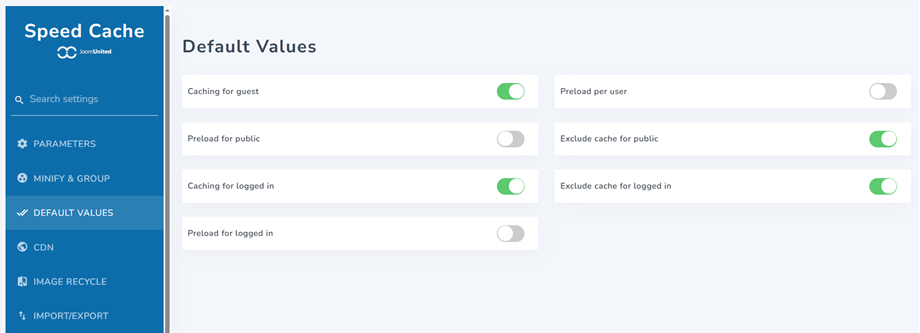
- Caching for guest: Caching this URL for guest users
- Preload for public: Preload this URL for public users
- Caching for logged in: Caching this URL for logged in users
- Preload for logged in: Preload this URL for logged in users
- Preload per user: Preload this URL per user
- Exclude cache for public: Exclude URL from cache for public users
- Exclude cache for logged in: Exclude URL from cache for logged in users
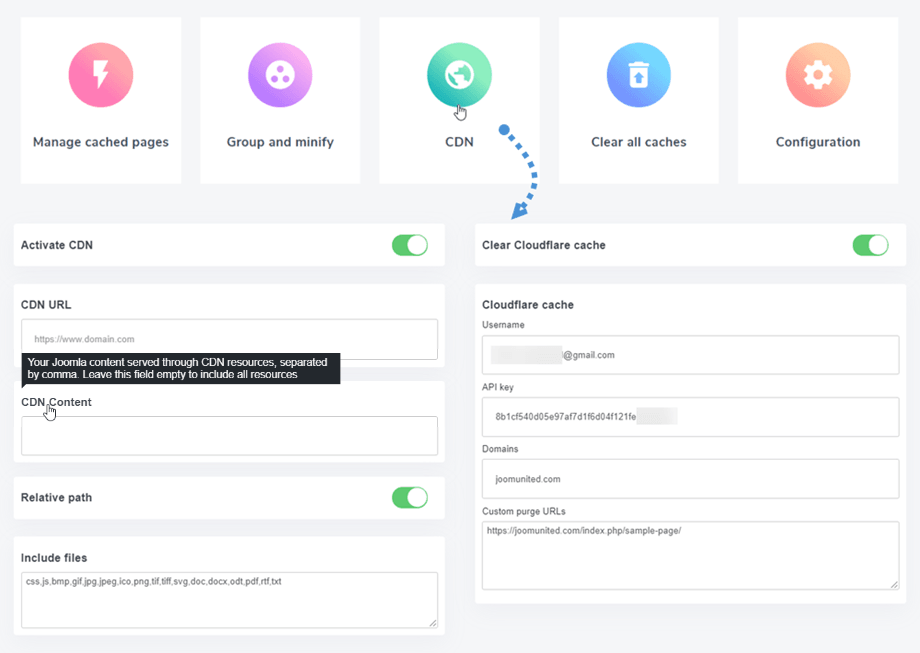
6. CDN
To access CDN, go to Dashboard > Configuration link. Then you activate CDN, and fill your CDN information here.
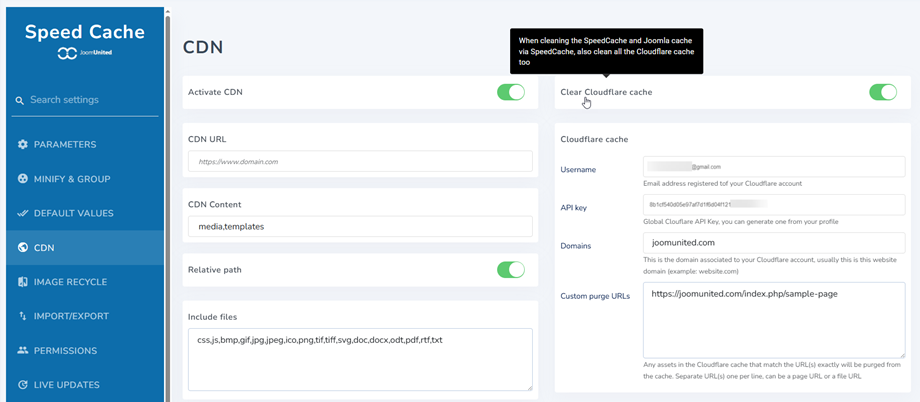
CDN cache
- CDN URL: add your CDN URL, without the trailing slash (at the end).
- CDN Content: Your Joomla content served through CDN resources, separated by comma.
- Relative path: Enabled by default, Enable/Disable the CDN for relative paths resources. Used for some compatibilities with specific Joomla plugins.
- Include files: File type to load using the CDN.
Cloudflare cache
- Username: Email address registered to your Cloudflare account.
- API key: Global Cloudflare API Key, you can generate one from your profile.
- Domains: This is the domain associated with your Cloudflare account, usually this is this website domain (example: website.com).
- Custom purge URLs: Any assets in the Cloudflare cache that match the URL(s) exactly will be purged from the cache. Separate URL(s) one per line, can be a page URL or a file URL.
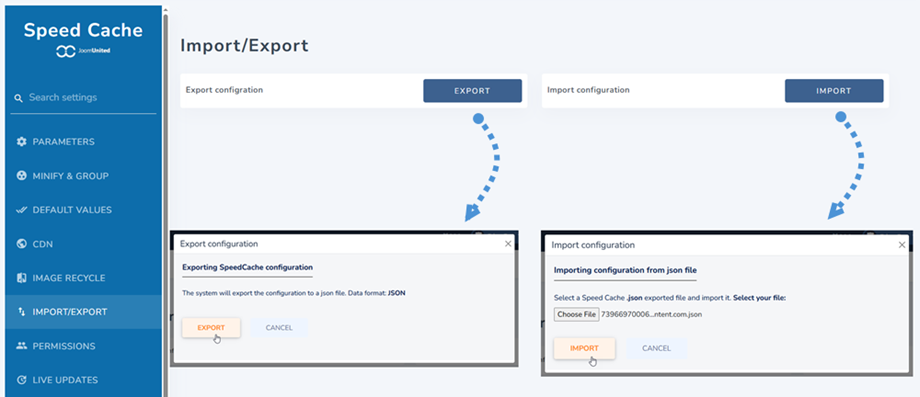
7. Import/Export
To access Import/Export, go to Dashboard > Configuration link. Now you can see Import/Export configuration.
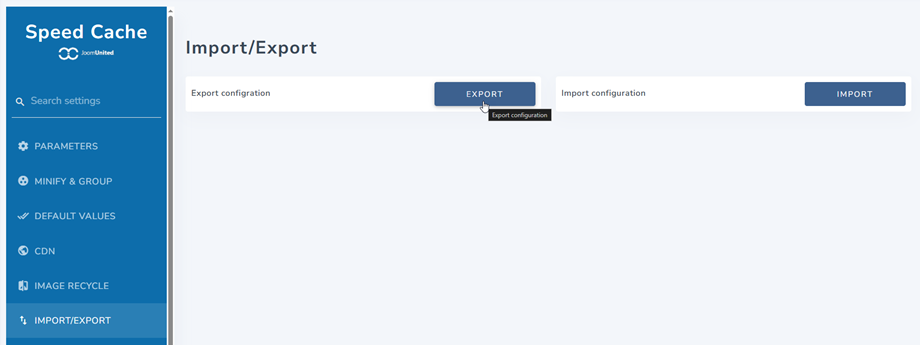
Website optimization takes time and importing a file to get back all your extension configuration is faster. From here, you can Import or Export a json file.
-
Can I measure the performance gain?
Partially, the online speed test like Pingdom measure only a first page load (no browser cache) for non loggedin users (no loggedin cache) so you may find few difference, but your users will!
The best way to measure the performance, is to test by yourself the time to render a page in your browser.
-
Can I use Cache Cleaner from Regular Lab with Speed Cache?
Sure, cleaning the cache from Speed Cache automatic system or from Cache Cleaner extension will have the same result.
-
Does Speed Cache work with community, forums, dynamic content?
Usually yes, you do need to activate cache per user in this case. You may not include some URLs that have fresh content every second to work properly.
To use speed cache on dynamic environnement, please check every case your users may encounter before validating the URL presence in Speed Cache.


