How to use Google Photos with WP Media Folder and Gallery Addon

Connecting your WordPress site with cloud services is a good option when you want to manage as fast as possible all your files, one of the best services for the cloud is one called “Google Photos”, a really interesting service that will allow us to do a lot of things with our images.
Google Photos is a really important service that allows you to do a lot of things like save your media from your phone or PC directly to the cloud and automatically create albums or collages based on the images that you save.
You are going to be able to connect your WordPress site with Google Photos just by following simple steps with WP Media Folder so you are going to be able to import your files from Google Photos with only one click.
Table of Content
Google Photos integration in video
Say goodbye to messy media library.
WP Media Folder lets you categorize files, sync folders with cloud storage, create amazing galleries and even replace images without breaking links.
Optimize your media workflow today
Creating a WordPress Google Photos Album
This is really useful if, for example, you have a media agent that uses a smartphone to take photos in order to upload them to your WordPress site, the photo will be automatically uploaded to the Google Photos account and then, it will be automatically uploaded to your WordPress site.
For this example, we are going to create a gallery using WP Media Folder and the Gallery Addon which helps us a lot when creating galleries and all of this directly from a Google Photos account.
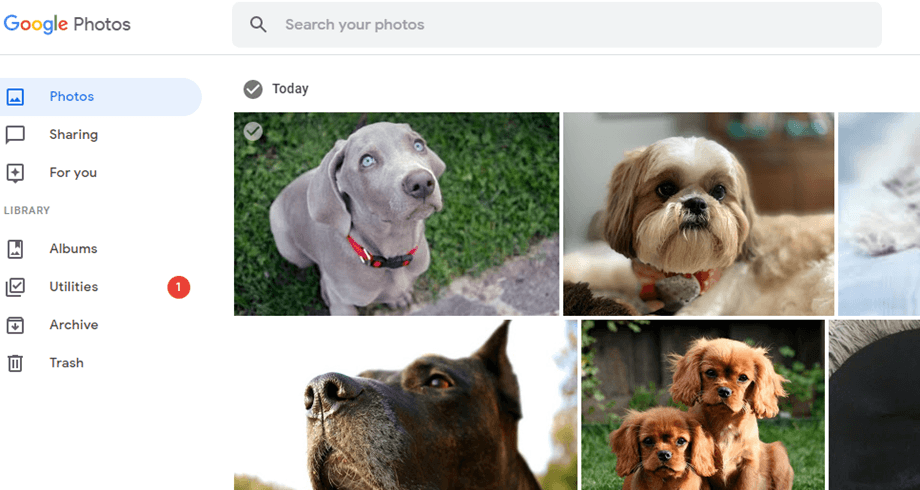
Here is the Google Photos account that we are going to use:
And here is our empty media library with WP Media Folder installed:
![]()
First of all, we are going to connect our WordPress site with Google Photos using the cloud addon of WP Media Folder, it is really easy! There are two ways of connecting WordPress with Google Photos. The first one is by using JoomUnited's ready-made Google application to establish the connection, which won't take more than a minute. The second option is to create your own application.
Establishing an automatic connection between Google Photos and WordPress

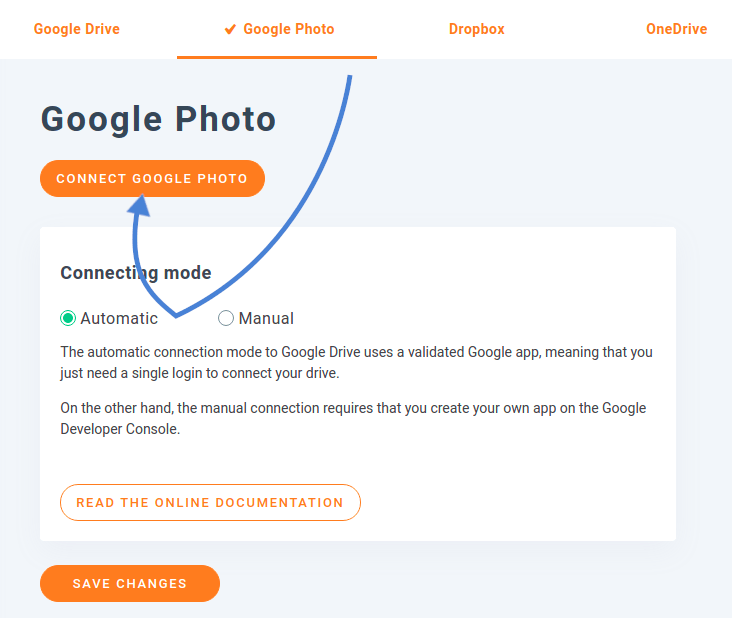
The easiest way of synchronizing Google Photos and WordPress is by using the automatic option. To find this option, head to WP Media Folder's setting, navigate to the cloud sub-menu, and find the Google Photos tab. Click on automatic to use JoomUnited's Google application.

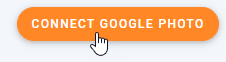
To connect Google Photos with WordPress and use your cloud pictures and albums on your blog, you need to approve two conditions. To get started, click on the Connect Google Photo button. The first notice you have to approve is a disclaimer that tells why JoomUnited is asking for permission to access your Google Photos content.

After approving the first disclaimer, you will be taken to Google to choose the account you want to link. Here too, a pop-up will tell you what access Google will hand over to JoomUnited's ready-made app: namely access to your Google Photos account. Accept this to finalize and start using your connection between Google Photos and WordPress.
Establishing a manual connection between Google Photos and WordPress with a custom app
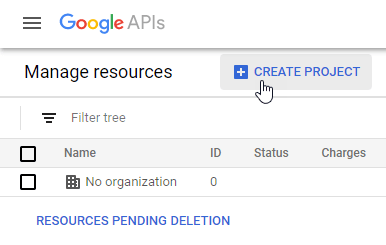
The alternative to using JoomUnited's Google app is to create your own. To do this, tick manual instead of automatic in the settings. Next, you will need to create a Google dev App to connect it with your site, go here to create one.
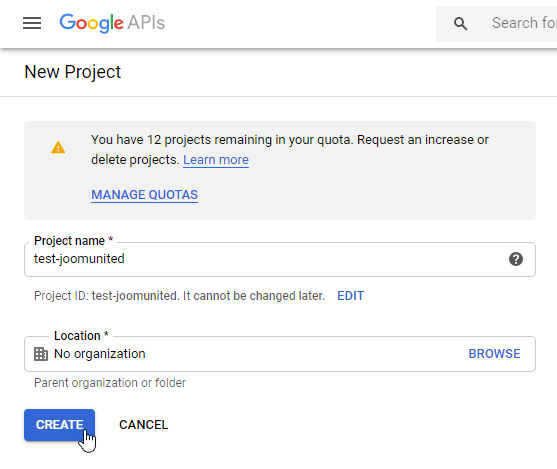
After clicking on “Create Project” you will be able to choose the project name and then, just click on “Create”.
Wait a few seconds for the project creation and then, go to the project by clicking on the notification.

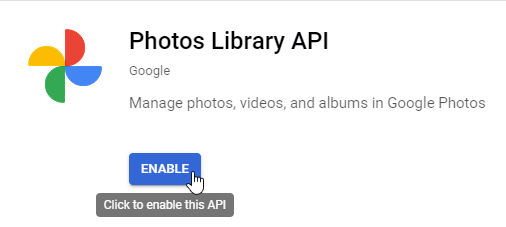
If this is your first time using Photos Library API, you will have to enable it, for this go to APIs & Services > Library and search “Photos Library API”, select it and click on “Enable”.
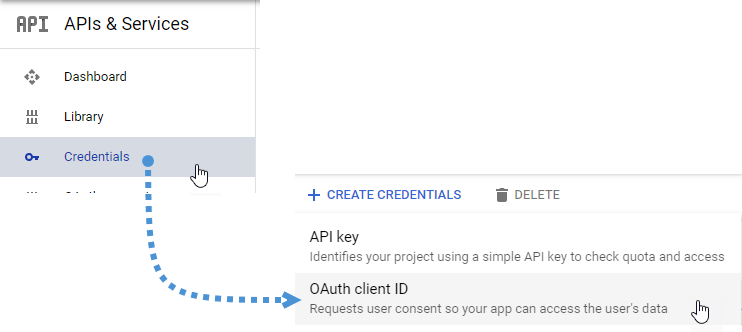
From the left menu, click on APIs & Services, then on the left menu go to Credentials > Create Credentials > OAuth client ID.
If this is your first time, click on “Configure Consent Screen” and select the user type.
Now comes the most important step:
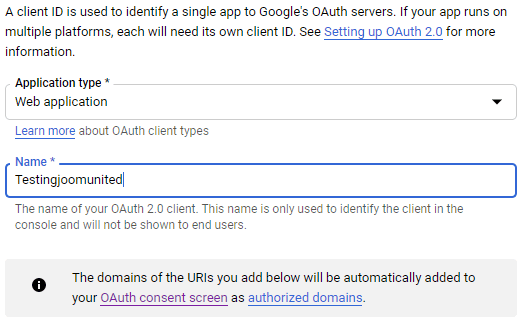
First, click on “web application” and choose a name.
Now click on “Add URI” on the “Authorized JavaScript origins” section and add: https://your-domain.com (replace by your domain name, with no trailing slash).
And click on “Add URI” on the “Authorized redirect URIs“ section an add: https://your-domain.com/wp-admin/options-general.php?page=option-folder&task=wpmf&function=wpmf_google_photo_authenticated (replace “your-domain” with your domain name).
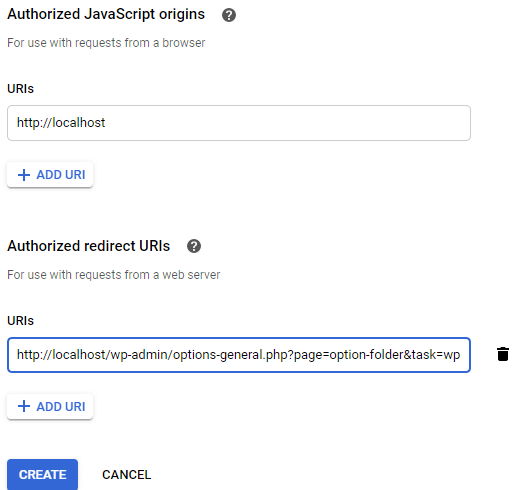
Click on “Create”.
Google has changed their policy recently, so you need to fill your Authorized domains at OAuth consent screen tab > Edit App.
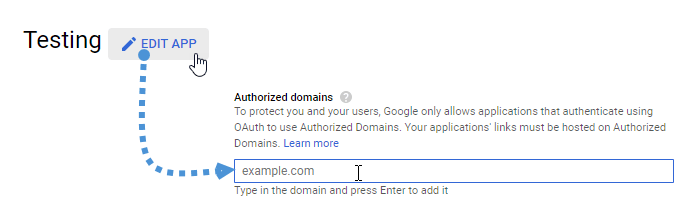
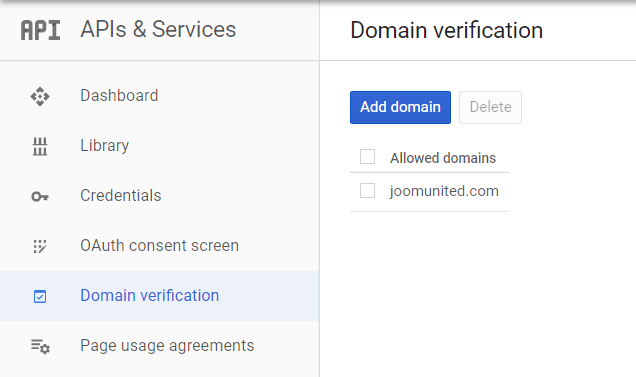
Moreover, you should add your domain to the Domain verification tab. Please click on the “Add domain” button and follow the instructions.
Now you can turn back to the previous step to create the credentials.
And finally… voilà! You got your ID and Secret to add in WP Media Folder's configuration.
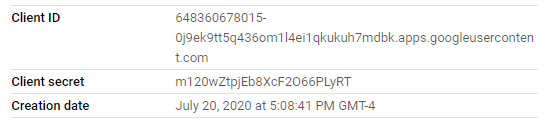
Now go to Settings > WP Media Folder > Cloud tab > Google Photo and copy/paste the Client ID and Client Secret from your Google dev App to the WP Media Folder configuration, then click on “Save”.
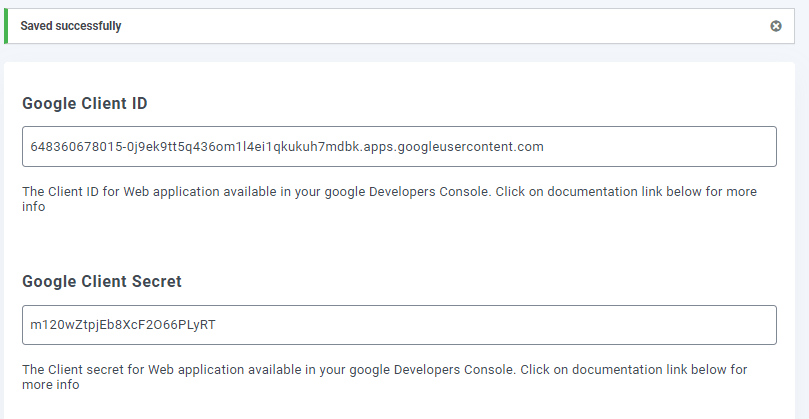
The data will be saved, finally, click on “Connect Google Photo”, then sign in to your Google account(the one that has the Google Photo cloud that you want to use).
Allow all the permissions.
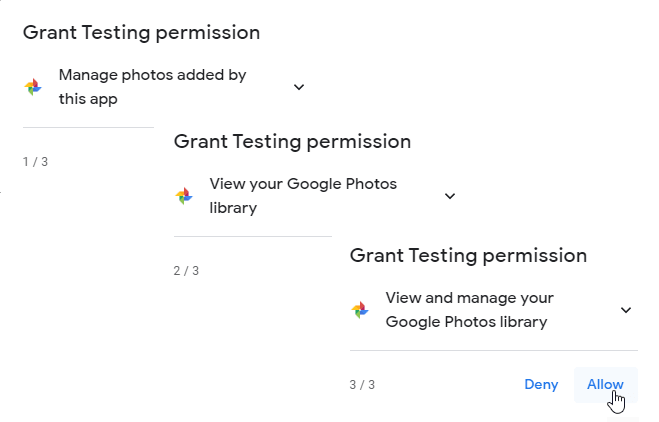
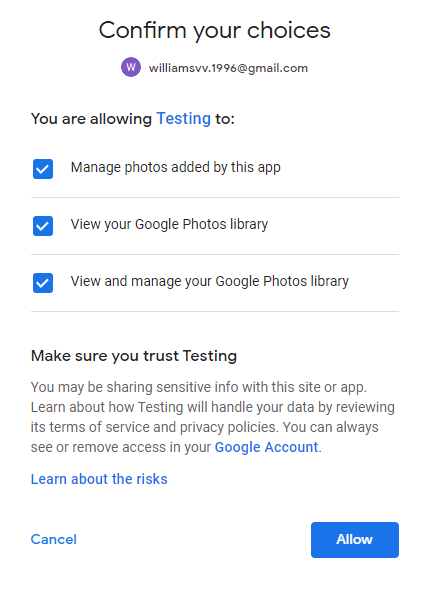
Confirm your choices and everything is going to be done.
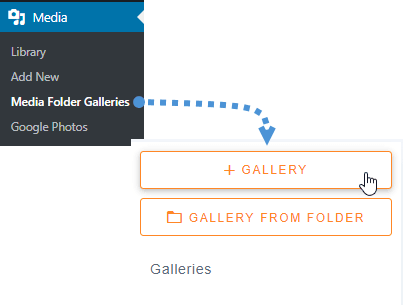
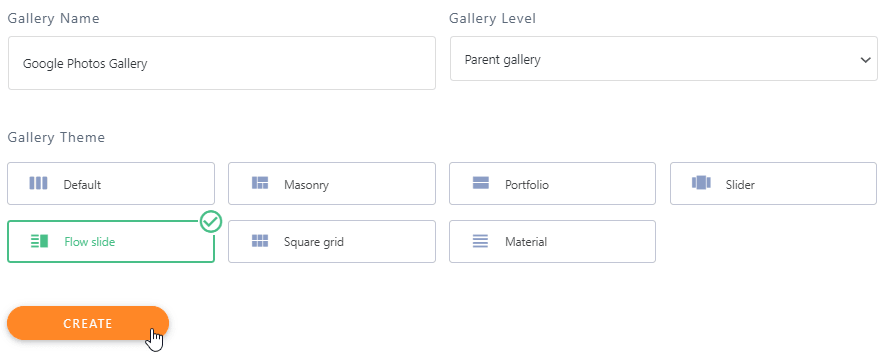
After all these things, we are going to have everything set, let’s go to create a gallery based on Google Photos media, for this, go to Media > Media Folder Galleries > +Gallery.
We will have to type a name, select a theme, and click on “Create”.
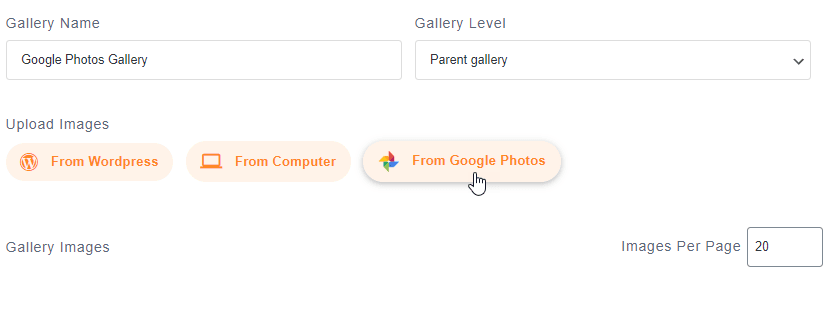
The next step on the gallery creation is to add the media for the gallery, we will have Google Photos as an option, select it.
Now, you are going to be able to see the Google photos folders On the left side and the images on the main tab. We are going to select all and then click on “Import Selection”.
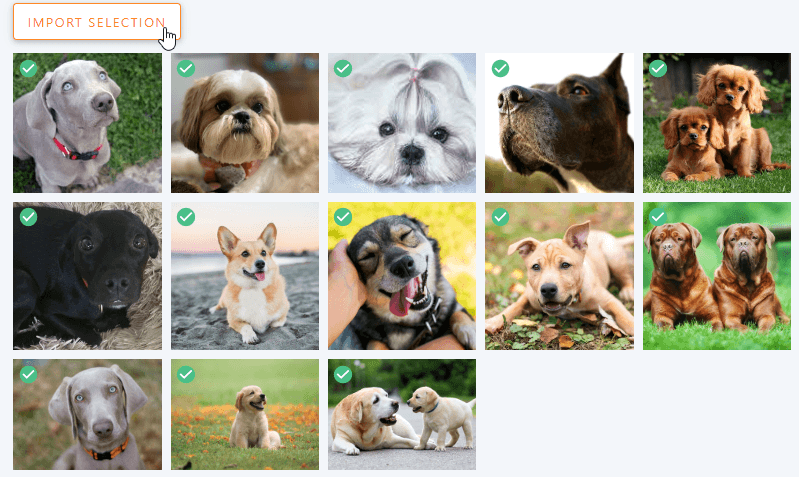
It will automatically import your selection.

All the images are going to be available on the dashboard so you are going to be able to move an image, remove it, or edit things like meta fields.
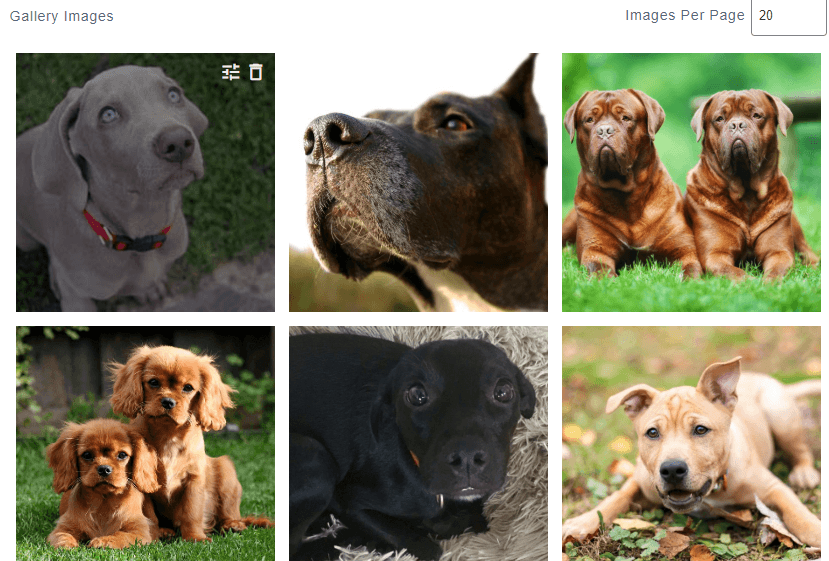
After editing the gallery as you want, click on “Save”.
Now that we have finished everything with the gallery creation, go to the post/page where you want to add the gallery, we are going to add it into a Post so let’s go to Post > Add New.
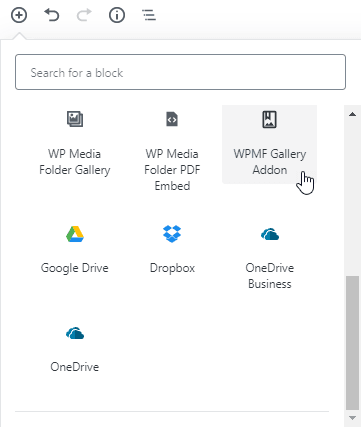
Click on + > WP Media Folder > WPMF Gallery Addon block.
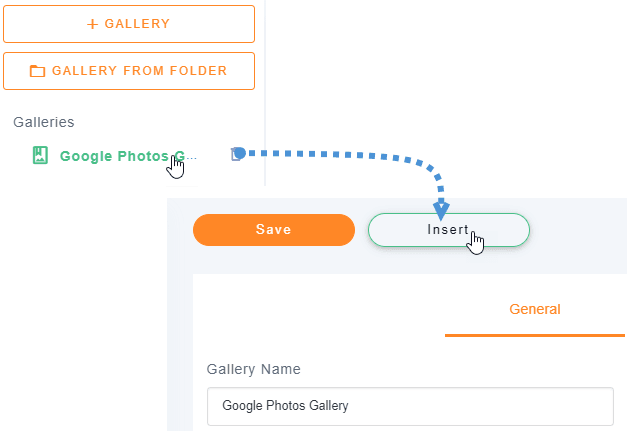
Click on “Select or Create a Gallery”(Yes, we can also create the gallery directly from the post creation), select the gallery that we have created before and click on “insert”.
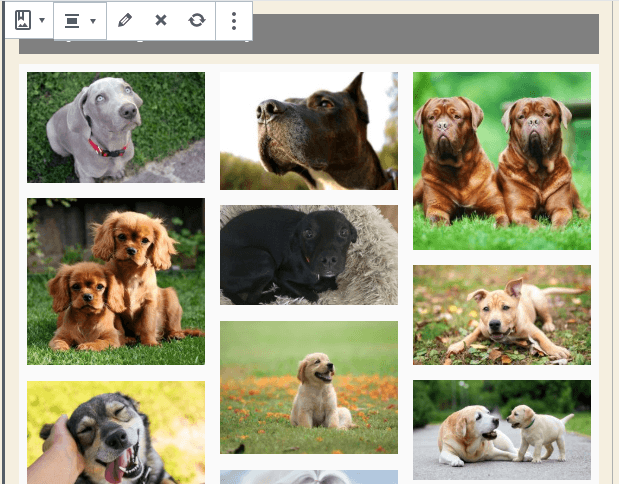
You are going to be able to see a preview of your gallery in the block editor, there are a lot of options on the right section as the change the theme option so we can customize our gallery directly on that section if we don’t like how it looks.
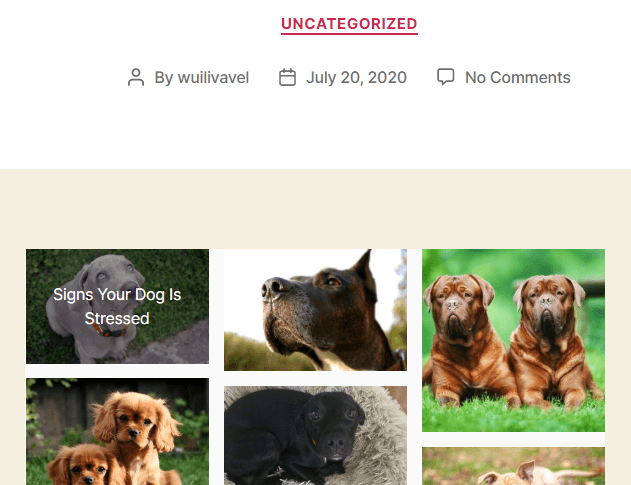
Finally, click on Publish and everything is going to be done.
As you can see it was really easy as WP Media Folders make everything easier.
Calling all webmasters!
Save time and boost productivity with WP Media Folder. Effortlessly organize client media files, create custom galleries, and provide a seamless user experience.
Upgrade your website projects now!
Use this Google Photos WordPress Plugin to Speed Up all The Processes
As you can, WP Media Folder is really easy to use and gives you a lot of options when using Google Photos, and creating a gallery based on Google Photos process is going to be really faster.
The best of everything is that this is one of all the tools that WP Media Folder has, there are a lot of options like cloud connection to save storage space and create folders or galleries based on folders so what are you waiting for? Go here and take your own membership ;).
When you subscribe to the blog, we will send you an e-mail when there are new updates on the site so you wouldn't miss them.


Comments