How to create WordPress galleries using Google Drive media

We'll take a look at a handy way to create WordPress galleries using Google Drive that it is totally possible with WP Media Folder, which allows you to access media directly from Google Drive without taking up your server space.
Table of content
Say goodbye to messy media library.
WP Media Folder lets you categorize files, sync folders with
cloud storage, create amazing galleries and even
replace images without breaking links.
Optimize your media workflow today
Connecting Google Drive to your Website
The first step on this tutorial is to connect Google Drive with your site and you will see how easy it is, first of all, you will need the Cloud Addon from WP Media Folder that is what is going to allow you to connect your site with Google Drive.
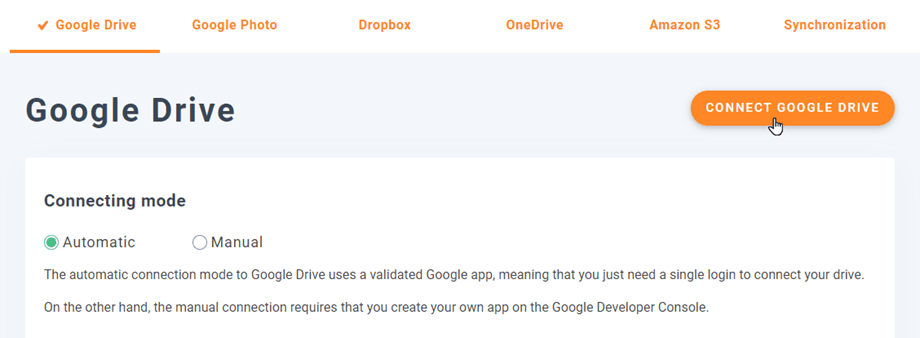
Now that we have installed WP Media Folder, and the Cloud Addon we can start with the setup, for this, there are two options, Manual and Automatic so let's explain them.
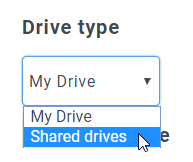
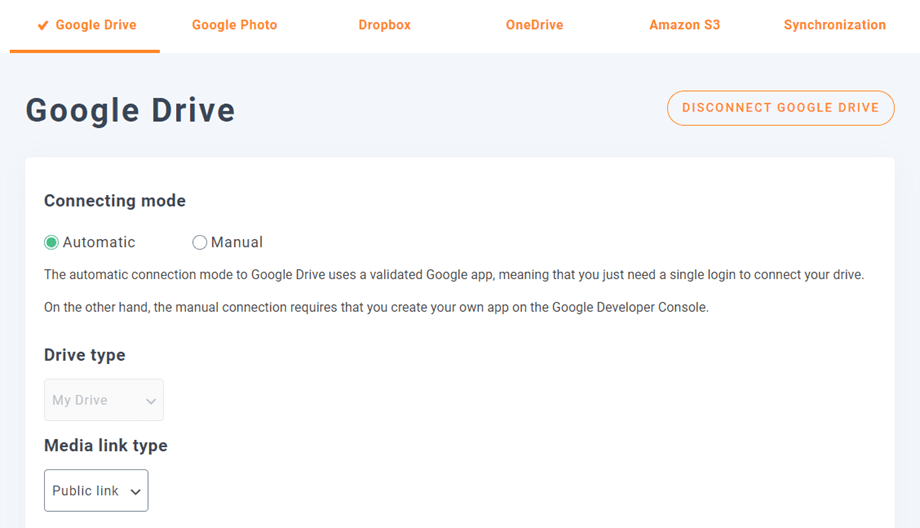
In order to start the setup go to Settings > WP Media Folder > Cloud > Google Drive. Here you'll be able to select the Drive Type:
- Personal Drive: your personal account.
- Shared Drive: your Gsuite account.
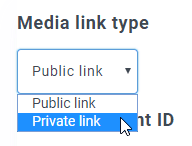
Then select the link type for your images:
- Public link: generate a public accessible link for your files and affect the appropriate rights on the cloud files (Shared link). E.g: https://drive.google.com/uc?id=1Bq_VQt4z5Sy74Xg3IoN3KKWg4P7gymV1
- Private link: AJAX link, hide the cloud link to keep the original access right of your file (Users need a login to view the images). E.g: https://yourdomain.com/wp-admin/admin-ajax.php?action=wpmf-download-file&id=1Bq_VQt4z5Sy79Xg3IoN3KKWg4P7gymV1&dl=0
And then, proceed with the connection:
First, in order to use this feature, you have to link your Joomunited account at Menu Settings > General, please click on the WordPress settings link if you have not connected yet.
After doing this, go back to Settings > WP Media Folder > Cloud > Google Drive, select the Automatic Mode, and then on Connect Google Drive.
Follow the steps to connect your Google account, and that's all, you have your site connected :)
Really easy and quick, isn't it?
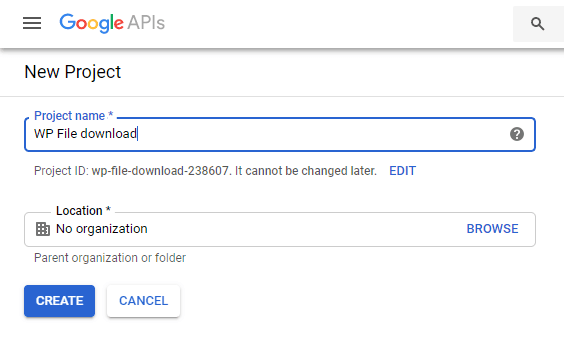
Manual mode: first of all, you need to create Google Dev APP to connect it with your site, for this, go here and create a Create Project.

Then, select the project name and the location.
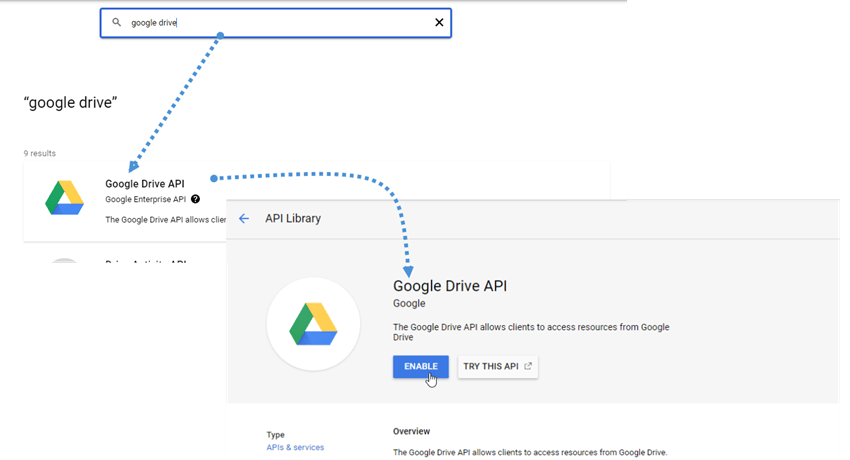
If it's the first time using the Google Drive API, go to APIs & Services > Library, look for the Google Drive API and click on Enable.
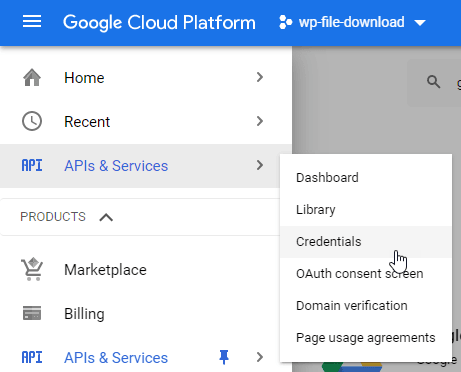
Now that you have enabled it, let's create the keys to connect your WordPress site go to the left menu again and click on API & Services > Credentials.
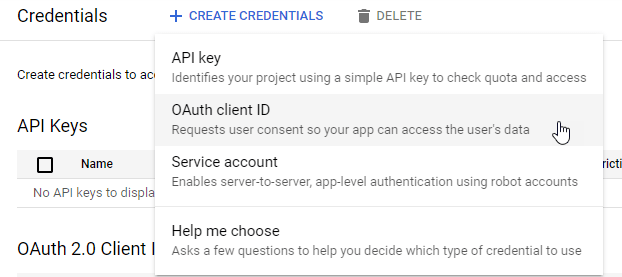
Click on + Create Credentials > OAuth Client ID, if it asks for it, please add a name to your OAuth consent screen.
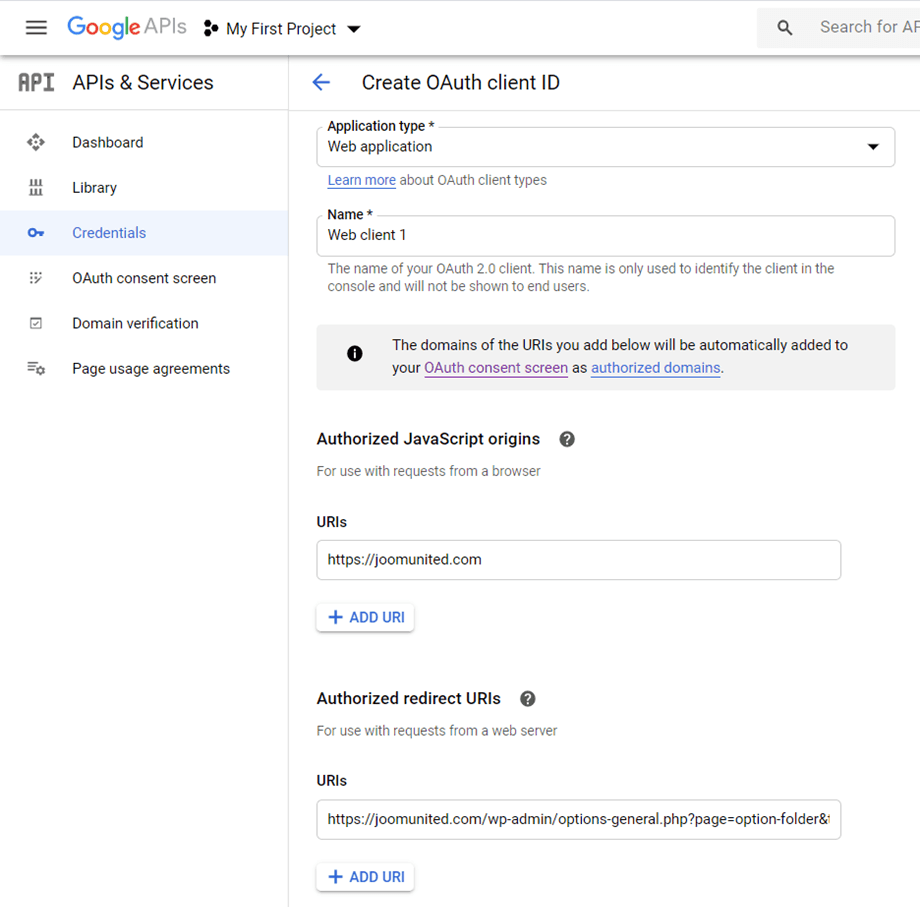
On application, you can select Web Application, and add a name of your choice, for the other parameters use the following:
- Authorized JavaScript origin: https://your-domain.com (replace by your domain name, with no trailing slash)
- Authorized redirect URIs: https://your-domain.com/wp-admin/options-general.php?page=option-folder&task=wpmf&function=wpmf_authenticated
(replace by your domain name)
Please keep in mind that if this warning appears: "To create an OAuth client ID, you must first set a product name on the consent screen" you should click on Configure consent screen button or go to APIs & Services >> OAuth consent screen, then add your domain name at Authorized domains.
First, you'll need to select a User Type.
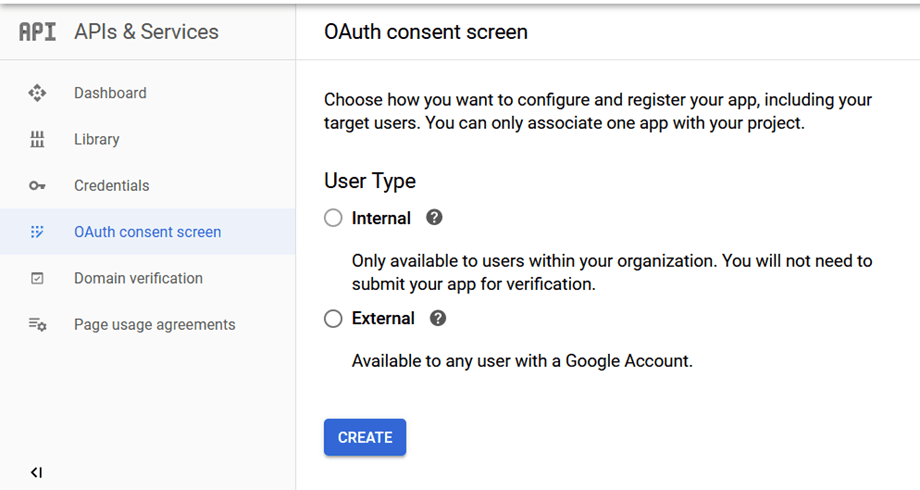
You can select between:
- Internal: your app is limited to G Suite users within your organization.
- External: your app will available to any user with a Google account.
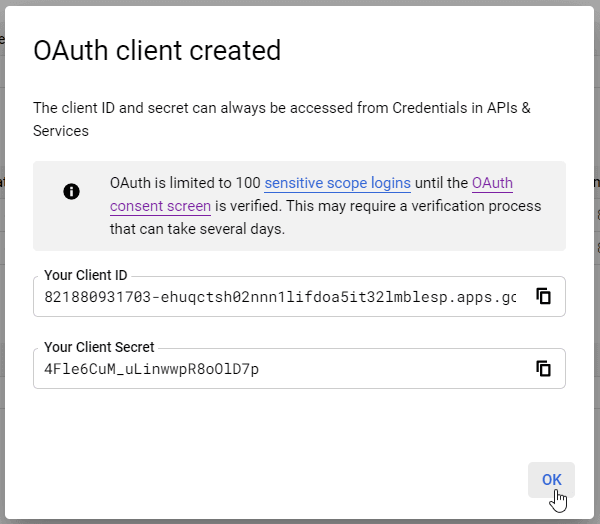
As a final step goes to Settings > WP Media Folder > Cloud > Google Drive, and select the manual mode, in this screen, you will see the option to add the Client Secret, and the Client ID so basically, past them there and click on Connect Google Drive.
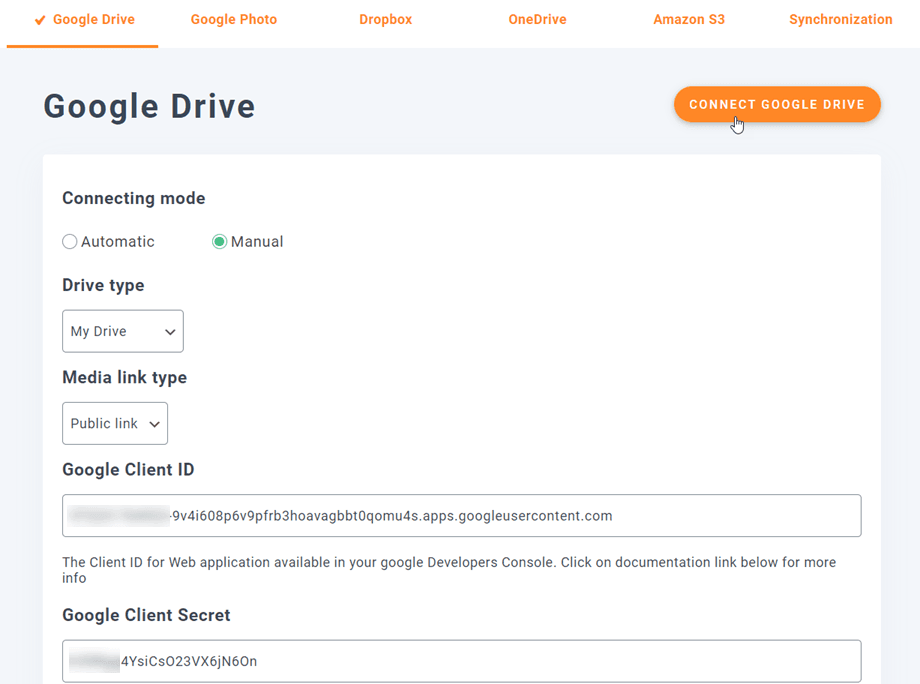
Allow WP Media Folder to access the APP and that's all! You'll have the Google account connected!
Let's create WordPress cloud Galleries
Now that we have connected Google Drive to our Media Library, the connection will work really simple, it will generate a root folder in your Google Drive Account and all the media/folders added there will appear on your Media Library under the Google Drive folders, and all the media/folders added to your Media Library added under the Google Drive folders will appear on your Google Drive account.
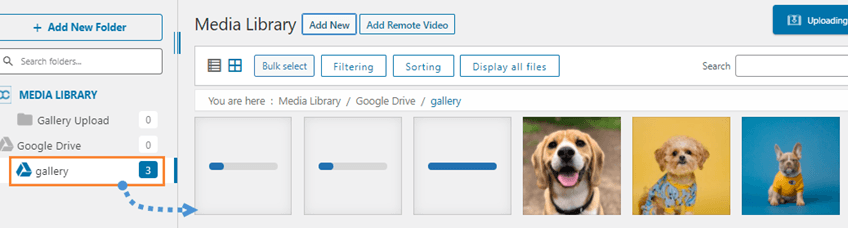
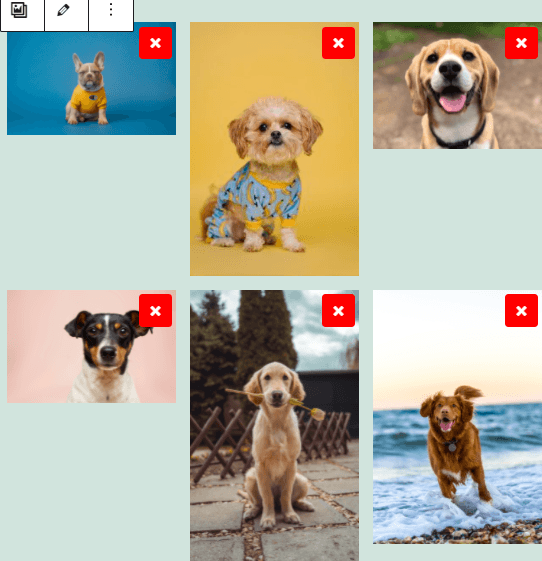
So let's start with the gallery creation, for this, go to your Media Library > Google Drive and you can add a new folder to keep things organized, for example, we add a new one called Gallery to use on this tutorial.
Upload the images there and you'll see them reflected on Google Drive.
And let's proceed with the funniest part, create the galleries! For this, go to Post/Page > Add New (Or edit an already created one).
We will use Gutenberg Editor for this case but you can use any other Page Builder as all of them are compatible with WP Media Folder ;)
Now that we are here, click on + > WP Media Folder Gallery.
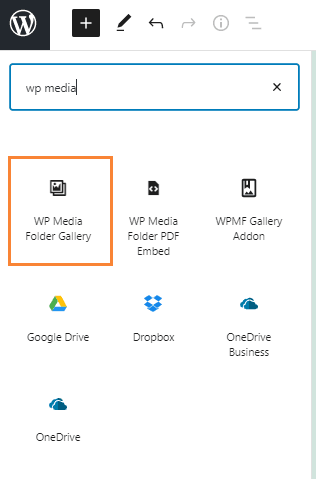
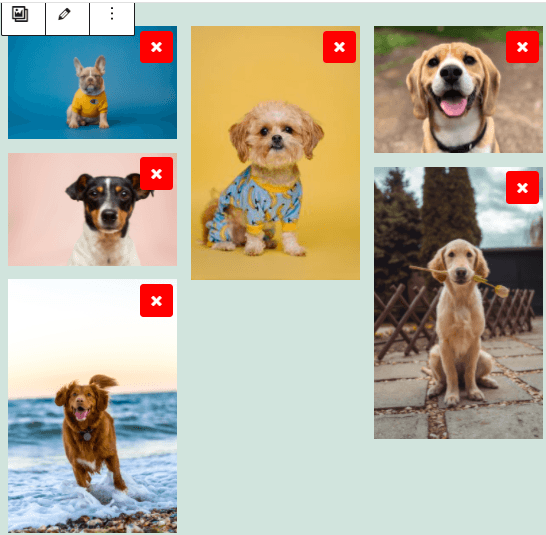
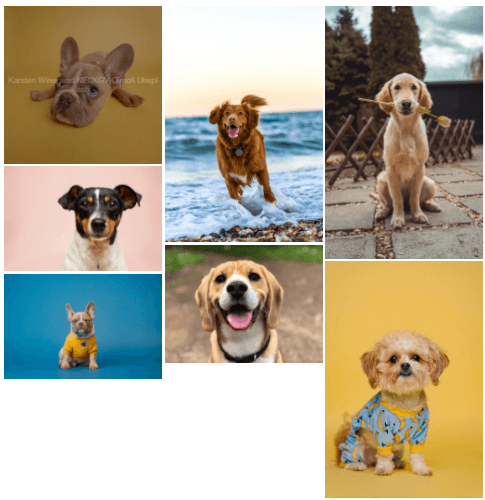
This will show you all the available folders including the ones from Google Drive, we will select the one we created called Gallery, and then click on Create Gallery.
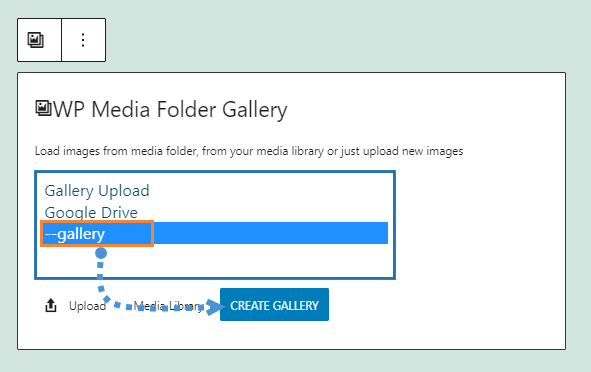
You will see a preview of the theme, you can change it on the right panel.
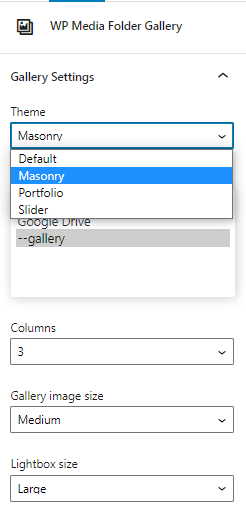
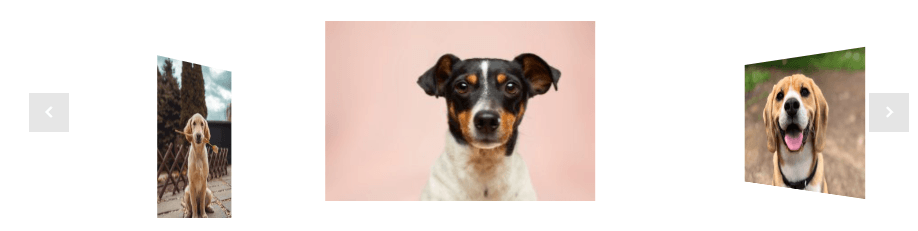
Theme previews:
Default
Masonry
Portfolio
Slider
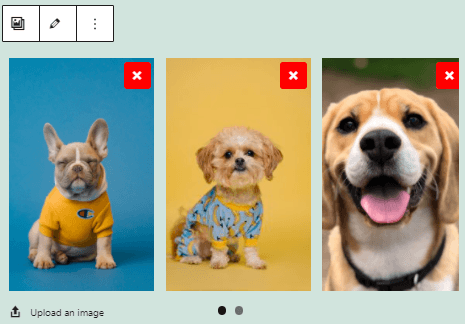
As you can see, it is as easy as select the images, the theme and publish it, there are other options so you can adjust the galleries as how you want like the order, action on click, and the Lightbox size.
You can confirm in your server that the images won't exist because these are only hosted on Google Drive ;)
Using the Gallery Addon to Create Professional Galleries
The other option when you want to create galleries is using the Gallery Addon, this awesome addon offers you more gallery themes and options to edit them with an interface to customize them before being published.
You can find it by going to Media > Media Folder Galleries, on this screen, click on +Add New Gallery and set up the gallery options, you can select a name for the gallery and also, select the gallery theme that you're going to use.
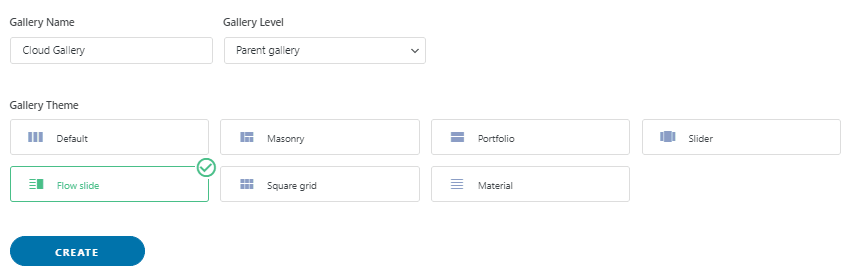
Choose the name, the gallery level, and the gallery theme, and then click on Create.
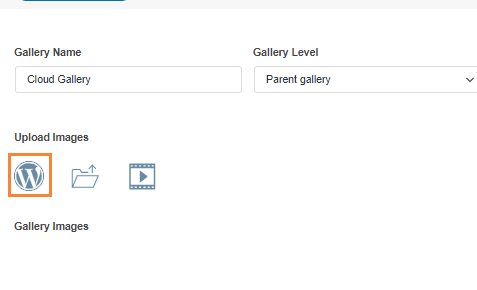
Now, here you can see all the options available to add images. For this case, where we are going to use the Google Drive add-on, select the WordPress icon.
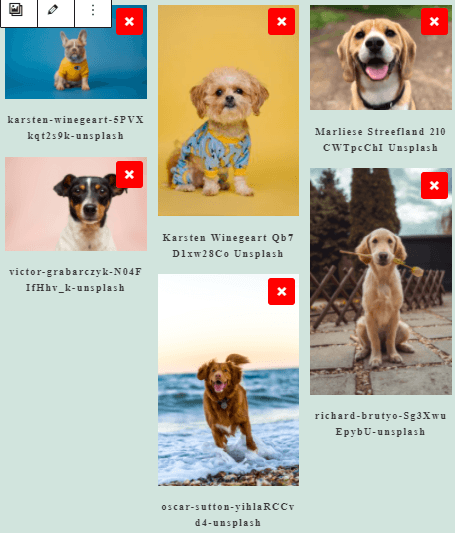
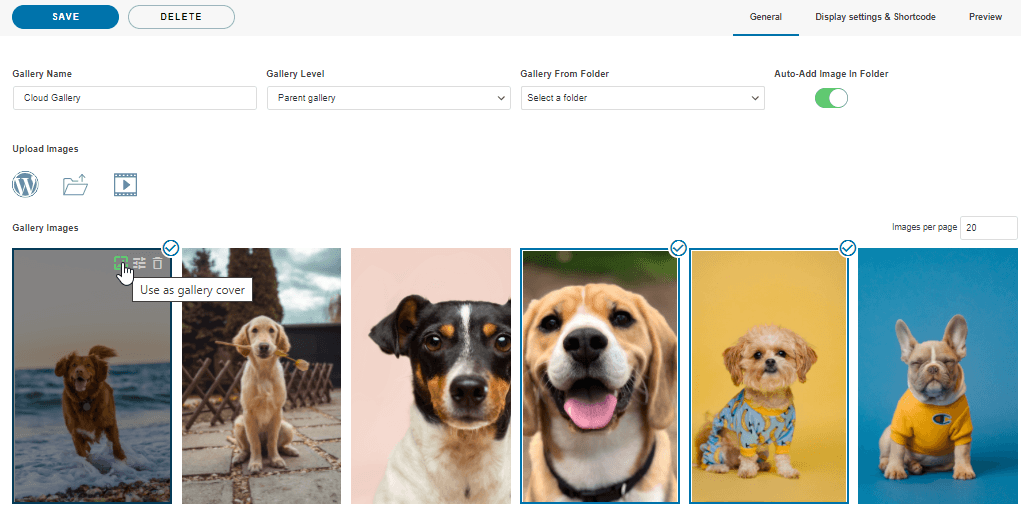
This will open the Media Library, we are going to select the Google Drive folder that we created before, in this case, called Gallery, and select all the images that you want to add to the gallery, finally, click on Import.

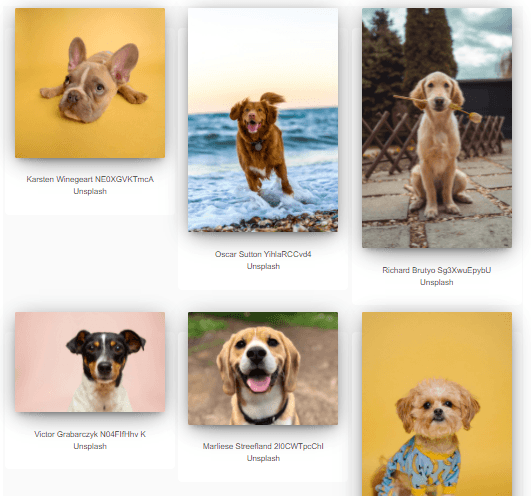
You'll see the images on this screen so you can reorder, set an image as the cover, or change the settings from a specific image, things like the alt name, and title :)
So now, all we have to do is choose the gallery, adjust it to fit your content, confirm your gallery with the preview and save it!
On the Display settings & Shortcode, you can set:
- Theme
- Gallery Image Size
- Lightbox Size
- Action on click(open a new page or a lightbox)
- Columns
- Order
- Navigation settings(like the button and buttons size)
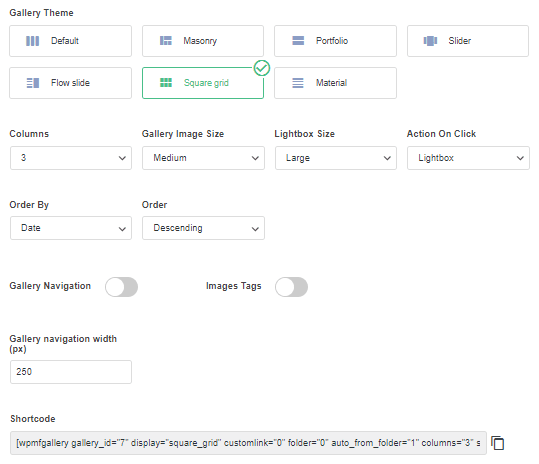
You can also copy the shortcode from this screen if you want to use it instead of the predefined block for each Page Builder.
Now the last step is to preview the gallery to confirm that everything is okay, this can be done in the third tab called Preview.
The extra available themes with the addon are the following ones:
Flow Slide
Square Grid
Material
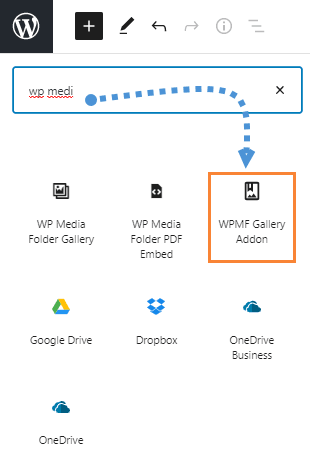
Now that you have selected the theme, and finished the setup, you can proceed with publishing the gallery, for this go to your Post/Page and edit it, for the Gutenberg Editor, and click on + > WPMF Gallery Addon.
Click on Select or Create Gallery, this will load the gallery addon dashboard so you can select the gallery, or also create a new one directly from there, check the preview and then, click on Insert.
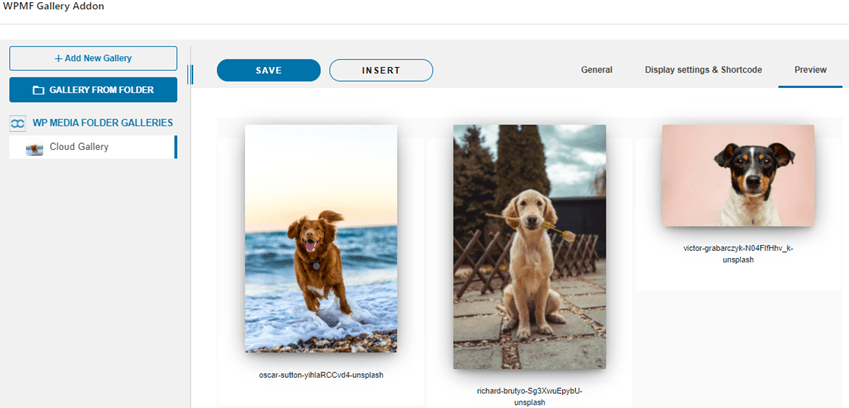
So now insert your gallery and finally, publish it! As you can see the Gallery Addon offers you more possibilities than the normal galleries do, is like, go to the next level :)
Calling all webmasters!
Save time and boost productivity with WP Media Folder. Effortlessly organize client media
files, create custom
galleries, and provide a seamless user experience.
Upgrade your website projects now!
Create your First Google Drive Gallery in WordPress
You save server space by leveraging Google Drive for WordPress galleries and creating a more efficient and organized media workflow. WP Media Folder offers an easy and flexible option to create galleries directly connected to Google Drive, with attractive themes and display controls, and features like adding remote videos from stream services!
So, are you ready to take your website to the next level? Create your first gallery in WordPress with Google Drive today and enjoy a simpler and more professional media management experience!
When you subscribe to the blog, we will send you an e-mail when there are new updates on the site so you wouldn't miss them.


Comments