How to set a default featured image for WordPress posts
WP Media Folder comes with a really new exciting feature which is setting up a default featured image for our WordPress posts! You won't have that nightmare of non-featured image posts anymore, from selecting a static image to a random selection of images from a folder so it doesn't look like we forgot to add it or didn't add it at all (+Non plugin methods).
Setting a default featured image on WordPress posts could be an important setting to keep in mind when creating posts for your site, One of the reasons not to set a featured image could be that we could have a designer team in charge of creating featured images that could take more time to design images or we could forget to add the featured image.
In this post, we will see how easy it is to set up a default image with WP Media Folder and will also explore other methods.
Table of content
Say goodbye to messy media library.
WP Media Folder lets you categorize files, sync folders with
cloud storage, create amazing galleries and even
replace images without breaking links.
Optimize your media workflow today
Default featured image without a WordPress plugin
It is important to say that this part of the tutorial requires some coding knowledge as we will need to edit certain theme files to make it work and doing something wrong could cause major issues.
That being said, let's start!
We will try 2 methods in this part of the tutorial, one to set a static image and the other one to use the first image available in the post.
Method 1 - Set a static image as the default Featured Image
In this method, we will use a snippet to set a static image and add it to a specific place in our post/page.
To do this, we need to go to our theme files and edit the file where we want the featured image to appear, it can be added to any file that you want but in this case, we will use the single.php that is the file handling our posts.
The code is the following:
<?php if ( has_post_thumbnail() ) {
the_post_thumbnail();
} else { ?>
<img src="/<?php bloginfo('template_directory'); ?>/images/default-image.jpg" alt="<?php the_title(); ?>" />
<?php } ?>
It should look like this:
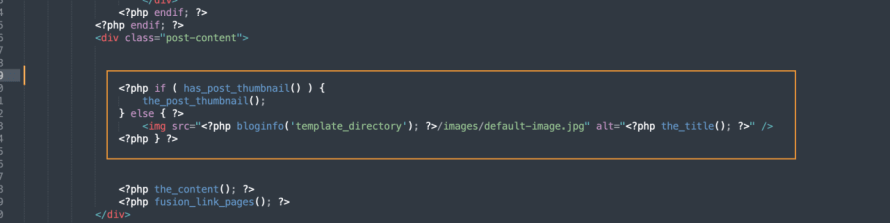
Where the code is added depends on your theme and where exactly you want the image to be placed, also /images/default-image.jpg should be replaced with the path of the image that we will be using, this same image, should be inside the theme folder.
We can also replace <?php bloginfo('template_directory'); ?>/images/default-image.jpg with a direct image URL and it will also work.
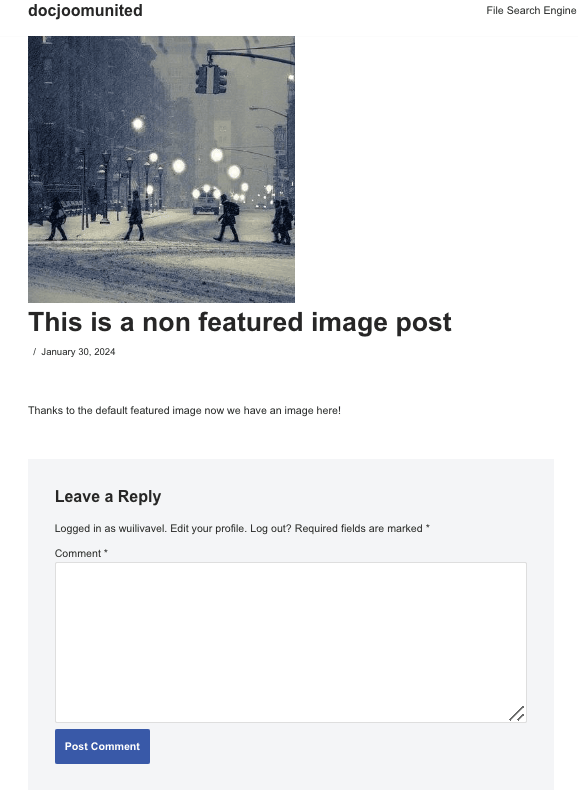
Now we should be able to create an image without a featured image and the magic is done!
It is important to note that this code won't be setting a default Featured image so we will need to add it everywhere we want it to be shown, for example, on the blog page where the posts are shown as well as where we call the posts.
Method 2 - Use the first image in the post as the featured image
This method will require us to follow 2 steps to define the image and another step to call the image.
This method is similar to the first one but we won't need to add the image in the code, instead, it will get the first image in the post and will add it wherever you place the second code.
First Step - add the following code to the functions.php of your theme.
function main_image() {
$files = get_children('post_parent='.get_the_ID().'&post_type=attachment
&post_mime_type=image&order=desc');
if($files) :
$keys = array_reverse(array_keys($files));
$j=0;
$num = $keys[$j];
$image=wp_get_attachment_image($num, 'large', true);
$imagepieces = explode('"', $image);
$imagepath = $imagepieces[1];
$main=wp_get_attachment_url($num);
$template=get_template_directory();
$the_title=get_the_title();
print "<img src='$main' alt='$the_title' class='frame' />";
endif;
}
Second step - Now that our code is added to the functions.php, we can proceed to add the following code to where we want the image to be shown (just like we did for the first method).
<?php if ( (function_exists('has_post_thumbnail')) && (has_post_thumbnail()) ) {
echo get_the_post_thumbnail($post->ID);
} else {
echo main_image();
} ?>
And done! posts will show now the first image available on their content.
It is important to note that just like the first method, we will have to add this last code in all the places where we want the image to appear, for example, the blog page, the article itself, and in any other place where the posts are displayed.
Easily set a default featured image using a WordPress plugin
Now that we have seen how to set a default featured image using pieces of code, let's see how to set it using a plugin and how WP Media Folder makes this process easier in WordPress posts.
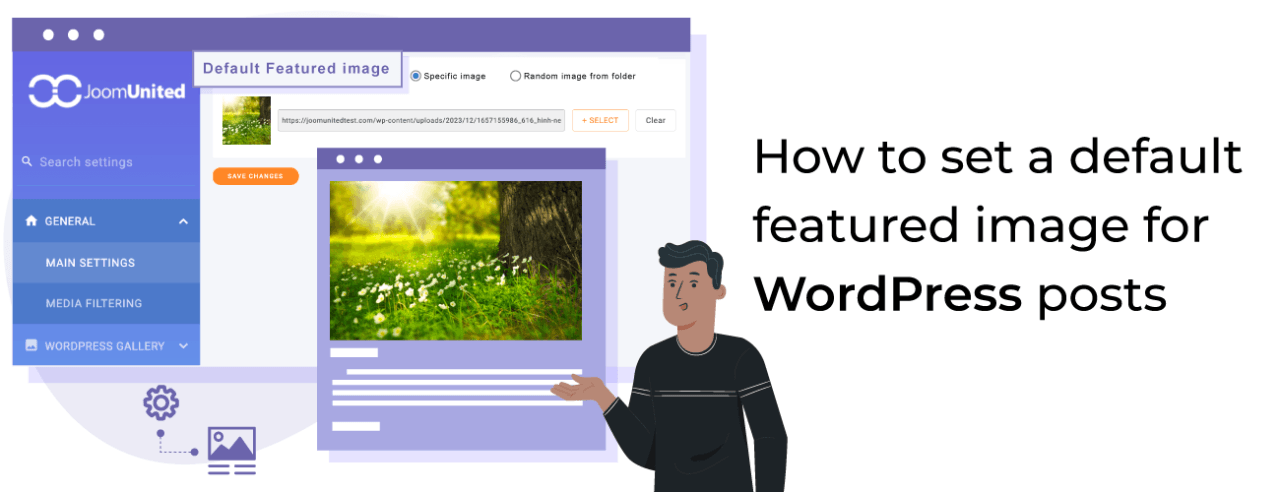
WP Media Folder just introduced an option to set a default featured image that is helpful keeping in mind all the features that this plugin offers.
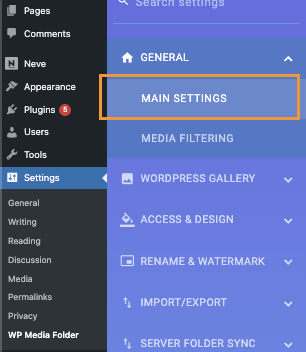
To enable this feature go to Settings > WP Media Folder > Main Settings.
In this section, at the bottom, we will see the Default featured image option with 2 main options:
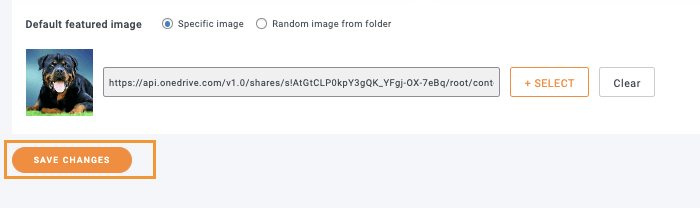
1st option - Specific image that allows us to select a static image that will be used on all the posts when a featured image is not selected, to use this option, just select the checkbox and then click on SELECT.

After clicking on SELECT our media gallery will be triggered with all the Media Folders available to make more easy the process of finding the image that will be used, all we need to do is click the image and then Select.
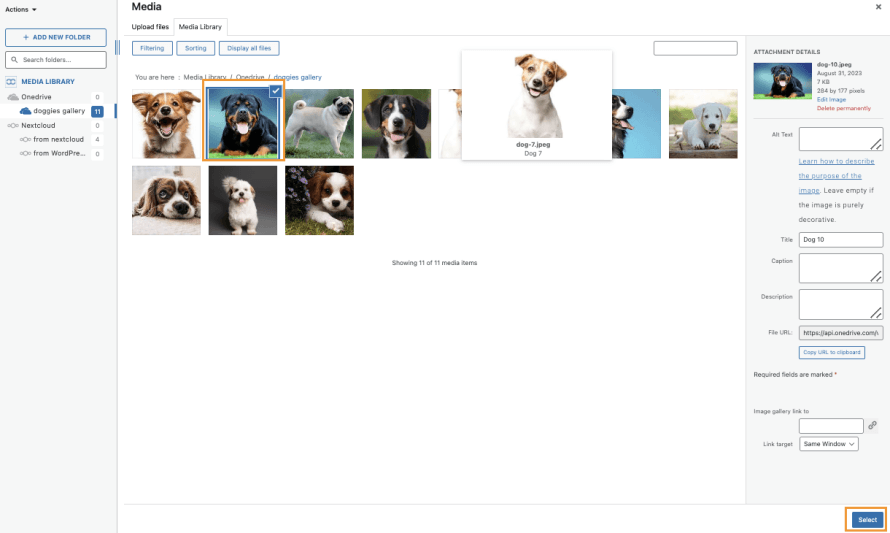
Finally click on Save Changes and the magic is done!
2nd option - Now, what happens if we don't want to use just a specific image and instead, a selection of images to be used randomly?
Easy! With WP Media Folder, it is possible by clicking on Random image from folder that using the power of the media folders included, will allow us to select a media folder that we created previously in our Media Library and it will get the images from there randomly to be set as the default featured image.
After selecting this option, we will be able to see the available folders that can be set.
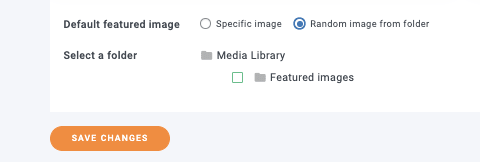
In this case, we have created a folder called Featured images so all we need to do is click it and then save changes.
The magic will be done and now we won't need to stress anymore for the posts without a featured image, awesome! Isn't it? :)
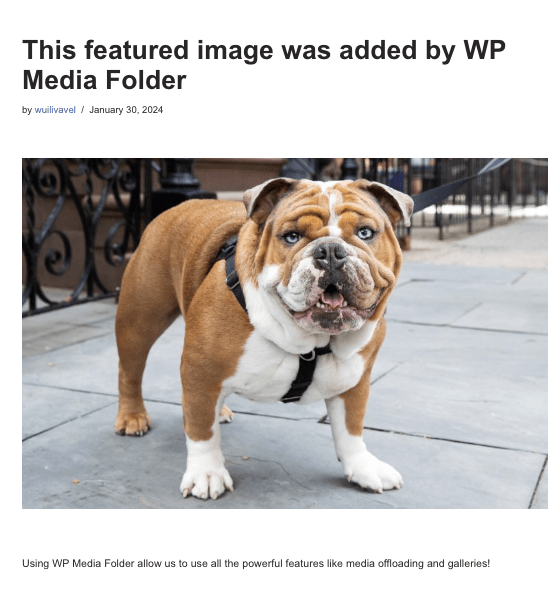
As you can see, we didn't need code at all, and the default featured image was set.
Calling all webmasters!
Save time and boost productivity with WP Media Folder. Effortlessly organize client media
files, create custom
galleries, and provide a seamless user experience.
Upgrade your website projects now!
No more WordPress posts without a featured image
Now we were able to see how easy is to set a default featured image using the WP Media Folder plugin for all our WordPress posts by just doing 2 clicks and without having to place code on all the files with the risk of breaking things.
The best part of WP Media Folder is that this is not the only feature that it offers as we have many other options like offloading media to AWS, using Google Drive as the image source, or creating stunning galleries!
So what are you waiting for? Go here and get WP Media Folder now
When you subscribe to the blog, we will send you an e-mail when there are new updates on the site so you wouldn't miss them.