How to create a photography website with WordPress and WP Media Folder

WP Media Folder is the best plugin to organize our Media Library as well as create galleries but, in the past, it used to miss essential features that photographers could use for their projects like sharing with clients, protecting, as well as allow the download but that's not an issue anymore! In this post, we will introduce the new Photography Addon.
Protect your images and galleries, create galleries quickly, share them with your clients, create a wishlist, and also allow your clients to download it is a few of the features that WP Media Folder offers for photographers, and we will see how to use this new remarkable addon.
Creating and managing galleries wasn't so easy in the past, but let's start with the post to see how easy it is to use!
Table of content
Say goodbye to messy media library.
WP Media Folder lets you categorize files, sync folders with
cloud storage, create amazing galleries and even
replace images without breaking links.
Optimize your media workflow today
Create a WordPress Photography gallery
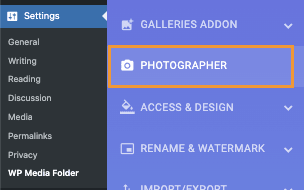
The first step would be creating a photography gallery under our gallery manager, to do this, first, we will need to enable it under the WP Media Folder settings.
Go to your general Settings > WP Media Folder > Photographer.
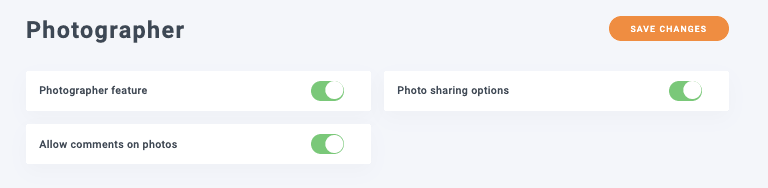
On this page, we can enable the Photographer features as well as add Size limits for the download options.
The features that can be enabled are:
Photographer Feature: this will allow us to generate separate private galleries to be shared with our clients.
Photo sharing options: to enable the option to share our protected galleries with clients.
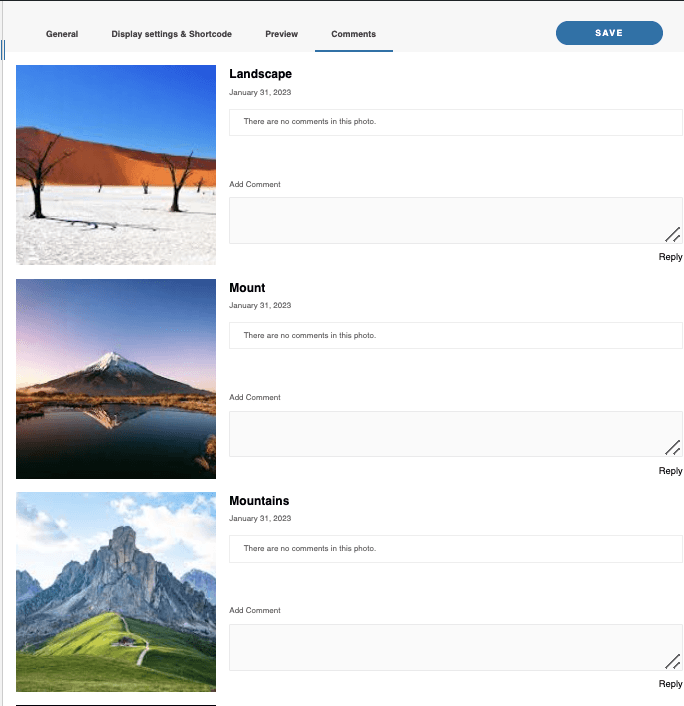
Allow comments on photos: this feature will add the option for our clients to add comments o our photos in the front end.
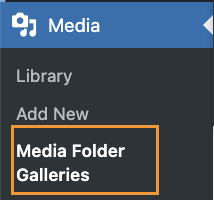
With this enabled and our download limits set, we can proceed with saving the changes and create our gallery so let's click on Save Changes and then, navigate to Media > Media Folder Gallery.
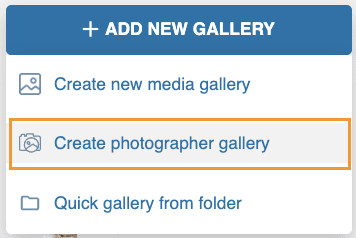
On this page, we can click on +Add Gallery > Create Photographer Gallery.
We will be able to define the Gallery title as well as if we want it to be a sub-gallery in the popup that appear.
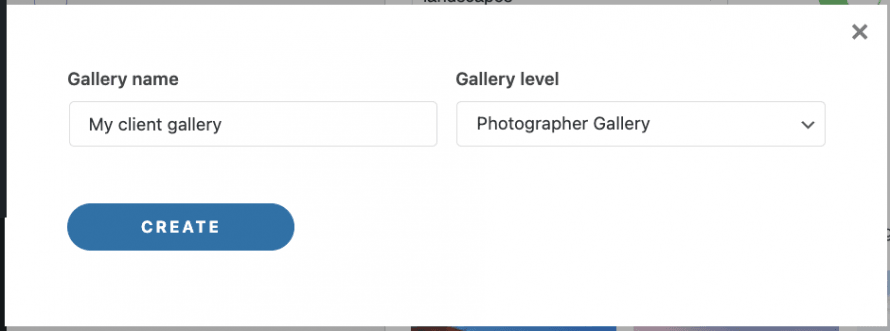
And our photography gallery will be created!
Now we can proceed to add images to our photography galleries, for this, we have 4 options available:
Upload: to upload our images from our PC, we can also drag and drop our images

From our Media Library, this option will allow us to open our media library and allow us yo navigate between our Media Folders, and select a folder or just certain images.
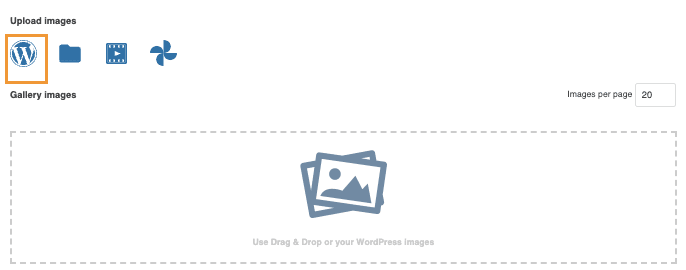
The other options are to load an external video or a video in our Media Library and also import our images directly from Google Photos.
For this post, we have a few images already prepared in our Media Library so let's select the WordPress Icon to load our Media Library and select our photos.

A preview of the images will load in our Gallery creation section, we will also notice that we have the option to use a Media Folder to create our Photography Gallery and also set it up so all the media added to the media library will be added automatically to the photographer gallery as well.
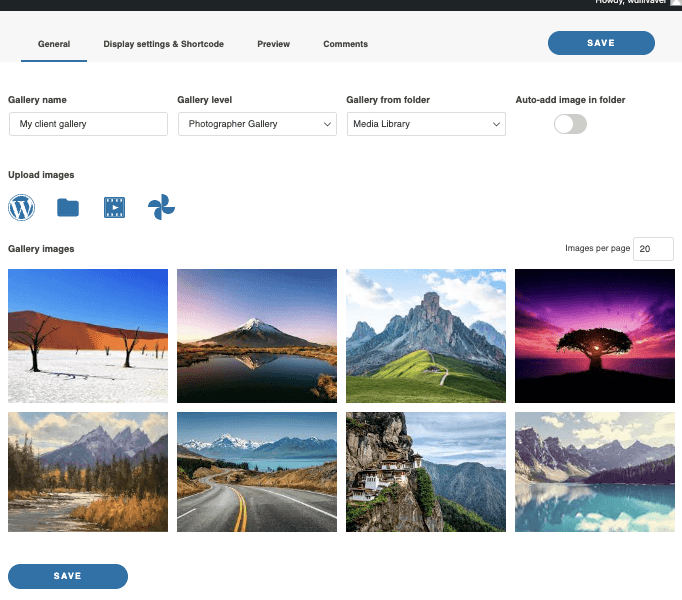
Now we have other tabs where we can further setup our Photographer Gallery, these tabs are:
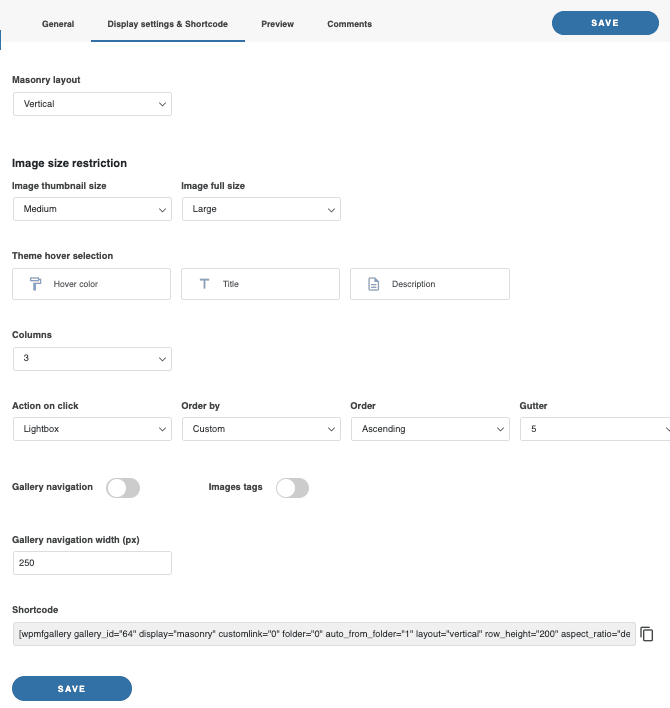
Display Settings & Shortcode: that will allow us to set up further our Photographer gallery, and make it display how we want.
Preview: where we can see how the gallery will be displayed in the front end before adding it.
Comments: on this section, we can manage the image comments, and reply to our customers.
As easy as upload images and adjust the settings, we will have a Photographer gallery created.
Sharing the WordPress Photographer Galleries with clients
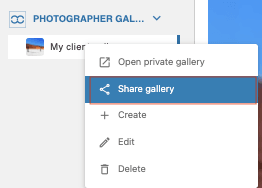
Now that we have our Photographer gallery created, we can proceed to share it with our customers, for this, do a right click on the gallery title in the side bar of the gallery manager and then, click on Share Gallery.
This will open a modal where we can easily add our client email account, a password, and the email content with the link to our Photographer Gallery.
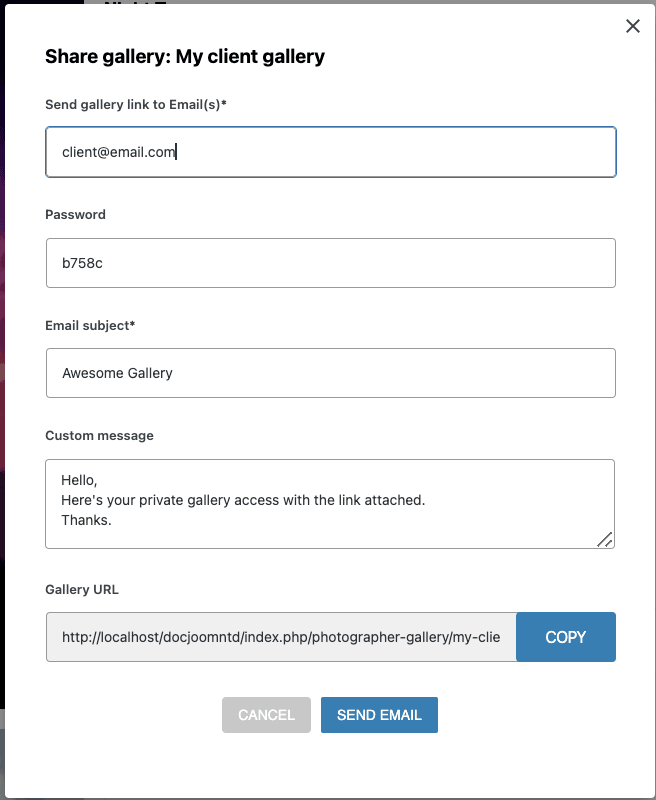
As easy as clicking on SEND EMAIL, and the gallery will be shared with our customers!
Of course, we also have the option to copy the link of the gallery and send it to our client.
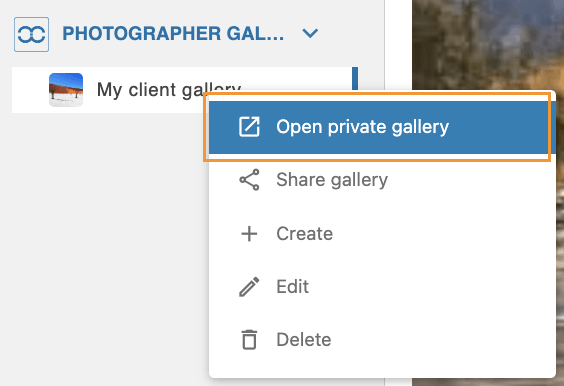
As a final step, we can interact with our Photographer gallery as if we are our clients to confirm that everything looks and works correct, for this, do a right click on the gallery name > Open Private Gallery.
A new tab will be opened with all the options available for our customers like add photos to wishlist, download the photos, check the wishlist, and also comment on the photos.
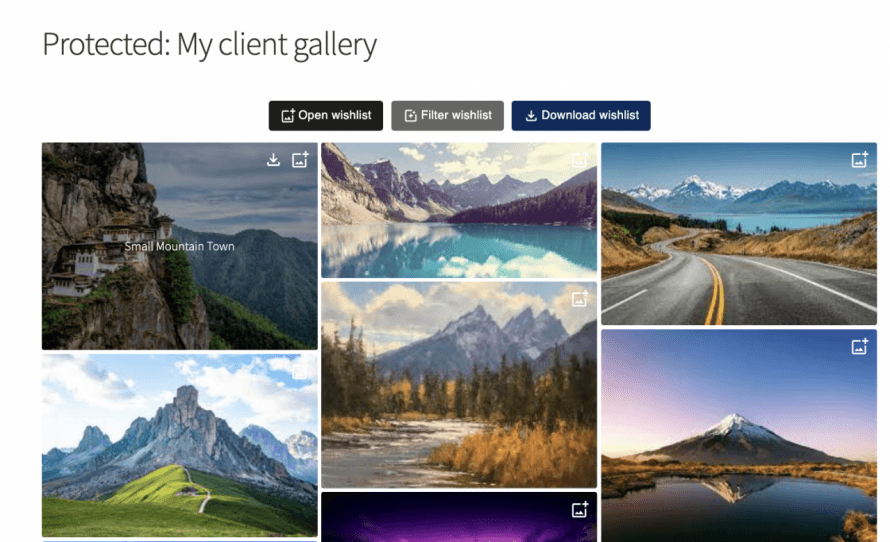
We can add images to the wishlist by clicking the option that appears at the top right.
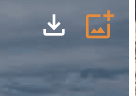
the other icon will allow us to download that specific image.
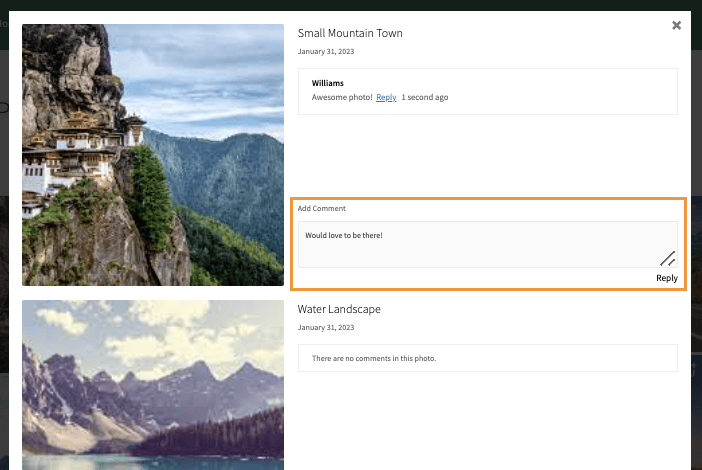
now under our wishlist, we will be able to comment on the images to give the photographer some feedback, for example.
And when the customer finish the Wishlist, they can easily download it from the buttons at the top of the gallery!

A pop-up will appear with all the sizes that we added in the configuration step and, finally, the button to download them.

As you can see is a very functional gallery that can be easily shared with our customers! And with awesome comment options that will allow us to communicate with them on the same platform, a feature that can be described with one word, awesome!
Calling all webmasters!
Save time and boost productivity with WP Media Folder. Effortlessly organize client media
files, create custom
galleries, and provide a seamless user experience.
Upgrade your website projects now!
WordPress photographer galleries and more
As we were able to see, an awesome feature that will allow us to create Photographer galleries, but that's not all! As we also have a gallery manager with a lot of themes available as well as many other options like offloading our media, organizing them into Media Folders, and connecting between our Media Library and cloud services like Google Drive, OneDrive, and Dropbox!
You can check as well this awesome video where we explain the details and show how these work in real-time.
What are you waiting for? Go here and get your own WP Media Folder and the Gallery addon!
When you subscribe to the blog, we will send you an e-mail when there are new updates on the site so you wouldn't miss them.


Comments 2
I wish you did these tutorials and marketing for Joomla you would be noticed for your Joomla extensions as well.
Thanks! We'll do it, but takes time