Using SpeedCache on RoseHosting Server
Joomla is a content management system (CMS) which allows you to build user-friendly, mobile-ready and high-performance websites with a few clicks. When it comes to performance, Joomla has a built-in cache system which is somewhat effective, but, like many other Joomla users, you may want to get out the best of your website. This is where Speed Cache comes in handy.
It is a Joomla extension and it comes over as an enhanced version of the Joomla page cache system. In this tutorial, we are going to show you how to install Joomla with Speed Cache on your Linux VPS (CentOS or Ubuntu).
Prerequisites
- A VPS running Ubuntu or CentOS. You can get a VPS from RoseHosting - all their VPS hosting plans are fully managed with full root access. They'll install, configure and optimize Joomla with Speed Cache for you, free of charge.
- SSH access to the server
- Apache 2.4+ with mod_mysql, mod_xml, and mod_zlib
- MySQL 5.5.3+
- PHP 5.6+ or 7+ with Magic Quotes GPC, MB String Overload set to off, Zlib Compression Support, XML Support, INI Parser Support, JSON Support, Mcrypt Support, MB Language set to Default
Also, add the following settings in your php.ini file:
- memory_limit: 128M
- upload_max_filesize: 32M
- post_max_size: 32M
- max_execution_time: 300
Once you are sure the prerequisites are met, you can continue with the other steps of this tutorial. If not specified, the command is the same on both CentOS and Ubuntu systems. Where specified, you should run the command according to the distro you are using.
Install Joomla
First of all, create a directory for the Joomla files:
Download the latest version of Joomla from the official site. The latest version of Joomla at the moment of writing this tutorial is 3.7.2:
# wget https://downloads.joomla.org/cms/joomla3/3-7-1/joomla_3-7-2-stable-full_package-zip
# unzip joomla_3-7-1-stable-full_package-zip
Change the file permissions. On Ubuntu run:
# chown -R www-data: /var/www/html/joomla
On CentOS, run:
Create a new virtual host in Apache for your domain name and add the following content:
ServerAdmin
DocumentRoot /var/www/html/joomla
ServerName yourdomain.com
ServerAlias www.yourdomain.com
AllowOverride All
Order allow,deny
allow from all
ErrorLog /var/log/apache2/yourdomain.com-error_log
CustomLog /var/log/apache2/yourdomain.com-access_log common
Note: If you are using CentOS, you need use httpd instead apache2 for ErrorLog and CustomLog. Also, you need to replace yourdomain.com with your actual domain name. To restart Apache on Ubuntu, run the following command:
To restart Apache on CentOS, run the following command:
Next step is to create MySQL database and MySQL user for your new Joomla site. Log in to MySQL:
Run the following commands to create MySQL database and user:
mysql> GRANT ALL PRIVILEGES on joomla_db.* to 'joomla_user'@'localhost' identified by 'your_password';
mysql> FLUSH PRIVILEGES;
mysql> quit
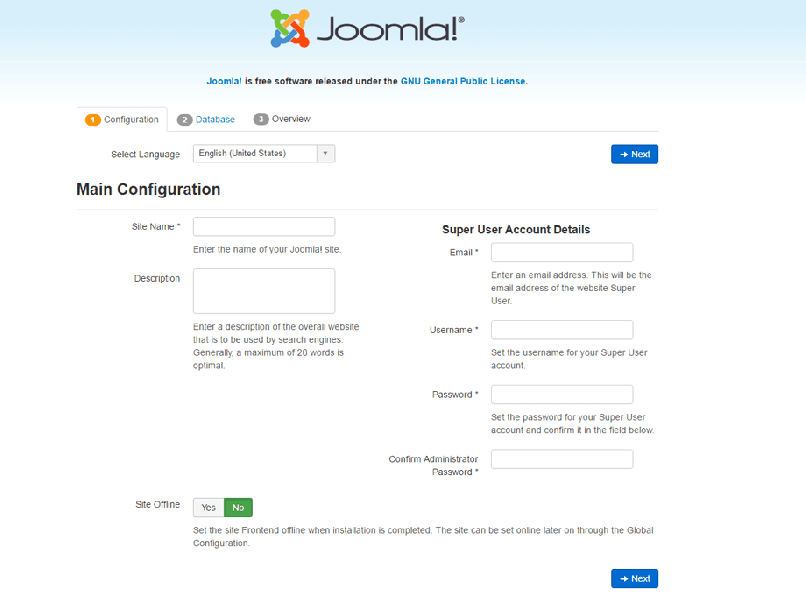
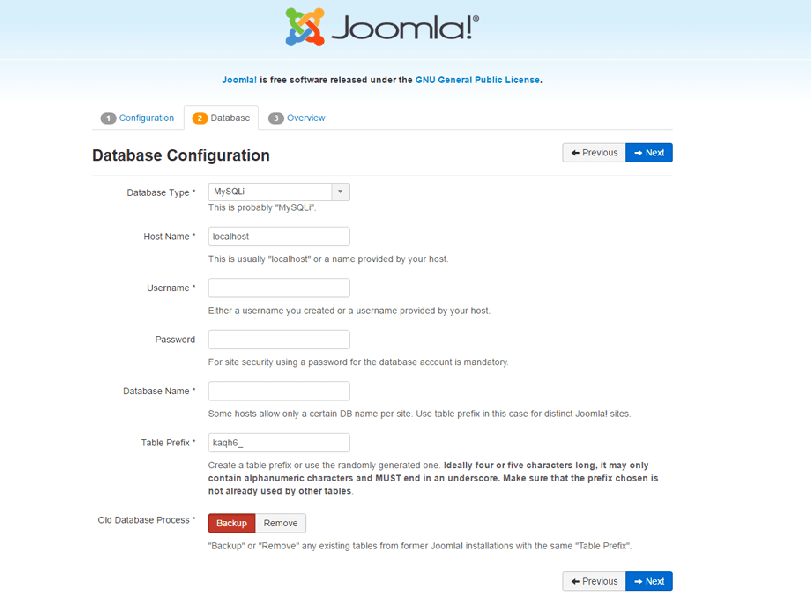
You can now open your favorite web browser and enter your domain name in the search bar. You will see the Joomla installation screen. Here, you need to enter some basic information like name for the site, email, username and password. In the next screen, you will be asked to enter the details for the MySQL database you created. Enter the name of the MySQL database, username and password.
In the next screen, you will be asked to enter the details for the MySQL database you created. Enter the name of the MySQL database, username and password.
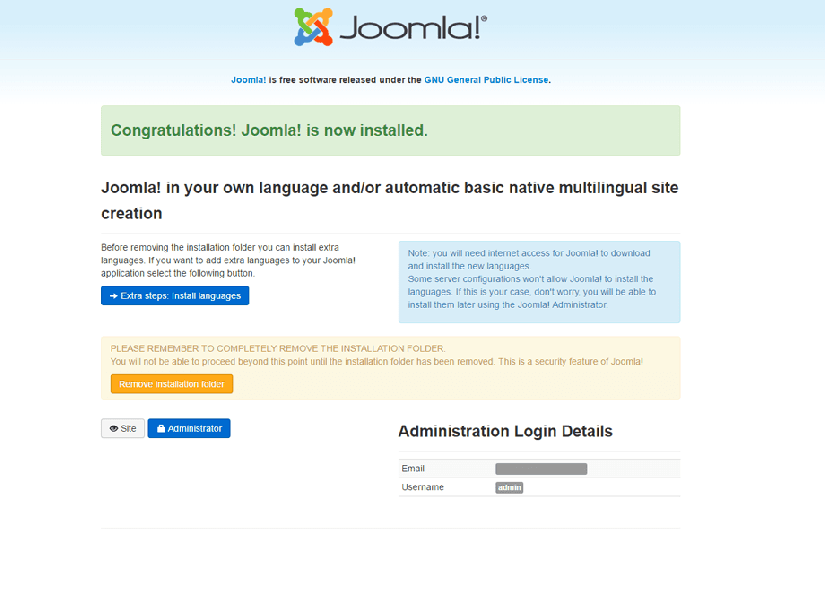
Proceed to the next screen to finish the installation.
Once Joomla is installed you can remove the installation directory:
Install the Speed Cache extension for Joomla
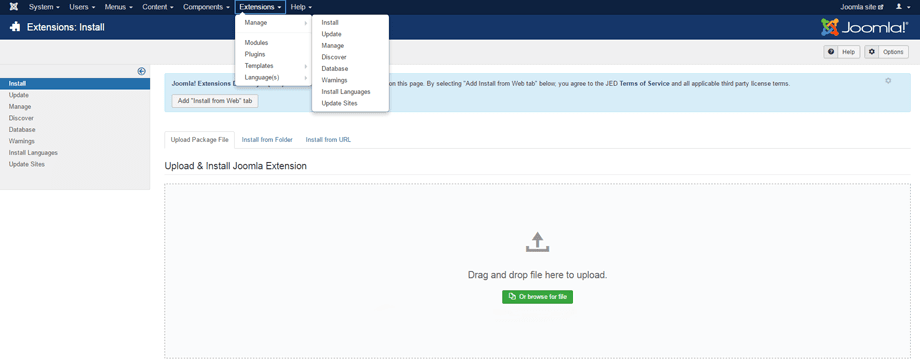
Speed Cache provides many useful features and will surely improve the performance of your Joomla site. Some of the most important features are the new static cache, the ability to activate full browser cache, Gzip compression, URL autoindex activation, adding expire headers etc. Go here to register and purchase the extension. Download the extension's .zip file and use the standard Joomla installer to install it. From your Joomla administrator panel select Extensions > Modules > Install
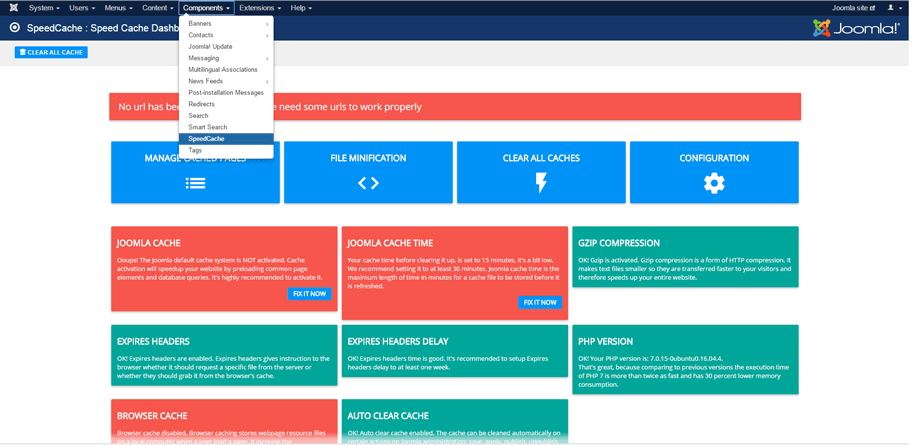
Drag and drop the file into the upload box or upload it manually. The extension will be automatically installed and activated. To access the Speed Cache dashboard and to manage the Joomla cache, select Components > SpeedCache
You can read the Speed Cache documentation for more information and details about how to manage the Joomla cache using Speed Cache. If you followed all the steps, you should see a great improvement in performance for your Joomla site. By using a Linux VPS powered by SSD, along with your Joomla site using the Speed Cache extension, you're ensuring that you get the best and fastest performance out of your Joomla website.
When you subscribe to the blog, we will send you an e-mail when there are new updates on the site so you wouldn't miss them.


Comments