Connect Joomla With Google Drive!

There are few easier ways to manage files than Google Drive. Nonetheless, whereas Google Drive makes it easy for teams to share files, most of the blogging action happens on Joomla. Dropfiles is JoomUnited’s answer to manage all your Google Drive files directly from your Joomla blog.
Dropfiles is primarily a file manager for Joomla, but one that is aware that sometimes, it is far easier to host files away from your blog. In light of this, Dropfiles comes with complete integration of Google Drive, allowing you to manage your cloud files from Joomla, and your Joomla files from Google Drive.
Creating the Google Drive & Joomla Integration
Google Drive integration on your Joomla blog starts off with a one-time setup that involves creating a Google application from Google’s developer console. You need to choose a name for the application and possibly enable the Google Drive API if this is your first set-up.

Webmasters, simplify file collaboration for client websites with Dropfiles.
Empower clients to securely share and collaborate on files, boosting productivity and streamlining project workflows.
Get the competitive edge now!
Then, create a new set of OAuth credentials; you might need to visit the configure consent screen to set a product name. Regardless, you will end up creating a new client ID, which represents your Joomla website. Three settings are most important:

Firstly, select the web application type and provide a name. Secondly, set the authorized JavaScript origin to your website address, excluding www. The third and final directive is to set the authorized redirect URIs as shown, adding the following string to your domain name: /administrator/index.php?option=com_dropfiles&task=googledrive.authenticate. Then you'll get your credentials.

This step will complete the Google Drive setup, giving you a client ID and secret that go into the cloud connection configuration tab on Joomla. Update your credentials, save and then click on the connect button to integrate Google Drive with your Joomla blog. It’s that simple!

Using Joomla’s Google Drive File Manager
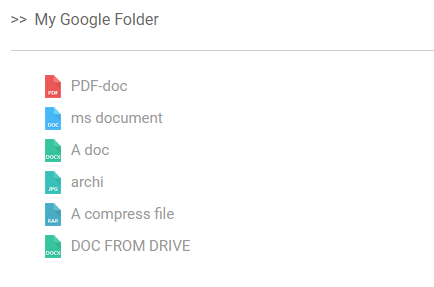
What does it mean to use Google Drive right in Joomla? When you establish this connection in Joomla, Google Drive creates a root folder with your blog’s name. On your Joomla website, DropFiles lets you create a new type of category - a new Google Drive folder - that is hosted in this root folder on Google Drive.

Everything else works exactly as before, only this time, Dropfiles becomes a Google Drive file manager hosted on your Joomla blog. This integration also comes with the added perks that the files reside on Google Drive, but Dropfiles does so without taking away any of your control.

Google Drive Automatic Synchronization
In fact, Dropfiles handles all synchronization for you. The Joomla file manager listens to changes in your files and reacts accordingly. On top of handling file creation and deletion, the Joomla file manager synchronizes changes to both files and folders.
Dropfiles supports all kinds of files, for which it synchronizes names, descriptions, and creation and update dates with Google Drive. The Joomla extension also synchronizes the Joomla categories, analogous to Google Drive subfolders, whenever you create new ones, or if you move, rename or delete them.

Moreover, Dropfiles’ synchronization works in both ways - if you make a change on Google Drive, it will be reflected on Joomla, and vice versa. These changes also display on your desktop if you use Google Drive with your local file manager.
Having all your files in one place is often desirable, even if that means storing them away from Joomla. Thanks to Dropfiles, you can transform your blog into a remote file or download manager, bringing all the features of Google Drive to Joomla.
Display Google Drive files on the Joomla frontend
Now that our site is connected and synchronized with Google Drive, we can start to use all the cloud files on Joomla as any other that we have stored in the server, let’s see how to display these files on the frontend.
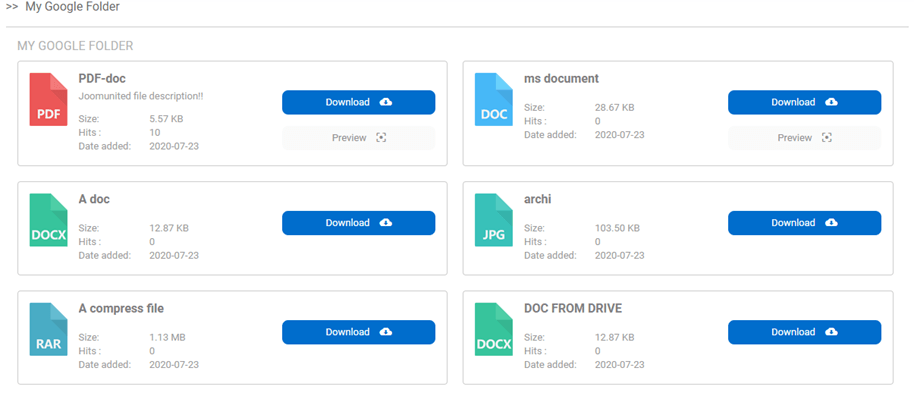
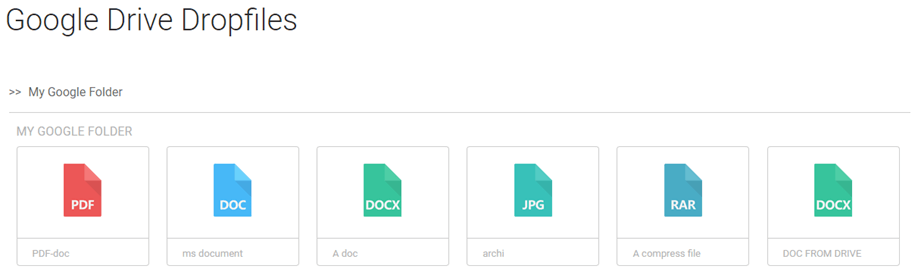
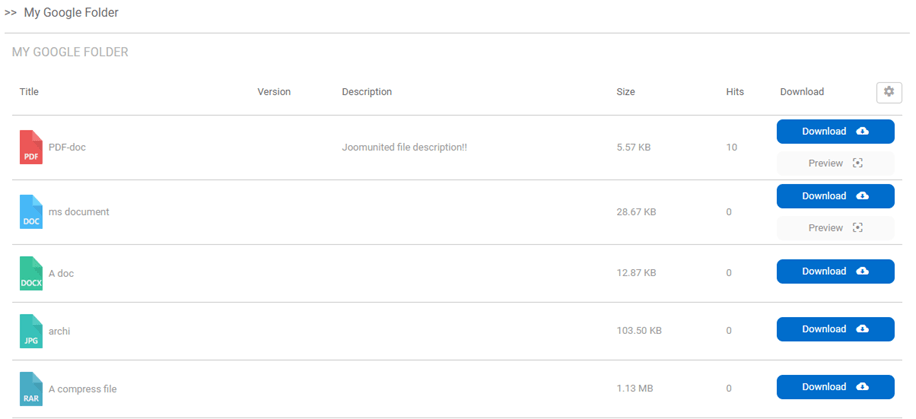
We have two options to display files: as a category and inserting a single file in the frontend, both options are available with cloud files.
First, in order to show a cloud category, we just have to select the category in the file manager and select the theme in the right section, finally click on Save Settings.
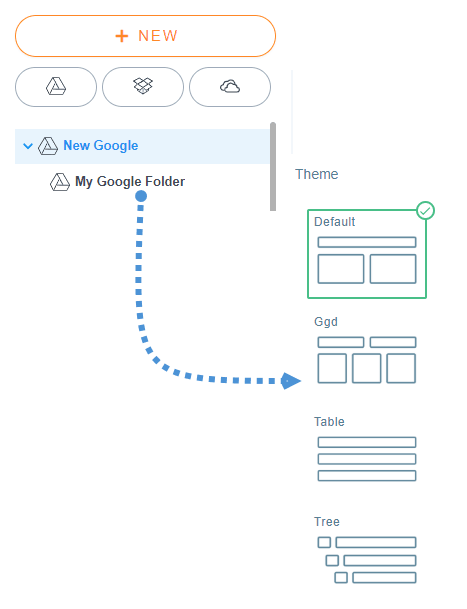
After this, you just have to insert your category by clicking on the Dropfiles button on your editor, selecting the Google Drive category and, finally clicking on “Insert this category”.
There are 4 themes that you can choose:
Default
Ggd
Table
Tree
As you can see all the themes are available with your cloud categories and you can also edit the layout as in any other category and the best of everything is that the category comes from the cloud so you will save storage space ;)
Keep your Cloud Files with the Access Limited
Another important thing that you can do with cloud files is to limit access as in any other file per user group or per single user so it will allow you to keep your files secured and create a personal user repository based on Google Drive folders.
In order to limit the access per user group, you just have to go to the cloud category that you want to limit and, in the right section, look for the “user groups” section.
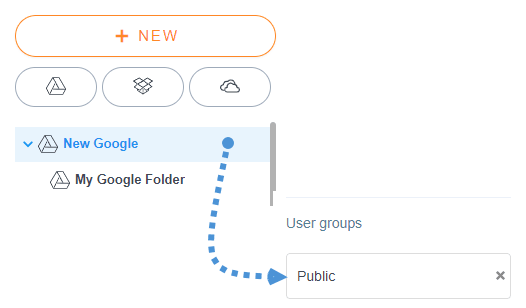
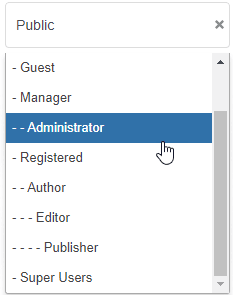
Now click on “Public” and select all the user groups that will be able to see and download the files.
Finally, click on the “x” icon at the right of “Public” so the public won’t be able to see or download files inside the category.
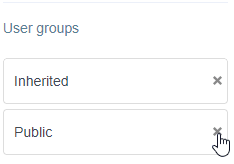
Finally, click on the “Save Settings” button and done! Now the category is going to be available only for these user groups.
The other option is to limit the access with Single user restriction, this can be done to a single user or to the entire category.
Go to the category/file that you want to limit and look for the Permission settings section.
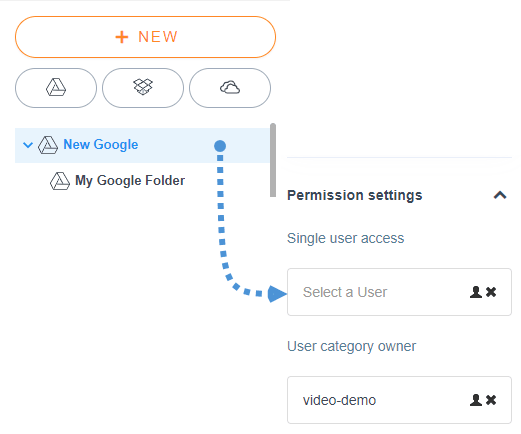
In order to select the user, just click the person icon and select the user that is going to be able to see and download the file/category.
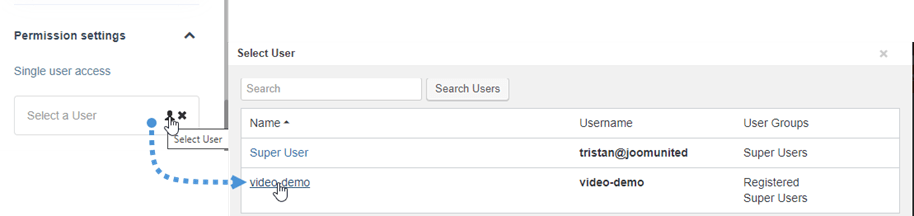
In order to finish the configuration, just click the “Save Settings” button and everything is going to be done, that user is going to be able to download and see the file/category, it was as simple to set as with any other file stored in your server.
We can also enjoy the awesome new UX that makes things easier than before! Managing files wasn't so easy before.
Calling all webmasters!
Enhance your client websites with Dropfiles. Easily upload, categorize, and share files, offering clients a user-friendly and efficient way to manage their documents.
Upgrade your web design services today!
More Details: Joomla & Google Drive Integration >>
Google Drive <> Joomla Video Demo
When you subscribe to the blog, we will send you an e-mail when there are new updates on the site so you wouldn't miss them.