Complete Guide WooCommerce Block

WooCommerce is one of the popular plugins for building e-commerce sites on WordPress. WooCommerce Blocks is one of the plugins in WooCommerce, designed to make it easier for users to create online stores on WordPress. WooCommerce Blocks assists in crafting personalized store pages, displaying your products, and adding advanced e-commerce features such as product filtering and searching – all without writing a single line of code.
- WooCommerce Blocks empower store owners to easily build and customize online stores using a simple drag-and-drop interface within the WordPress block editor—no coding required.
- With WooCommerce Blocks, you can add diverse features like product grids, filters, shopping carts, and custom checkout experiences, improving customer navigation and boosting sales.
- WooCommerce Blocks offer modern, mobile-optimized, and high-performance components that enhance user experience and future-proof your e-commerce site with flexible design options.
Table of content
- What is WooCommerce Block?
- List Feature of WooCommerce Block
- How to use product grid block in WooCommerce
- How to add featured products to your page
- How to add filter blocks in WooCommerce
- Cart and Checkout Blocks
- How to Custom Shop Page on WooCommerce
- Build your Online Store with WooCommerce Block & Sell your Product
- Conclusion
You must install the WordPress WooCommerce Blocks plugin to use these new blocks. This plugin is a testing ground for experimental features that could be added to the core WooCommerce.
In this practical guide, we will discuss the features of WooCommerce blocks and how to customize them.
What is WooCommerce Block?
WooCommerce Blocks are a collection of blocks integrated with the WordPress block editor (Gutenberg) that allow you to easily add various WooCommerce features and functionality to your pages and posts. Without writing code, these blocks enable you to showcase products, product categories, search filters, shopping carts, checkouts, and more.
In simpler terms, WooCommerce Blocks are pre-built components you can insert into your WordPress site using the block editor, providing an easy way to incorporate e-commerce functionality powered by WooCommerce. This is of the core WooCommerce plugin, so you get them automatically when you install and activate WooCommerce on your WordPress site.
Also, they integrate seamlessly with the WordPress block editor, allowing you to build custom product pages, category layouts, and shopping experiences using a familiar drag-and-drop interface.ext here ...
List Feature of WooCommerce Block
After understanding what WooCommerce block is, next, we will discuss each feature provided one by one:
- All Product: Displays all store products in a grid format.
- Active Product Filters: Displays active product filters in list form or as chips (similar to buttons).
- All Reviews: Displays all product reviews.
- Best Selling Product: Displays best-selling products in a grid format.
- Checkout: Displays a form allowing customers to complete their orders.
- Cart: Displays the shopping cart.
- Featured Category: Highlights specific product categories along with call-to-action buttons.
- Featured Product: Displays selected featured products.
- Filter by price: Displays a price range that customers can filter products. You can also enable an editable price range by clicking a button or text here.
- Filter by stock: Allows filtering products based on stock availability status. This feature provides options to display products in stock, out of stock, or being reordered.
- Filter by rating: Allows customers to filter products based on ratings.
- Filter by attribute: Filters products based on size or color.
- Hand-picked products: Displays hand-picked products in a grid format, allowing you to choose which products to display specifically.
- Mini cart: Provides a brief view of the shopping cart.
- Newest products: Shows the most recent products arranged in a grid. format. They can be customized by adding/removing elements such as title, price, rating, and buy button.
- On-sale product: Displays products currently on sale in a grid format and can be customized by adding/removing elements such as title, price, rating, and buy button.
- Product search: Adds a search bar to facilitate customers in searching for products.
- Product by tag: Displays products with specific tags/labels in a grid format.
- Product by attribute: Displays products with specific attributes (color, size, etc.) in a grid format.
- Product by category: Displays products based on categories in a grid format.
- Review by-products: Displays reviews grouped by product.
- Review by category: Displays product reviews from specific categories.
- Single product: Displays detailed view for a single product.
- Top-rated products: Displays products with the highest ratings in a grid format.
How to use product grid block in WooCommerce
Besides learning about the features available in WooCommerce blocks, let's try using or adding a product grid in WooCommerce. Make sure you have installed the WooCommerce blocks plugin on your website. Here's how to add it:
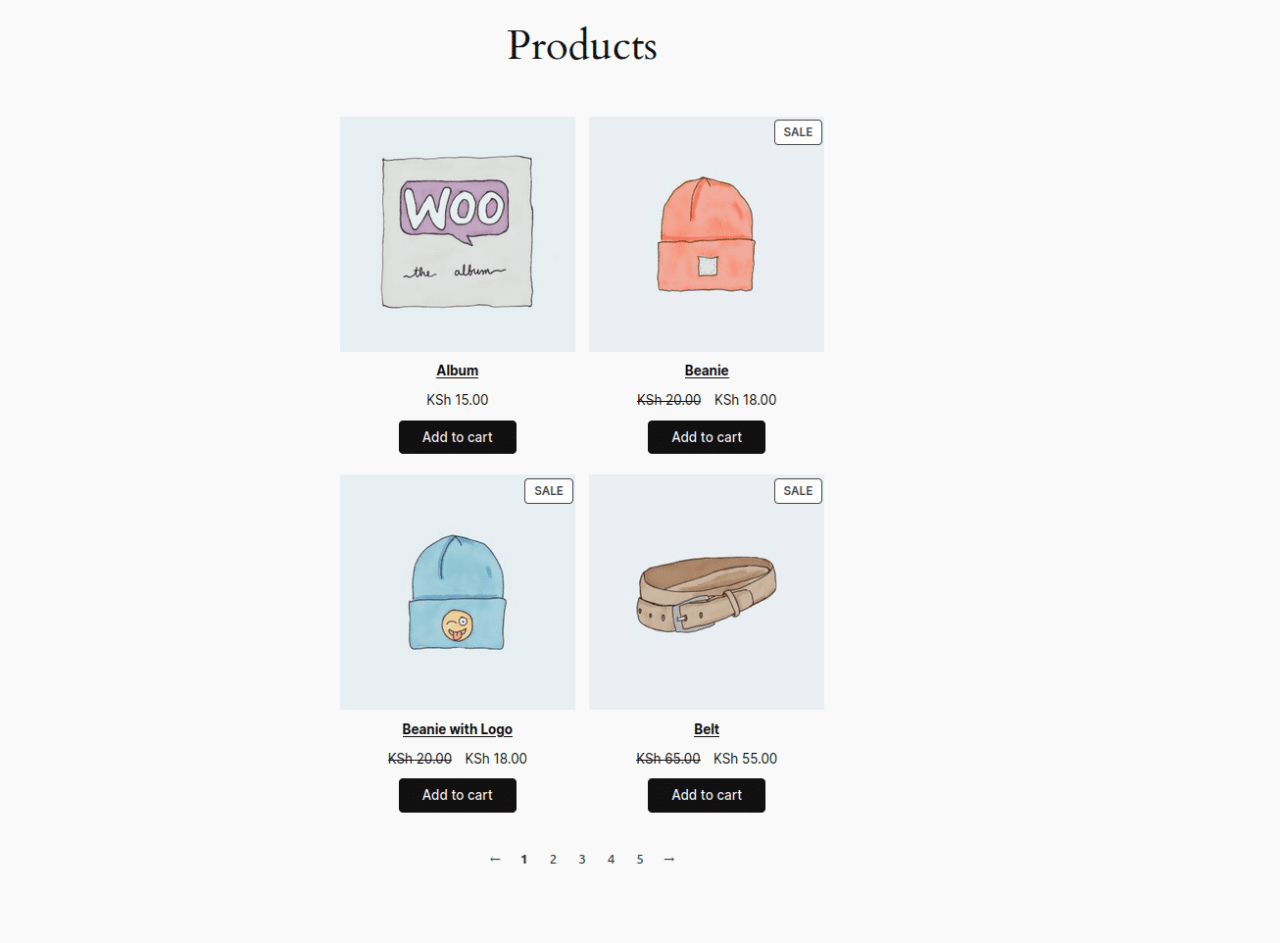
1. Open the page or post where you want to display the product grid, then enter the title "Product".
2. On the left navigation, click the (+) button > scroll down to the WooCommerce section > select "product grid".
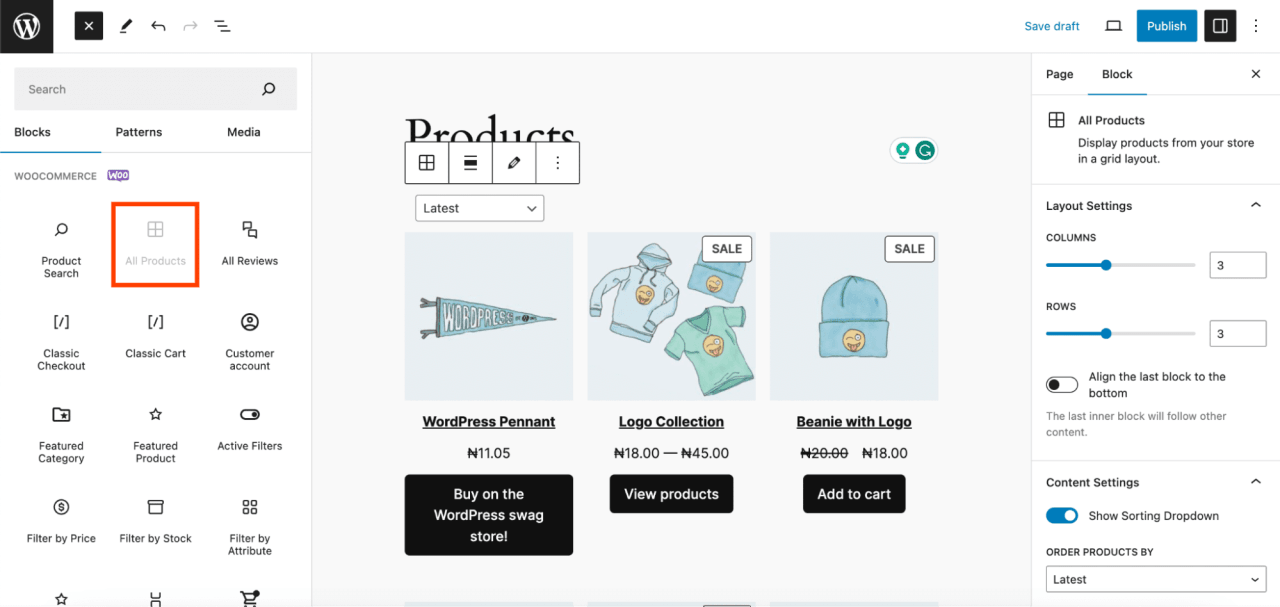
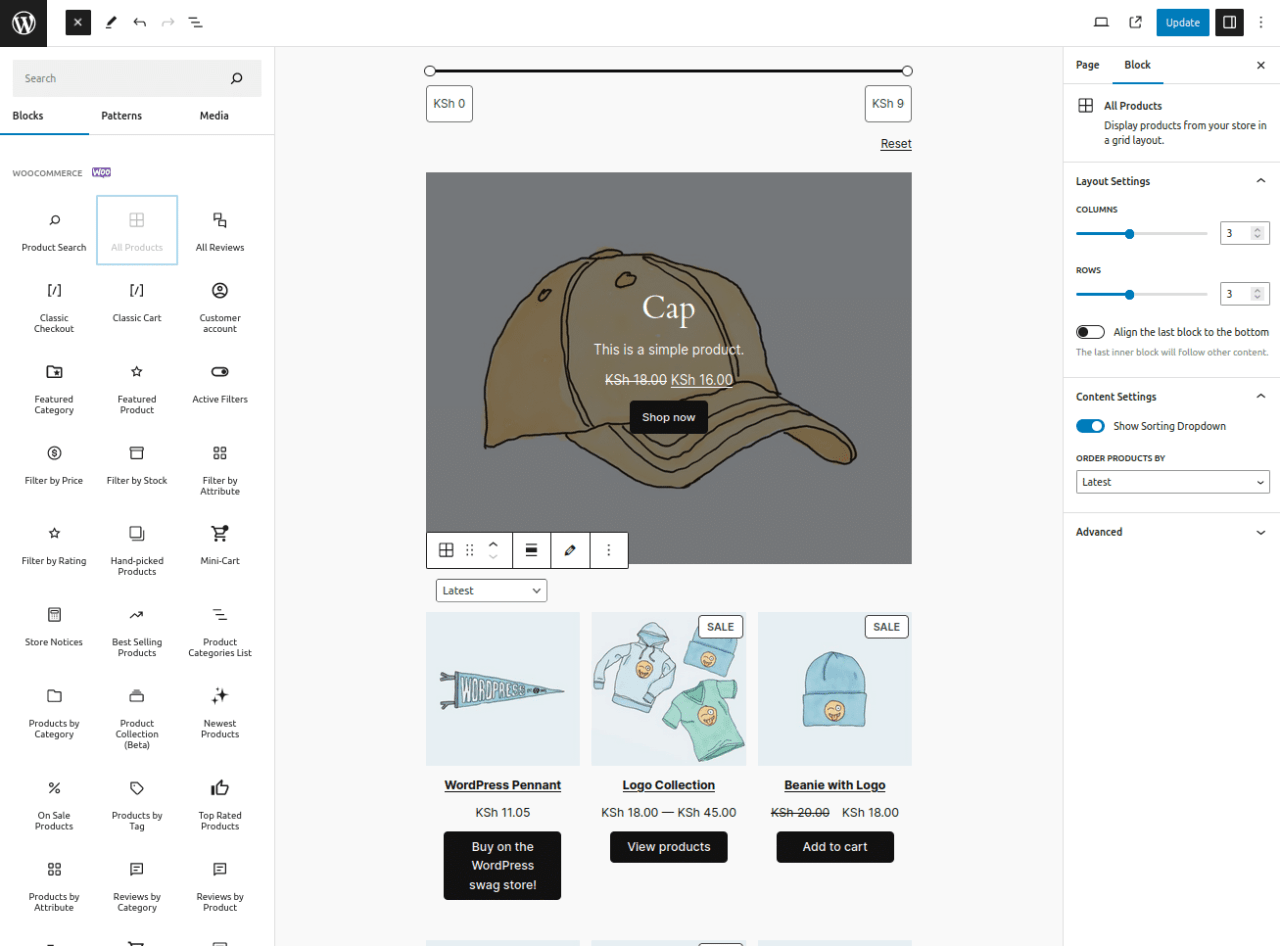
3. Next, to configure the block, go to the right panel.

In this panel, you can adjust several things, including:
- Layout settings: You can customize the number of rows and columns displayed in the product grid. For example, setting both to 2 for a balanced view.
- Content settings: You can display a dropdown menu for sorting products. This feature allows customers to sort products according to their preferences. You can disable it if it's not needed.
- Advanced styling: You can add CSS classes to customize the appearance.
How to add featured products to your page
The Featured Product block lets you showcase specific products on your page or post. With this block, you can select products, customize their appearance, and place them in your content to attract visitors to the items you want to promote.
To add the Featured Product Block, follow these steps:
1. Open the page or post where you want to add it. For example, if you place it above the product grid, create space in that area and click the "+" button that appears.
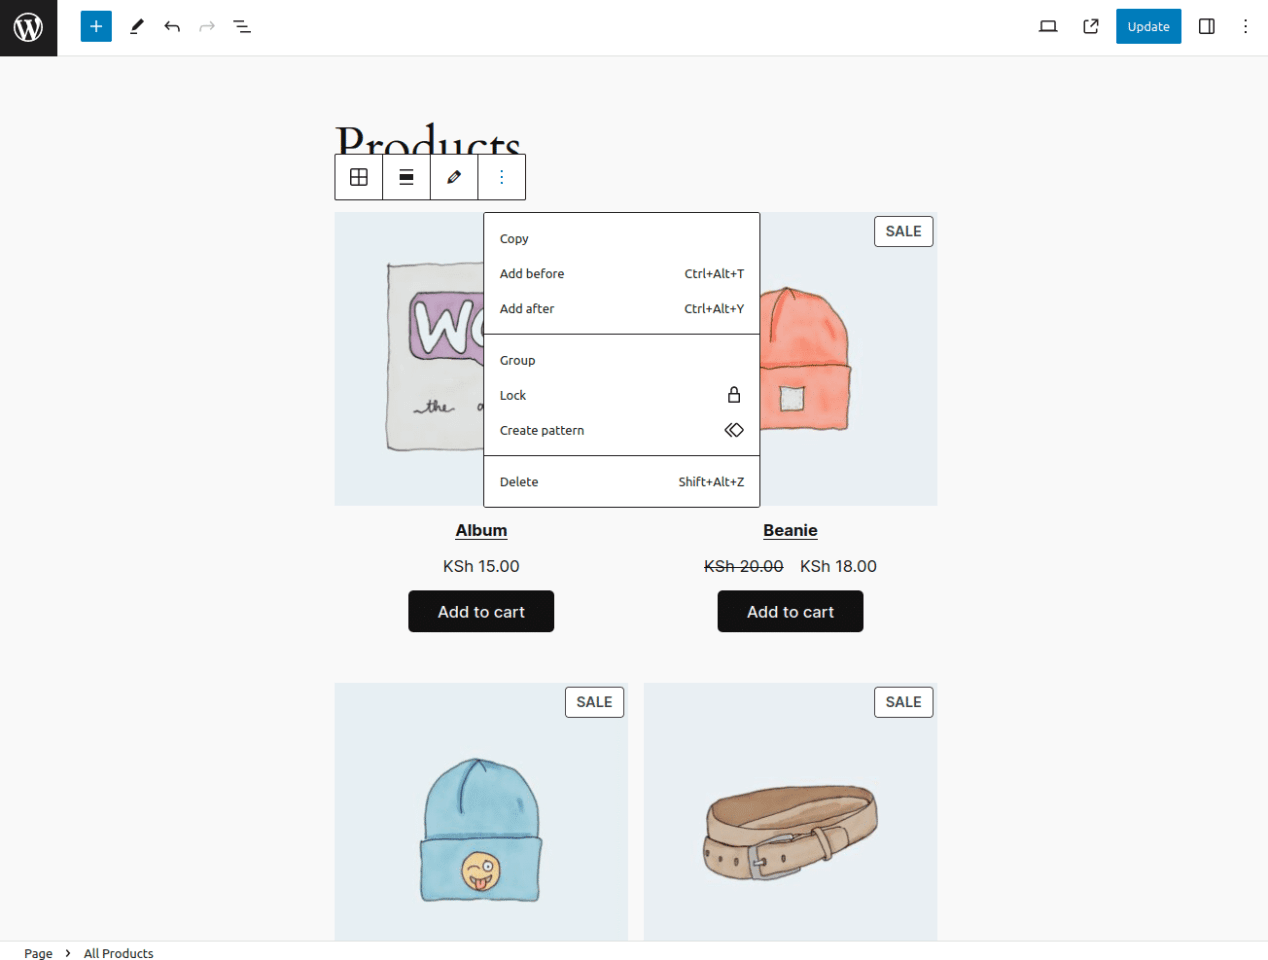
2. Select the "+" button on the block toolbar to open the block list, then search for and select "Featured Product".
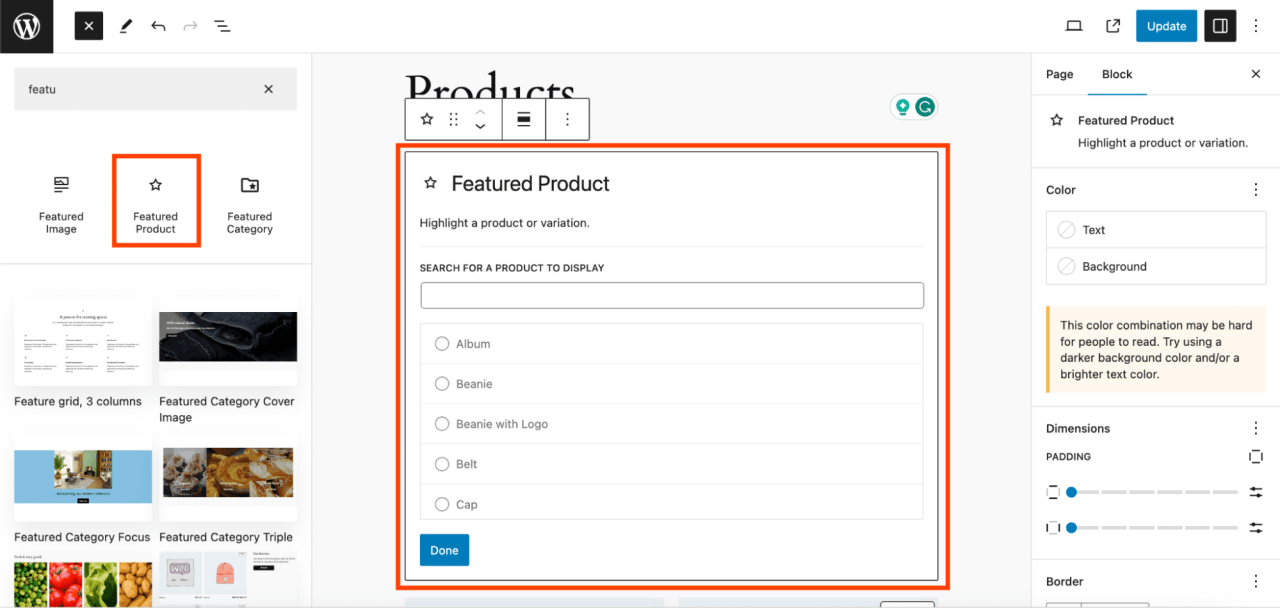
3. Choose the products you want to highlight, then click "Done".
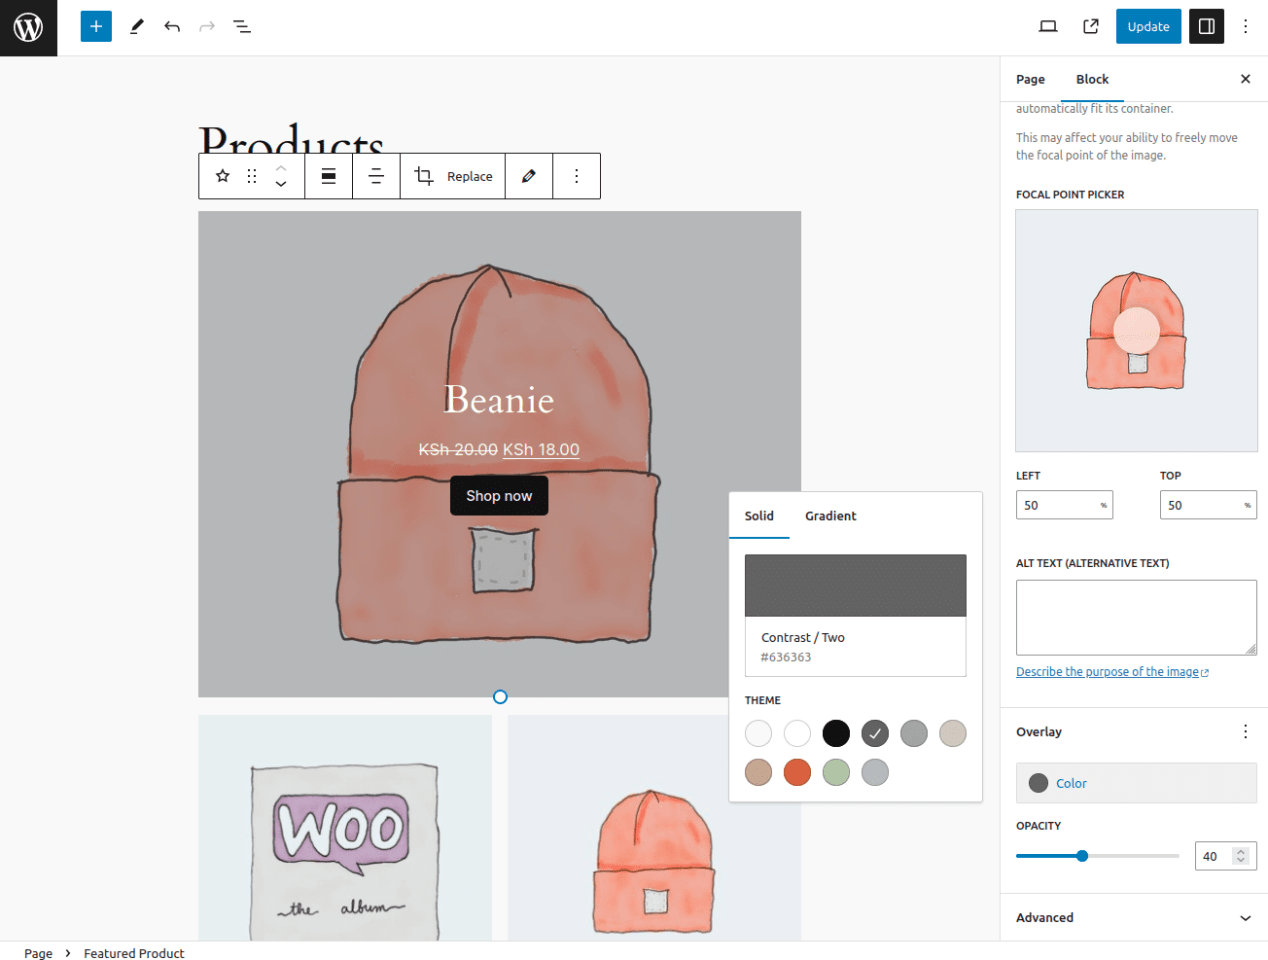
4. To customize the block's appearance, click "Settings". In the settings panel, you can adjust several things including:
- Show or hide product description and price.
- Configure media display (image and video).
- Add alternative text for product images.
- Select block overlay color.
- Adjust block opacity.
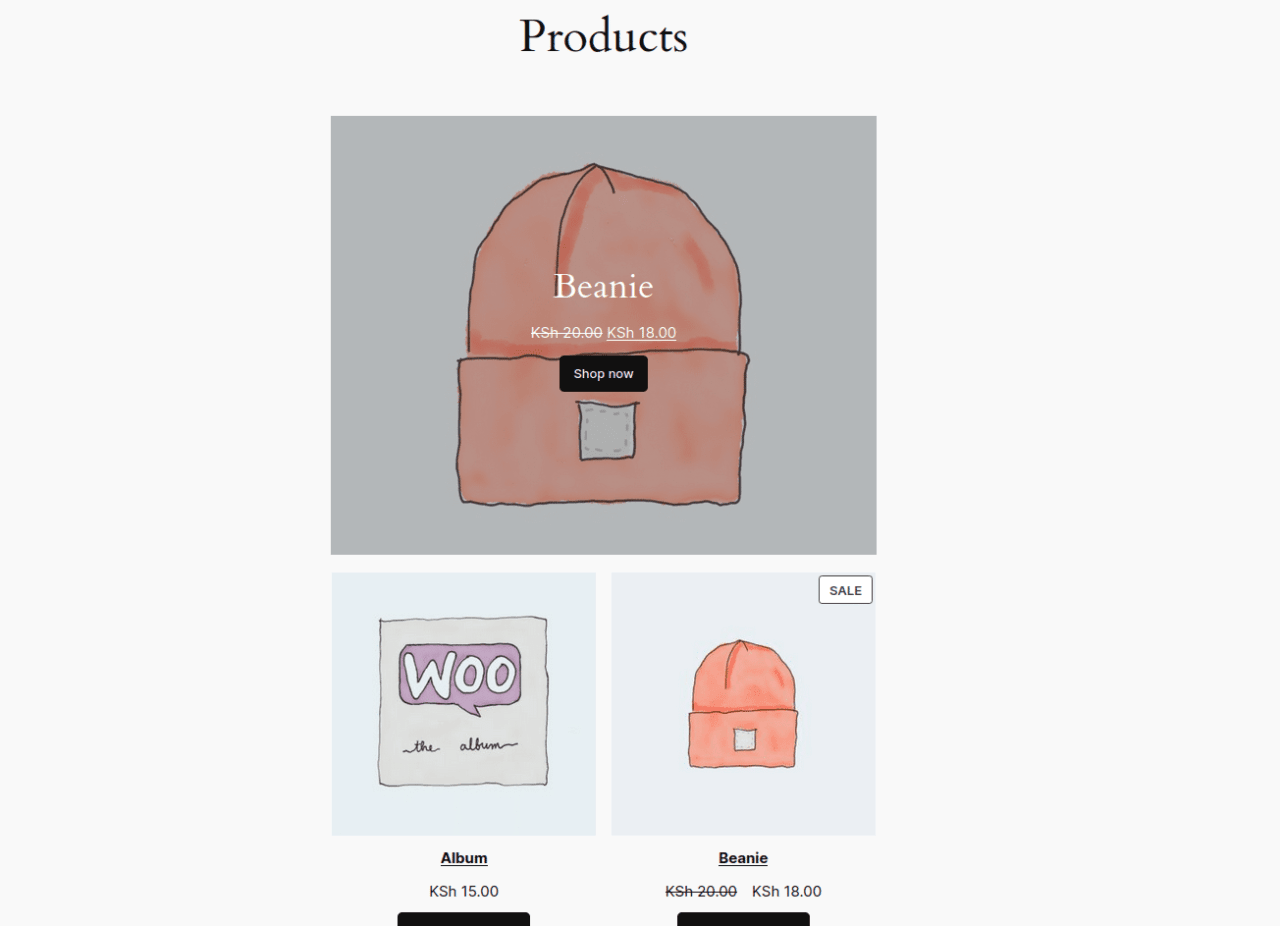
5. After adjusting, you can publish or update the page to see your featured product block display.
How to add filter blocks in WooCommerce
The WooCommerce Filter block makes it easy for customers to find products that match their search criteria. By providing filtering options, customers can quickly narrow down search results to products relevant to them.
To add the filter block, follow these steps:
- Open the page or post where you want to place the filter block.
- Determine the desired location to place the filter block.
- On the block editor toolbar, click the "+" button and search for WooCommerce filter options such as Price Filter, Stock Filter, Attribute Filter, and Rating Filter.
Now, let's discuss each type of filter that is available.
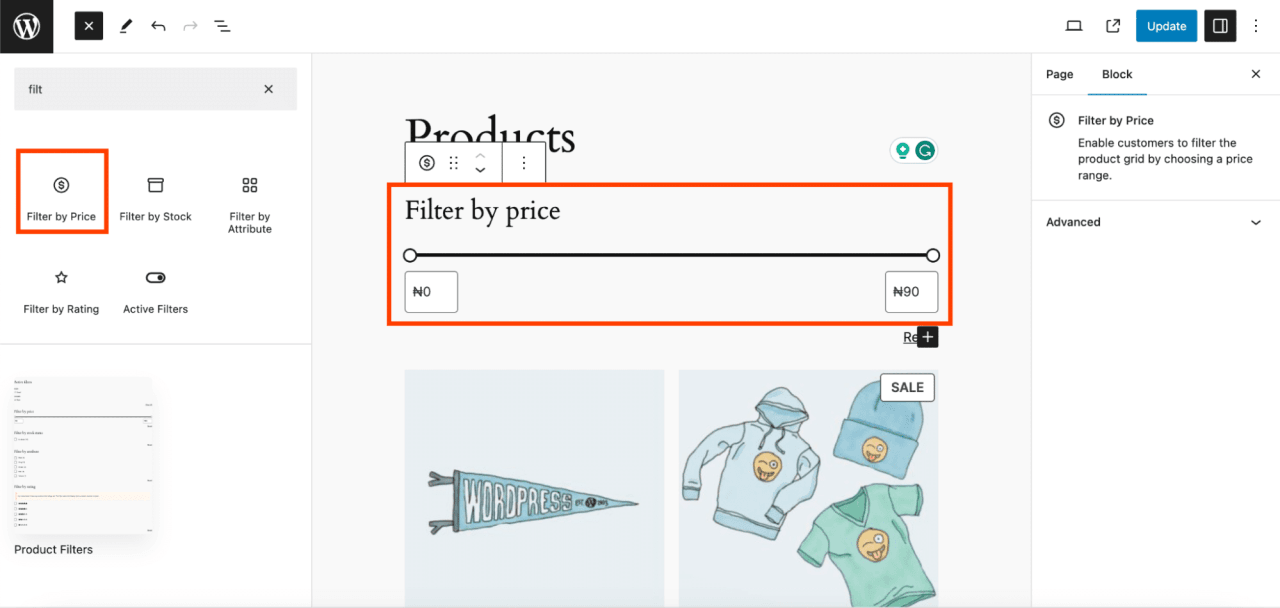
Adding filter by price
The Price Filter Product Block allows you to add a filtering feature that enables users to select the desired price range. The price range can be displayed as editable buttons or regular text. You can add buttons if desired and adjust their heading level.
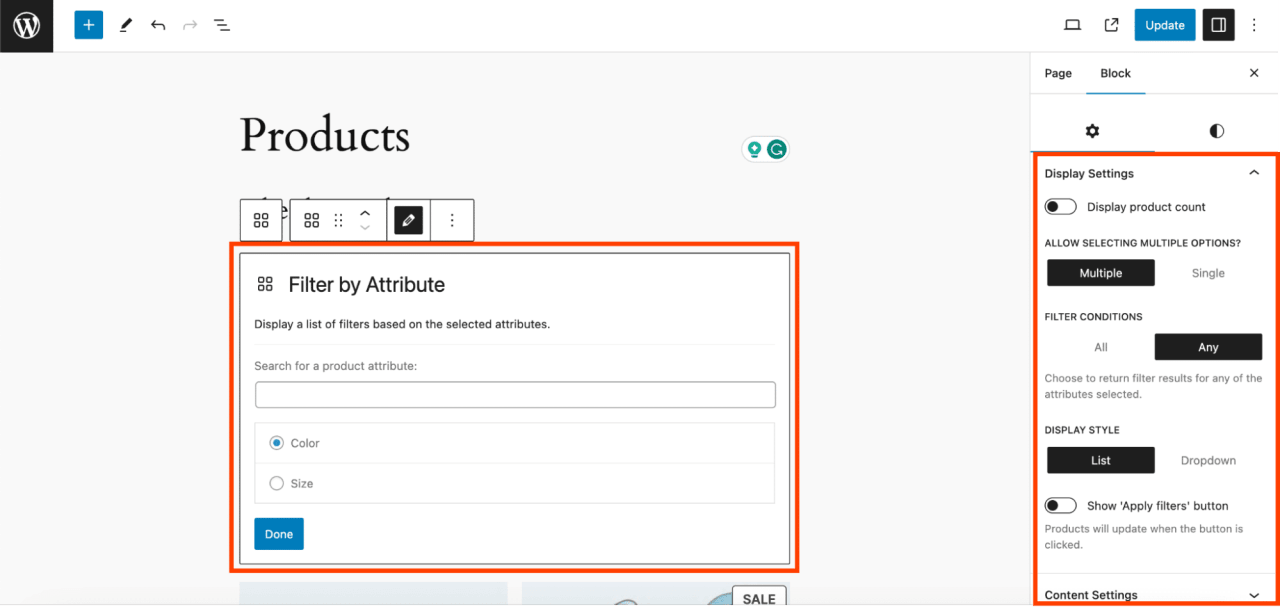
Adding filter by attribute
The Product Attribute Filter Block enables users to filter products based on attributes such as color and size. You can choose the attributes you want to use from the available list. Its display can be in the form of a list or a dropdown menu. You can also configure the query type to be either AND or OR. Other features include displaying the number of products, selecting the heading level, adding buttons, and choosing the filter.
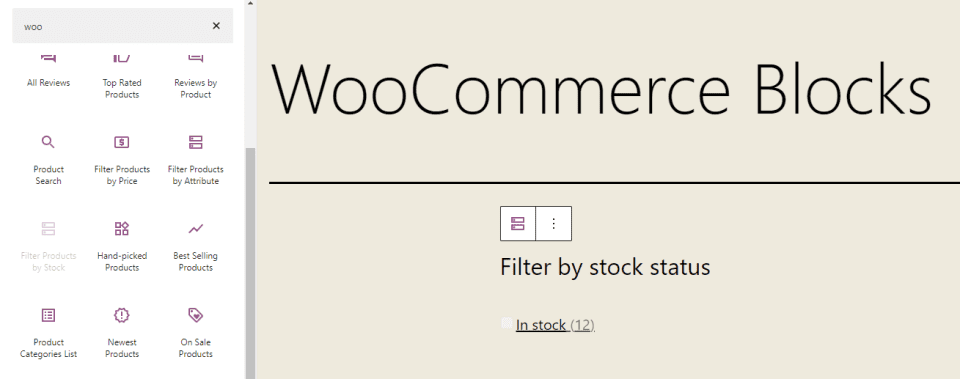
Adding filter by stock
The Stock Status Product Filter Block allows users to display products based on their availability status. They can display available products (in stock), out of stock (out of stock), or on backorder. You can also configure it to display the number of products, select the heading level, and add buttons. This block can be used with other WooCommerce blocks, such as All Products. Unfortunately, this block does not provide a preview when added to the page.
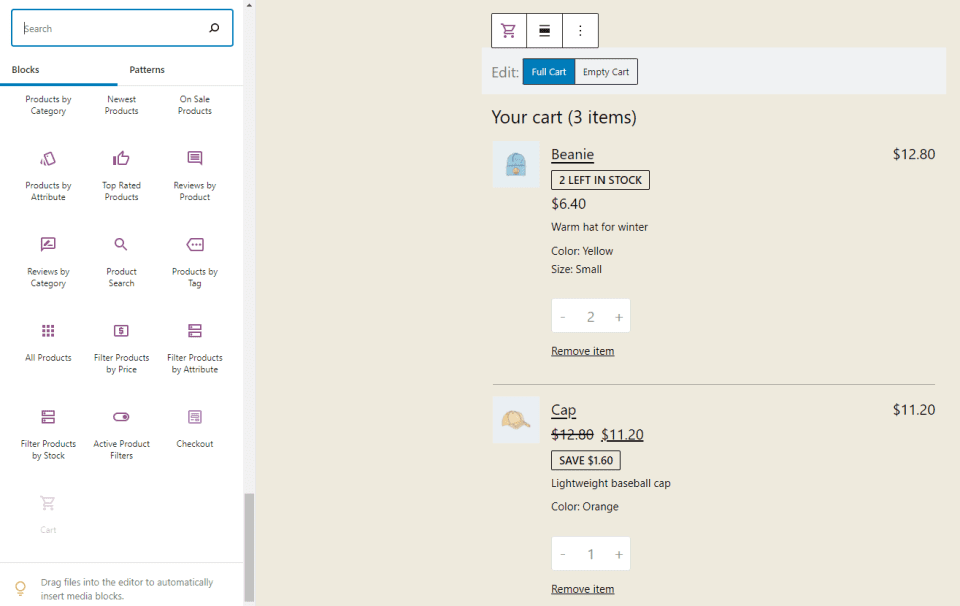
Cart and Checkout Blocks
ourThe shopping cart block adds a shopping cart display to your page. You can include a shipping cost calculator, select a link for the checkout button, and set a dark mode display. This block also provides a notification that you can set the page as the default shopping cart page in WooCommerce settings. A link to provide feedback is also included.
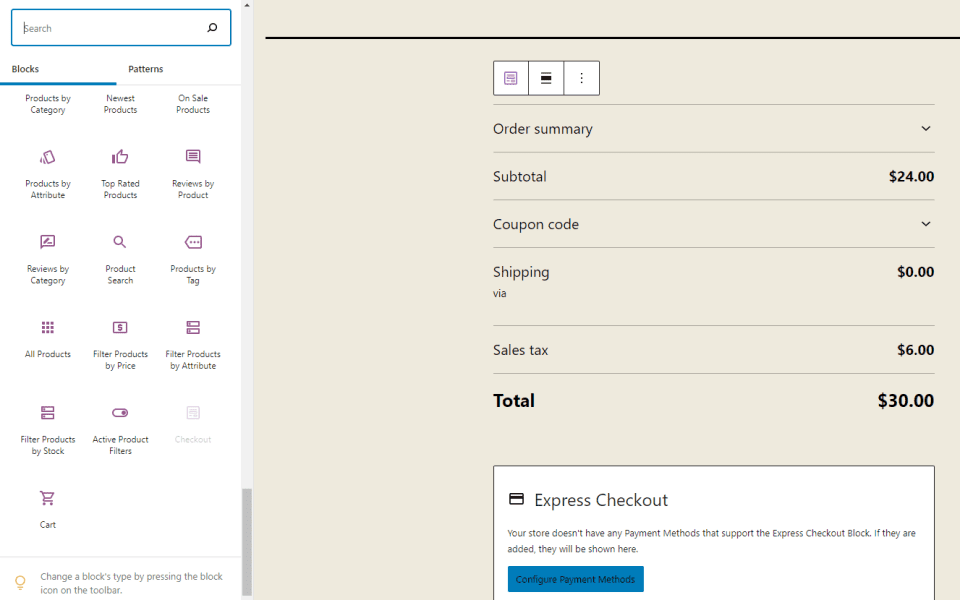
Meanwhile, the checkout block provides a checkout form for your shopping cart. You will be informed that this page can be set as the default checkout page in WooCommerce settings. There is also an option for dark mode display. This block consists of several elements that you can customize individually. Unfortunately, this block does not provide a preview once it is added to the page.
How to Custom Shop Page on WooCommerce
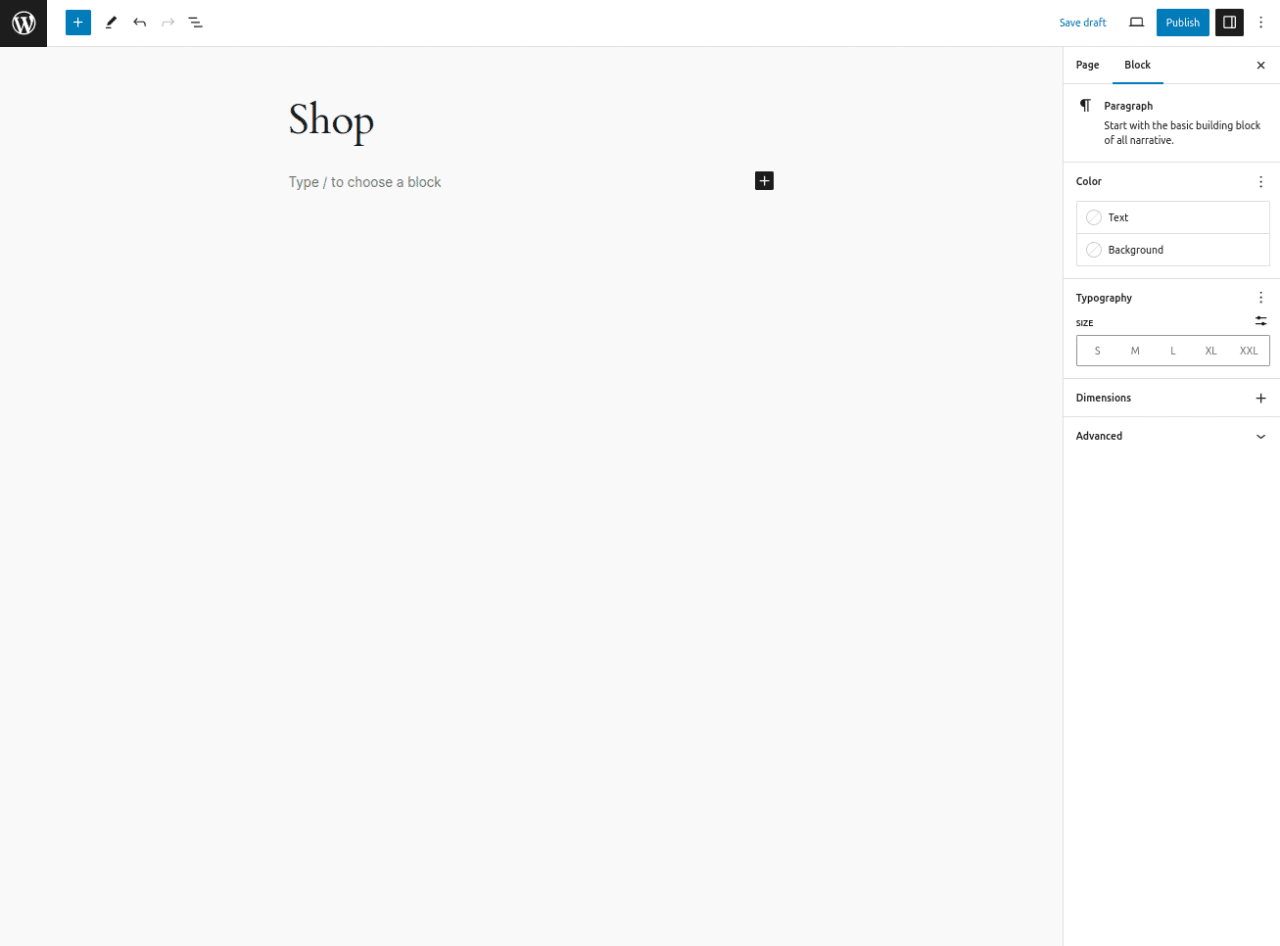
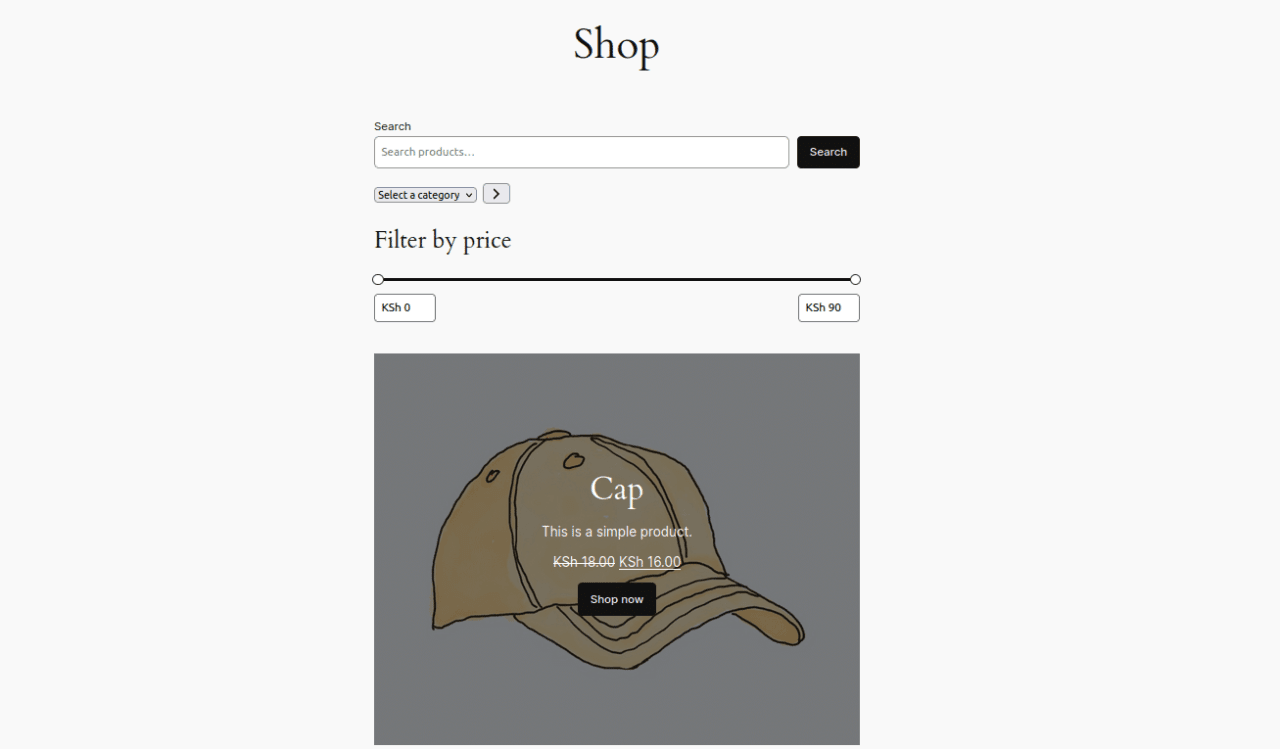
After learning how to use various WooCommerce Blocks, you can combine several to create a user-friendly custom shop page. To build this specific shop page layout, follow these steps.
1. Create a new page and name it "Shop".
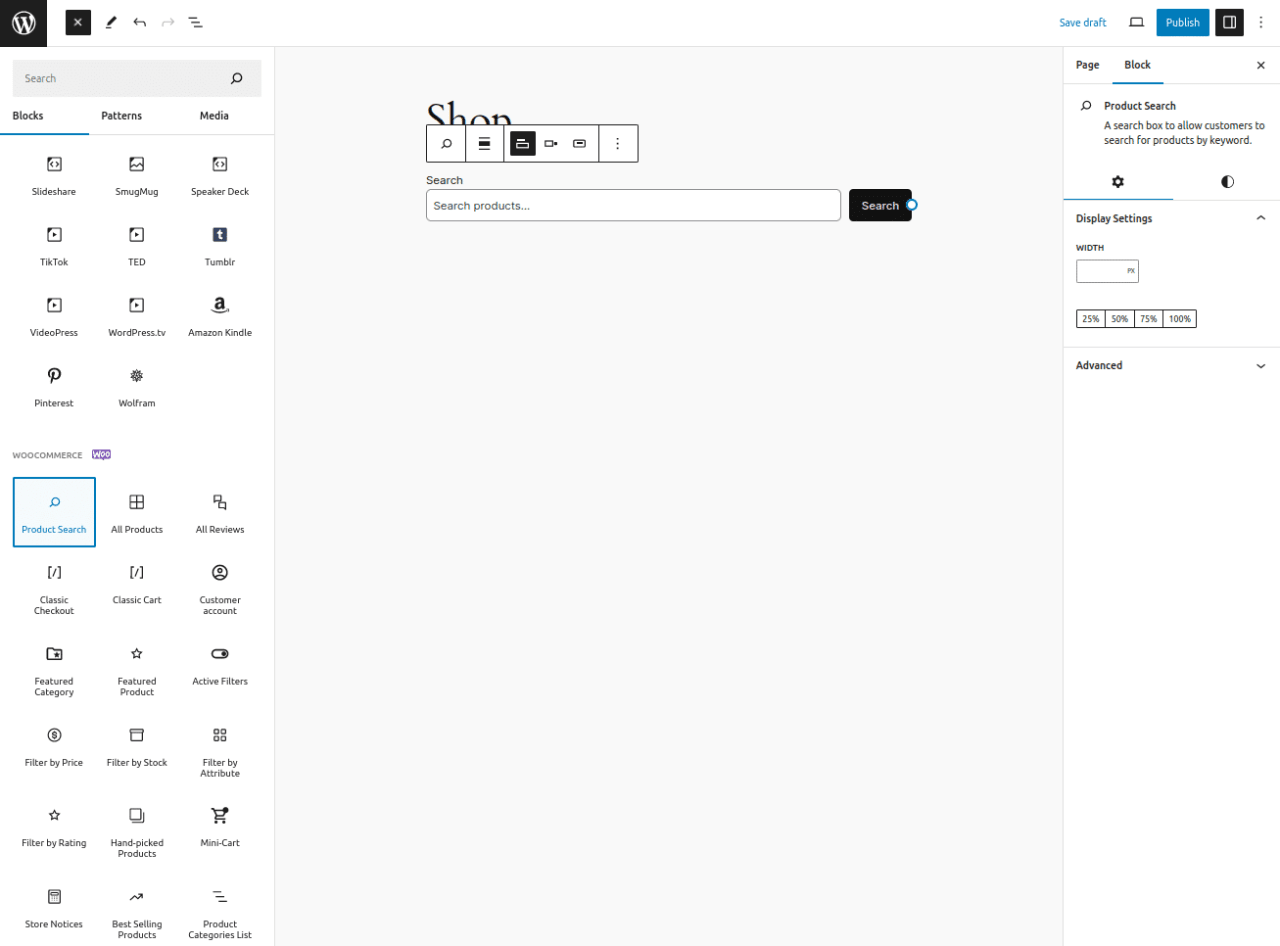
2. Add the Product Search block.
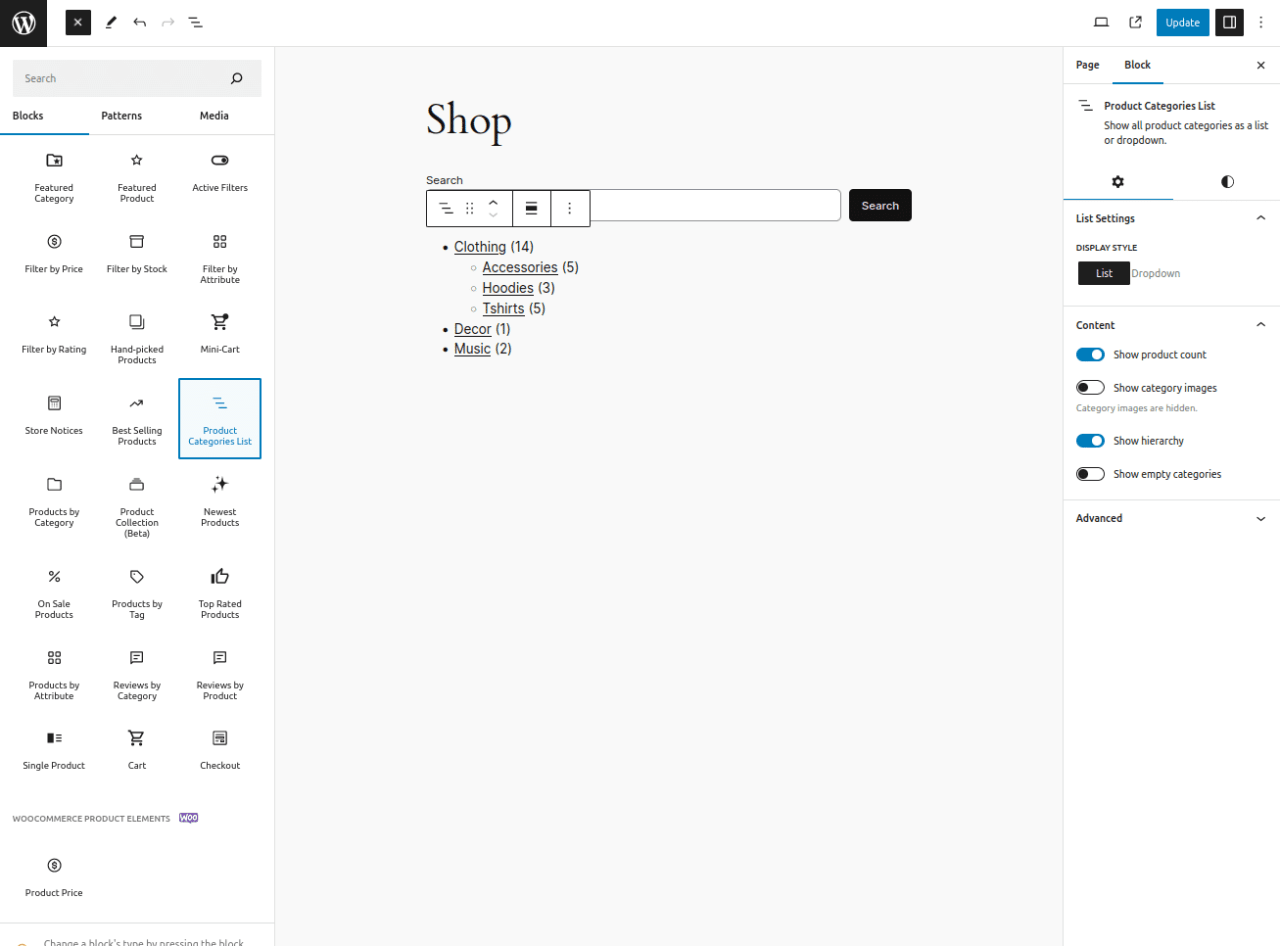
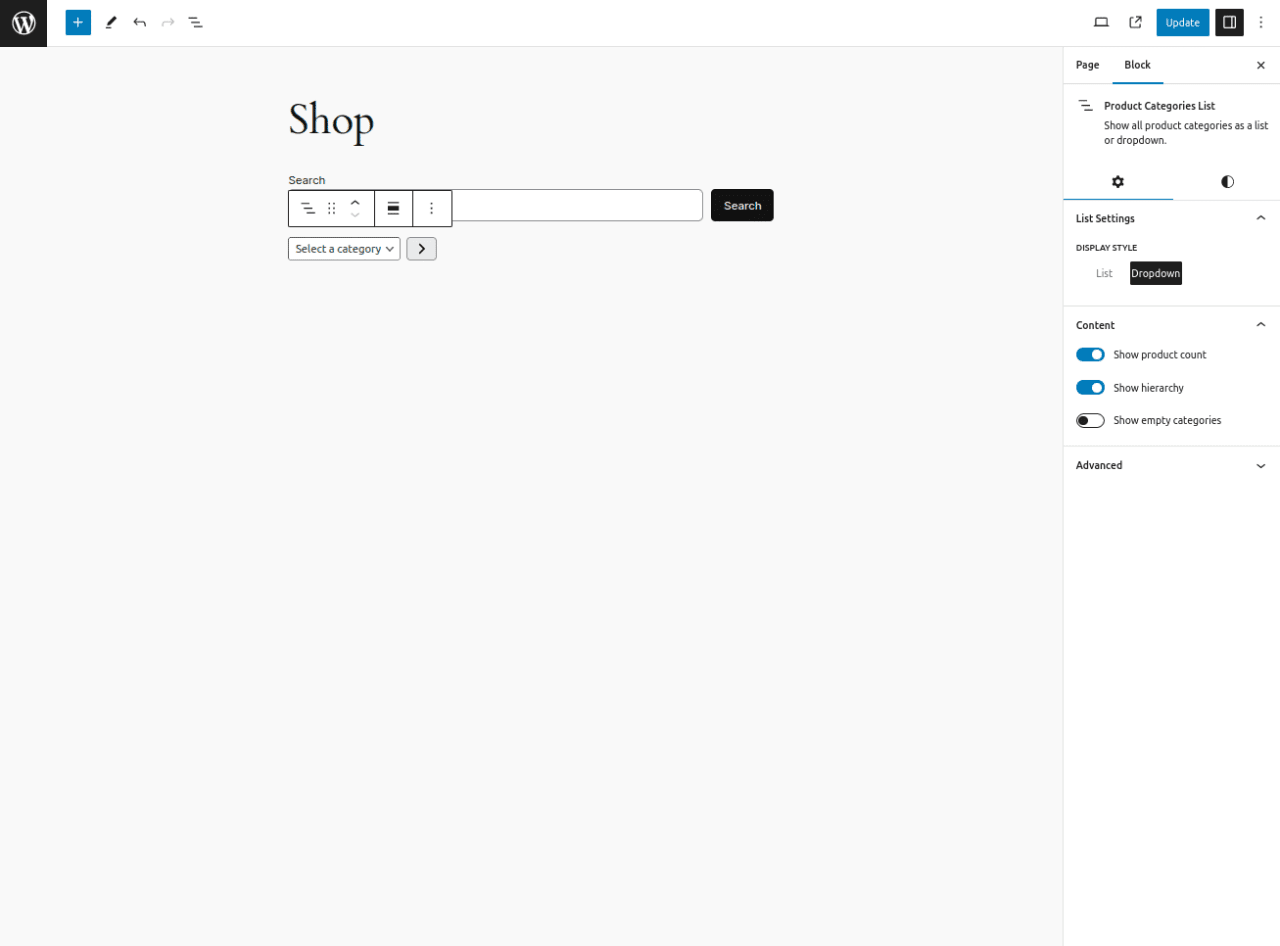
3. Add the Product Categories List block
Then, set the display style to the dropdown.
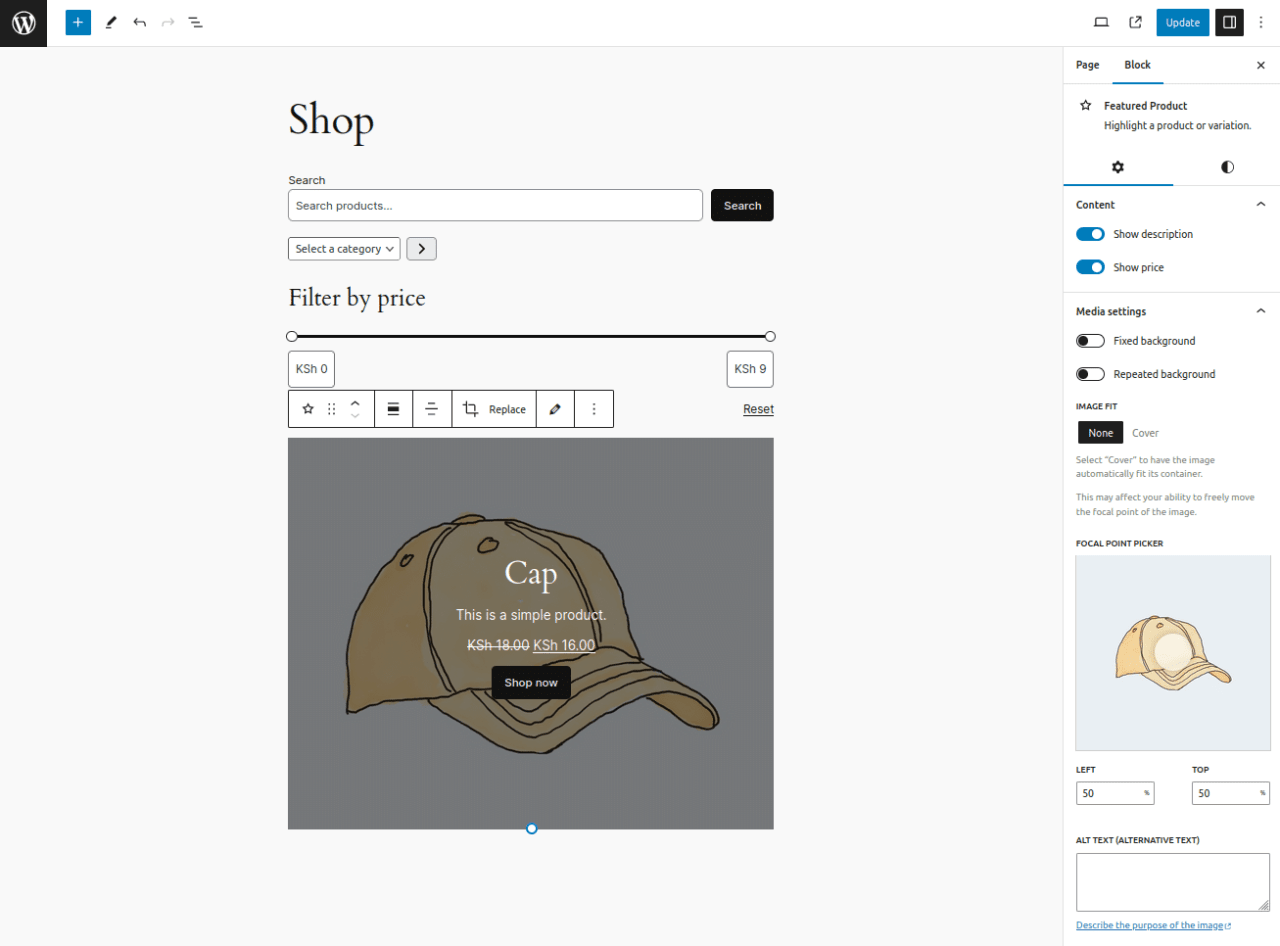
4. Add the Price Filter block.
5. Add the Featured Products block and select the products you want to highlight. Configure as needed.
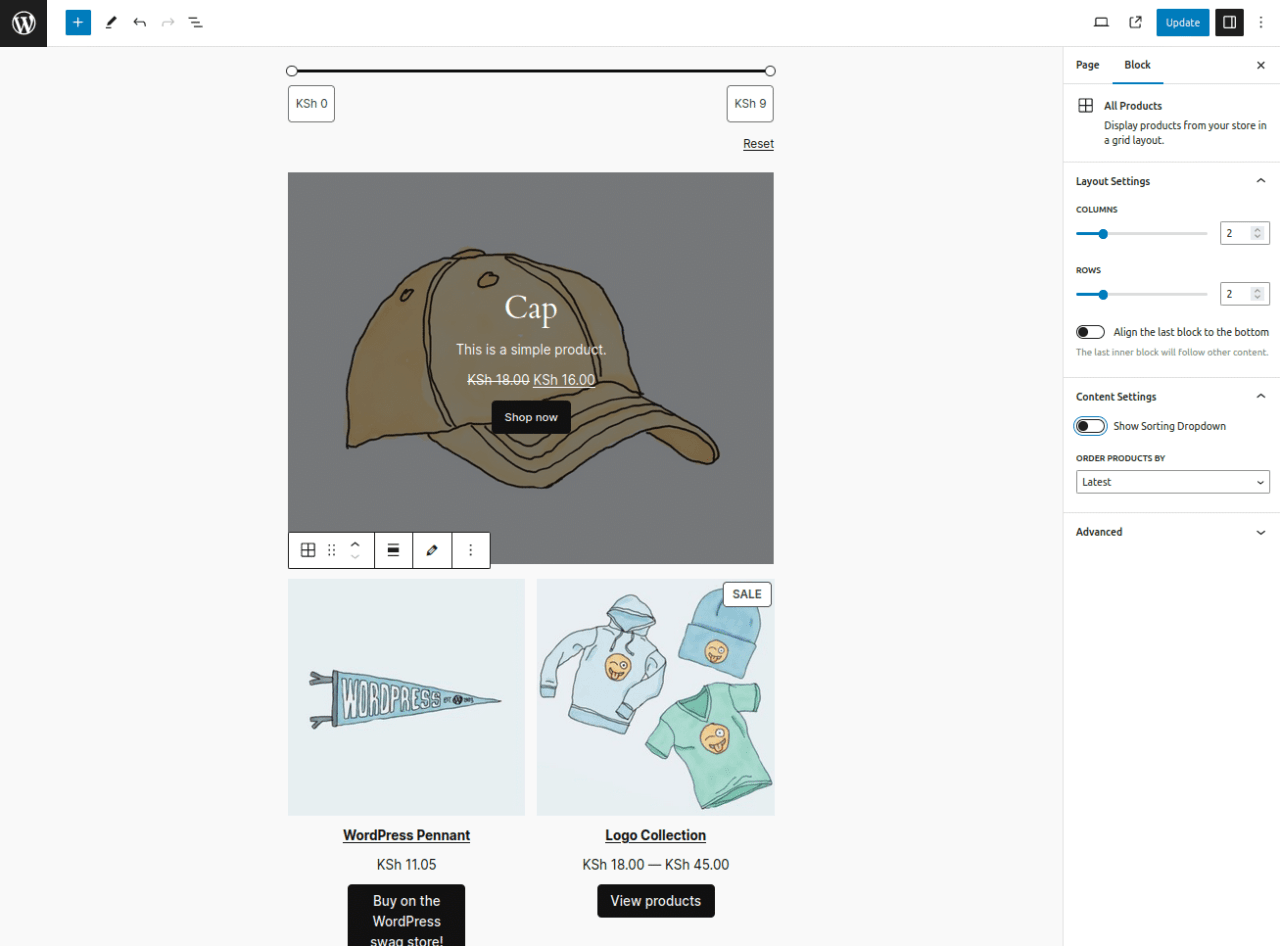
6. Add the All Products block.
Set the number of columns and rows to 2, and turn off the sorting dropdown option.
7. Finally, publish the page to see the final layout of the shop page you've created.
Looking for a powerful file management solution for client websites?
WP File Download is the answer. With advanced features like file categories, access
restrictions, and intuitive UI.
Impress your clients with top-notch file organization!
Build your Online Store with WooCommerce Block & Sell your Product
After successfully creating a custom shop page with WooCommerce Blocks, you can now start selling your physical and digital products. Especially for digital products, it's crucial to add a file download plugin like WP File Download Addon.
This plugin allows you to sell digital download products in WooCommerce. WP File Download Addon makes managing files and file categories for WooCommerce digital products easy. You can quickly create many digital download products associated with one or multiple files.
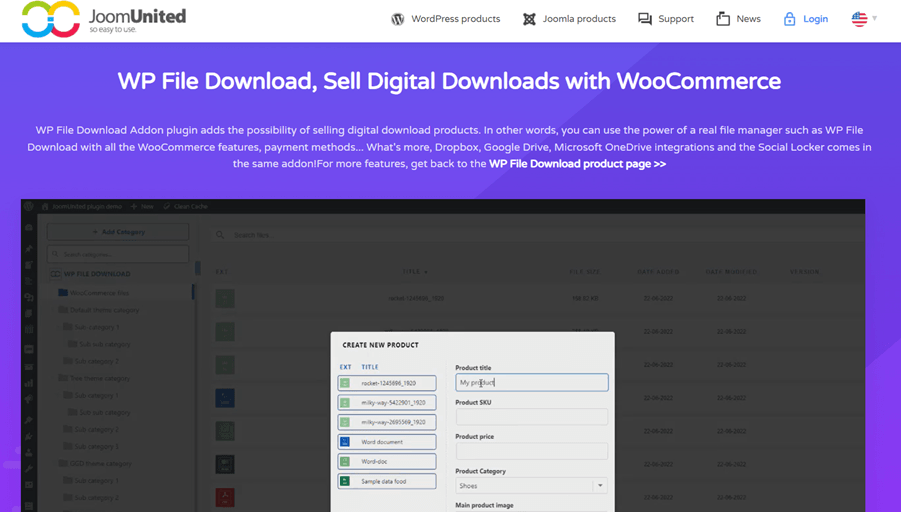
In addition, this plugin integrates with Dropbox, Google Drive, Microsoft OneDrive, and the Social Locker feature. You can provide files from these cloud services as WooCommerce digital downloads with highly restricted access through cloud API connectors.
With the WP File Download Addon, selling digital products in your WooCommerce online store has become more accessible and efficient. After building your store with WooCommerce Blocks, this plugin perfectly complements selling your digital content.
Calling all webmasters!
Enhance your client websites with WP File Download. Create secure and customizable file
repositories, allowing clients
to easily access and manage their files.
Upgrade your web design services today!
Conclusion
WooCommerce Blocks is a plugin that allows you to build a complete online store in WordPress without writing code. With various blocks, such as product grids, filters, and featured product displays, you can easily create an engaging and user-friendly shopping experience. The familiar drag-and-drop interface makes Developing an online store faster and more efficient.
After building your online store, the next step is selling physical and digital products. You can utilize the WP File Download Addon plugin to sell digital products with WooCommerce, such as ebooks, software, or multimedia content.
WP File Download Addon is available starting from $49 per year and has been used by over 60,000 members. So, what are you waiting for? Join us for better digital product sales!
When you subscribe to the blog, we will send you an e-mail when there are new updates on the site so you wouldn't miss them.

Comments