How to display a WordPress HTML table from Gravity Forms entries

WP Table Manager has an awesome integration with Gravity Forms that allows us to create HTML tables based on the entries, allowing us to filter, design, and show with an instant sync of the entries in the best possible way.
Table of content
Showing form entries is an important aspect that we need in every site as that's the best way to take advantage of what our form collects, and tables are the best for this, this doesn't just help with internal processes but also helps a lot when we want to show these submissions in our pages or posts if, for example, we have a contacts form that collect data from providers and show that info to our customers.
In this tutorial, we will see how to add our Gravity Form entries directly to an HTML table with the possibility of adding those to a page or post as well.
Looking for a robust table management solution for client websites?
From pricing tables to product comparisons, this plugin offers powerful features to present
data in a clear and
user-friendly manner.
Get the competitive edge now!
Create and customize WordPress HTML tables with form entries
It is important to note that we need Gravity Forms and WP Table Manager to follow this tutorial.
Let's start with the creation of the table, we have some Gravity Forms already generated with some entries for this tutorial.
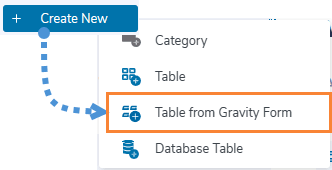
Now with our forms ready, we need to go to WP Table Manager > All tables and click on + Create, if we have Gravity Forms installed, the Table From Gravity Form will be shown, click on it.
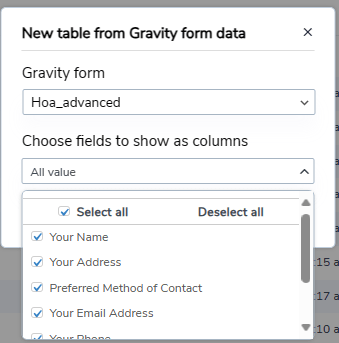
This will show all the active forms, we just need to select the form that will be used and then select the fields that we want to display, or just display all fields, and click on Done.
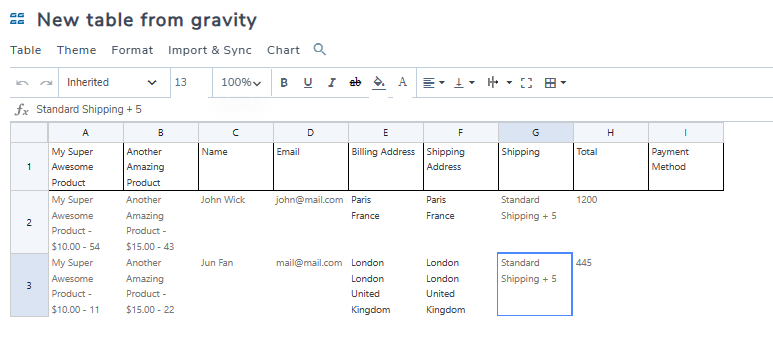
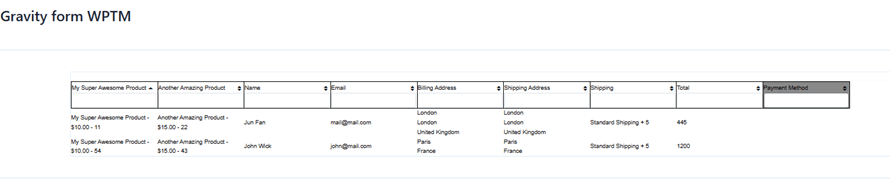
Our table will automatically load with the entries from the form, adding borders only to the header so we can easily identify those.
Now the first thing that we can see is that we have all the customization options from WP Table Manager available so let's start by creating a filter, this is helpful when we have a lot of entries in a form.
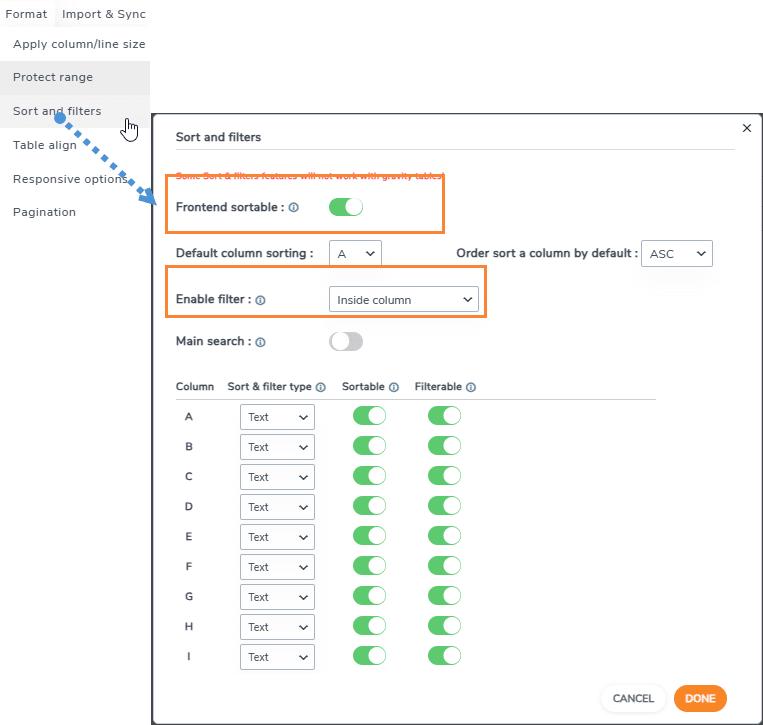
To create a filter, click on Format > Sort and Filters, a popup will appear where we can select what to filter and if we want a sort option as well, this is how it would look like after setting the Enable Filter option from None to Inside Column and enabling the sort as well.
The sort and filters will only appear at the front of our site so we should add the table to our page/post to see it, adding our table is as easy as searching for the WP Table Manager Table block and adding it to our post/page.
Awesome filters with a sort option but we may still style our table, to do this, we can use all the options from the table editor in WP Table Manager, from alignment to borders and strong fonts, we have all the following options available.

For this tutorial, I'll set all the fonts to be strong and will use the Theme > Alternate Colors section which will speed up further our table creation.

The best part is that our table will keep updating the cell with all the entries submitted, let's see our form on the page where we published it before.

And done! Our entries will be displayed and the options for customizing the table will allow us to make it fit any theme!
From Gravity Form entries to Charts
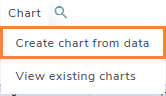
We could think that WP Table Manager would only allow us to create tables from the entries and the answer is no! We can also make charts based on the info, and it is as easy as clicking on Chart > Create Chart from data.
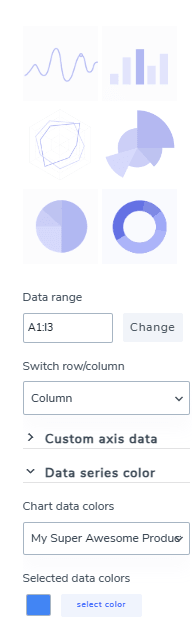
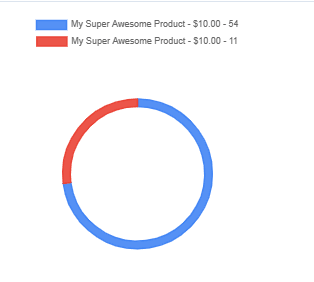
And magic is done! our tables data is now appearing in a chart, and we have a side panel with many customization tools like applying another theme or selecting what data should be used for the chart, now we could, for example, create a chart based on the amount of products purchased using our forms!
On the first section of the side panel, we can select the theme, and select the data and colors that will be used.
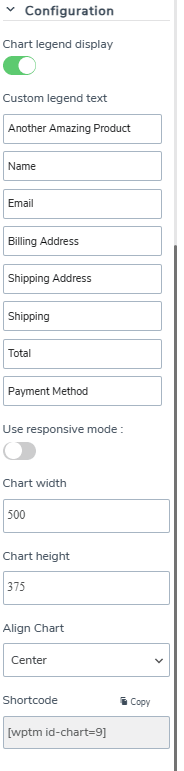
And the second section with Configuration will allow us to further customize our chart and edit the labels used to define each part of the chart, it also contains a shortcode that we can use to display our chart wherever we want.
In this case, we are comparing 2 products so ended up using the circle chart with 2 different colors that will allow us to easily see the difference in the number of sells.
The process of publishing this would be similar to the normal table displaying, we can use any page builder with the WP Table Manager Chart block (that is available on all major page builders).
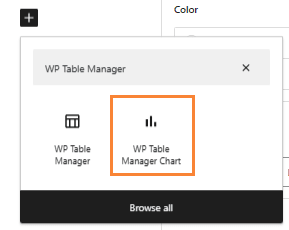
A box will be opened where we can select the chart that we want to display, we need to select it and done! The chart is published.

Now we have a table with our entries and an awesome chart that helps us understand the table as well, we can say that this integration is a totally complete tool! Isn't it?
Calling all webmasters!
Enhance your client websites with WP Table Manager. Easily manage and customize tables, charts,
and spreadsheets,
providing clients with dynamic and engaging data visualizations.
Upgrade your web design services today!
Start using Gravity Forms and WP Table Manager
As you can see WP Table Manager + Gravity Forms, is just a perfect combination to keep all our entries and data in order, we have many ways to display it and the integration is as easy as click a button, awesome! Isn't it? What are you waiting for? Go here and get WP Table Manager now.
When you subscribe to the blog, we will send you an e-mail when there are new updates on the site so you wouldn't miss them.


Comments