How to design an Elementor blog using WP Latest Posts plugin and widget

Elementor is a page builder that allows us to create and design pages with easy-to-use blocks but combining it with WP Lates Post will allow us to create an awesome blog page with the posts on our site.
WP Latest Post allows us to create sections that contain a certain amount of post previews based on filters and using themes that look just awesome! Letting us create a collection of section in our pages with a few easy steps.
In this post we will see how to create a blog page using Elementor and WP Latest Post in a few easy steps.
Table of content
Looking to display dynamic and eye-catching latest posts on your WordPress website?
WP Latest Posts plugin has got you covered. Engage your visitors with a beautiful and
customizable display of your most
recent content.
Try it now!
Create a WordPress post block
First of all, we need to create a post block in order to define the posts that we will add to our content, if maybe we want to show all the posts or just certain posts.
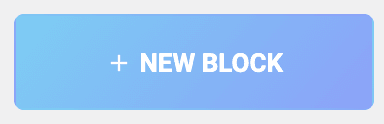
First of all let's go to WP Latest Post > All New Blocks in the left menu, we will see a +New Block button, click it.
First of all, we can define a title and then proceed with the block creation.
This block creation will be divided into 3 steps, the first one would be the Source.
In the source, we can define what we will be using in our block if maybe we will be using pages, posts, categories, or custom post types.
As we will be creating a blog, for this tutorial we will select the Posts option.

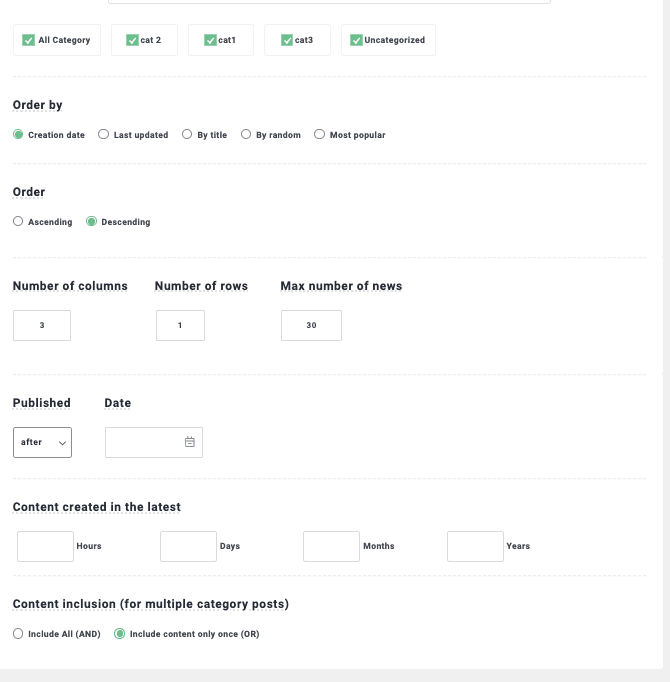
Now that we selected the main source for our block, we can proceed to further filter and customize our source, in order to do this we can define the following:
Categories: if we want to show just certain categories.
Order by/Order: to define the order of how our posts will be shown if it is based on the creation date and if it is ascending or descending.
The number of rows/columns and items: in this section, we can select the number of rows we want to show, the number of columns, and the max number of items that will be shown in our block.
Published/Date: to define if we want to show only posts published after/before a specific date.
Content created in the latest: this will allow us to define a more specific set of posts for the latest hours/days/Months/Years.
Content inclusion: to define if we want to show a category once or multiple times.
When we finish selecting how we want the block to search for our post, we can confirm the number of posts that will be added just below the title that we added for the post block.

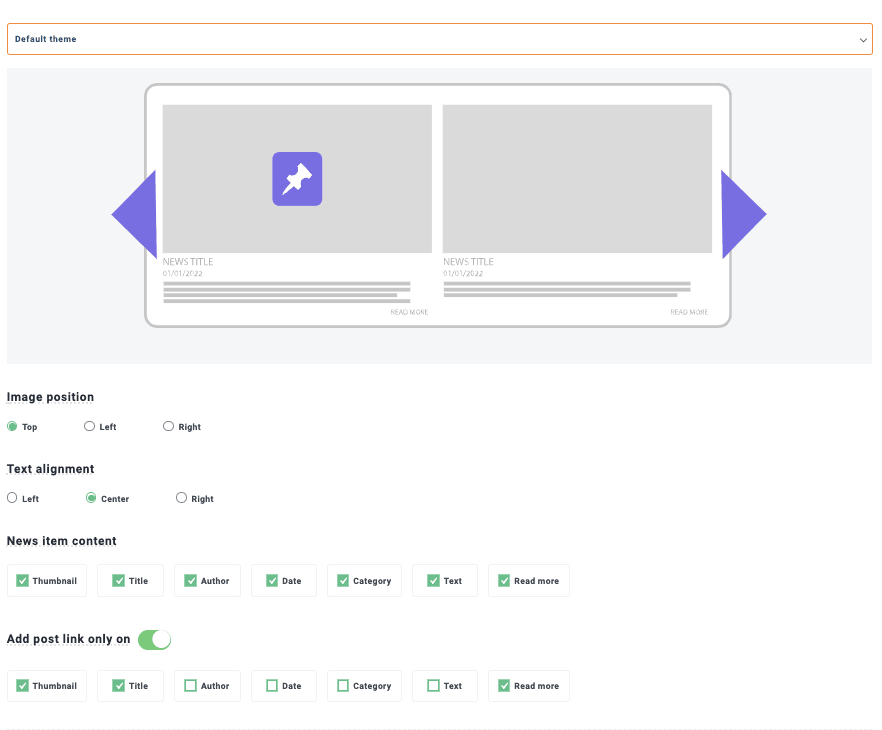
That would end the Source setup and allow us to jump into the second part of this block setup which would be the Display and theme step where we will be able to set a theme between the 8 available for WP Latest Post (+Addon).
The first option that we will see is the Theme selection and adjust settings with different settings available depending on the theme that we select, and a preview, let's check the available themes!
Default theme.
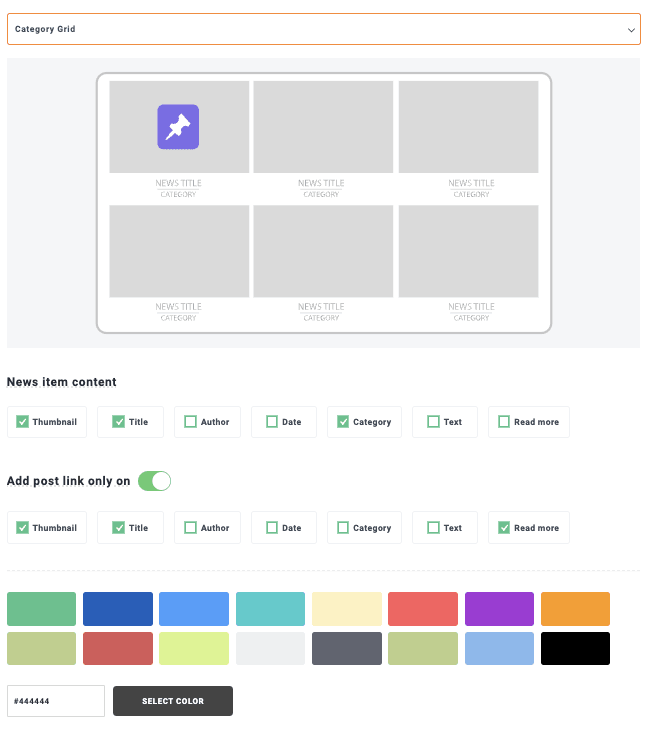
Category Grid
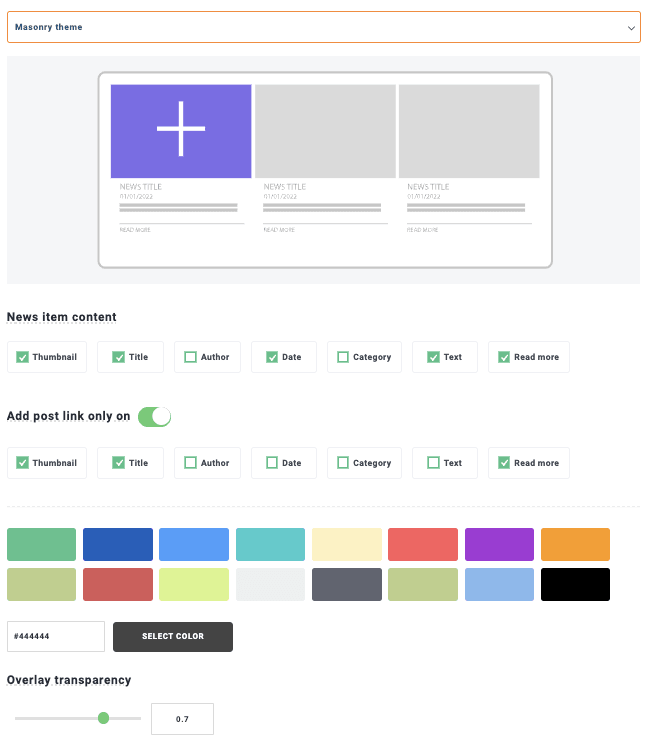
Masonry Theme
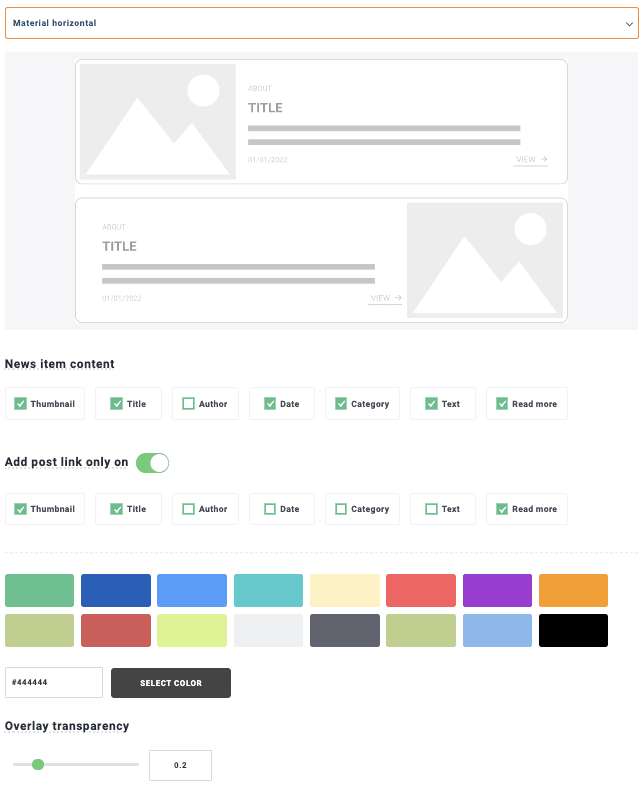
Material Horizontal Theme
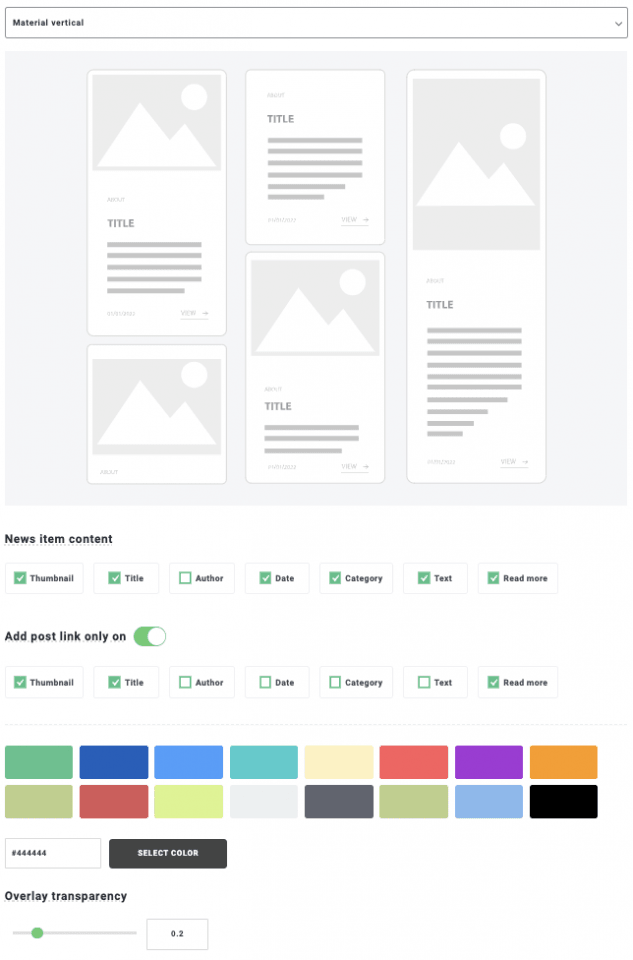
Material Vertical Theme
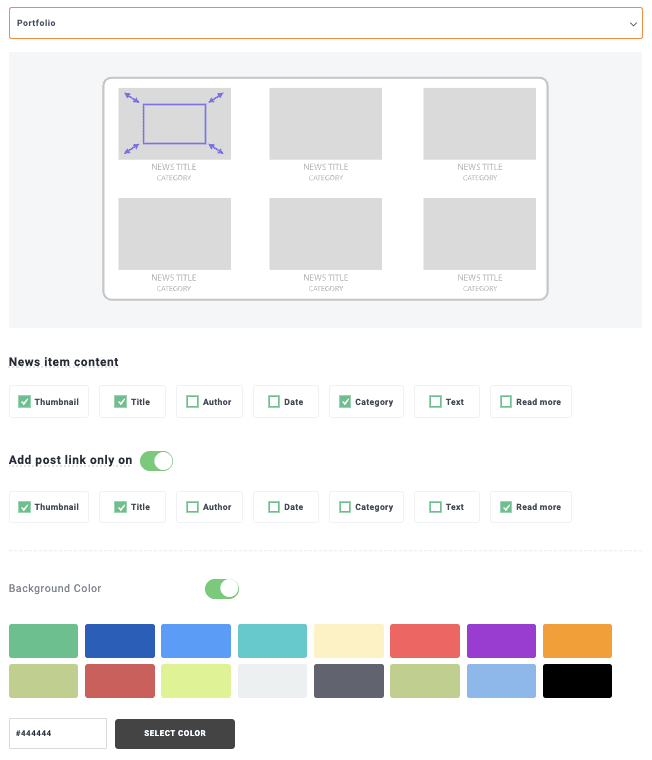
Portfolio Theme
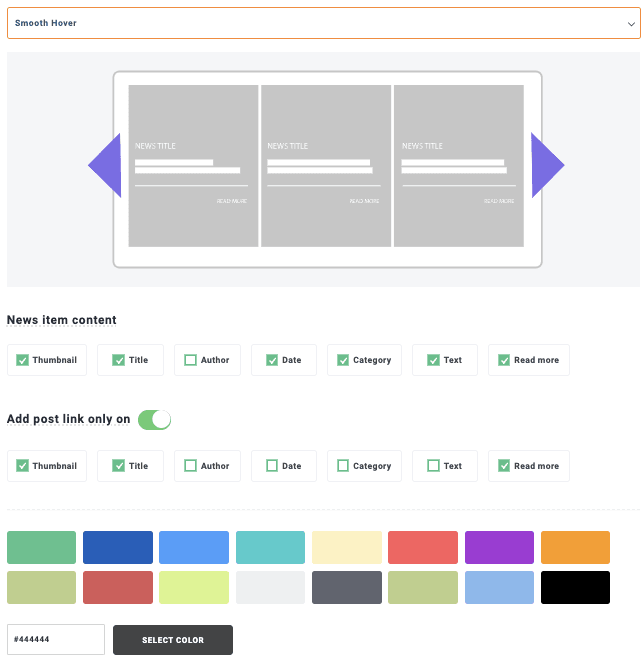
Smooth Hover Theme
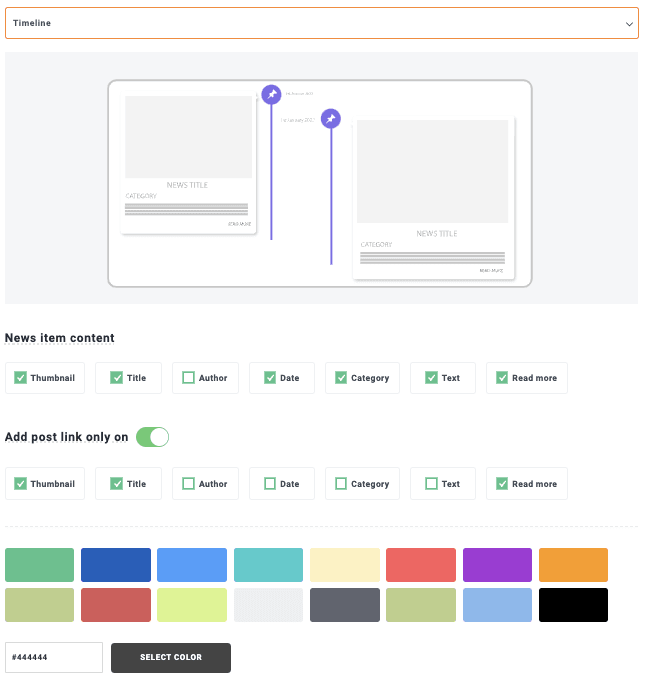
Timeline Theme
We can see that there are many options that can adapt perfectly to our page styles and content! In this case for the tutorial, we will proceed with the Masonry theme, so let's select it!
Now that we did show a theme, let's go with the next step which finishes the theme setup, for this, go to the next tab Theme Setup with options that will vary depending on the theme that we choose.
In this case, we have the option to display the title, a load more button, and force an icon on hover.
We can customize as much as we want the icon on hover as well as use one of the defaults offered by WP Latest Post or upload our own.
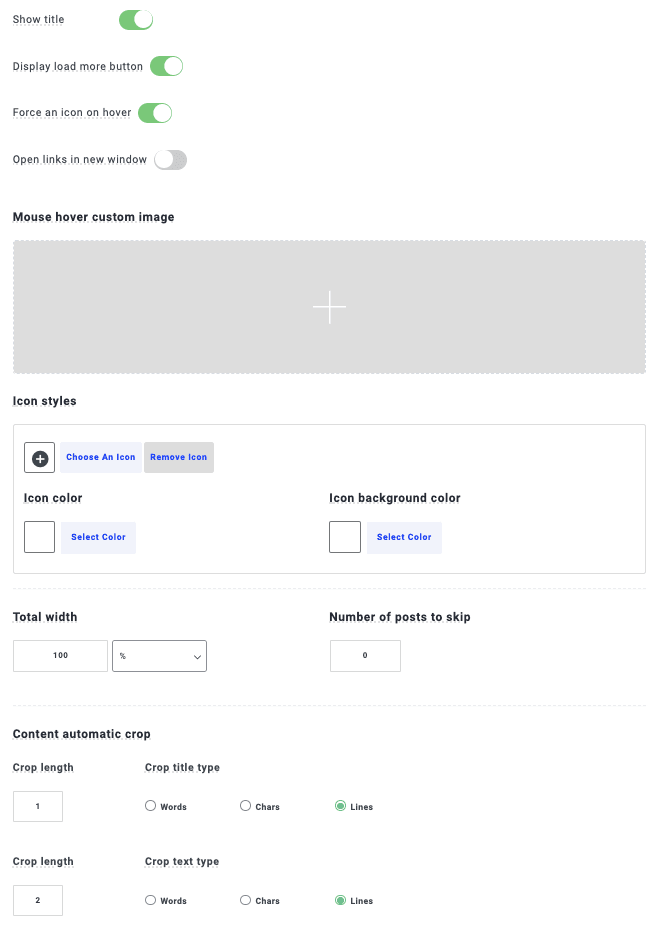
The last option in this section would be the Animation one which works for the themes that contain an animation like the Smooth hover theme, which works as a slider, for this tutorial we did select the Masonry which doesn't have an animation so we won't need to edit anything here.
And then we have the final step, which is the Image Source, on this tab we can define a default image in case there is no image available for that post, and also choose if we want to use the featured image of the post or the first image that will be found there.

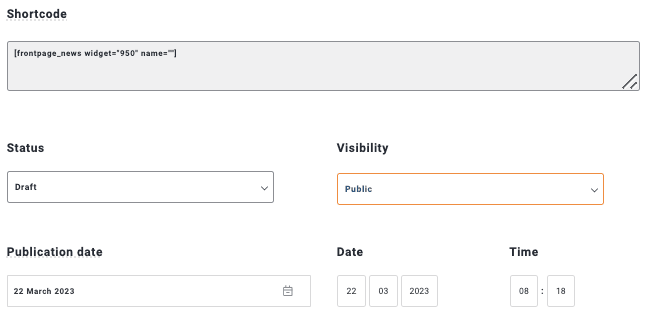
This would end the block post configuration so we should be ready now to go live! In this case, we have many options like a Shortcode in the shortcode tab that will allow us to set if it will be private or public and set if we want a publish the block in a certain time as well.
Create a blog using an Elementor widget
Now that we know how to create a post block using WP Lates Posts, let's jump to the next step which is to add our post block using an Elementor widget.
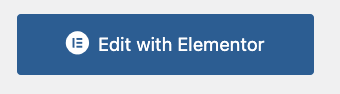
To do this, we can go to our blog page or create a new one by going to Pages > Add New and clicking on Edit with Elementor.
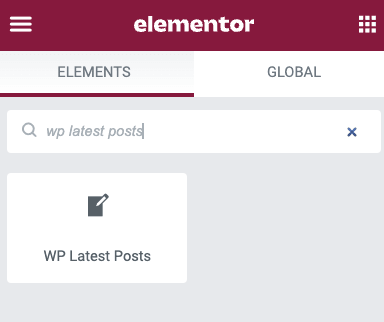
The Elementor builder will load automatically with a widget selection option in the sidebar, in this search bar type WP Latest Post, this will show the widget for our post block, and drag and drop it into the page content.
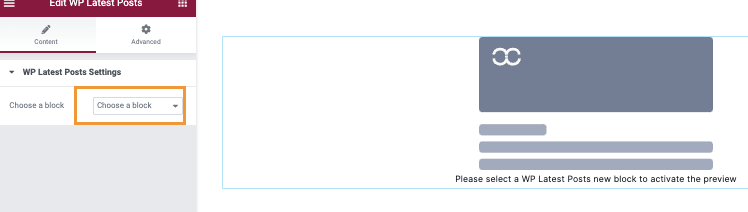
Now that we loaded the widget, we can proceed to choose the post block in the widget options that appear on the left bar.
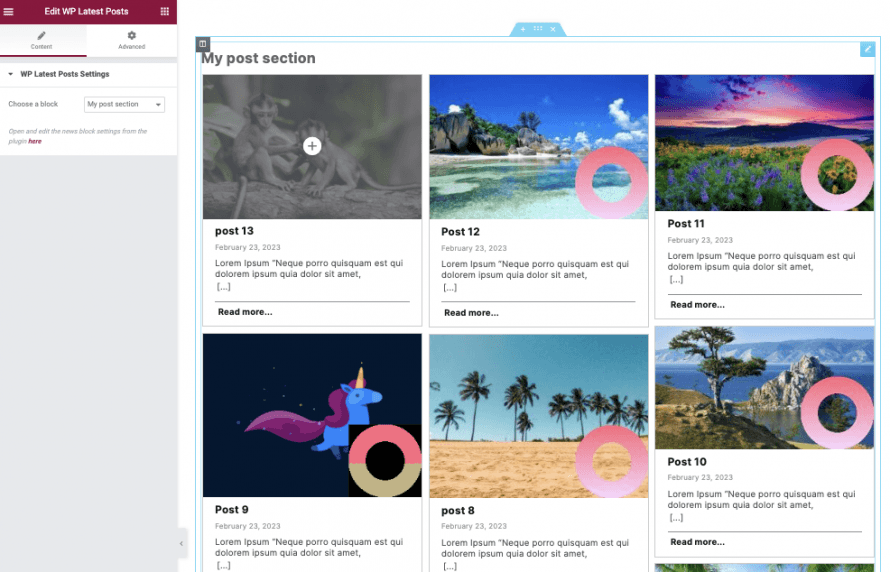
A preview of our post block section will appear, where we will see the title of the post block as well as the posts that we selected to be there, just 2 clicks and done! We have a customized blog page created and we can customize it as much as we want using the awesome tools that Elementor offers.
All we need to do now is publish our blog page and we are done, our blog is done!
The best of this plugin is that it allows us to add a post block section wherever we want in our content and also offers us a WooCommerce integration that, exactly, will allow us to create a product block wherever we want and that's just one of the features that it has, awesome! Isn't it?
Attention WordPress website owners!
Keep your visitors informed and engaged with WP Latest Posts plugin. Easily showcase your
latest articles, news, or
updates in a stunning and user-friendly format.
Get started today!
Create the best news WordPress sections easily
Being the Elementor widget just one of the features that WP Latest Post offers, we can be sure that the themes and tools that it contains will allow us to create sections of news with the best designs and in the easiest way possible.
This plugin gives us many features like using Custom Post Types, Categories, or even WooCommerce Products as the source for the blocks making infinite the options when creating and adding a block, so what are you waiting for? Go here and get WP Latest Post for your site now!
When you subscribe to the blog, we will send you an e-mail when there are new updates on the site so you wouldn't miss them.


Comments