How to Add Image Hover Effects in WordPress (5 Easy Ways)

Adding a hover effect to your website may seem like a small detail, but it can boost the site's appearance and usability. When visitors hover their mouse over an image or button and see it change slightly, it signals that the element is interactive.
This subtle movement will improve engagement and help reduce bounce rates. Hover effects are especially useful in e-commerce. They allow shoppers to preview products more closely, encouraging them to explore further and proceed to checkout.
There are many ways to add image hover effects in WordPress, from simple fades to eye-catching flip animations. Below, you'll find several methods to get started!
Table of content
How to Add Image Hover Effects in WordPress
In this article, we've gathered five easy ways to add hover effects to your site. Choose which one works best for you!
Method 1: Using a Plugin
A plugin will save you a lot of time and effort, especially if you want to use multiple hover effects on the same site.
For instance, if you have multiple image galleries, you can apply different animations to each, such as a simple zoom for blog thumbnails or a flip effect for product images.

Using a plugin like Image Hover Effects Ultimate makes this process much easier. This plugin is free for everyone and offers a wide range of effects for each element. To get started, simply install it by following the tutorial below:
Installing a Plugin
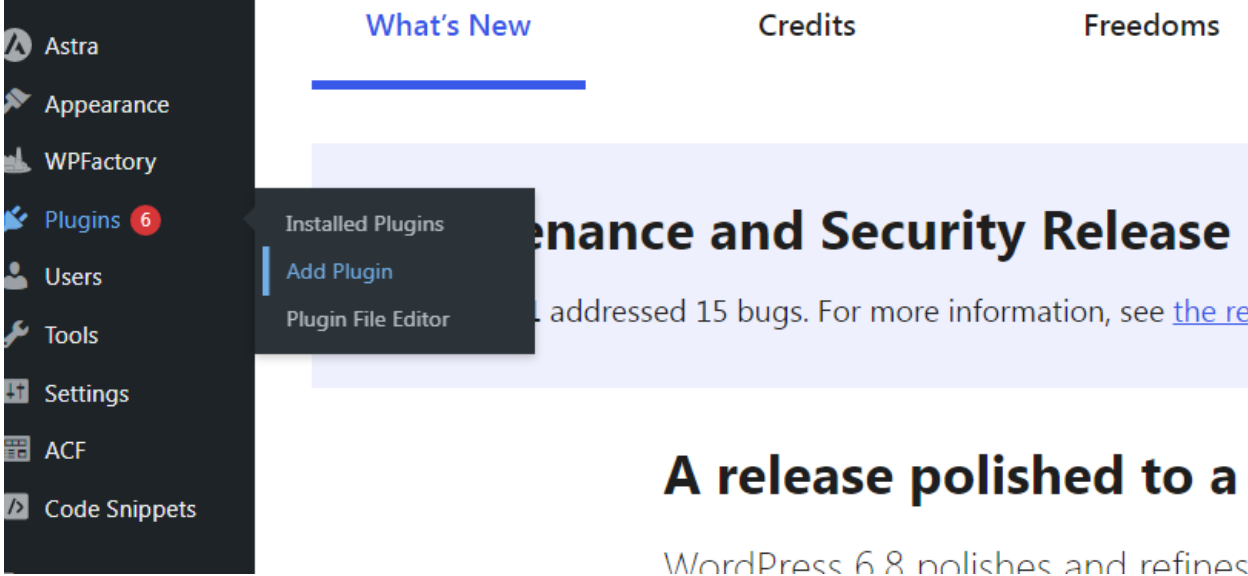
- Open your WordPress admin area.
- Click Add Plugin from the Plugins menu in the sidebar.
- Type Image Hover Effects Ultimate into the search bar.
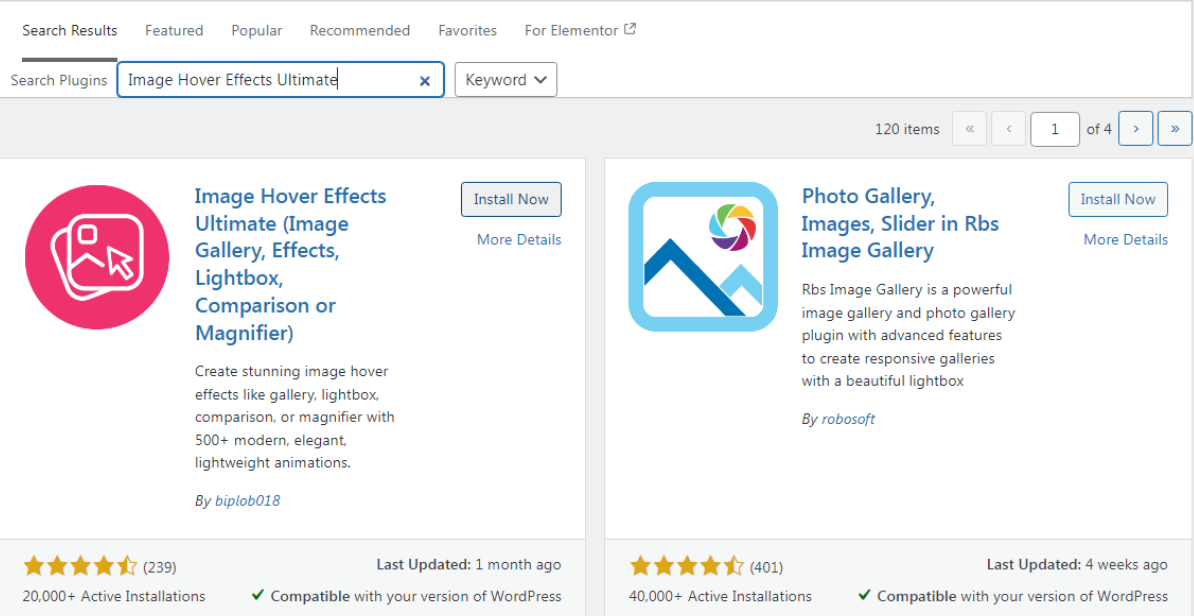
- Select the first result and click Install Now to start the download.
- Once the installation is complete, click the Activate button to start using the plugin.
Using the Image Hover Effects WordPress Plugin
- Once the plugin is installed, you'll see a new Image Hover menu in your dashboard.
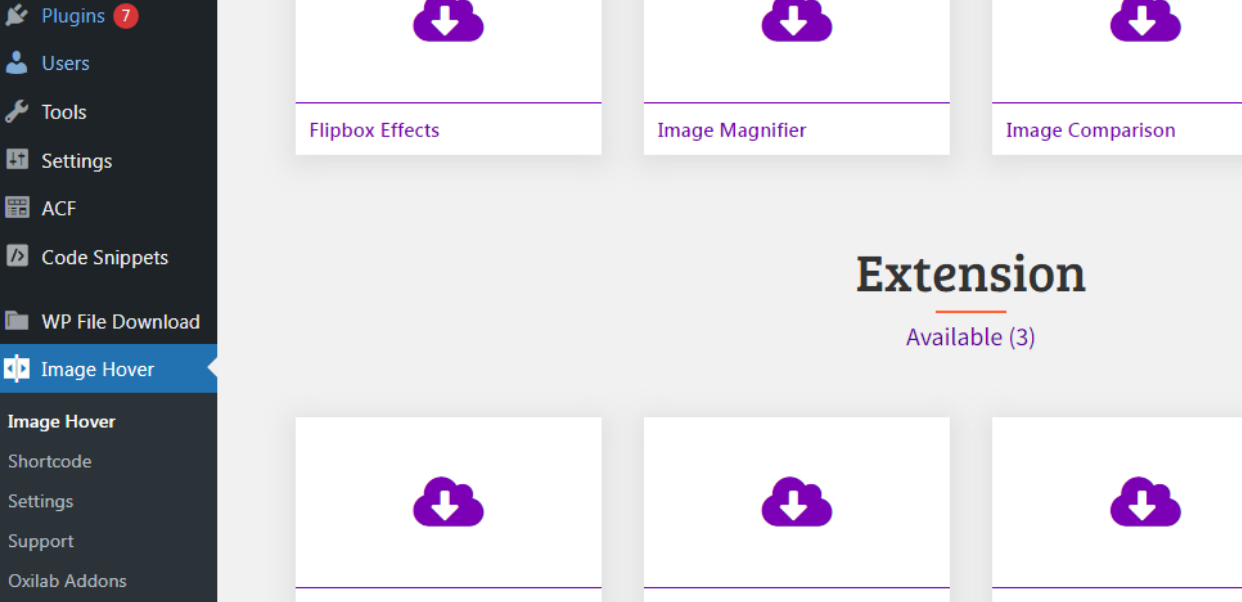
- Click the menu to open the plugin settings.
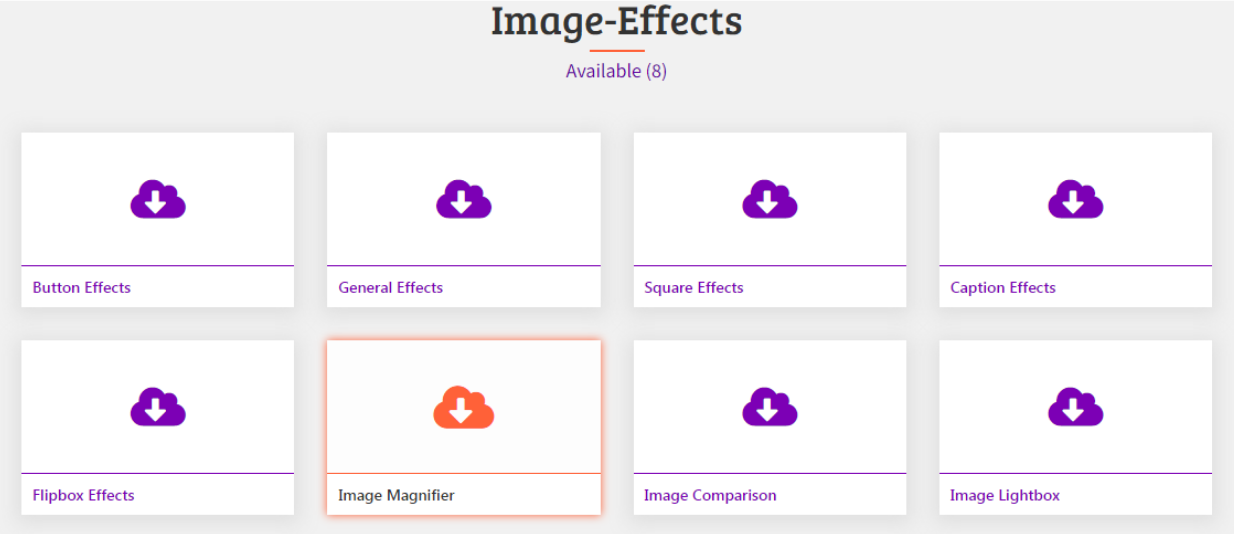
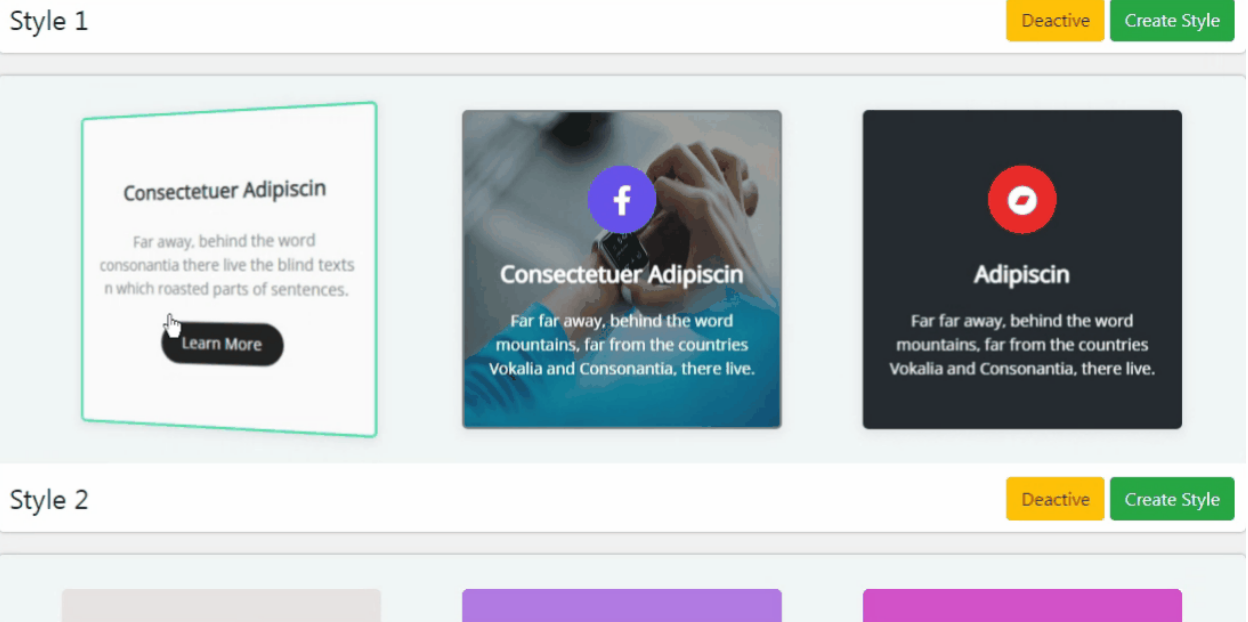
- Choose any effects you'd like to use. For this tutorial, we'll be experimenting with Image Magnifier.
- After selecting the effect, you will see a variety of animation styles.
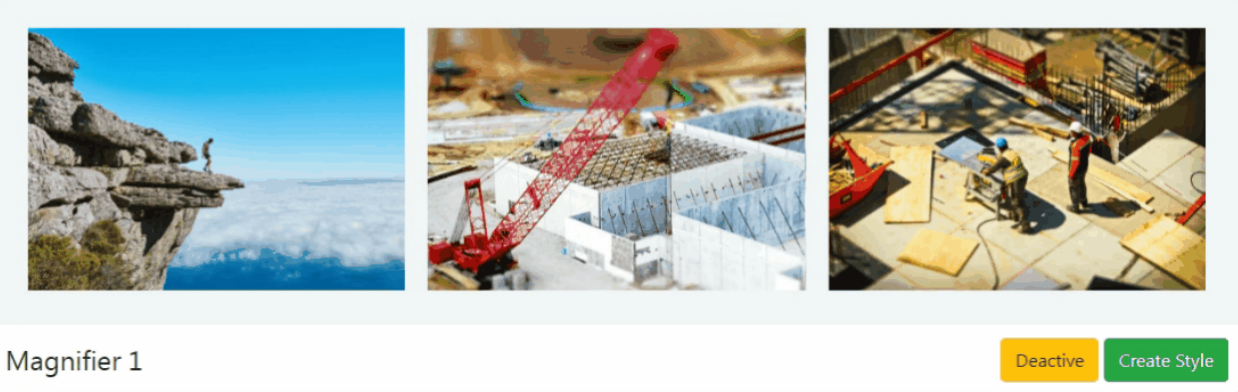
When you find one you like, click Create Style.
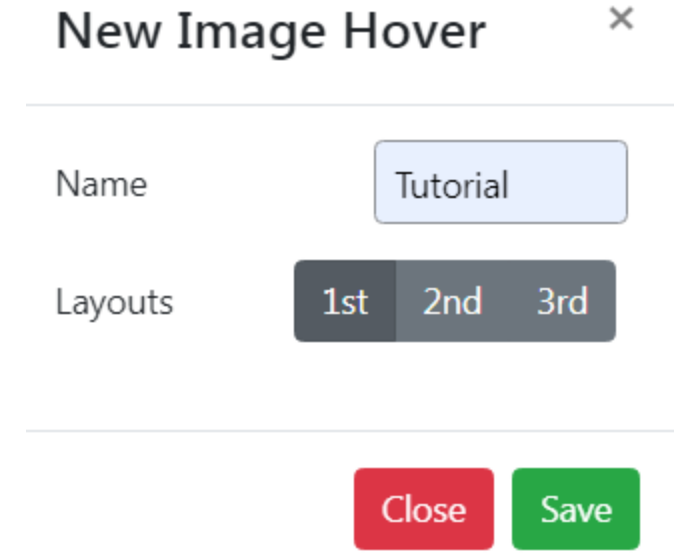
- A pop-up will appear. Enter a title in the Name field and select an effect from the layout (1st, 2nd, or 3rd). Then click Save to continue.
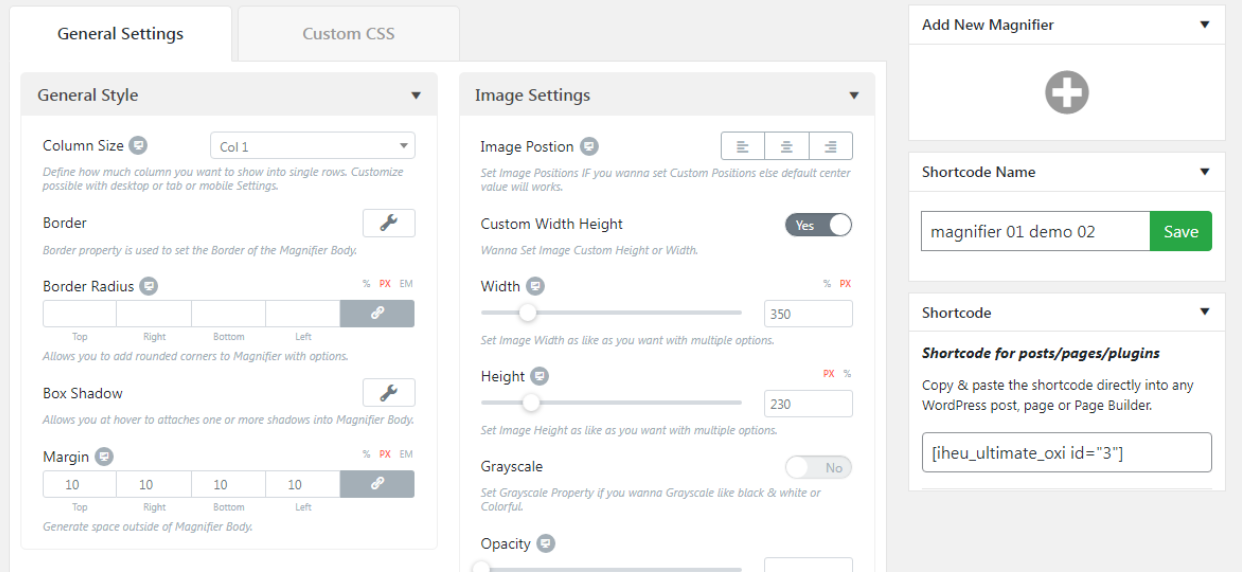
- You'll be taken to a new page where you can customize the settings, such as height, width, and opacity. Play around to see what looks best.
- Once you're satisfied with the settings, click Edit to customize your image.
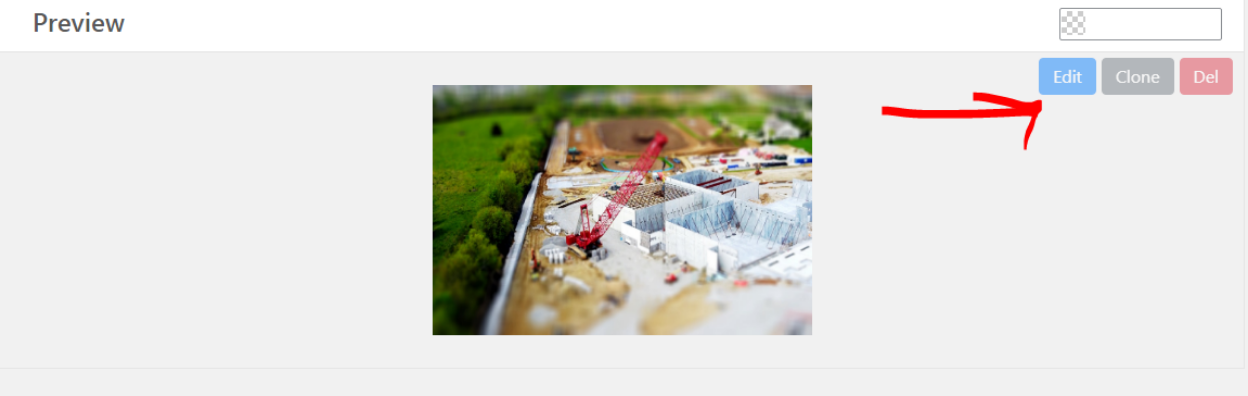
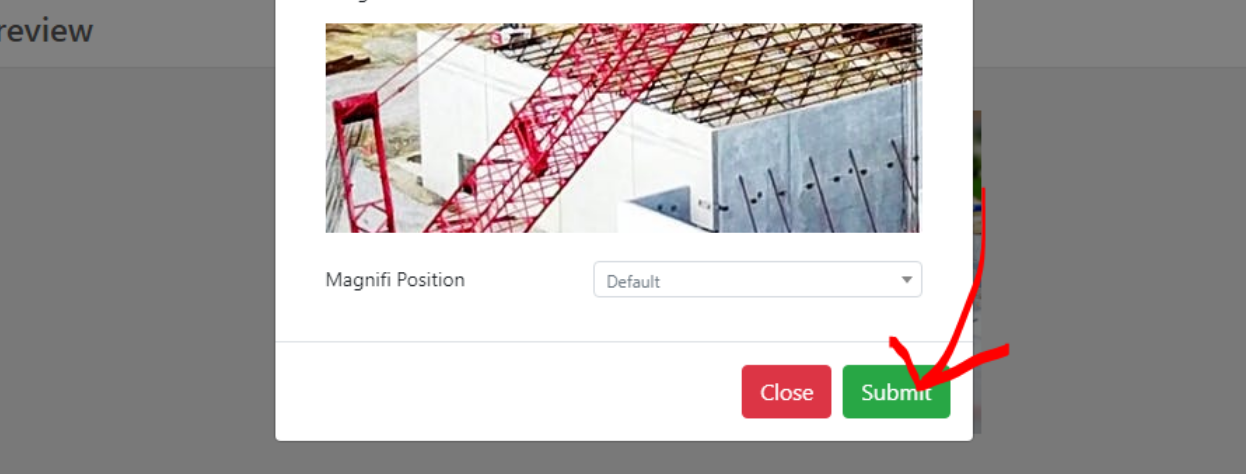
- Another pop-up will appear. Here you can customize the magnification position.
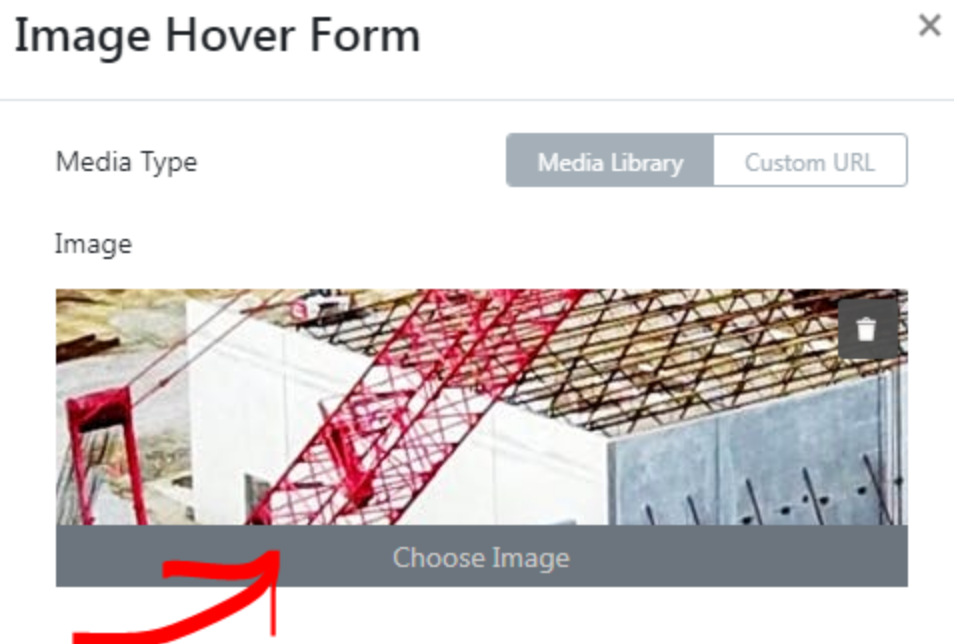
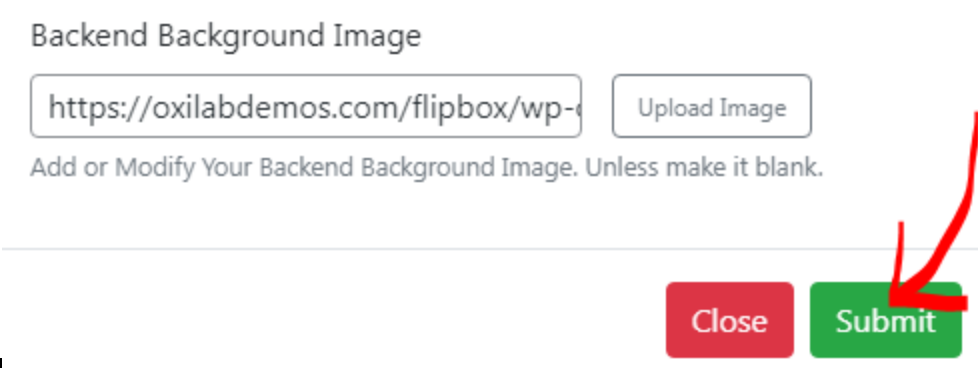
- You can also replace the image by on the Choose Image button.
- After setting everything up, click Submit to save your hover effect.
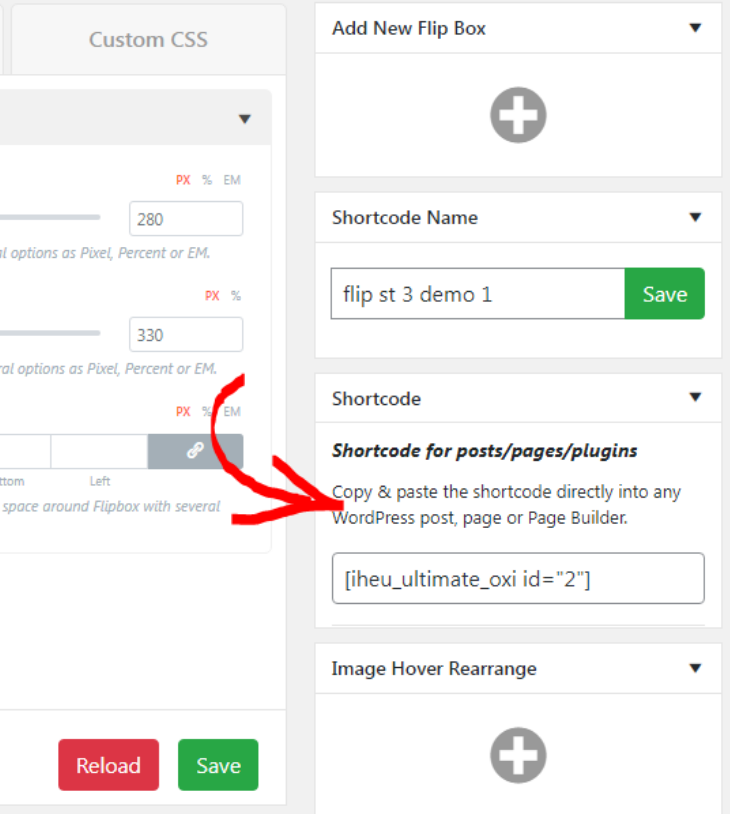
- To apply the effect to your site, copy and paste the shortcode into your post or page.
- Now your simple image hover effect is ready to be used in any part of your site.

Method 2: Using CSS
You don't need to install any plugins for this method. By using custom CSS, you can add various hover effects to your theme.
We'll start with something simple, like an underline hover effect. If you want to add this effect to your theme, follow the easy steps below:
- Navigate to the post where you want to add a hover effect.
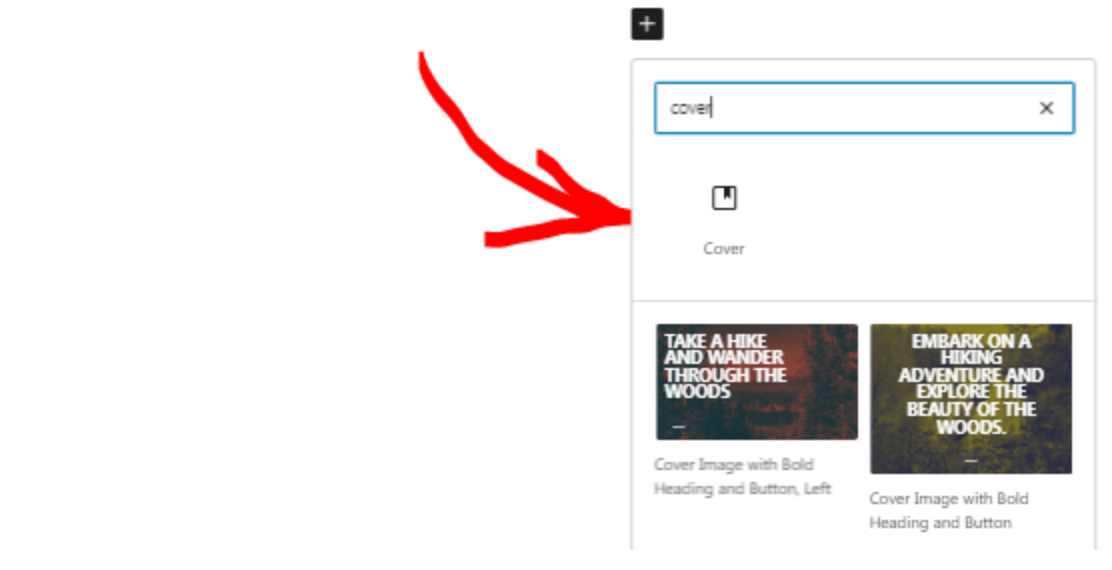
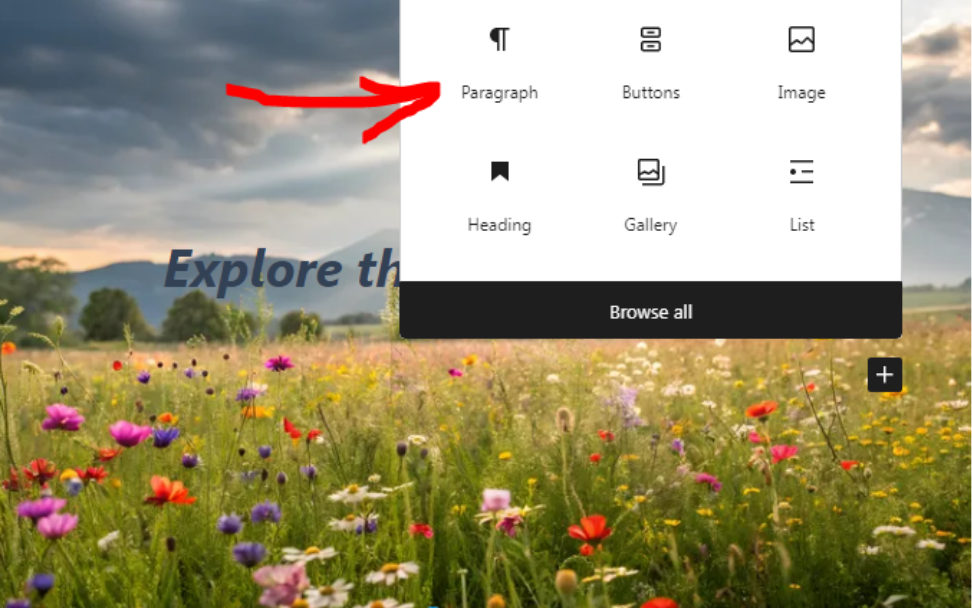
- Add an image by clicking the Cover block from the +.
- Enter your content into the Cover block. Here we'll add a title and a button.

- Set the font and styles to your liking.
- Save the page as a draft.
- Next, go to the Appearance menu in your dashboard.
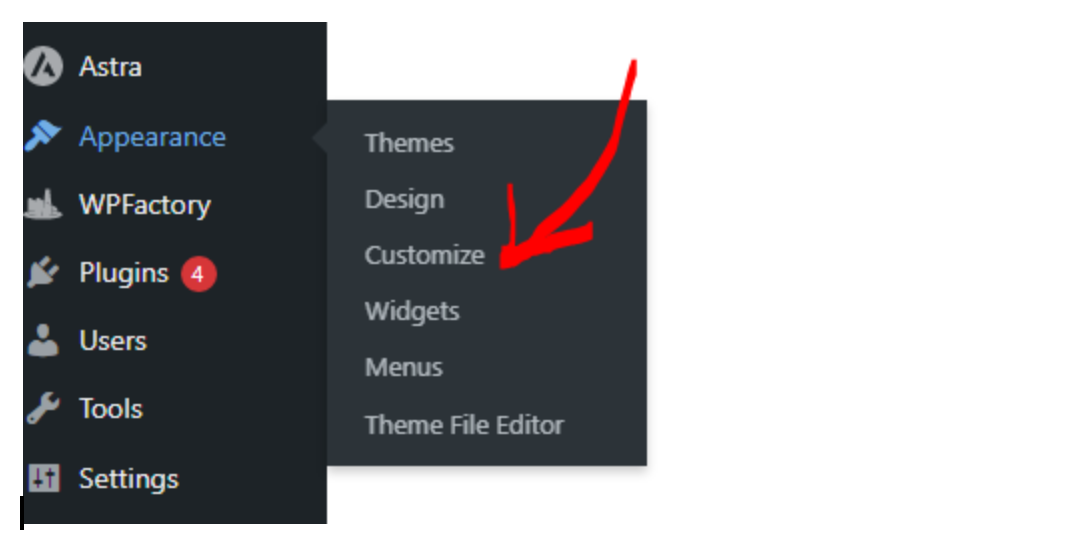
- Then, click Customize and go to Additional CSS. Add the following code:
body {
  display: flex;
  justify-content: center;
  align-items: center;
  height: 100vh;
  background: #0f0f0f;
  margin: 0;
  font-family: Arial, sans-serif;
}

.hover-underline {
  font-size: 2rem;
  color: #ffffff;
  position: relative;
  display: inline-block;
}

.hover-underline::after,
.hover-underline::before {
  content: '';
  position: absolute;
  width: 100%;
  height: 2px;
  background: linear-gradient(to right, #ff0000, #00ffff);
  bottom: -5px;
  left: 0;
  transform: scaleX(0);
  transform-origin: right;
  transition: transform 0.4s ease-out;
}

.hover-underline::before {
  top: -5px;
  transform-origin: left;
}

.hover-underline:hover::after,
.hover-underline:hover::before {
  transform: scaleX(1);
}
- Click Publish to save the code.

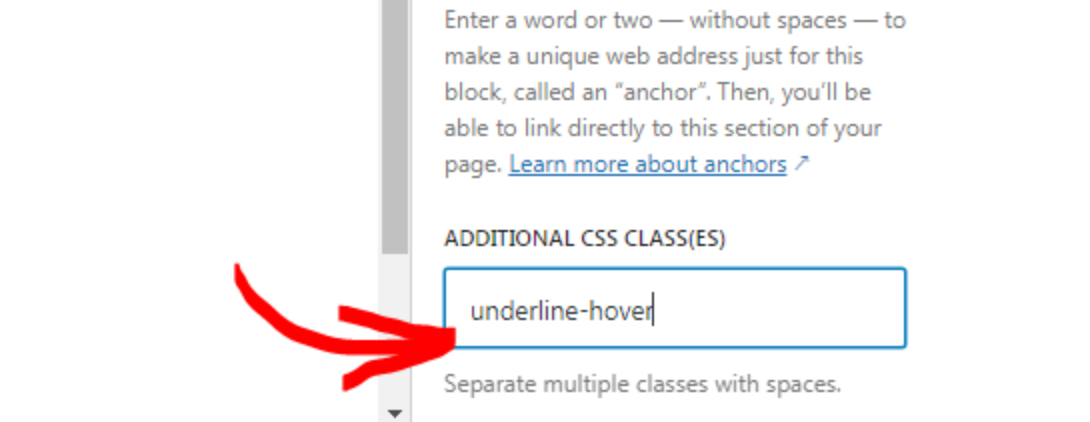
- Now go back to your post and select the text to which you want to apply the underline effect.
- Open the Advanced section in the block sidebar and enter underline-hover in the Additional CSS class(es) field.
- Save the page and preview it to see the effect.

There are so many hover effects to choose from, so pick the one that suits your style best. You can either learn to write the CSS yourself or find examples from the WordPress community. It's all out there!
Method 3: Using Page Builders (e.g., Elementor)
A page builder like Elementor allows you to build your website with a lot of creativity. It has built-in hover effects, all ready to use to liven up your site without requiring any coding.
You can also use it to create image hover effects in WordPress. In this section, we'll experiment with the built-in hover effects within the page builder itself.
To set up the effects:
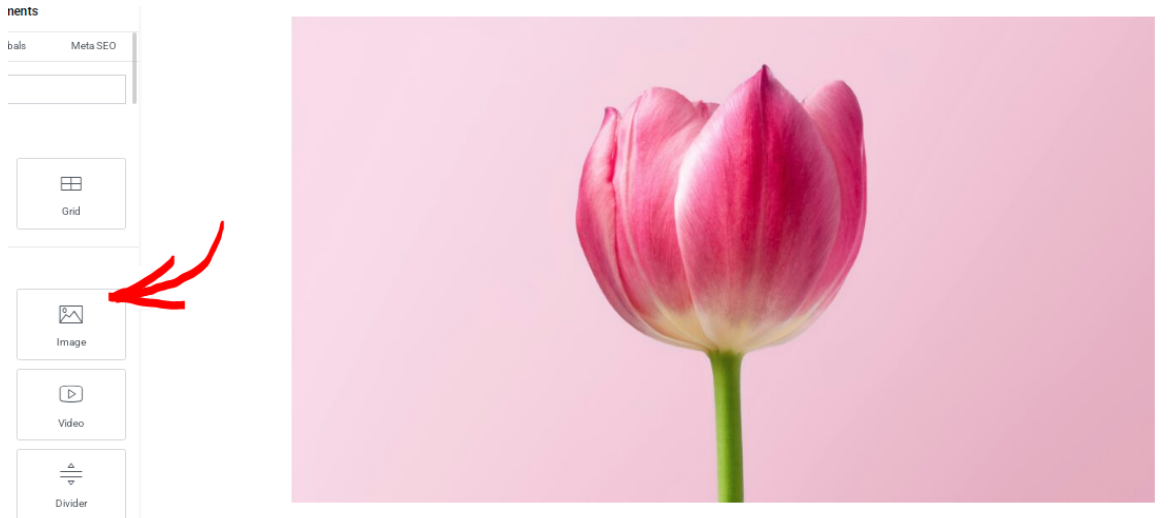
- Open the Elementor editor from the admin dashboard.
- Add your image.
- Select your image, then go to the Style tab.
- Scroll down and click Hover.
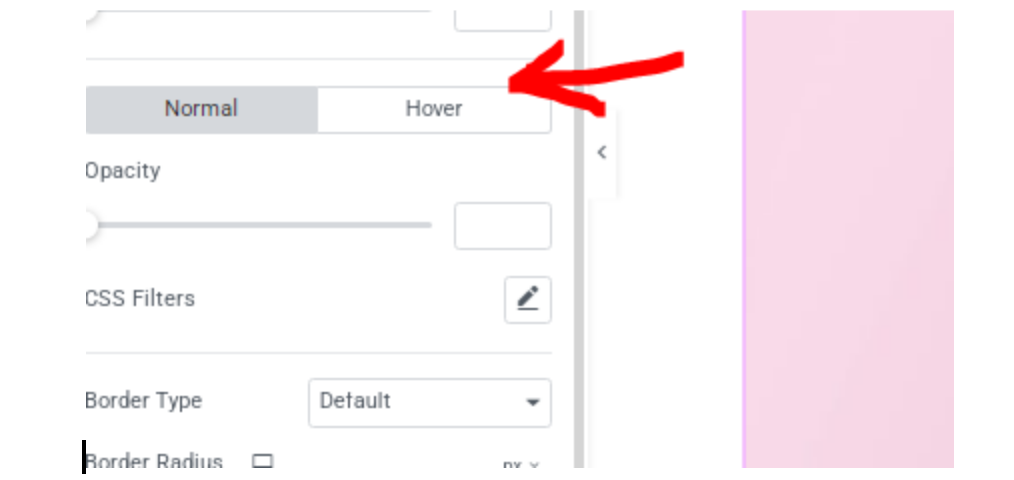
- In the Hover Animation dropdown menu, you'll find a variety of ready-to-use effects.
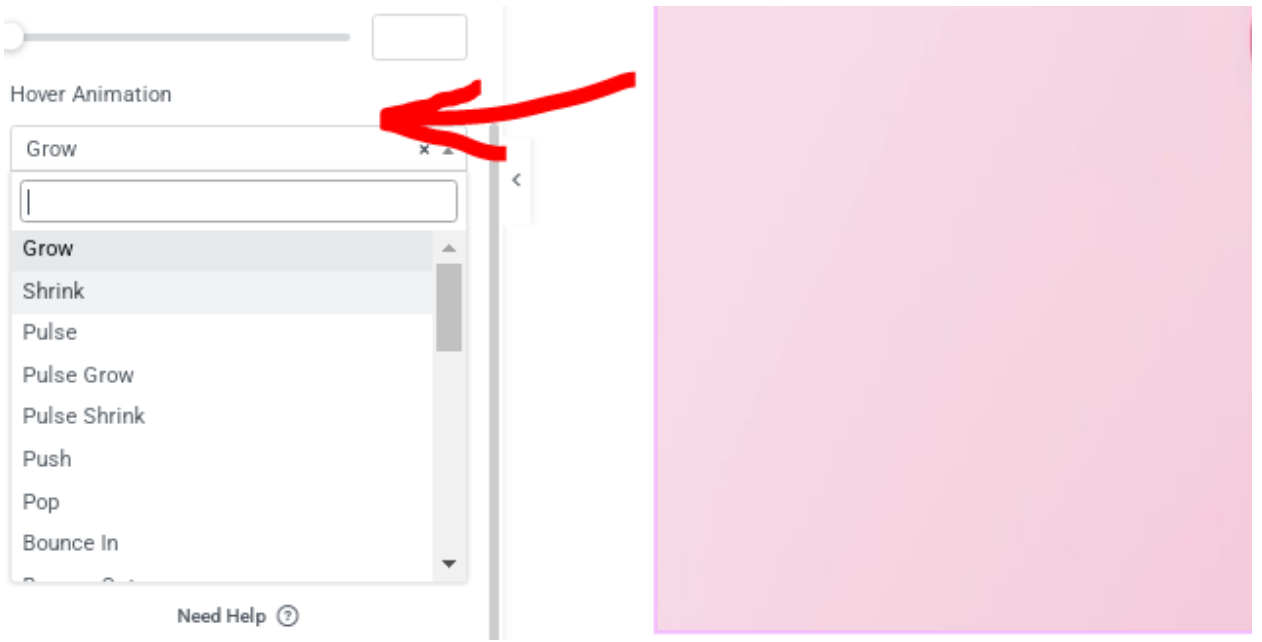
- Here we've chosen the Grow effect as an example. You can then customize the transition duration, opacity, and other settings to match your site's design.
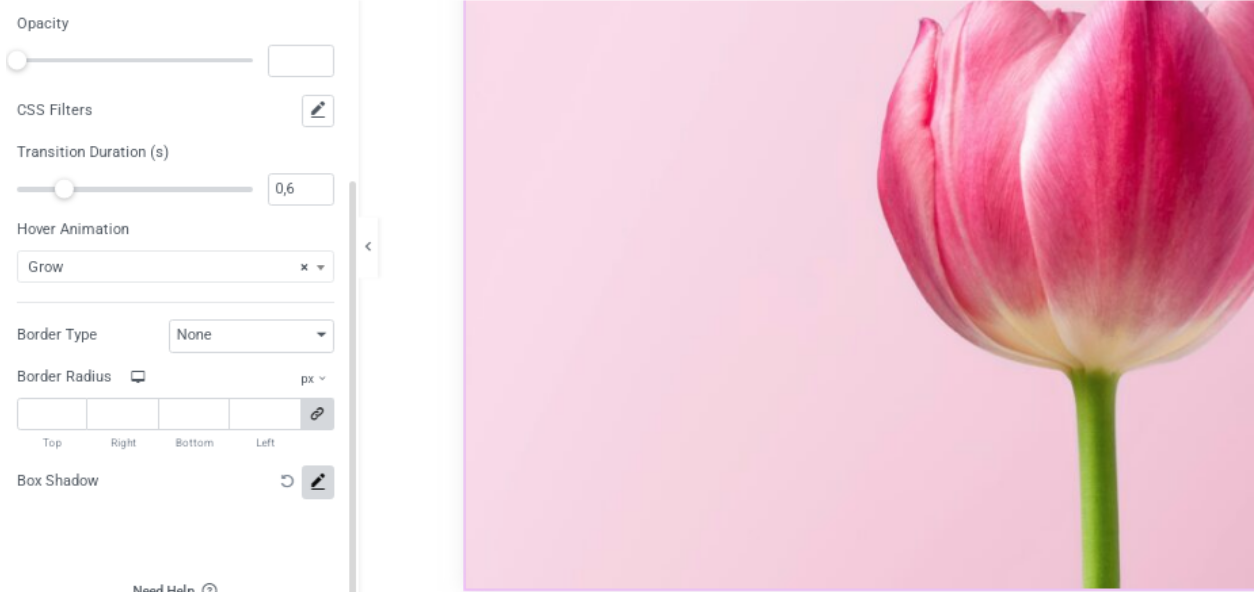
- After you're done, you'll be able to see the effect immediately without needing to preview it.
Method 4: Using Flipbox Plugins
If you're looking for a shortcut, you can install the flipbox plugin. A flipbox effect is when an image flips to reveal content on the front or back when you hover over it.
This effect is great for photography images, where you can display the photo on the front and camera details on the back. But the possibilities are endless.
In this example, we'll use the Flipbox – Awesome Flip Boxes Image Overlay plugin. To set it up:- From your WordPress dashboard, click on the Plugins menu. Then, select Add Plugin.
- Type Flipbox - Awesome Flip Boxes Image Overlay in the search bar.
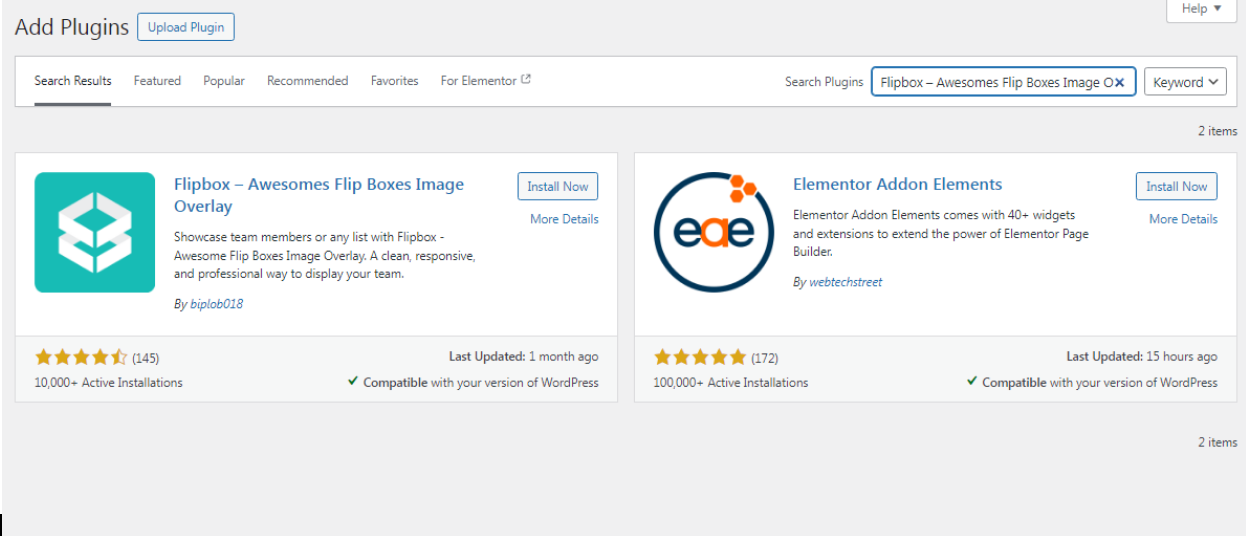
- Click Install Now, then Activate the plugin.
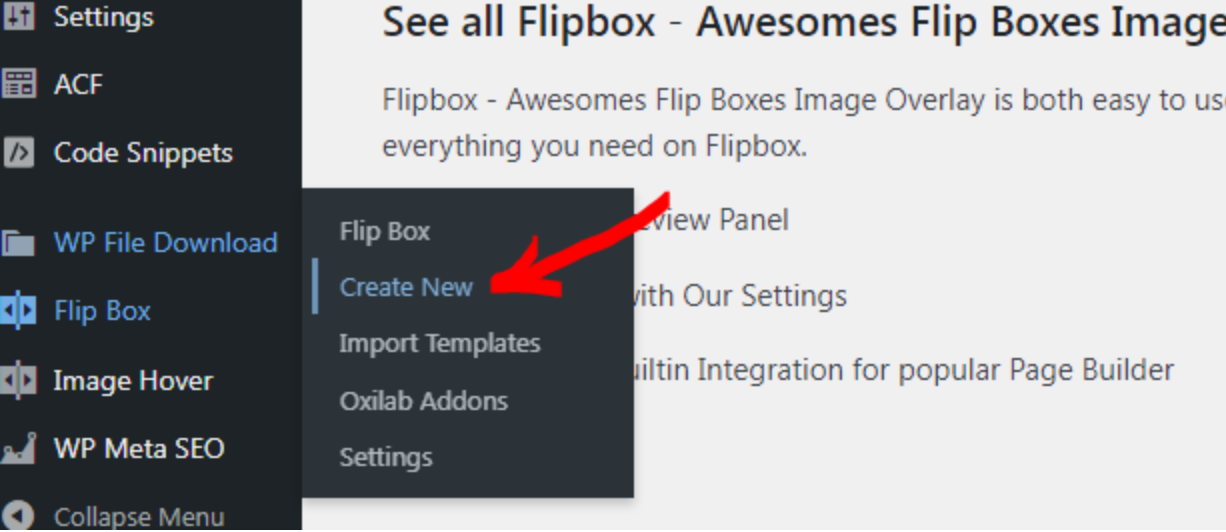
- To create a flipbox, go to the Flip Box menu and click Create New.
- Pick any animations you like. Once you've found one, click Create Style.
- A pop-up will appear. Select the desired layout (1st, 2nd, or 3rd) and enter a title.
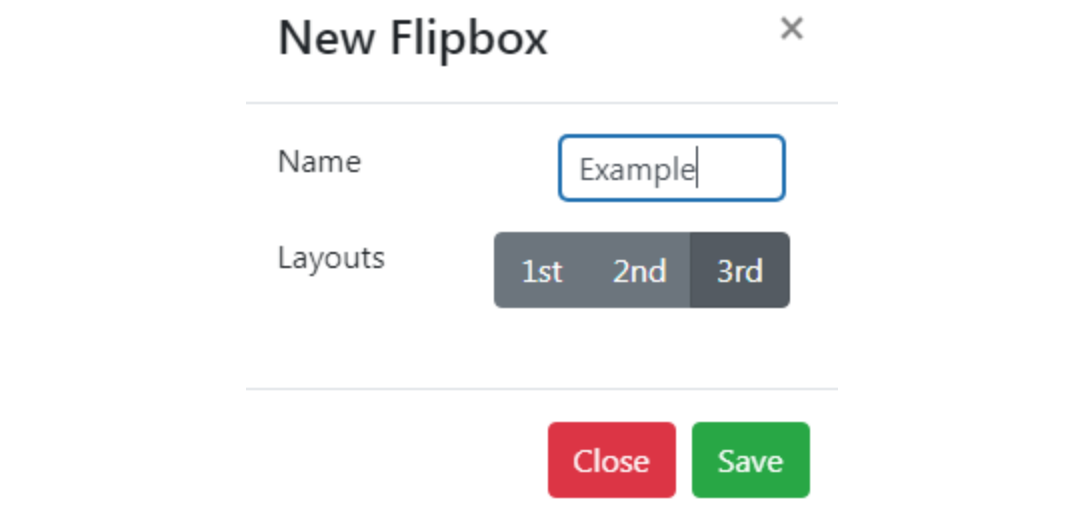
- Click Save to continue.
- Next, you'll be taken to the customization menu where you can set the effects and add your content.
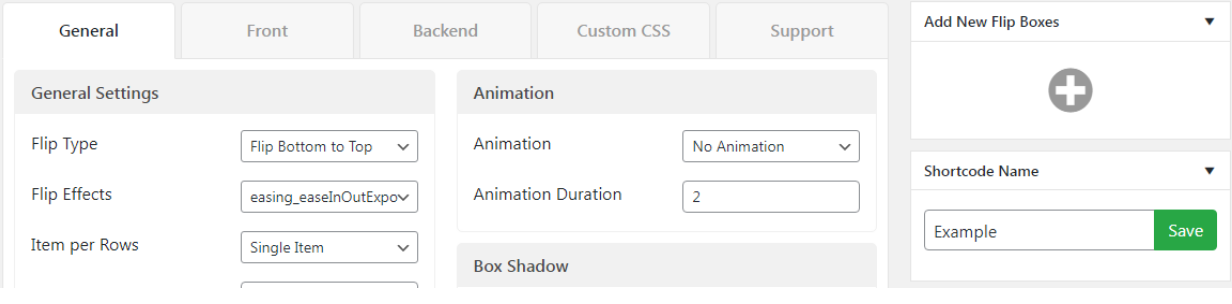
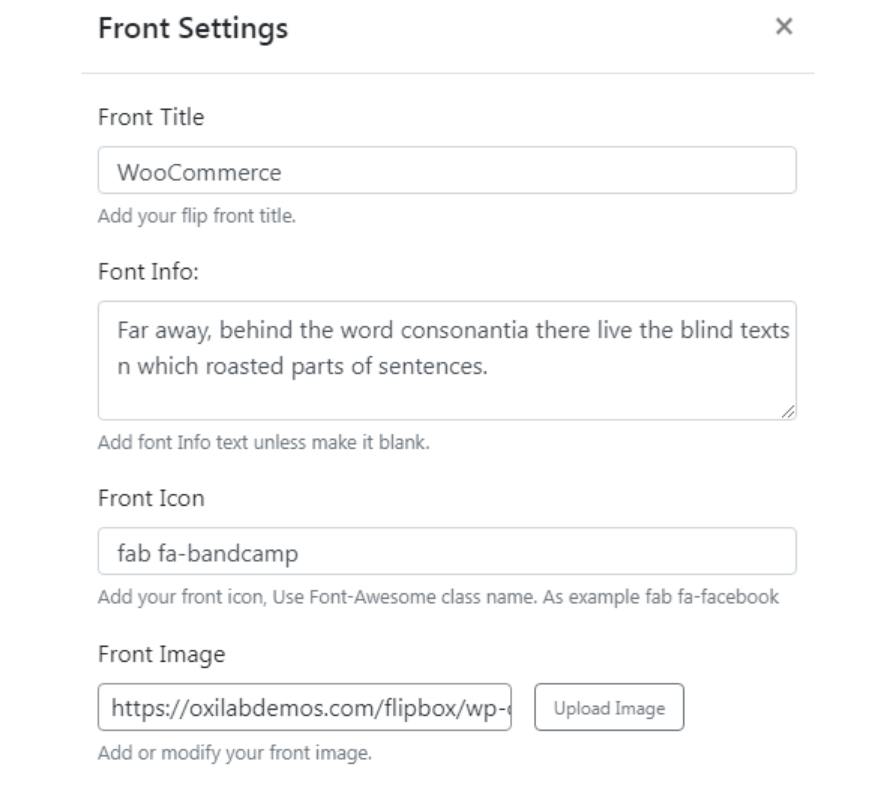
- Scroll down to find the Preview tab. Click Edit to customize the content for both the front and back of the flipbox.
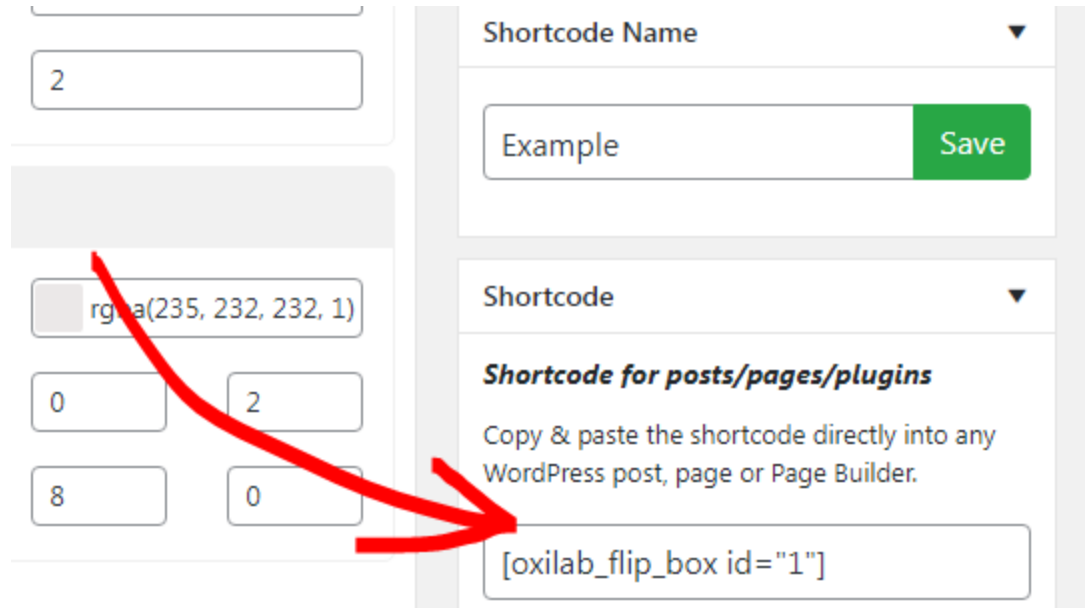
- Once you're done, click Submit to save it.
- To add this flipbox to your page, simply copy and paste the generated shortcode into any section of your site.
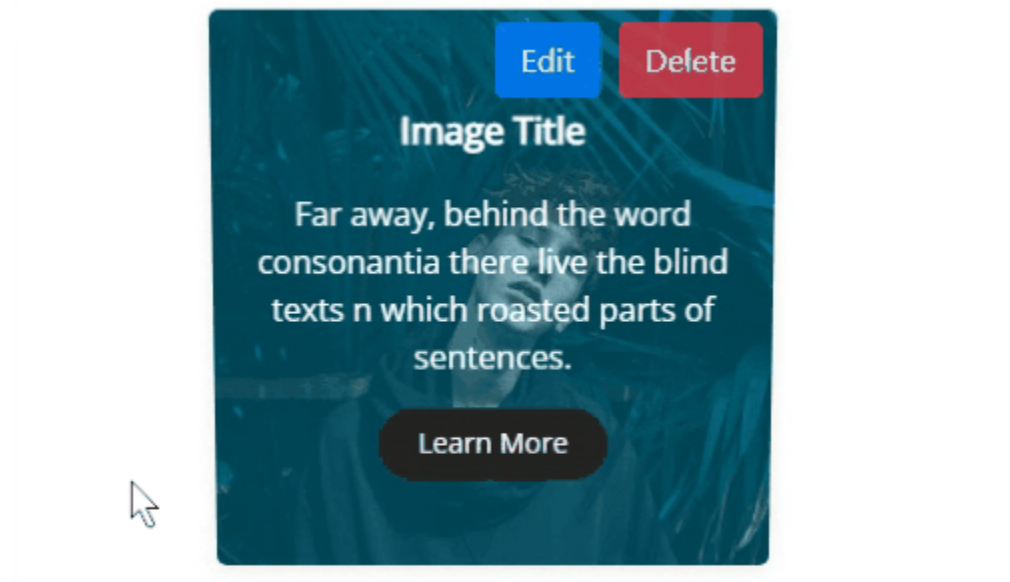
- And that's it, here's the finished product!
Method 5: Using Gutenberg Blocks
Gutenberg is the default WordPress block editor that allows you to add hover effects directly within the editor.
While it may not offer advanced hover effects, you can enhance the animations using custom CSS.
As an example, let's make a simple fade effect on hover. Here's the step-by-step tutorial:
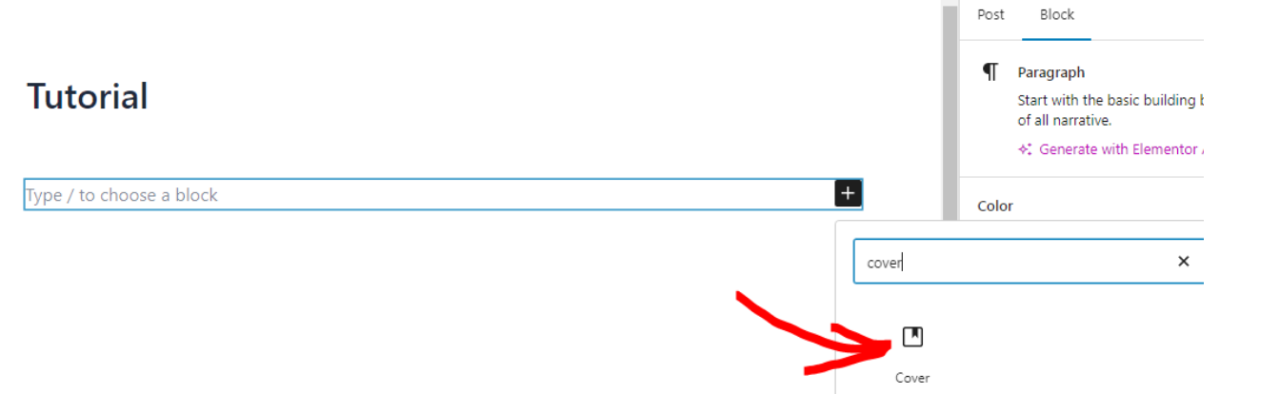
- Navigate to the post or page where you wish to add the hover effect.
- Click the + to add a new block, then choose the Cover block.
- Inside the Cover block, add a Paragraph block.
- Enter your title and a short description.
- Customize the font size, opacity, alignment, and color as needed.

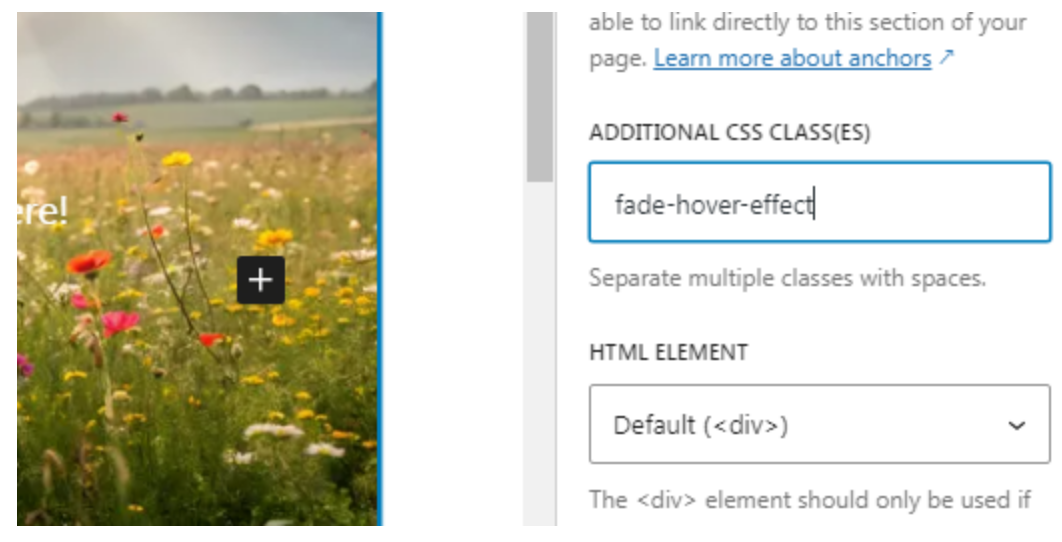
- Then select the Cover block to add a custom CSS class.
- Open the Advanced section in the right sidebar.
- Enter fade-hover-effect in the Additional CSS Class field.
- After that, save the page as a draft.
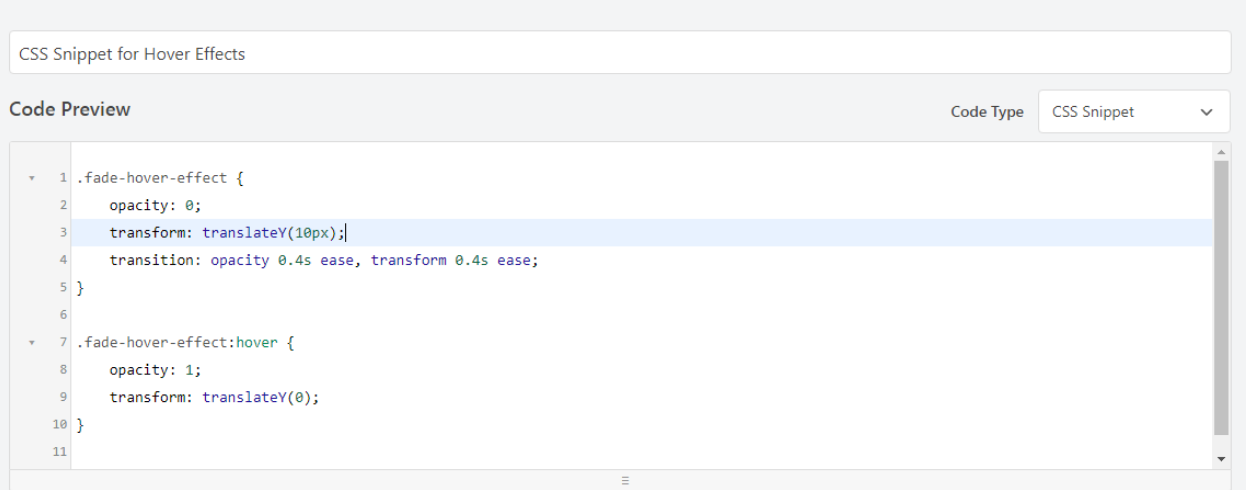
- Go to the Plugins menu and select your code snippet plugin. In this example, we're using WPCode.
- Create a new CSS snippet, then paste the following code:
.fade-hover-effect {
    opacity: 0;
    transform: translateY(10px);
    transition: opacity 0.4s ease, transform 0.4s ease;
}

.fade-hover-effect:hover {
    opacity: 1;
    transform: translateY(0);
}
- Save the snippet and activate it.
- Now, preview your page to see the hover fade effect in action.

You can reuse this effect by adding the fade-hover-effect class to any block or image. But if you're dealing with a lot of images, consider using a plugin like WP Media Folder to organize your media library into folders. This makes it easier to find and reuse related content.
Calling all webmasters!
Save time and boost productivity with WP Media Folder. Effortlessly organize client media
files, create custom
galleries, and provide a seamless user experience.
Upgrade your website projects now!
Does Using Too Many Effects Affect Performance?
Yes, using too many hover effects in your site can potentially affect performance, especially if not optimized properly. This is because some hover effects require additional CSS. The size of your site's CSS can add up and slow down page load times.
It's best to only use essential hover effects to enhance the user experience without overloading your site.
Wrap-up
Learning how to add image hover effects in WordPress can help boost your site by enhancing user interaction and keeping them engaged.
With multiple ways to add hover effects, whether through plugins, custom CSS, or page builders, you have the freedom to choose what works best for you. Experiment with different styles to find the one that best fits your site!
When you subscribe to the blog, we will send you an e-mail when there are new updates on the site so you wouldn't miss them.


Comments