How to Hide Featured Images on Individual Posts in WordPress

Some people might prefer not to show featured images on individual blog posts, whether due to performance issues, design choices, or content focus.
For example, you might not want a featured image on text-heavy posts like tutorials or announcements, as it could distract visitors from the content itself. Hiding the featured image can also improve loading speed, especially for users on mobile devices.
If you're aiming for the same thing, we'll guide you on how to hide the featured image on your individual blog posts!
Table of content
How to Hide Featured Images Individually
There are several ways to hide featured images from your blog posts. If you don't have coding experience, you can use a simple plugin to get the job done.
But if you don't want to install any plugins, you can take a more technical approach by editing the theme files or using custom CSS. Below, we've explained each method step by step:
Method 1: Using a Plugin
You can use the Conditionally Display Featured Image plugin to quickly hide the featured image. This popular plugin is available for free in the WordPress plugins directory.
With this plugin, you can choose to hide the featured image on individual posts or on the blog page that displays the list of all published posts.
If you want to try this easy method, let's get started by installing it first:
1. Install and activate the plugin
If you already know how to install and activate a plugin in WordPress, you may jump to the next step. But if it's your first time, let's continue by following the steps below:
- Open your WordPress admin dashboard.
- Click on the Plugins menu from the sidebar.
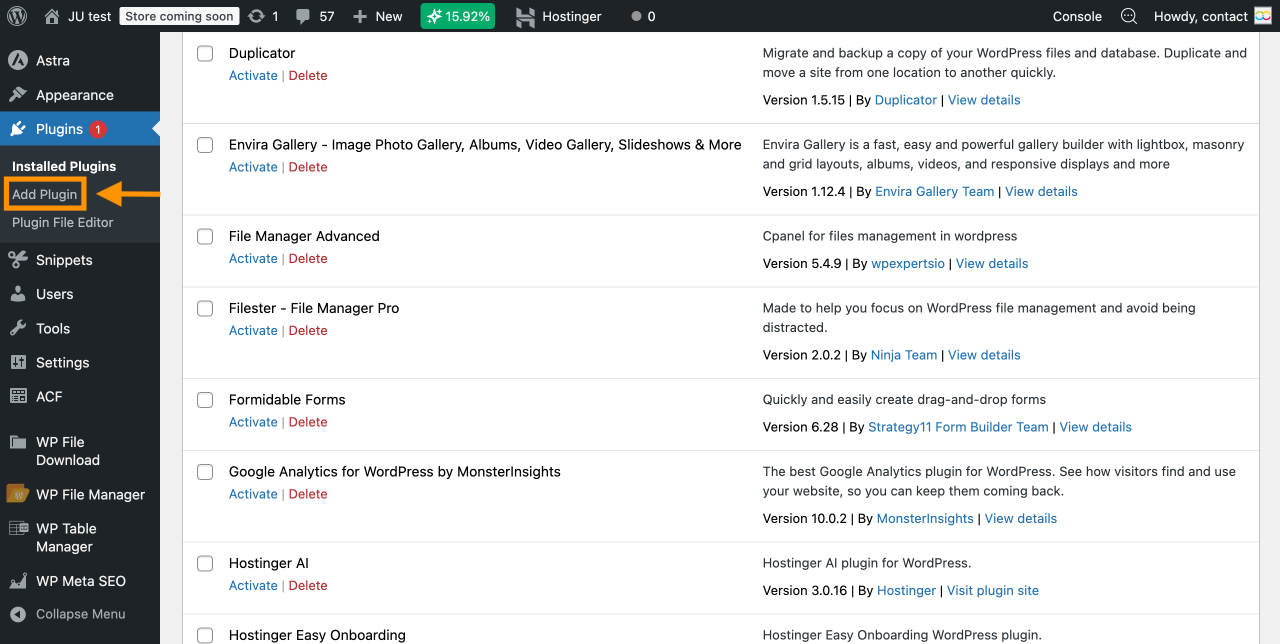
- Click Add Plugin to open the Plugin Directory.
- Type in Conditionally Display Featured Image into the search bar. The plugin should appear as the first result.
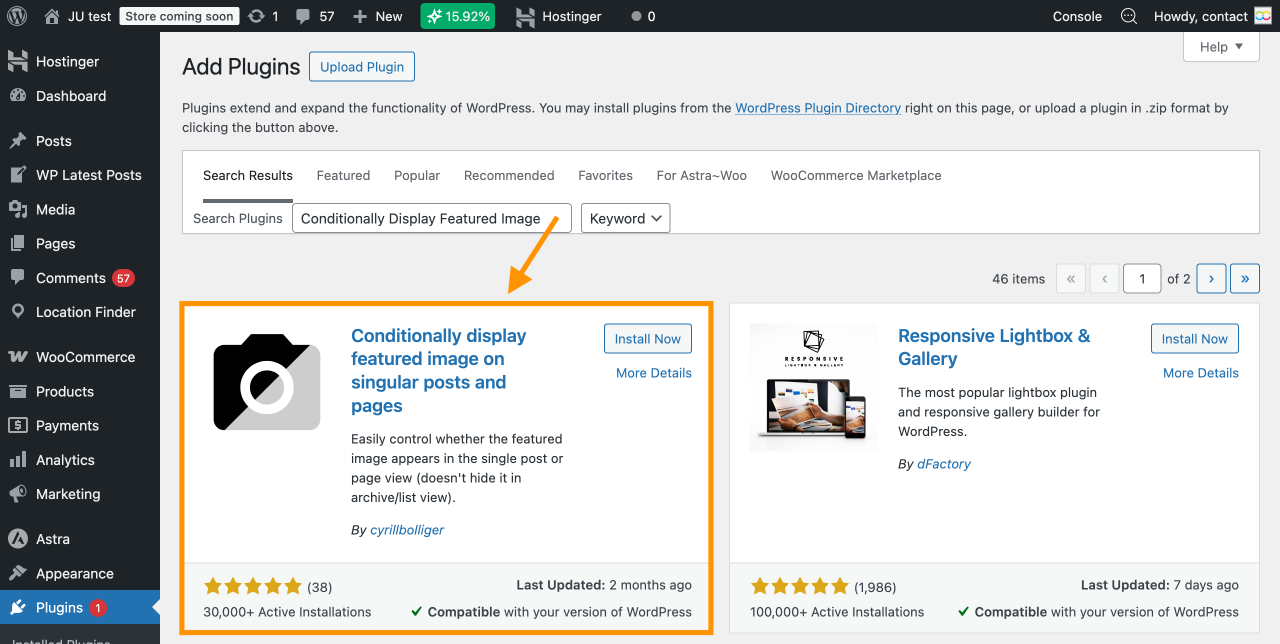
- Click Install Now to download the plugin.
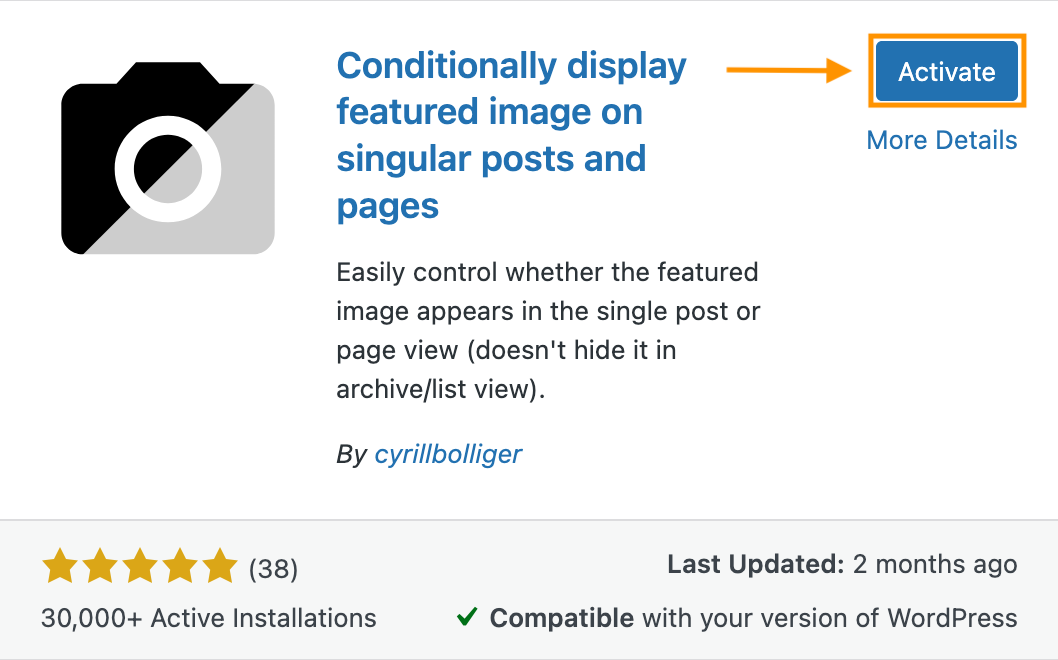
- Once installed, click Activate to enable it on your site.
2. Edit the desired post
After the plugin is activated, you can go directly to the post where you want to hide the featured image. Then, follow the steps below to locate the checkbox that allows you to hide the image:
- Open the blog post you want to edit.
- Click Settings to access the editor.
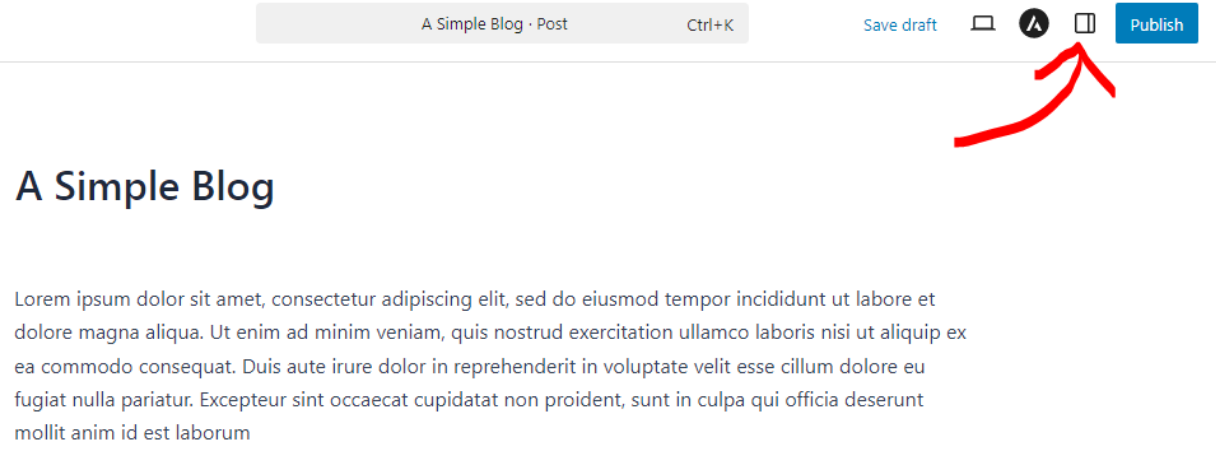
- In the sidebar, go to the Post tab.
- At the very top, you should see your featured image. Below it, you'll find the option: Show featured image in the post lists only, but hide it in the single post view.
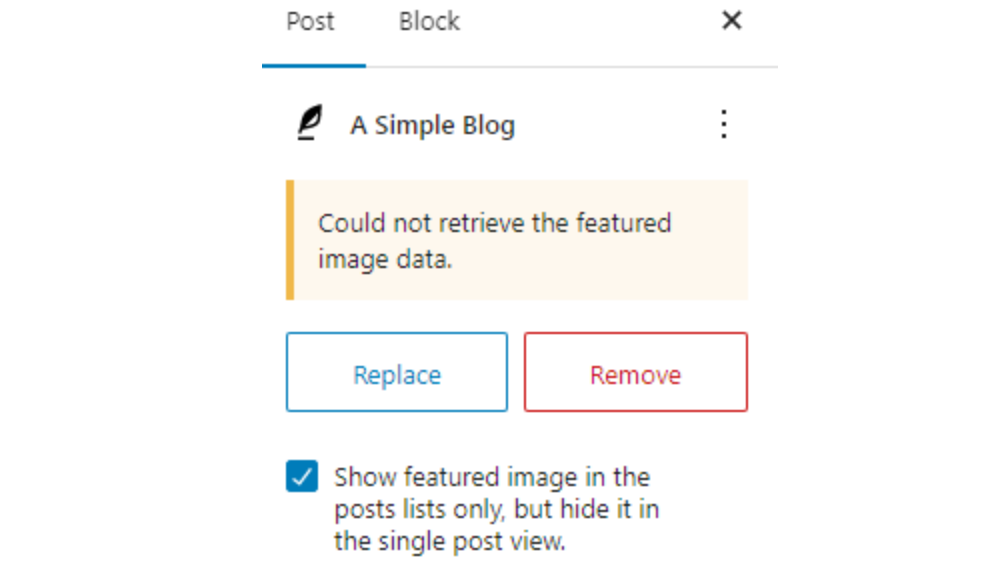
- Tick the checkbox to hide the featured image in that particular post.
- Next, save the changes by clicking the Update/Save button (if the post is already published) or the Publish button (if it's still a draft).
3. Update the post to apply changes
This step is complete once you click the Save or Update button. However, make sure to check the front end of your site to confirm that the featured image is actually hidden.
There are two ways to do this:
- Check the live version of the published post
- Or preview your draft post before publishing
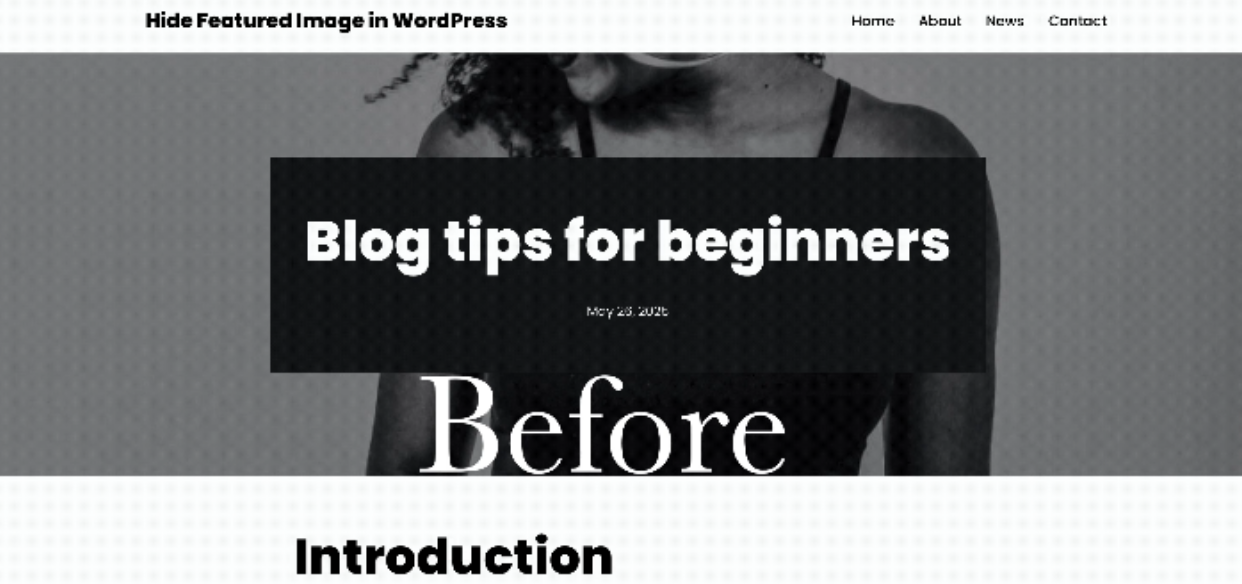
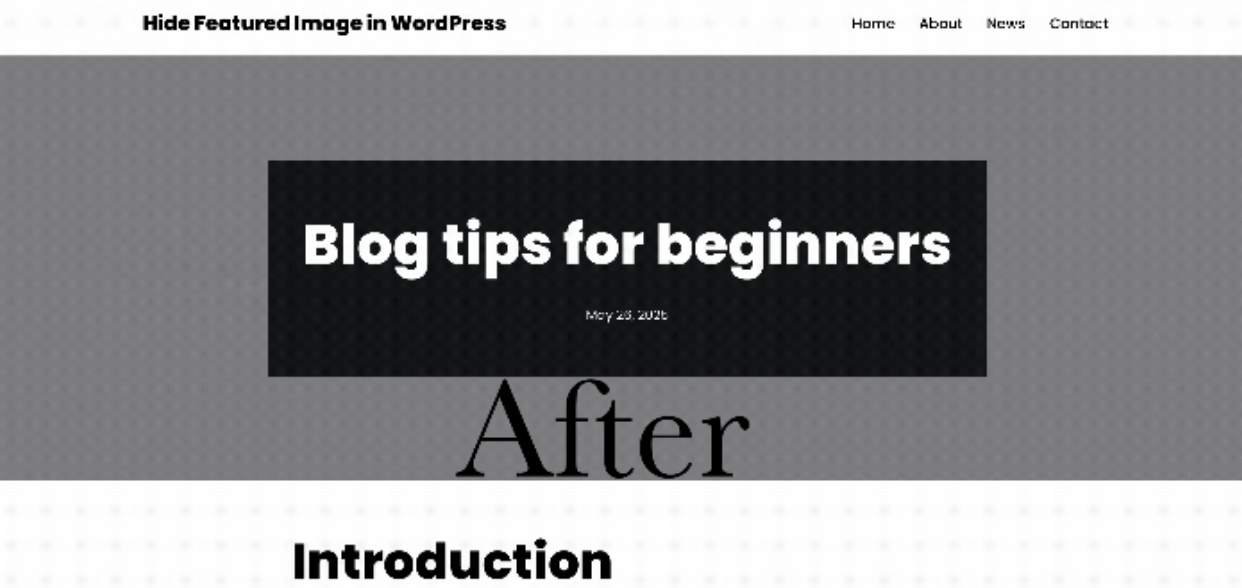
Here's a look at the before-and-after result:
Method 2: Using Custom CSS
If the featured image still appears on your posts, don't worry because we have another method to help you fix the issue.
You can use custom CSS code to hide it from the user's view. However, keep in mind that this method might slightly affect performance, as the featured image will still be loaded even though it's not visible.
If that's not a concern for you, go ahead and follow the tutorial below:
1. Identify the specific post ID
To ensure the CSS code only affects an individual post, you need to find its post ID. The post ID is a number that uniquely identifies each post in WordPress.
For example, the URL might include post=111, where 111 is the post ID.
However, if your site uses SEO-friendly permalinks, you won't see the post ID directly in the URL.
Here's how to find it instead:
- Go to your WordPress admin dashboard.
- Click on the post you want to edit.
- Look at the URL bar in your browser.
- You should see a URL that includes the post ID as shown below.

2. Add custom CSS to hide the featured image for that post
After identifying the post ID, the next step is to add it to your custom CSS code. WordPress has a built-in feature for adding CSS, so you won't need to install any third-party plugins.
You can add the CSS code though the Customizer menu. This method only requires basic coding knowledge, so there's no need to worry.
We'll walk you through the steps below:
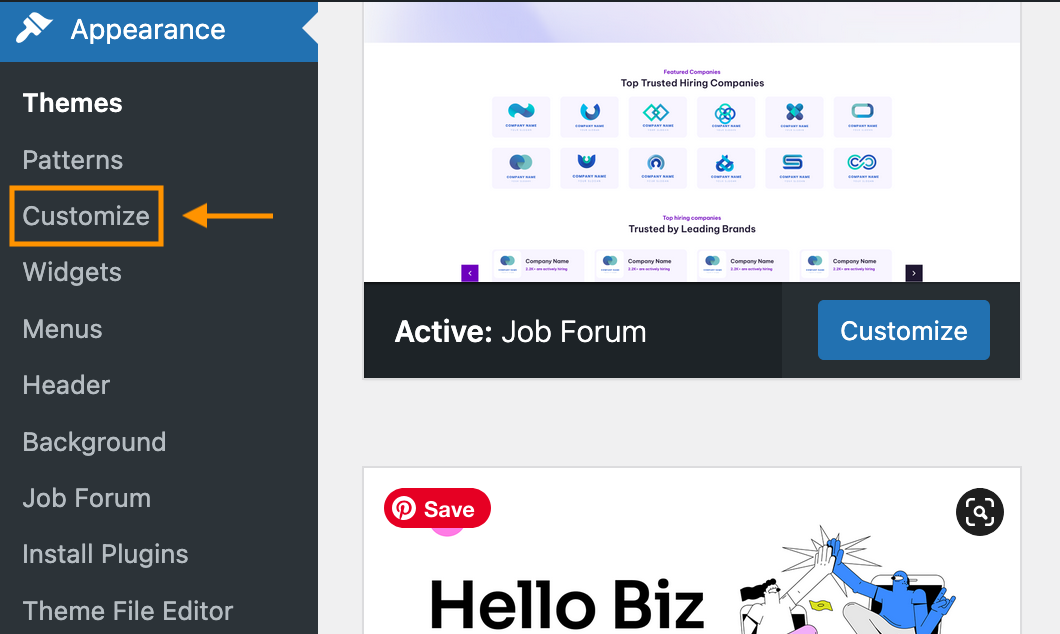
- Click on the Appearance menu from the sidebar, and select Customize.
- You'll be taken to the Customizer menu.
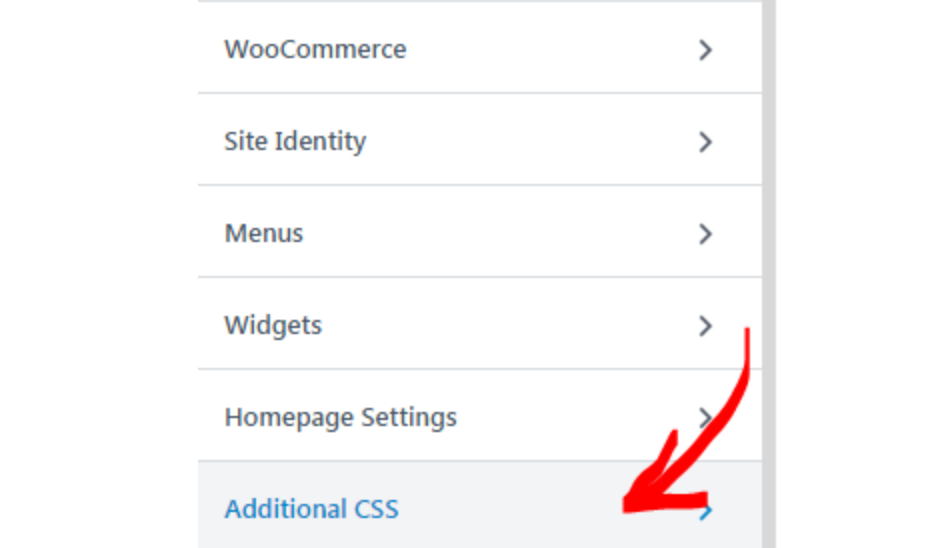
- Scroll down and click the Additional CSS section.
- Paste the code below into the editor box. Don't forget to replace the post ID with your actual post ID.
.postid-51442 .post-thumbnail {
    display: none;
}
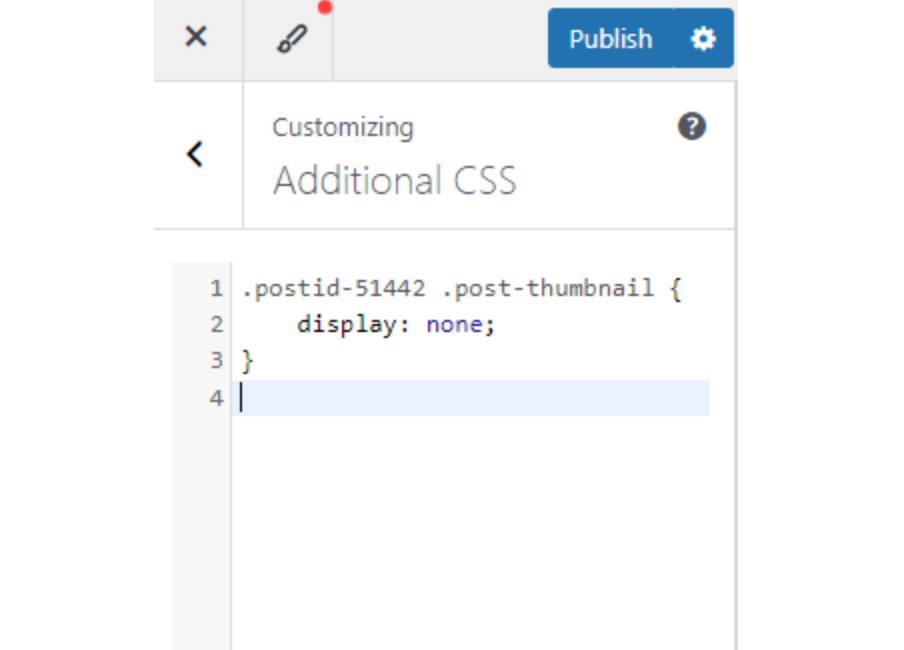
- Lastly, click Publish to apply the changes. Your featured image should now be hidden from that post.
Method 3: Editing Theme Files
If the methods above don't give you the desired result, you can try to edit the theme files.
But, this should be considered as a last resort, as editing theme files may cause errors or break certain features.
Be sure to keep a backup just in case. After that heads-up, let's get started:
1. Open the theme's functions.php file
There are many .php files within a theme, such as single.php, content.php, and functions.php. It depends on your theme's structure.
For this method, you need to locate the functions.php file. Here's how to locate it:
- Open the Appearance menu from the sidebar.
- Click on the Theme File Editor.
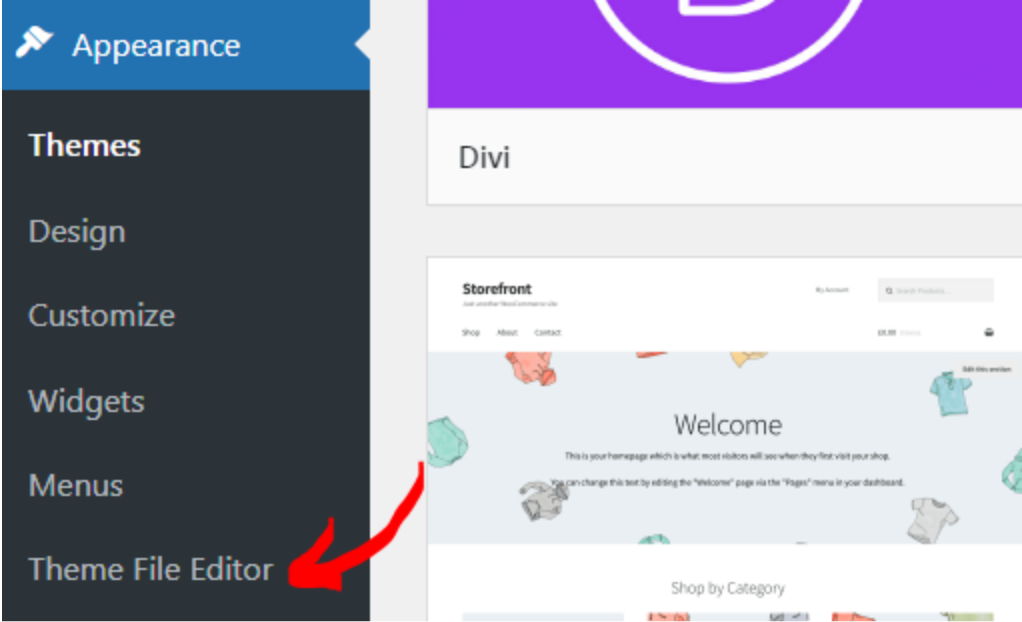
- It will open the theme editor as shown below.
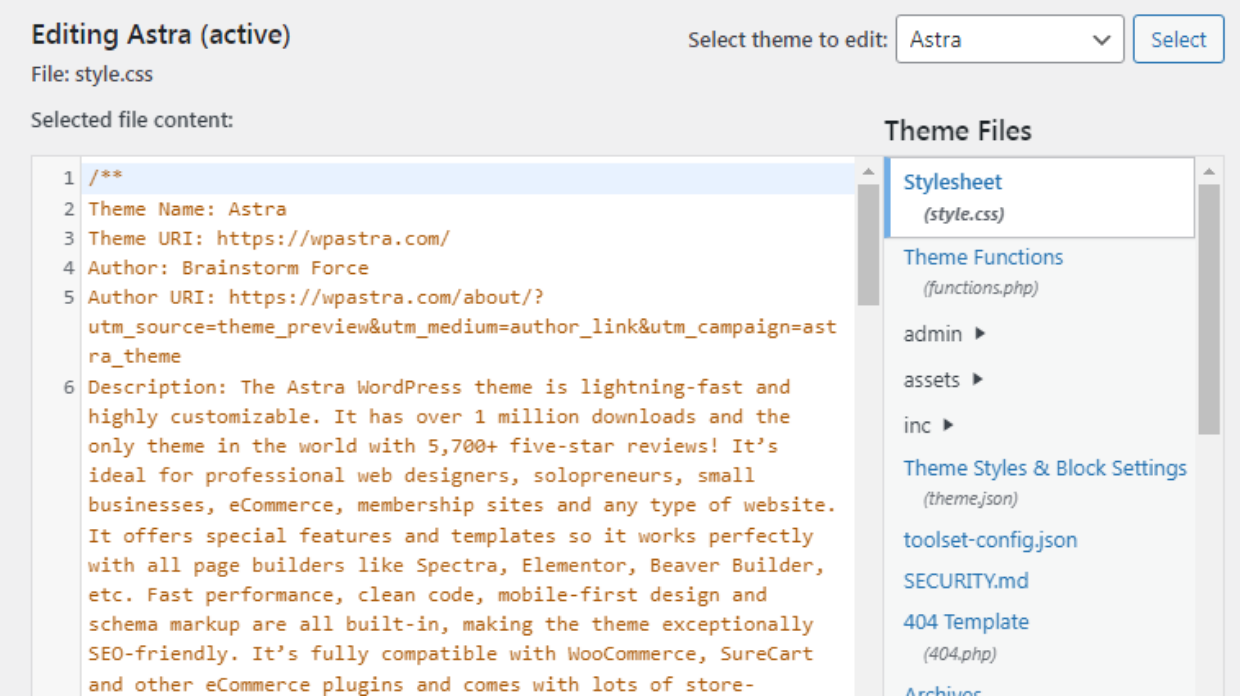
- Scroll down the Theme Files menu and find the functions.php.
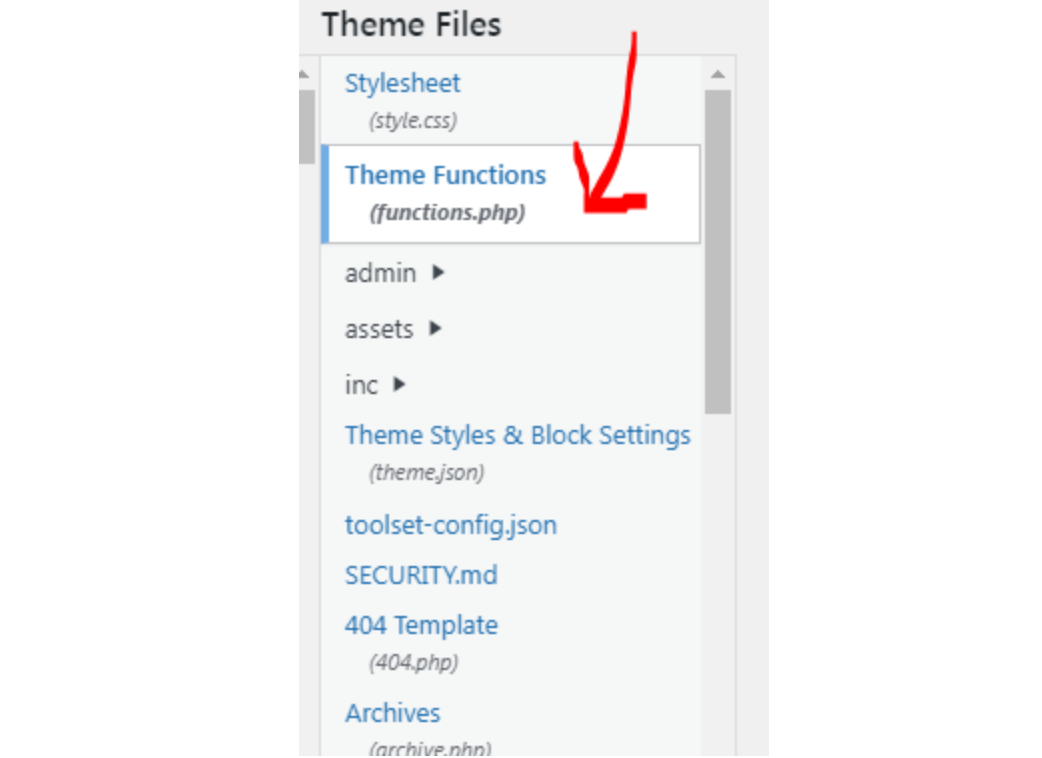
- Click to open the file.
2. Add conditional statements to exclude the featured image for specific posts
Now that you have opened the functions.php file, add the following code to hide the featured image on single post pages.
function wordpress_hide_feature_image( $html, $post_id, $post_image_id ) {
  return is_single() ? '' : $html;
}
// add the filter
add_filter( 'post_thumbnail_html', 'wordpress_hide_feature_image', 10, 3 );

To ensure the code only hides the featured image from a specific post, replace is_single() with is_single(123), where 123 is the ID of the post you want to target.
After that, save the changes by clicking the Update File button.
Say goodbye to messy media library.
WP Media Folder lets you categorize files, sync folders with
cloud storage, create amazing galleries and even
replace images without breaking links.
Optimize your media workflow today
How to Hide Featured Images in All Single Post
If you want to hide featured images across all your single posts, the Neve theme makes it easier for you.
With just a few clicks, this method will ensure that featured images stay hidden on your post pages.
If you already have the Neve theme installed, you can continue with the steps below:
- In your WordPress admin dashboard, go to Appearance and click Customize.
- Navigate to the Blog section.
- You will see two layout styles: Normal and Cover. The steps to hide featured images differ for each layout:
For the Normal Layout:
- Scroll down and locate the Thumbnail section.
- Click the Eye icon next to the Thumbnail to disable it.
- Apply this change by clicking the Publish button.
- Featured images will now be hidden on posts using the Normal header layout.

For the Cover Layout:
1. Scroll down to find the Hide Featured Image toggle.
2. Turn this toggle on.
3. Click Publish to save the settings.
- After saving the settings, wait a few seconds for the changes to take effect.
- Then, check by visiting one of your single post to see whether the featured images are hidden.
Keep in mind, you must have the Neve theme installed to use this method. If you haven't installed it yet, try installing and activating it from the Themes Directory. Simply type Neve into the search field and you'll find it.
Why Editing the Theme Files is not Recommended?
We have reminded you to not edit the theme files if not necessary. The simple reason: it can break your site.
So, we've gathered a few safer alternatives on how to hide featured images without needing to edit the theme's file:
- Using Code Snippets Plugin: Code Snippet is a free plugin that allows you to add custom PHP to your individual posts. It works wonders without risking breaking your site.
- Custom Functionality Plugin: This plugin enables you to hook a custom PHP, instead of typing it directly to the theme file.
Calling all webmasters!
Save time and boost productivity with WP Media Folder. Effortlessly organize client media
files, create custom
galleries, and provide a seamless user experience.
Upgrade your website projects now!
Conclusion
You don't have to try all the methods above to hide the featured image in WordPress. Just find the one that suits your needs.
Managing a large number of featured images can be time-consuming, especially when your media library becomes cluttered.
That's why it's a good idea to use a plugin like WP Media Folder, which lets you assign, preview, and organize featured images into folders with colored icons. It's a smart way to save time and stay organized!When you subscribe to the blog, we will send you an e-mail when there are new updates on the site so you wouldn't miss them.