WP Table Manager: Parameters
1. Main Settings
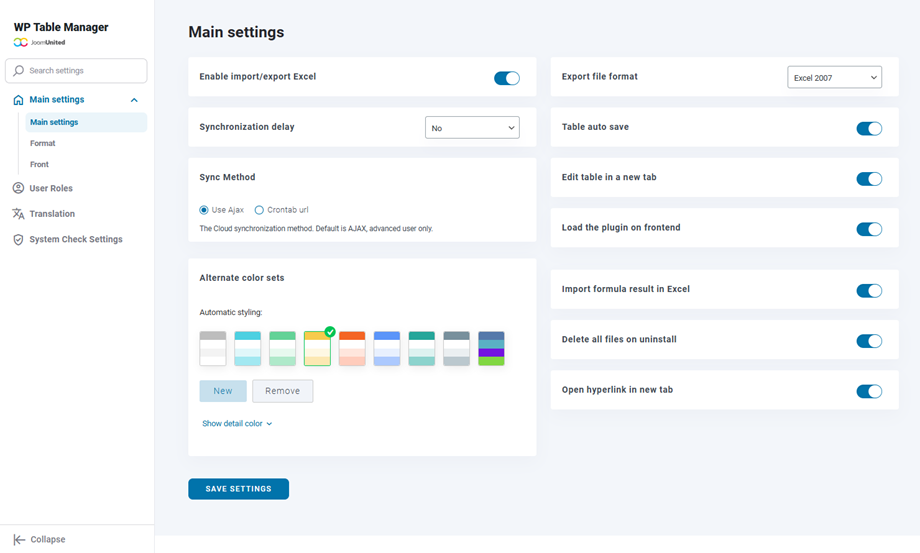
To access the WP Table Manager plugin settings, go in WP Table Manager > Configuration
As option you can define at Main Settings tab:
- Enable Import/Export Excel button
- Export file format: Select the Excel format when running an export of the table
- Synchronization delay: Define the delay for the automatic sheet synchronization between WP Table Manager and Excel or Google Sheets
- Table auto save: Enable the auto save or activate a manual saving button
- Sync method: use AJAX or Crontab url
- Edit table in a new tab: Open the table in a new tab if it is enabled
- Load the plugin on frontend: Load WP Table Manager required files to edit tables on frontend (from a text editor for example). If this feature is not required, keep it disabled to save server resources
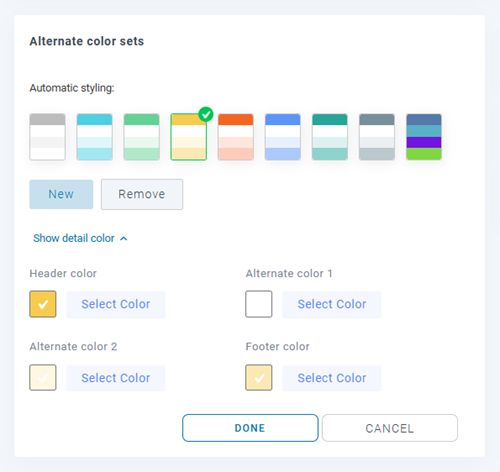
- Alternate color sets: available to style your data. Click "Show detail color" to modify specific color elements.
- Cell highlighting: Activate a color on cell mouse over to see on a first sight a cell content
- Highlight background color
- Highlight font color
- Highlighting opacity
- Import formula result in Excel: Automatically get formula results when importing or synchronizing Excel file
- Delete all files on uninstall: Caution! If set to Yes, on plugin uninstall all the data will be removed
- Open hyperlink in new tab: Open hyperlink in new tab
2. Format settings
You should go to plugin configuration > Format tab. You will see some other options.
- Currency symbol(s)
- Symbol position
- Decimal symbol
- Decimal count
- Thousand symbol
- Date formats
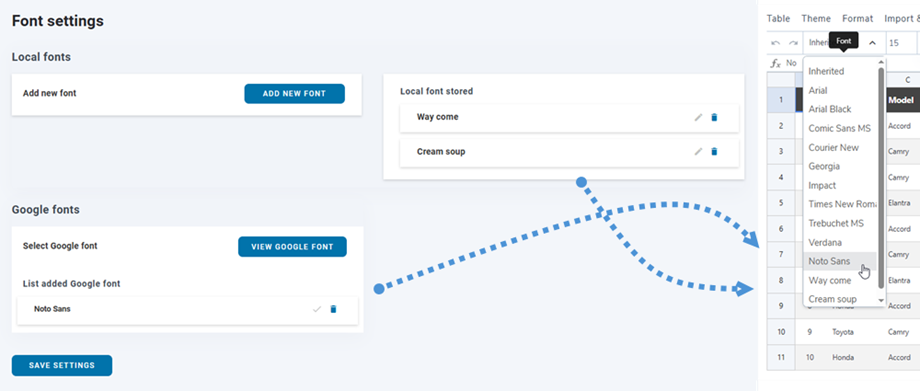
3. Fonts settings
3.1 How to add new local fonts?
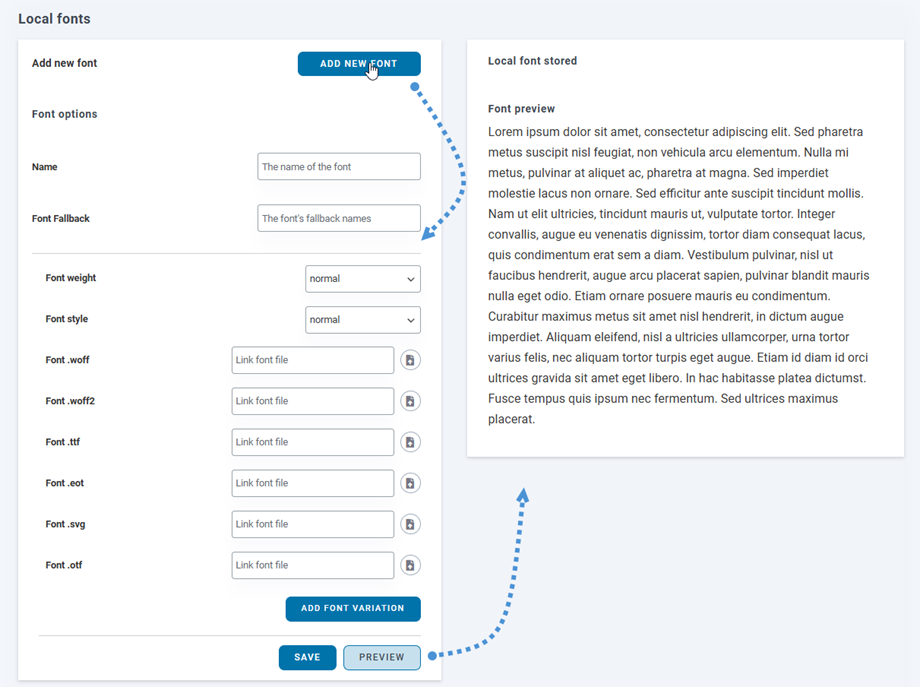
In order add new local fonts in table editor, click on Add new front button.
There includes a few options for the local font:
- Name
- Font Fallback
- Font weight
- Font style
- Field to insert new fonts
And you can also add font variation for the new font. Then you can click on Preview button to see how the font will look like on the right panel. Finally, remember to click on Save button.
3.2 How to add Google fonts?
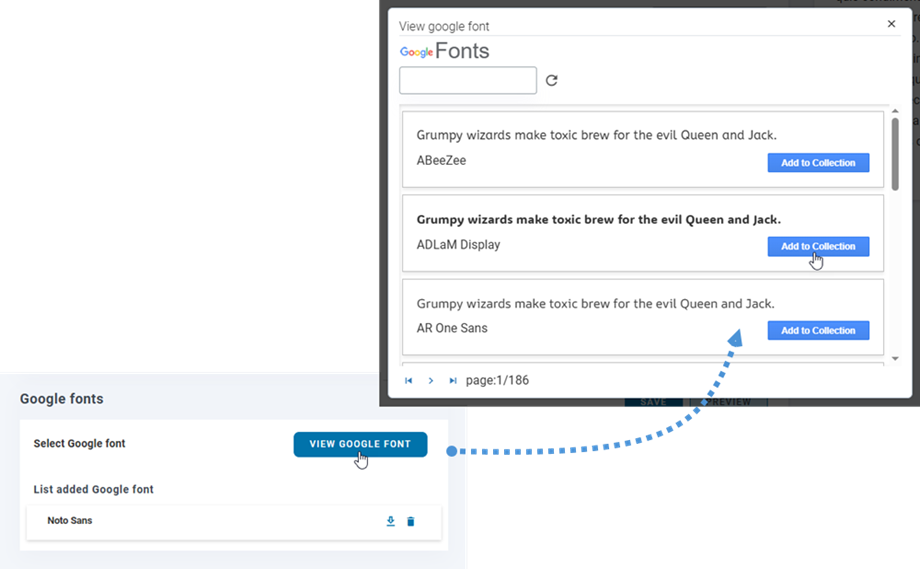
In order add Google Font to your editor, just click on View Google Font button and then click on Add to Collection button on your favourite font.
Then, you will see the new added fonts on the table editor.
3.3 How to download Google font?
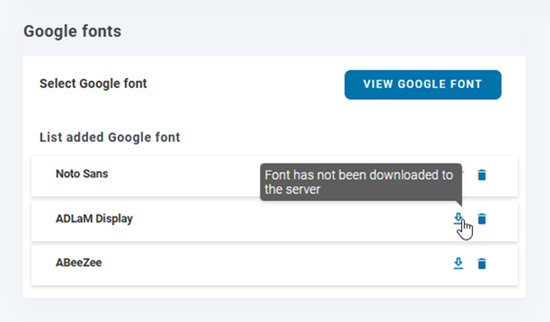
In the previous step, you added Google font to your Collection, then you can download them to use locally by clicking on Download button. The Download button will be a tick icon if the fonts were downloaded. Or you can hover on the Download button and the tooltip will let you know the font was downloaded or not.

