WP Table Manager: Excel, CSV, Google Sheets and OneDrive Sync
1. Import Excel files
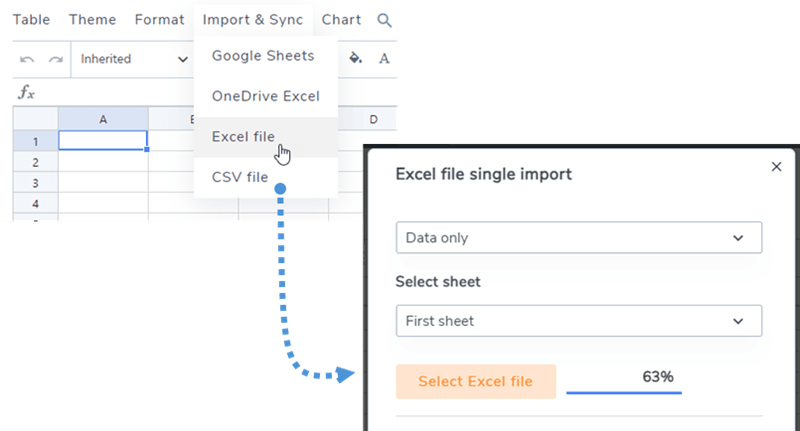
At any tables, you can import an excel file from your PC. First, you should go to Menu Import & Sync > Excel file button, then click on Select Excel file button to pick an Excel file in your PC to import.
Before import the file, you can select an option to import Data only or Data + styles.
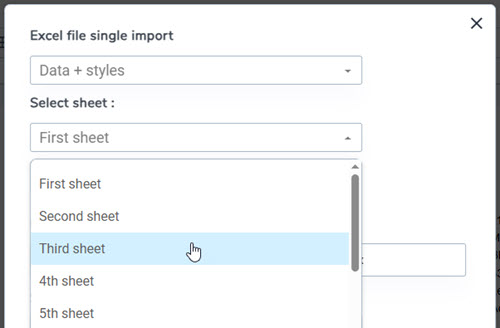
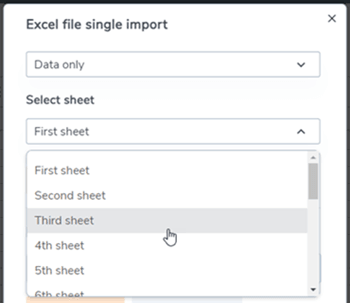
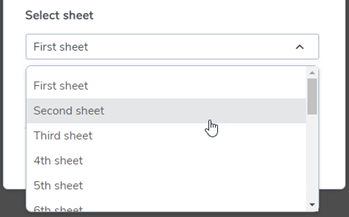
And select a specific sheet before importing
The tables can be imported from excel or open office documents. The format will be detected automatically and imported.
2. Sync a table with an Excel file data
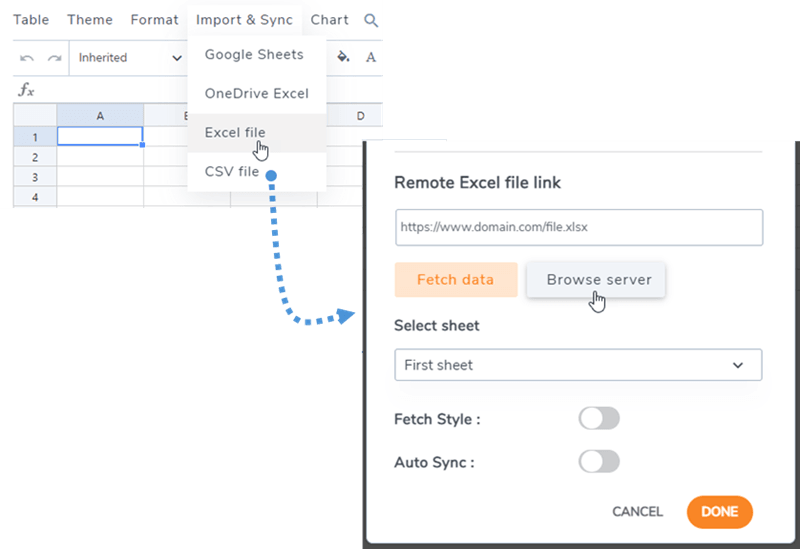
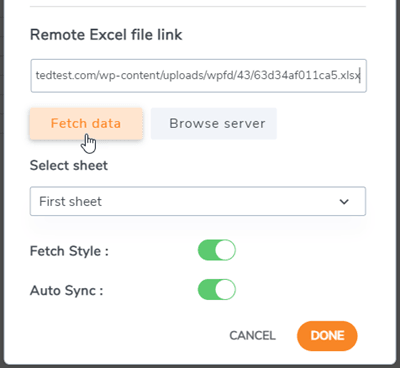
It is possible to run a synchronization between a table you've created and an Excel file located on your server (anywhere). After creating a new table or going to an existing table. Navigate to the Menu Import & Sync > Excel button, then a popup window will appear.
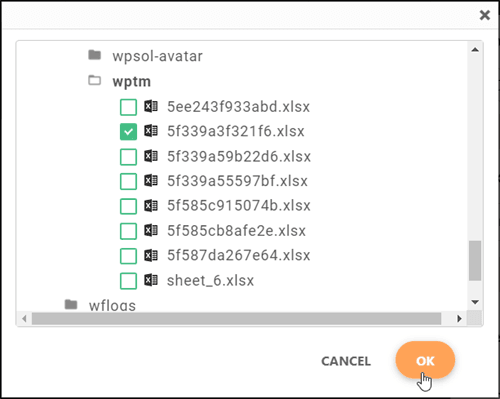
If you click on the Browse server button, you'll be able to select an Excel anywhere on your server, here it's a file uploaded through the media manager (/uploads folder).
Once your Excel file is linked to the table, you can hit the Fetch data button to import data from the Excel file.
There are some options you can choose such as: Auto Sync or Fetch Style before clicking on Fetch data button. You can also select a specific sheet to sync.
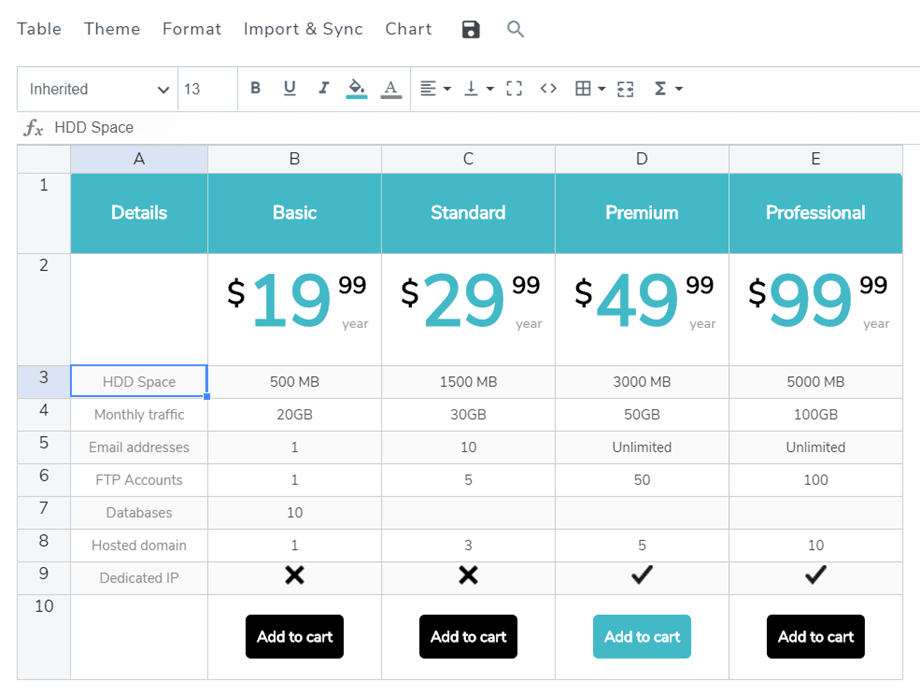
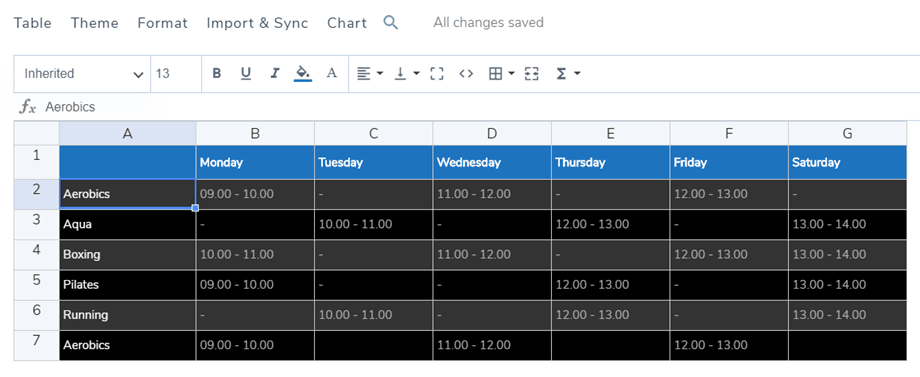
Then here is the result of a data import.
3. Synchronization with Google Sheets
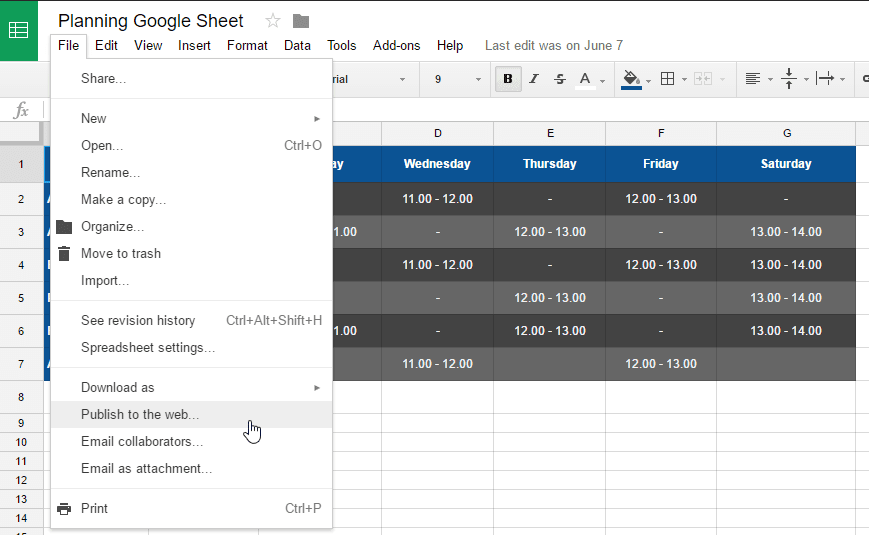
WP Table Manager also offers some Google Sheets synchronization possibilities. Your Google sheet has to be published to be synchronized. So first, open your sheet from Google Drive and publish it as web page using the File menu.
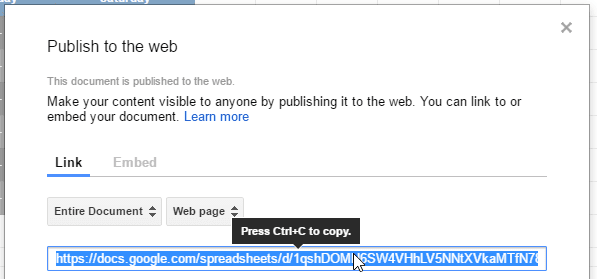
Then you'll get access to the Google Sheets file link, copy this link.
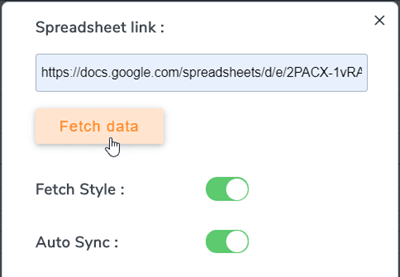
After that, back to the plugin and navigate to Menu Import & Sync, click on Google Sheets button. Then paste the URL into Spreadsheet link field and click on Fetch data button.
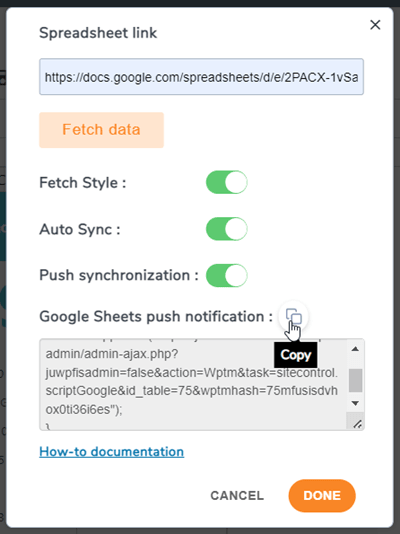
You're done! You can now fetch data for an instant synchronization and run an automatic synchronization too. The fetch style option is in case you also want to get Google Sheets spreadsheets styles.
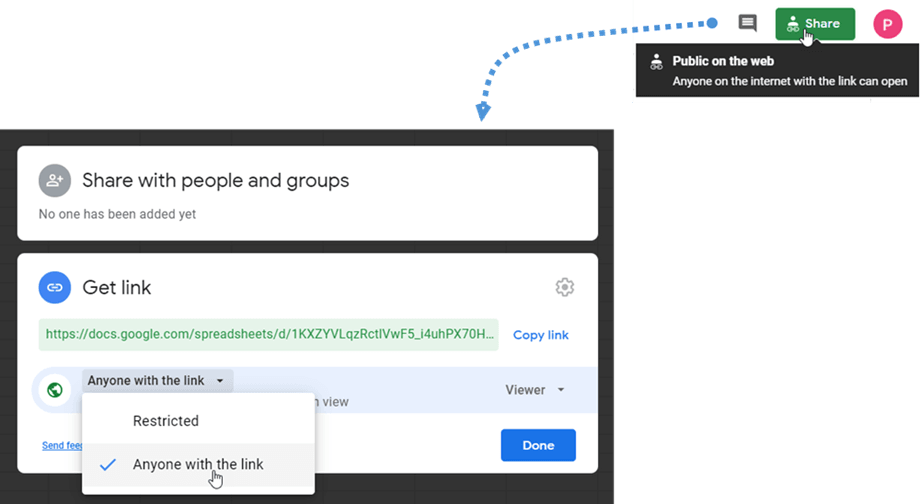
In order to work smoothly in any case, please select option Anyone with the link while sharing the sheet. And you can also use this link to fetch data.
4. Automatic Excel and Google Sheets sync
Above the file link you can also activate an automatic synchronization. WP Table Manager will fetch the data automatically at a regular interval.
Once it's activated a notification is displayed after the table title.
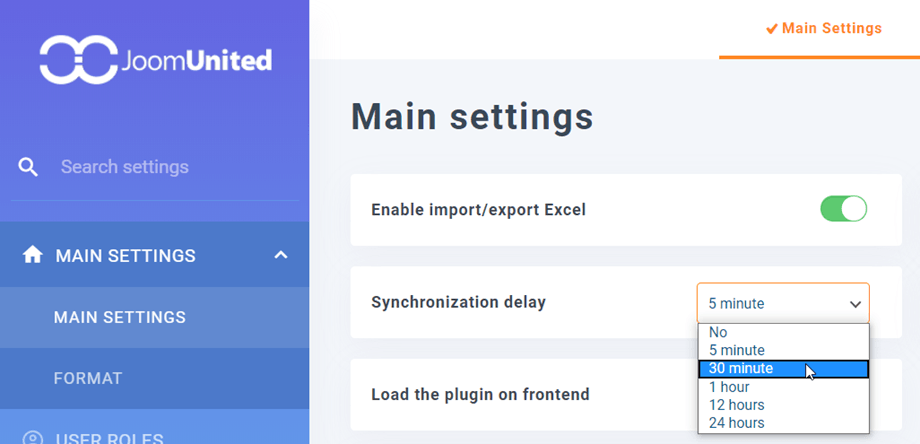
The synchronization delay can be set in the WP Table Manager > Main settings.
5. Real-time synchronization with Google Sheet
This option will help users update their data from Google Sheet without any time delay. Prerequisite, you have synced with Google sheet, please go to section 3. Synchronization with Google Sheets or find how to do it in the video below.
Then you can follow the main steps:
- Copy the code at menu Import & Sync > Google Sheets
- Go to the synced sheet, navigate to Tools > Script editor
- Paste the code then save the project
- Navigate to Edit > Current project's triggers or click on the icon on the toolbar
- Add Trigger, select event type: On change
Please watch the video for the detailed steps:
6. Synchronization with Office 365 Excel - OneDrive Business
WP Table Manager also offers Office 365 Excel (OneDrive Business) synchronization possibilities. Your Excel file on OneDrive Business has to be embedded or shared to be synchronized in our plugin. Due to technical changes from OneDrive so synchronization from OneDrive Personal has no longer supported. Please follow our instruction below corresponding to your OneDrive Business account.
Business account
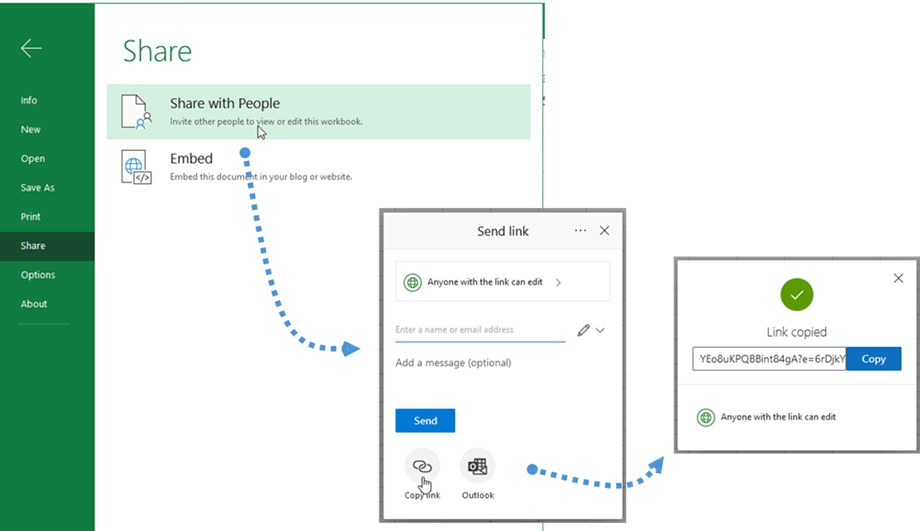
First, open your excel file on OneDrive Business and navigate to menu File > Share > Share with People.
At Send link popup, click on Copy link button. Then the link is copied, e.g: https://joomunited-my.sharepoint.com/:x:/g/personal/joomunited_com/ETcoorIno75ElJJaVVs5g1UB8Yq9DYEo8uKPQBBint84gA?e=riQdcz
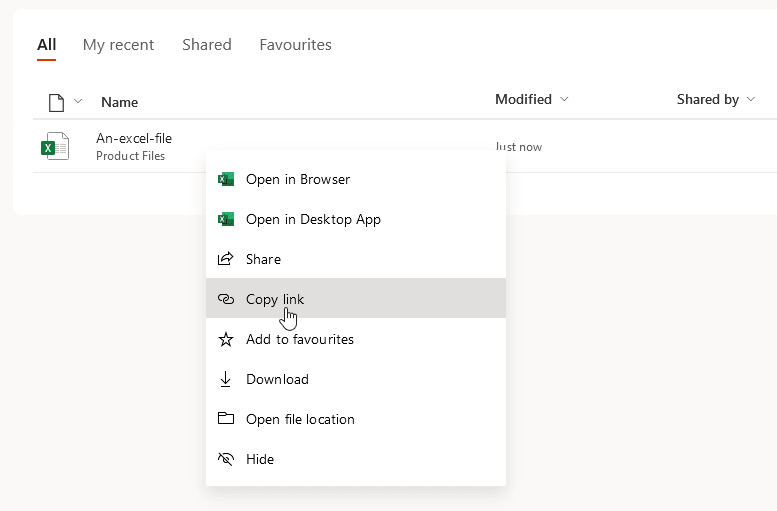
On the other way, at the OneDrive Business dashboard, right-click on the excel file, select Copy link button.
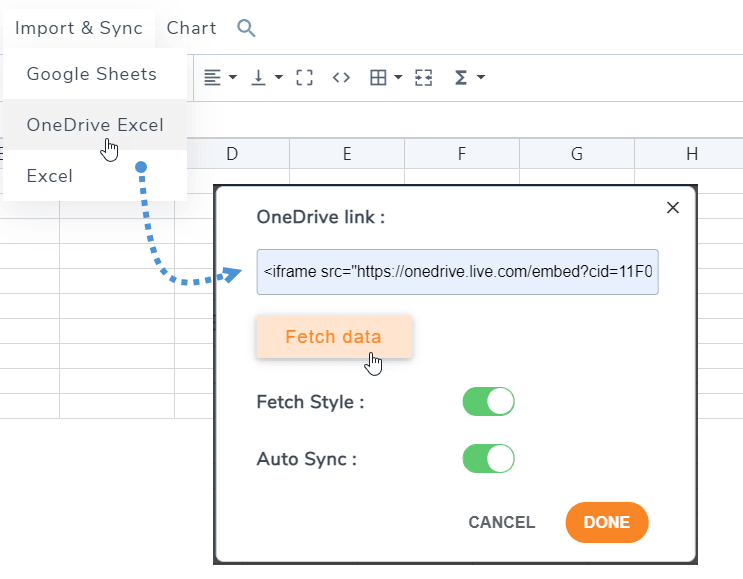
After that, back to the plugin and navigate to Menu Import & Sync > OneDrive Excel button. Then paste the code into OneDrive link field and click on Fetch data button.
You're done! You can now fetch data for an instant synchronization and run an automatic synchronization too. The fetch style option is in case you also want to get OneDrive excel styles.
7. Import and Sync CSV files
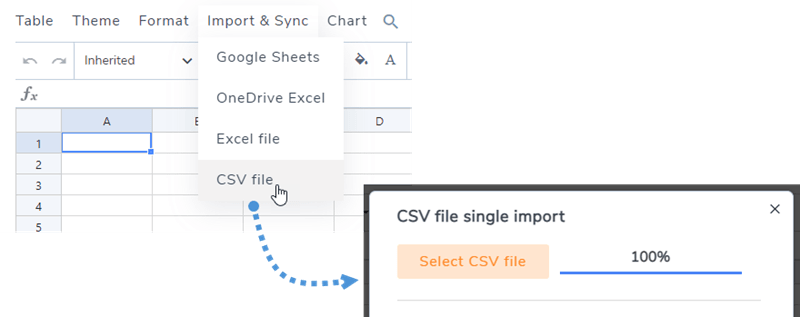
To import a CSV file from your PC using the WP Table Manager plugin, go to the "Menu Import & Sync" section and select the "CSV file" button. Next, click on the "Select CSV file" button to choose a CSV file from your computer that you want to import.
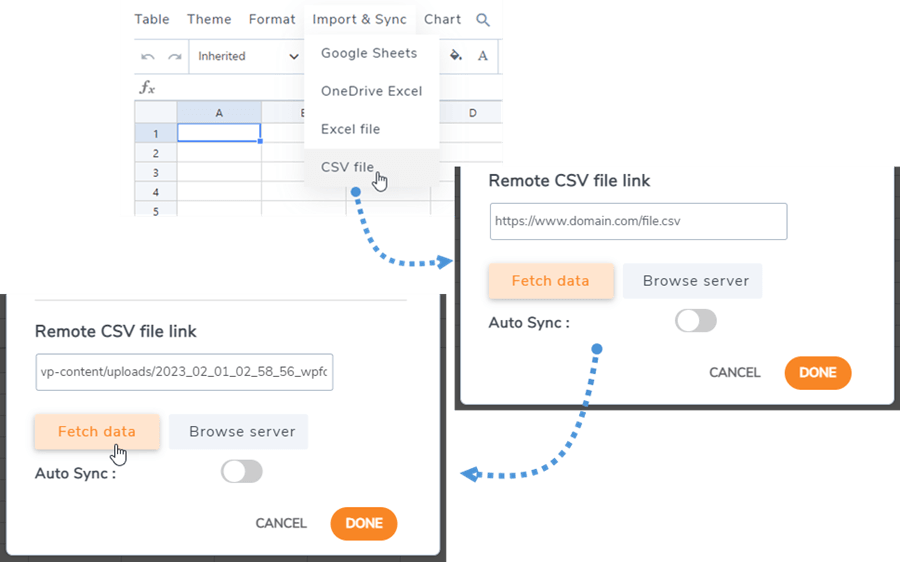
To synchronize your CSV files from the server using an alternative method, start by going to the "Menu Import & Sync" section and selecting the "CSV file" button. Next, click on the "Browse server" button and choose the CSV file you wish to sync. Then, click on the "Fetch data" button. After a few seconds, the popup will close, and you will be able to view the content.
Enabling the "Auto Sync" option will ensure that new data is synced automatically.
