WP Table Manager: Styling Tables
1. Format
On the toolbar, you can set style for cell such as: font, font size, text style, background color for cell, text color, cell horizontal and vertical aligment, ... It can be applied for a single cell or multi cells
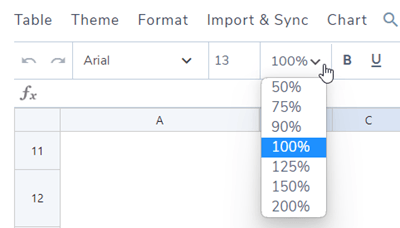
You can select the percentage for table editor. That means you can zoom in/out your table, the range from 50% to 200%.
The row height and column width can be defined in pixels. Please go to Menu Format > Apply column/line size, then select Resize column / Resize row. On the popup window, you can select range and set px for columns or rows. Click on Done buton to finish.
2. Themes and options
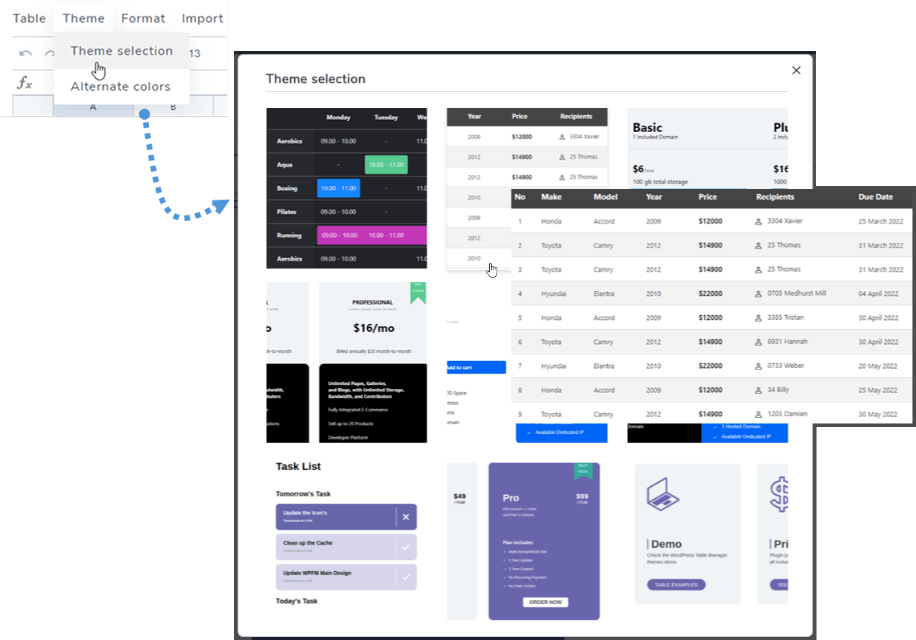
In each table, you can find Theme selection option at Menu Theme. Just click on a theme to apply it.
Alternate colors
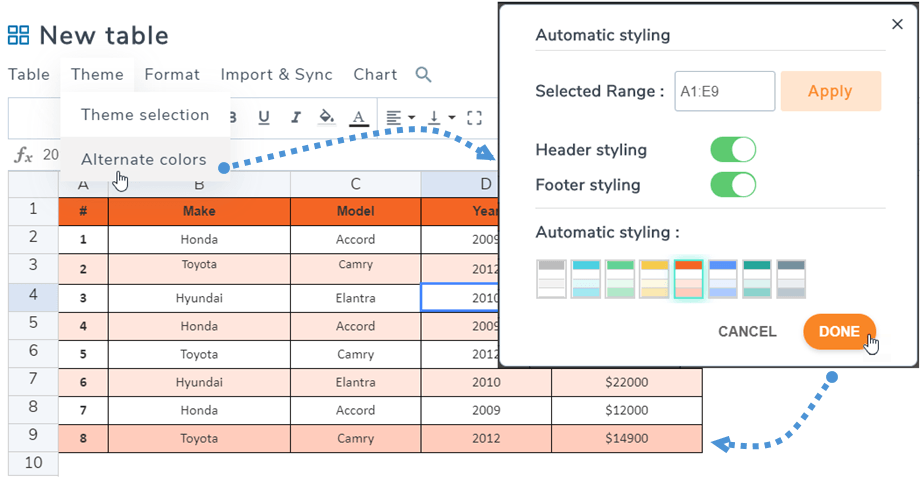
On the same Menu Theme > Alternate colors, the "Automatic styling" feature helps you color the line on your table with Header styling and Footer styling options. You can select the template styles or make your own at plugin settings.
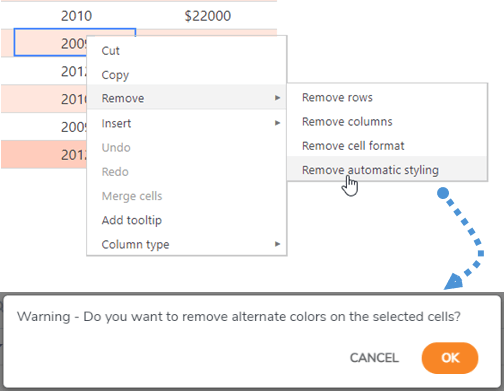
And you can remove the alternate color by clicking the "Remove > Remove automatic styling" option on the right-clicking menu. Then the color will be cleared after your confirmation.
Table align
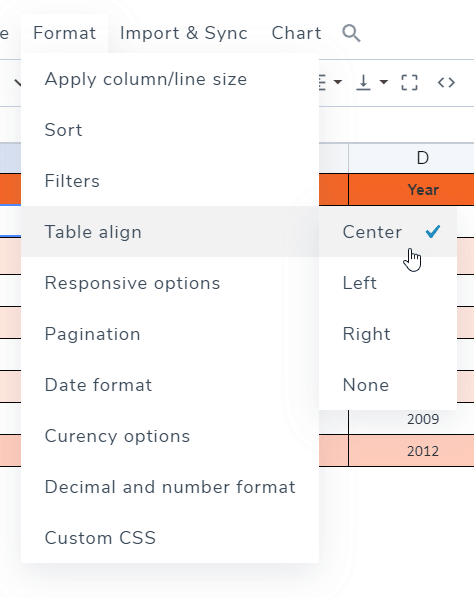
The table align is about align the div that contain the whole table, center all the table for example. You can find at Menu Format > Table align.
Cell highlighting
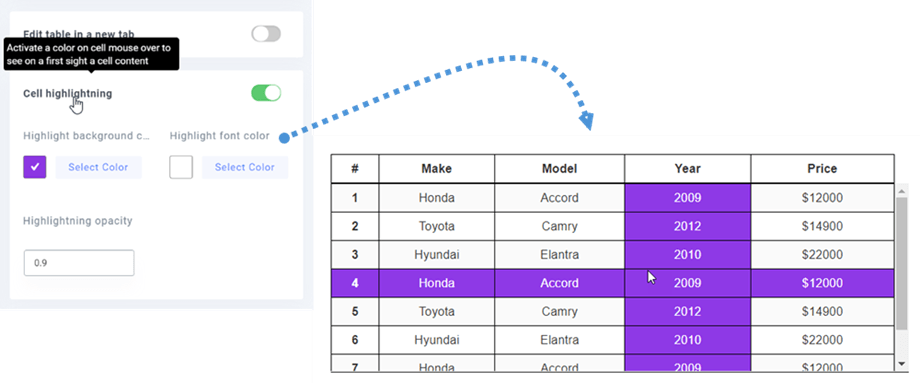
A cell highlight is also available as an option. You can enable this feature in the configuration. It is disabled by default. You can select highlight row to adjust color and opacity of highlighting.
3. Add tooltip on cells
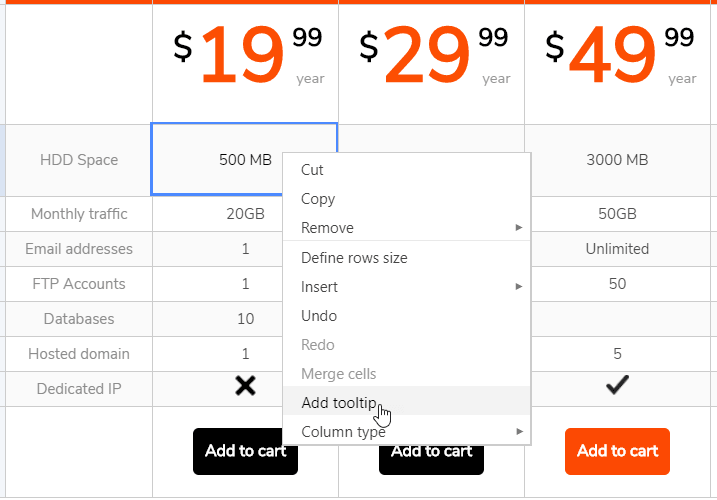
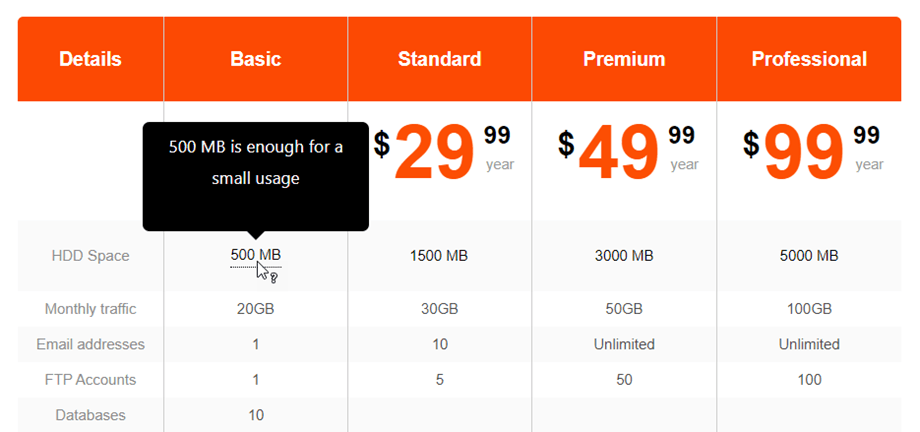
On each cell on a table, you can see the Add tooltip option when doing a right click on it.
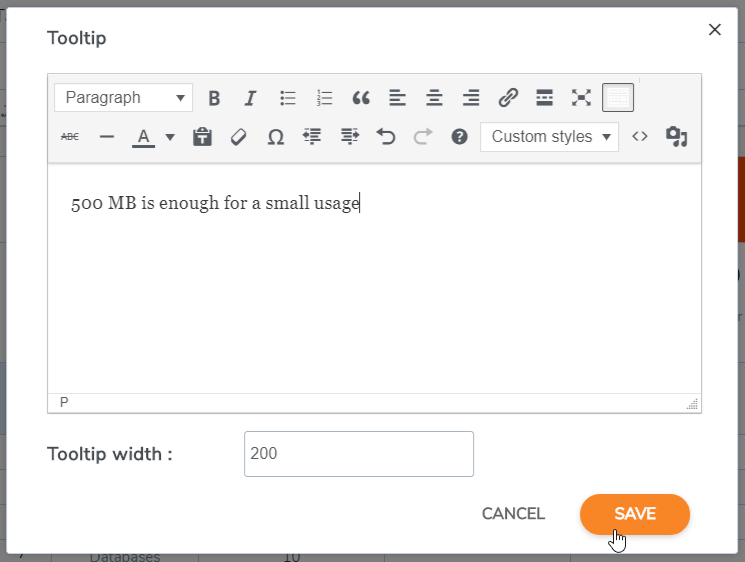
You can set the tooltip width in pixels. It will bring you to a tooltip with an editor to edit.
Add content and save, you’re done, the tooltip will be displayed on public side on mouse hover.
4. Row and column freezing
Column freezing
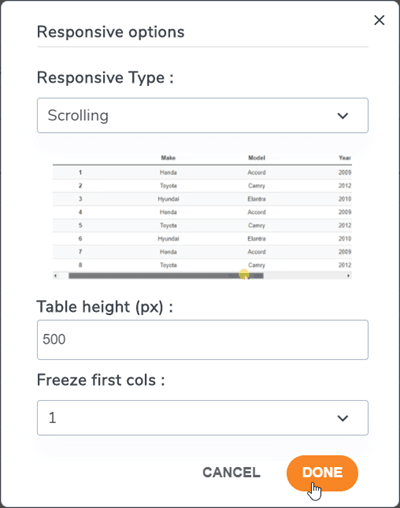
Column freezing is available in the Menu Format > Responsive options. You can freeze up to 5 columns. It's counted from the first col.
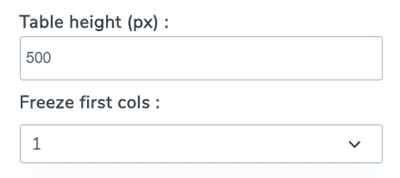
To make col/row freezing there’s an additional option that let you fix the height of the table (because your table container may have an infinite height).
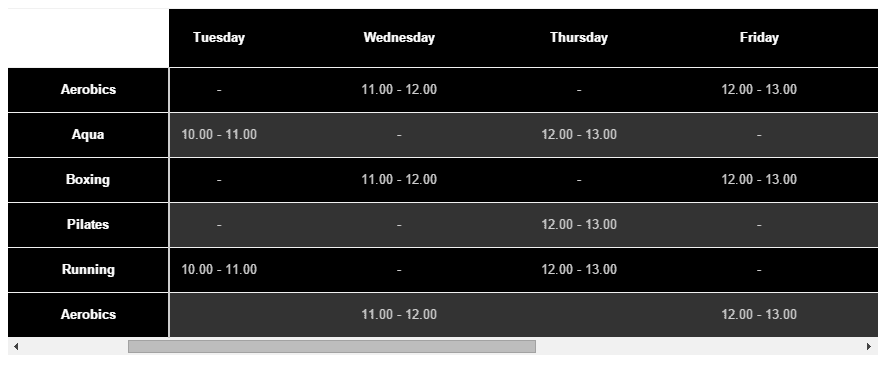
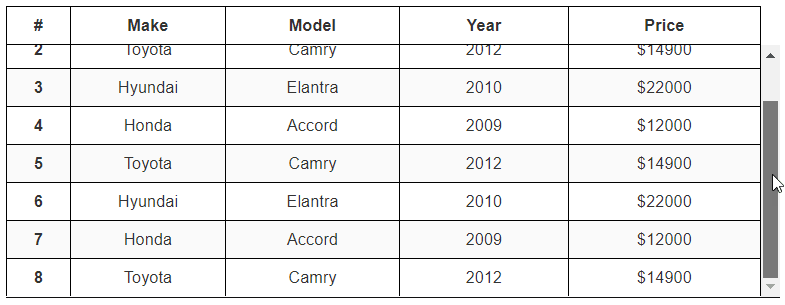
When you have chosen the column to freeze, you’ll be able to scroll on your table and always display the fixed column.
Row freezing
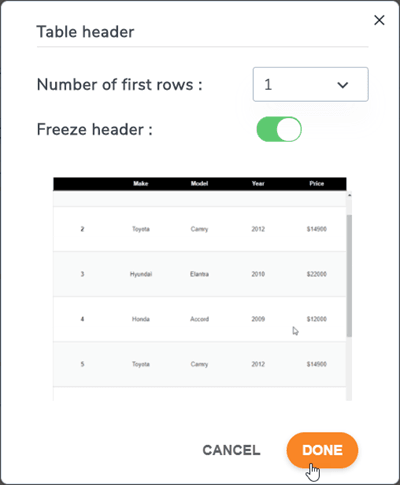
You can find it at Menu Format > Table header, from here you can turn on option and set rows to freeze (up to 5 rows).
If you want to set the table height, please turn back to Responsive options.
Then the first row will be frozen on frontend following the setting.
5. Sort and Filters
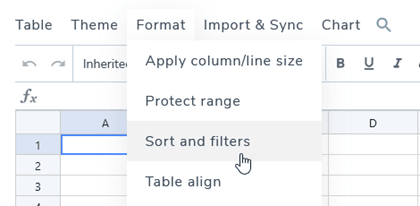
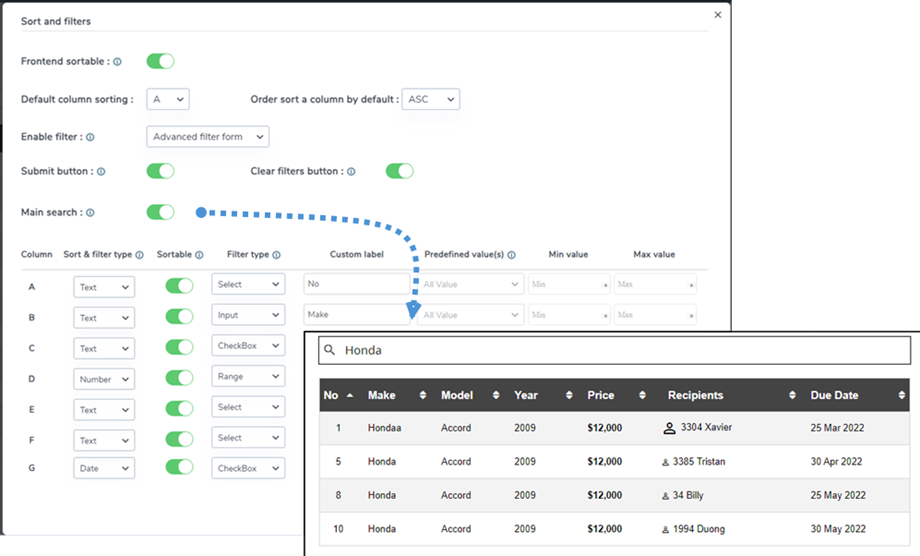
If you want to sort or filter your table, please navigate to Menu Format > Sort and filters option.
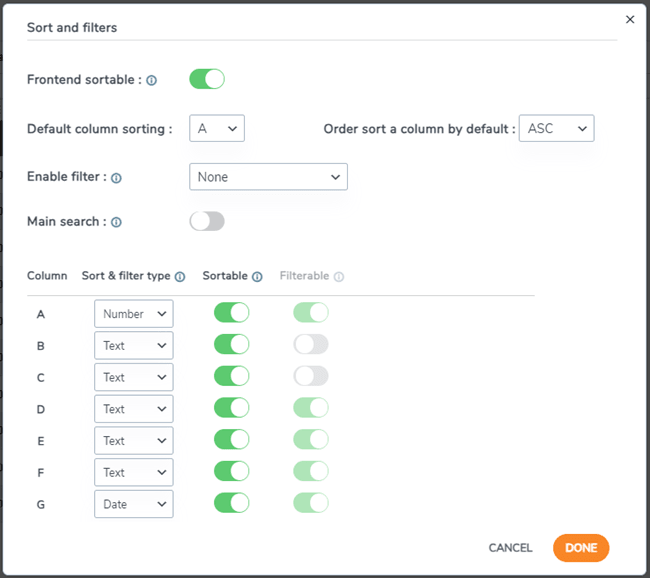
Then a popup appears containing sort and filter options.
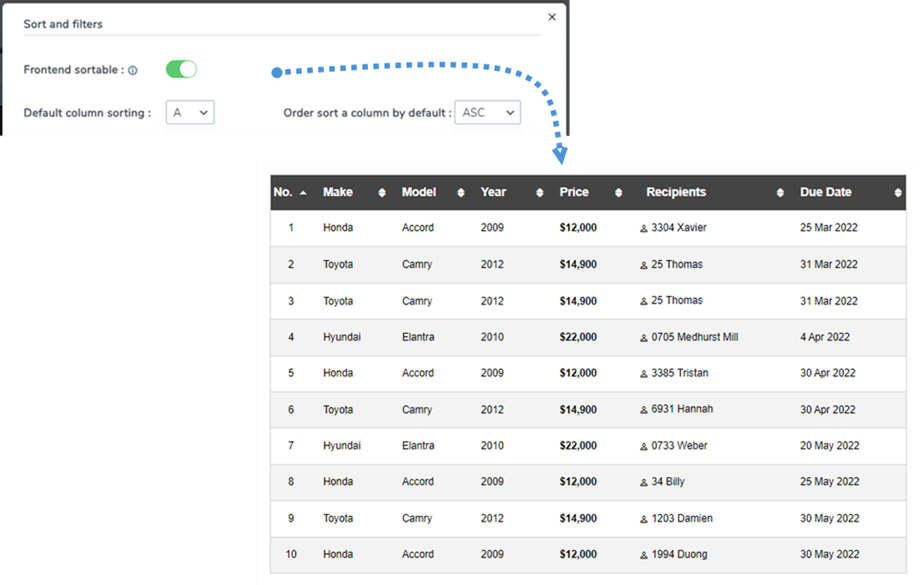
If you want to sort a table, simply enable Frontend sortable option. You can select a column for default sorting and its direction.
For example, in this case, select column A with ASC direction.
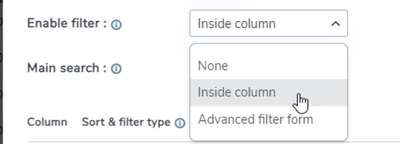
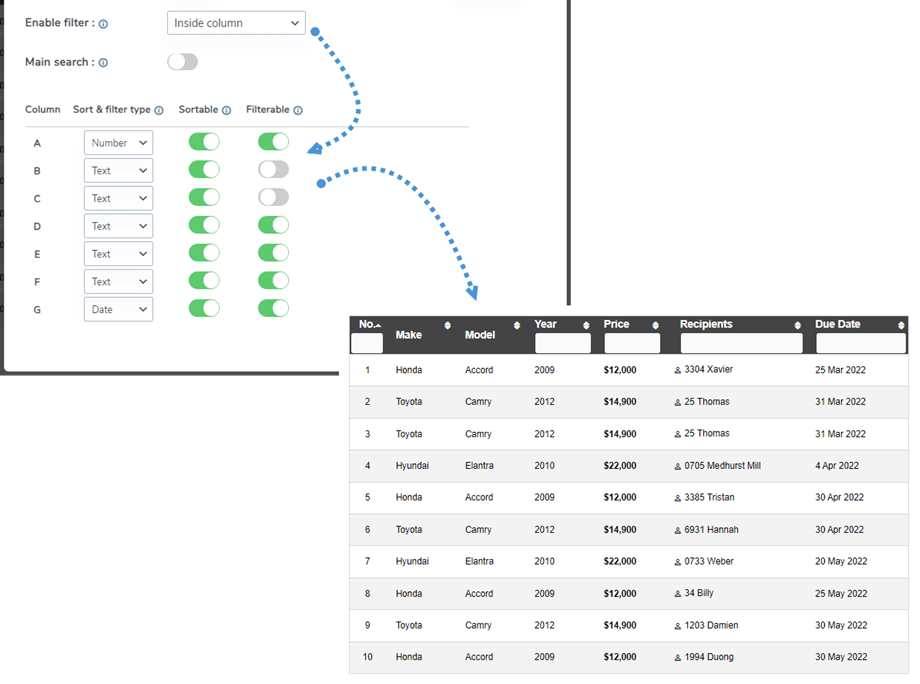
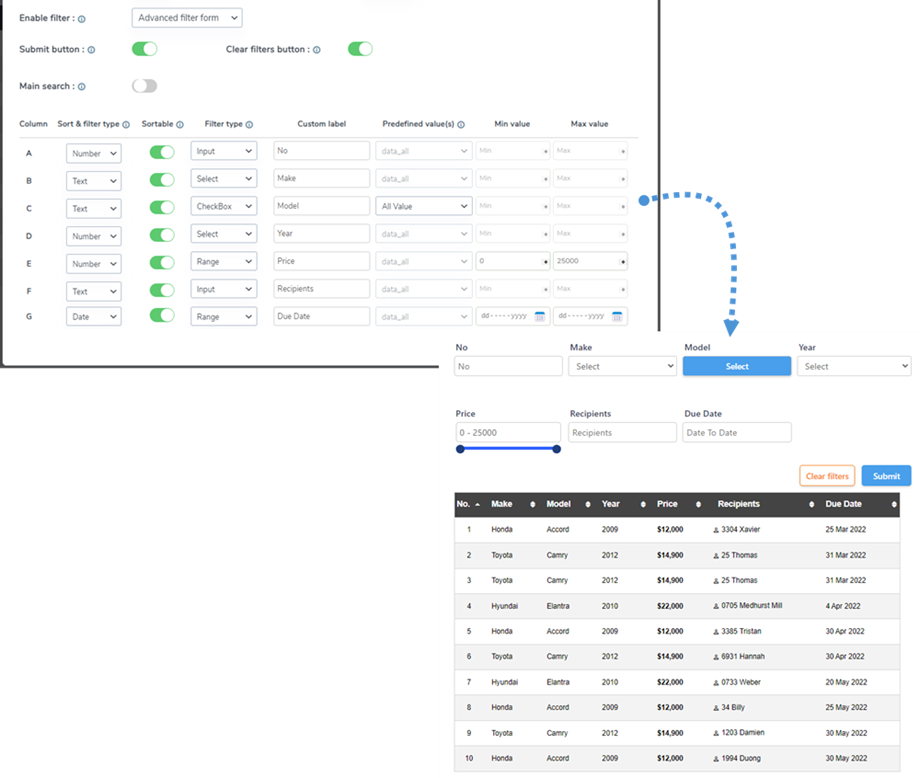
There are 2 options for filter:
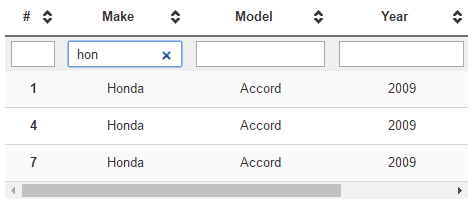
- Inside column: you can filter data at the header of each column. The toggle button will help you to show or hide the search field at the header.
- Advanced filter form: once the option is selected, you can search and filter data in a table
Main search: When you enable this feature, it will add a search input field on the frontend. This allows users to easily search through all the data in the table.
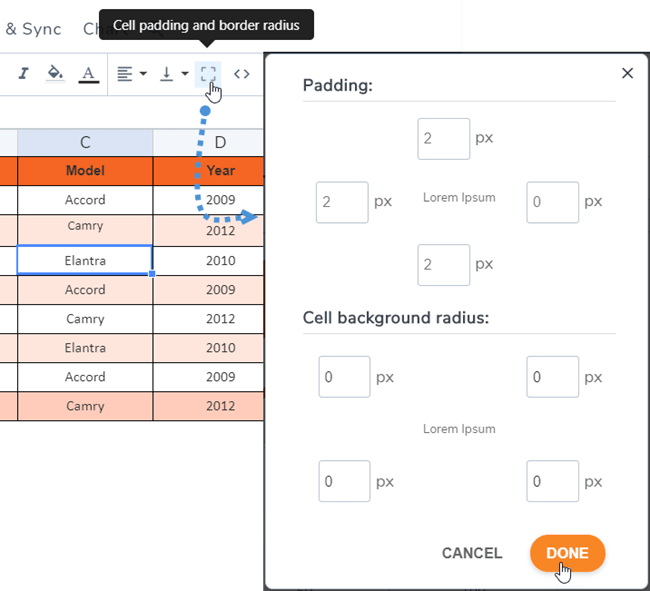
6. Cell padding and border-radius
You can find the border icon on toolbar that helps adjust padding and border radius on cell.
7. Custom CSS
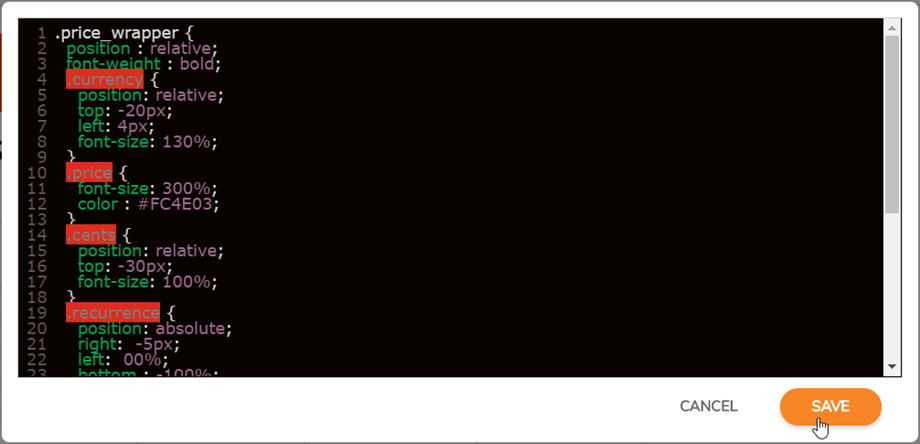
Let’s go one step beyond. If you’re a web designer with css skills you’ll be able to add css at Menu Format > Custom CSS.
The CSS code is colored using code mirror and can be written in less CSS, it works too!
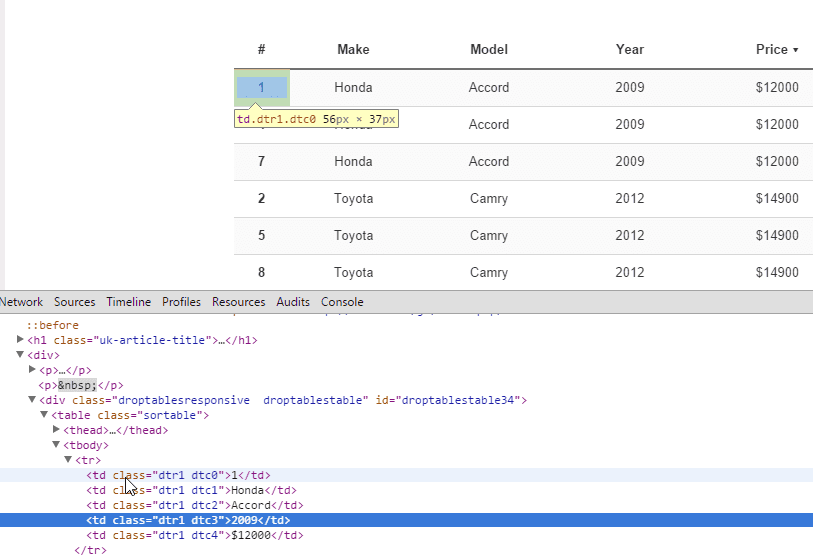
Cells, line, columns have coordinates to identify each one and apply custom css on it. R is row, C is column.
8. Responsive WordPress Tables
Are my tables responsive or use the scroll on small devices?
Hiding Cols
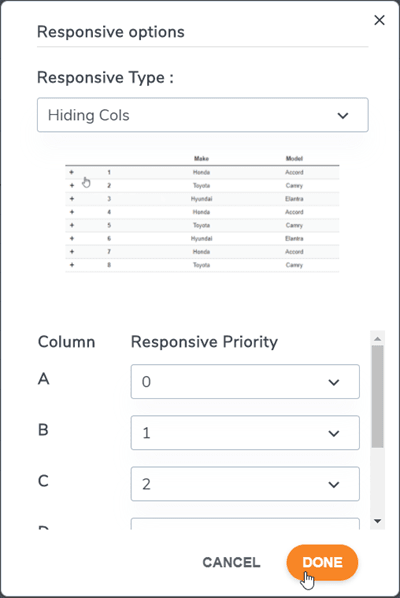
WP Table Manager handle the responsive design with a priority tool, as an option. By default the responsive feature is disabled, there will be an overflow (witch is working great on mobile though). In order to use Hiding Cols option, you should go to Menu Format > Responsive options.
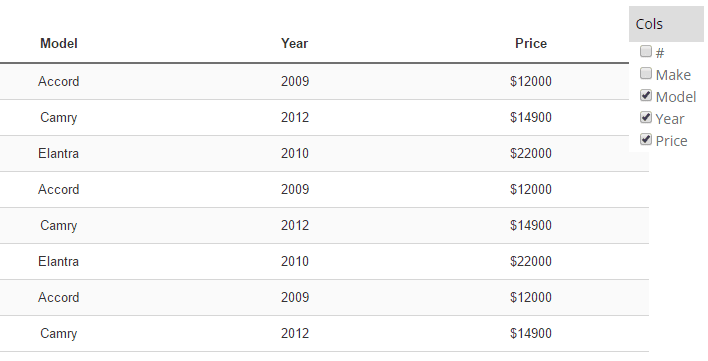
The responsive mode is advanced, you can define a priority for hiding columns on mobile sizes. When columns are hidden, a mobile menu with a check box will be displayed to force the display/hide of columns.
The column size is fixed during the table edition. If the size of all the columns is too large for the container you'll have an overflow and you'll be able to easily scroll on mobile devices.
Table with a scroll (better for a small amount of columns)
Table with column hidden (better for a big amount of columns)
Repeated header
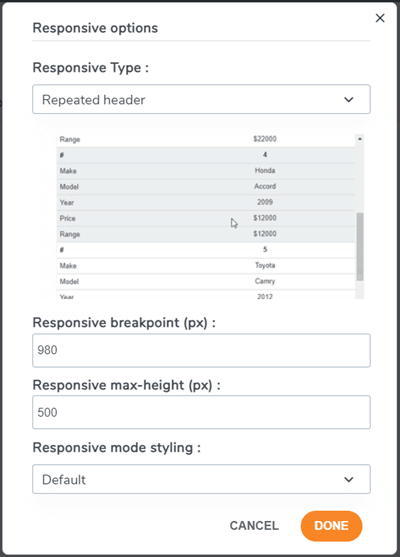
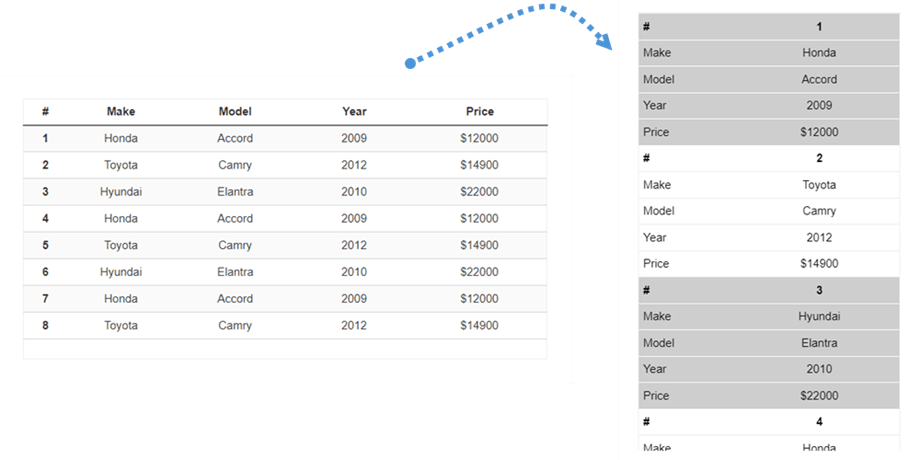
This is another option if you want to insert a table in a small area on your site. You should navigate to Menu Format > Responsive options. Then select Responsive Type > Repeated header.
There will be options to customize following your demand:
- Responsive breakpoint (px): Select a breakpoint value in pixel to define when the table will toggle to this responsive mode
- Responsive max-height (px): When the responsive mode is activated, depending on the breakpoint value, define a max-height to avoid a very-long table
- Responsive mode styling: Apply a default styling for this responsive mode or use the table colors
After that, you can see how the table will look like on frontend.
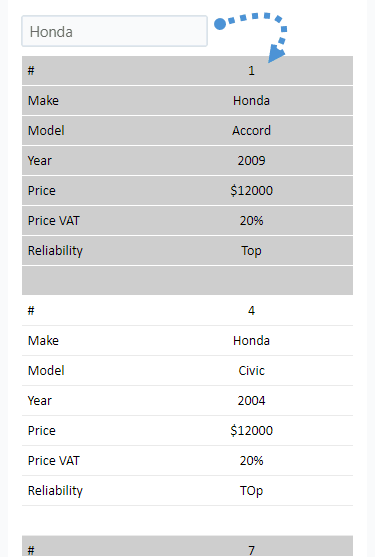
If you are using Repeated header and Filter option is enabled, you can filter by typing on the text box in mobile view.
9. Export to Excel
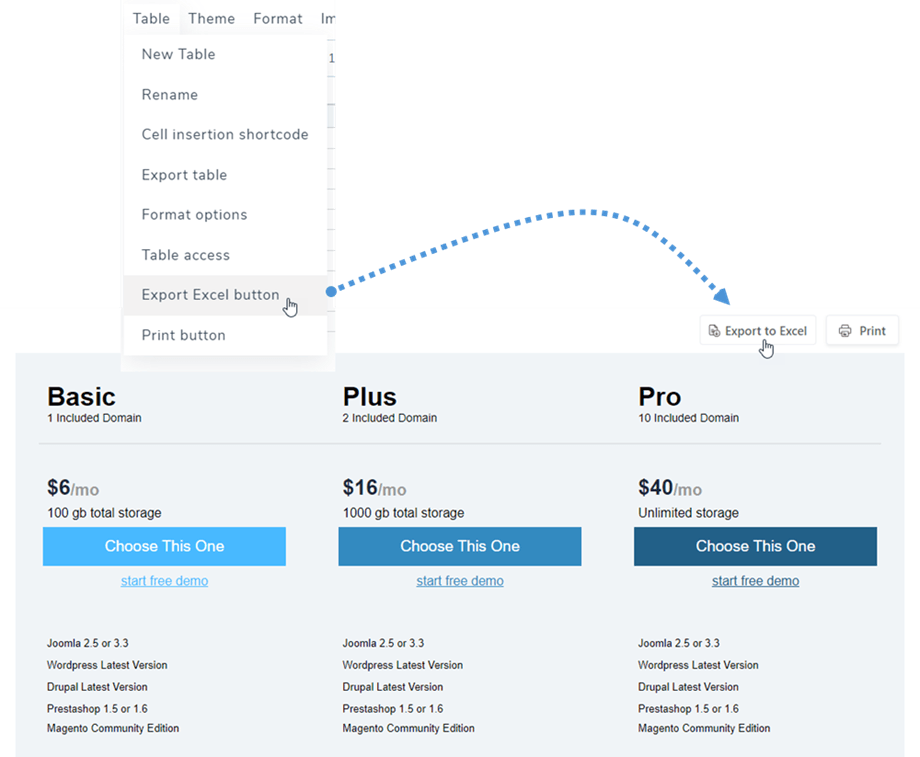
In order to save your table on your PC, you should go to Menu Table, and click on Export Excel button option. Then file type will be *.xlsx after exporting on frontend.
10. Pagination
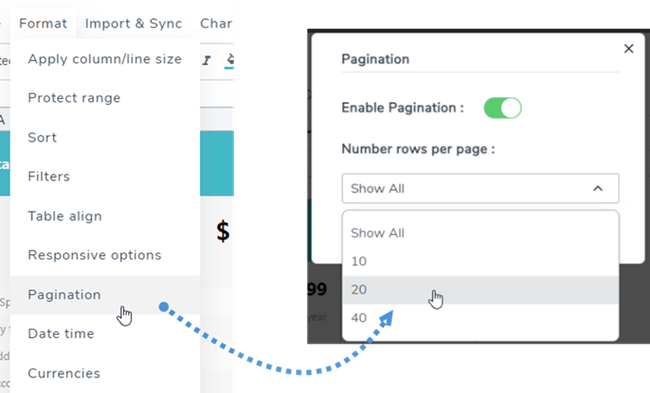
You can find this feature at Menu Format > Pagination in each table edition. Use the toggle button to enable and pick the number of rows to display on a page.
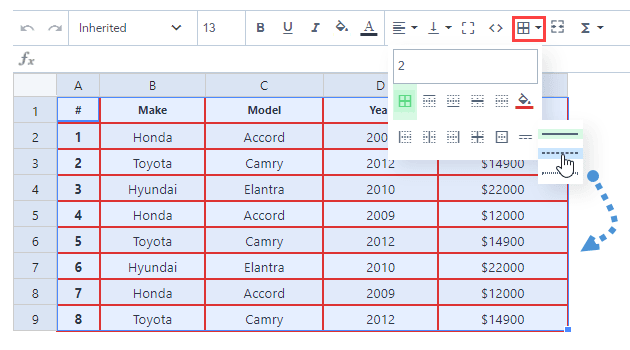
11. Cells border styling
You can apply border types for your table such as border width, border color, border style. First, selecting the cell range, then click on the icon on the Tool bar.
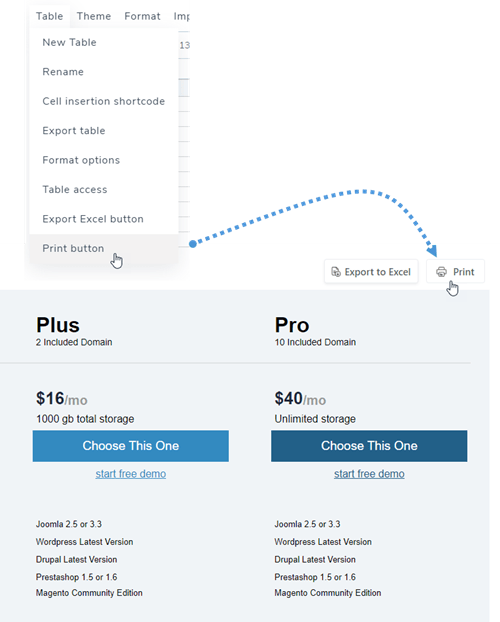
12. Print table on frontend
Sometimes, you need to print your table. So in order to show Print button on the frontend, first, you should navigate to Menu Table, and tick on Print button.

