WP Media Folder Addon: Bunny Storage Integration
1. Login to Bunny Storage from WP Media Folder
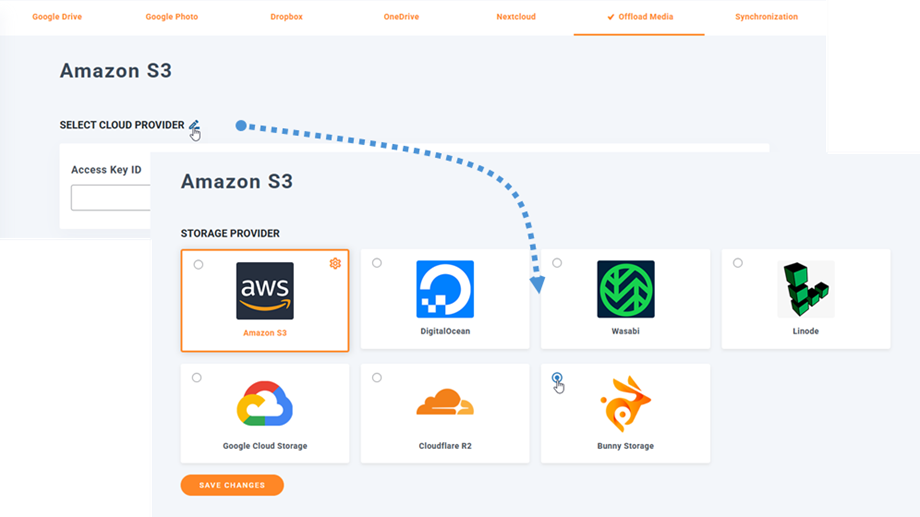
Return to the WordPress dashboard and click on the menu Settings > WP Media Folder > Cloud > Offload Media. Next, click the Edit icon at Select Cloud Provider and choose Bunny Storage.
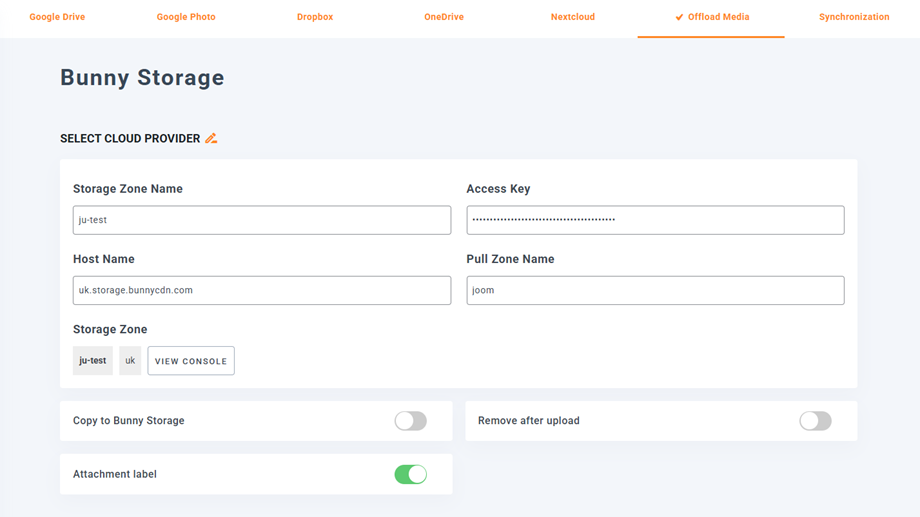
Then, paste the following into the form fields:
- Storage Zone Name: ju-test
- Access Key (Password)
- Host Name: uk.storage.bunnycdn.com
- Pull Zone Name: joom
After that, save the settings and the connection should be a success. Please go to the next step to discover Bunny Storage features.
2. How does it work? What can I do with Bunny Storage?
How does it work?
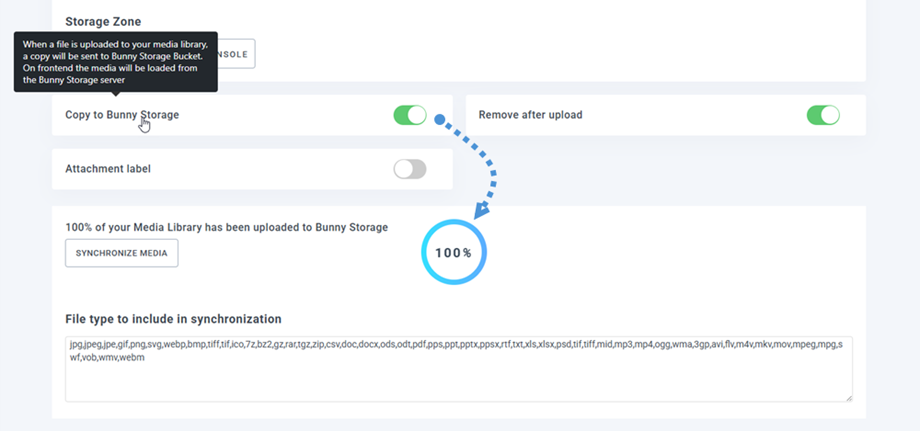
Once you've connected WP Media Folder with Bunny Storage, you can enable Copy to Bunny Storage option, and all your new media uploaded will be sent to Bunny Storage.
If you want to sync your uploaded media before using Bunny Storage integration, click on Synchronize Media button. Then it will send all your existing media library to your Bunny Storage bucket.
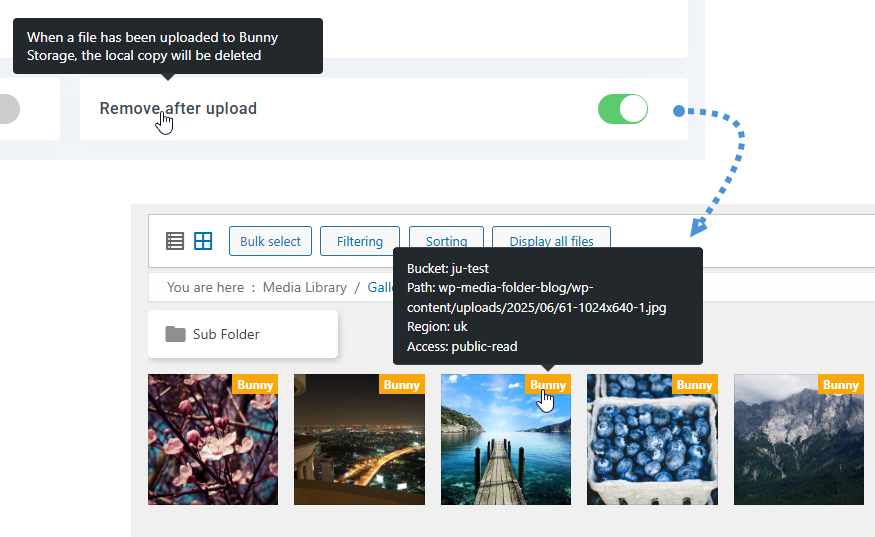
In order to offload the media on your site, you should enable Remove after upload option, your media library will be completely stored on Bunny Storage instead of your server.
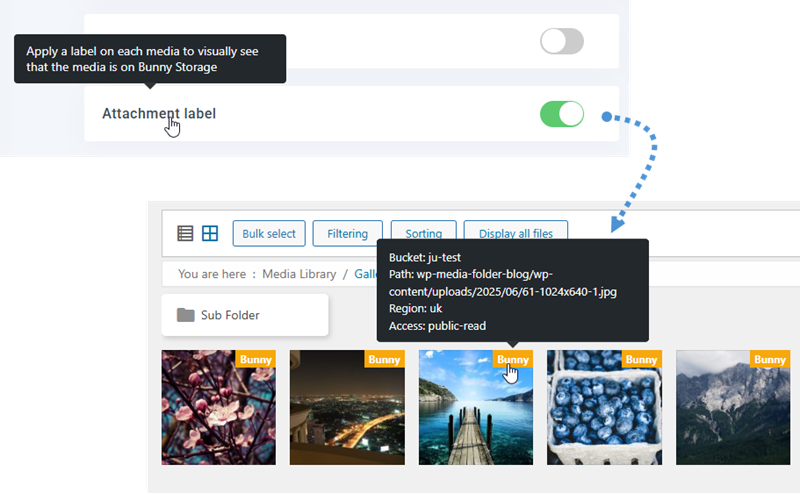
By enabling Attachment label option, the information on each media will be displayed when you hover on the Bunny Storage label on the top right.
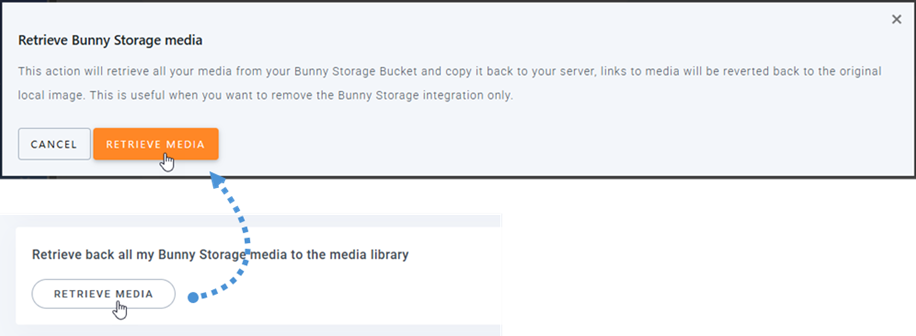
When you want to change your media location or remove the plugin, click Retrieve Media button, then all your media will be copied from Bunny Storage to your media library. All former link added in your content will remain in place (no broken link).
Advanced settings and actions
You can import folders and files from Bunny Storage server to your Media library.
3. Create Storage Zone and Pull Zone
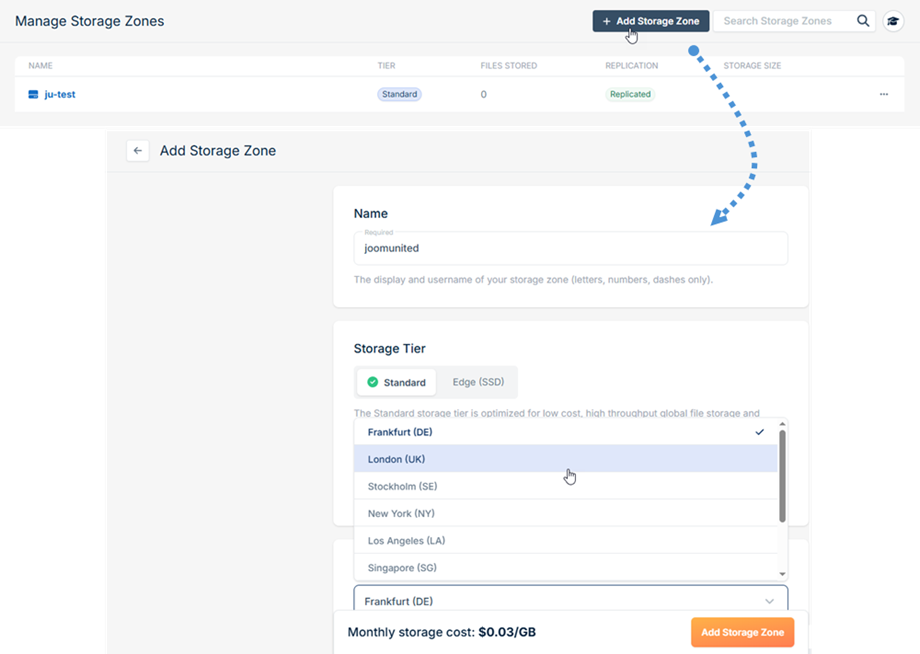
First, you should login to Bunny Storage. Once logged in, navigate to Delivery > Storage from the left-side panel. In the Manage Storage Zones section, click the Add Storage Zone button to create a new storage zone.
Complete the following fields:
- Name: Enter a descriptive name for your storage zone
- Region: Select the appropriate geographical region for your storage needs
After filling in the required information, click the Add Storage Zone button at the bottom of the form to create your new storage zone.
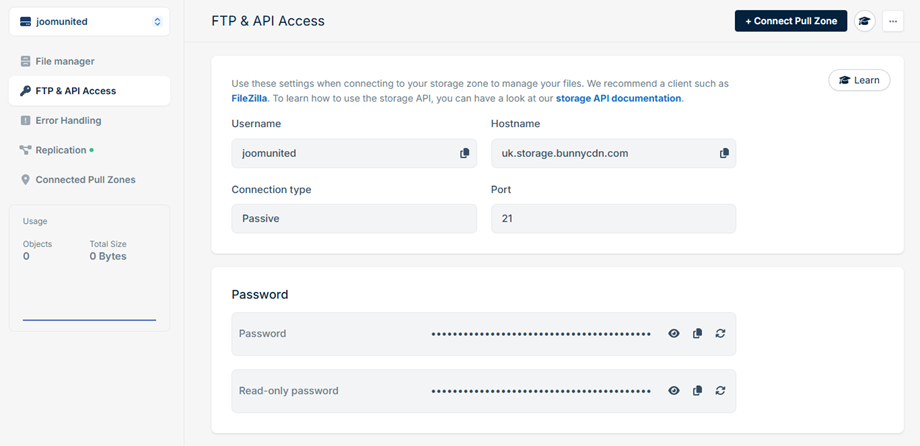
Then navigate to FTP & API Access setction to get the credentials.
- Username: Storage Zone Name
- Hostname: Host Name
- Password: Access Key in the WP Media Folder setting.
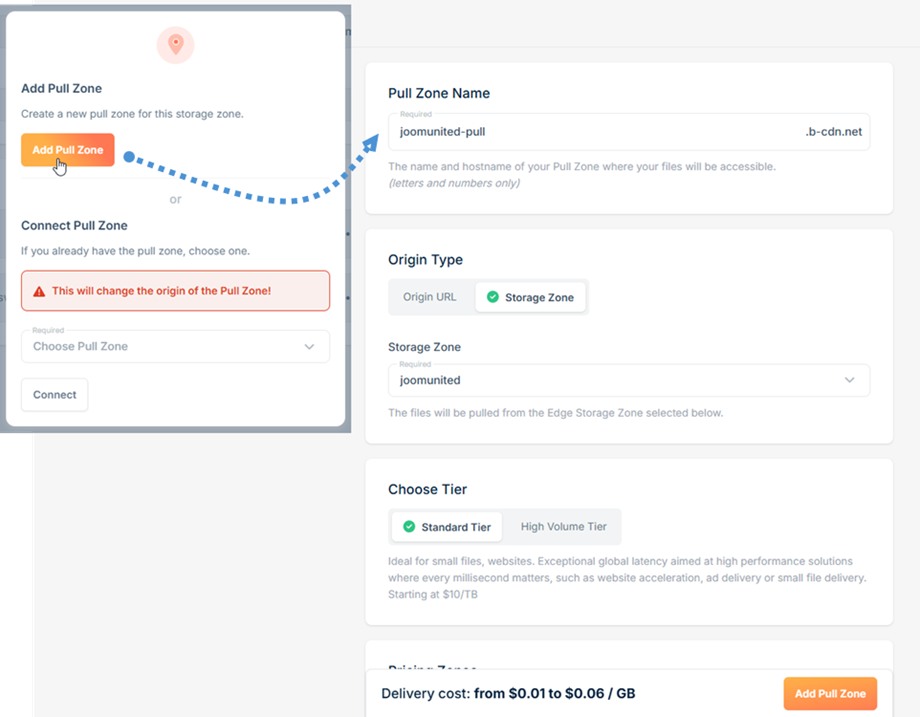
To complete your Bunny Storage connection in the WP Media Folder plugin, you'll need to configure one additional parameter by setting up a Pull Zone. Click on Connect Pull Zone button located at the top of the page. A popup window will appear with two options:
- If you already have an existing pull zone, select it from the list and click Connect.
- If you need to create a new pull zone, click Add Pull Zone.
When creating a new pull zone, you'll be directed to the Add Pull Zone page. Enter your desired Pull Zone Name in the designated field. This name will be used for the connection settings in WP Media Folder's Bunny configuration. Click the Add Pull Zone button at the bottom to complete the setup.
Once completed, your pull zone will be ready for use with the WP Media Folder plugin's Bunny Storage integration.
