WP Media Folder Addon: Google Cloud Storage Integration
1. Create a Google Drive App
The Google Cloud integration with WP Media Folder is included in the Add-on. You need to install this add-on (plugin) in addition to WP Media Folder. The add-on includes integration for Google Drive, Google Photo, Dropbox, OneDrive Personal, OneDrive Business, Amazon S3, DigitalOcean, Linode and Wasabi too.
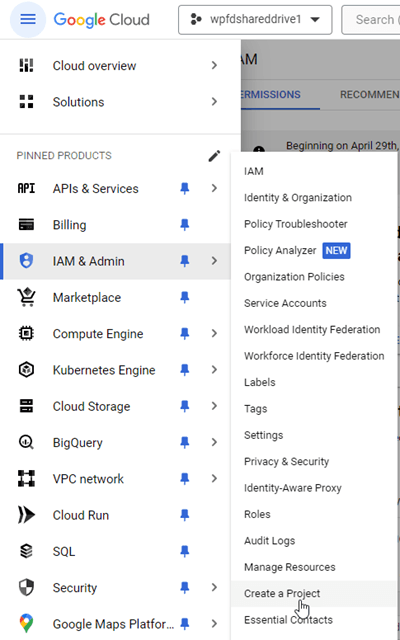
First, you need to log in to Google Cloud Console or sign up if you don't have a Google account. Navigate to Menu IAM & Admin > Create a project.
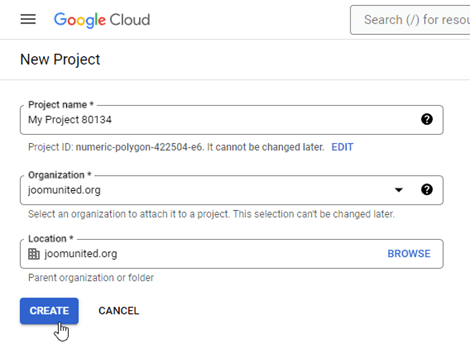
Then set up a project name - you can provide any name you want, but do not include spaces or accents. Then wait few seconds for the project creation.
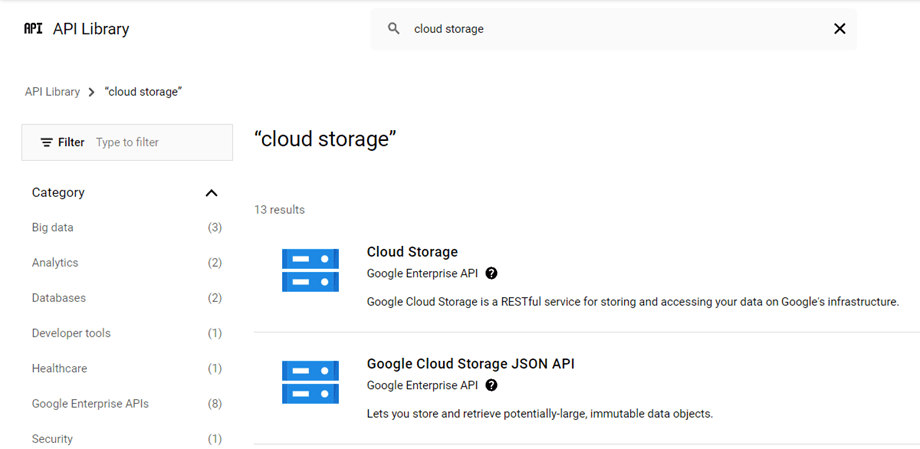
If it's the first time you're using the Google Cloud Storage, you should navigate to APIs & Services > Library, enable Cloud Storage and Google Cloud Storage JSON API.
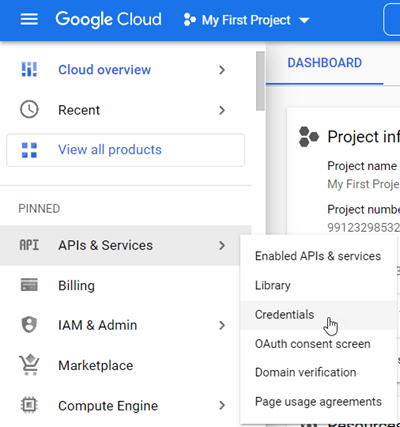
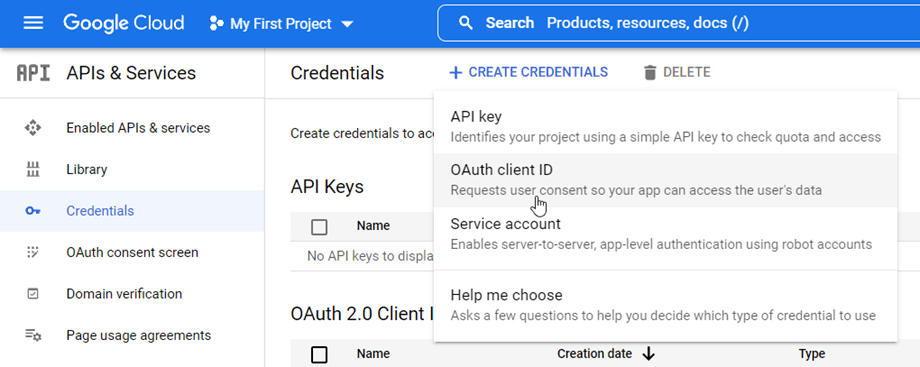
From the left menu, click on “APIs & Services” > “Credentials”.
On the main panel, click “+ New Credentials” >> OAuth client ID; if asked, add a name to your OAuth consent screen.
Now, the most important step:
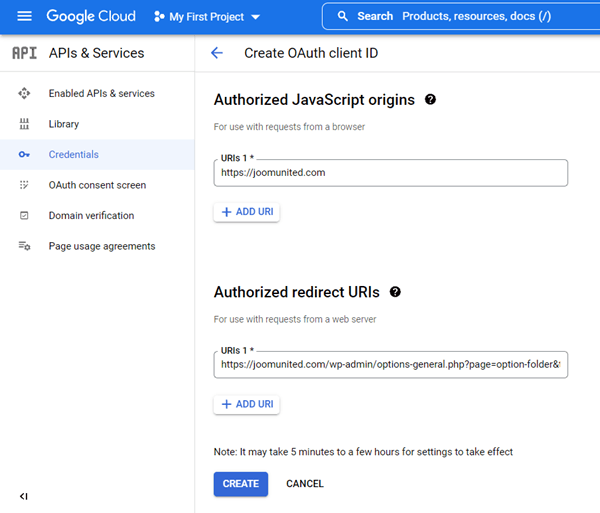
- Select “Web application” and add a name of your choice
- Authorized JavaScript origin: https://your-domain.com (replace by your domain name, with no trailing slash)
- Authorized redirect URIs: https://your-domain.com/wp-admin/options-general.php?page=option-folder&task=wpmf&function=wpmf_google_cloud_auth
(replace by your domain name)
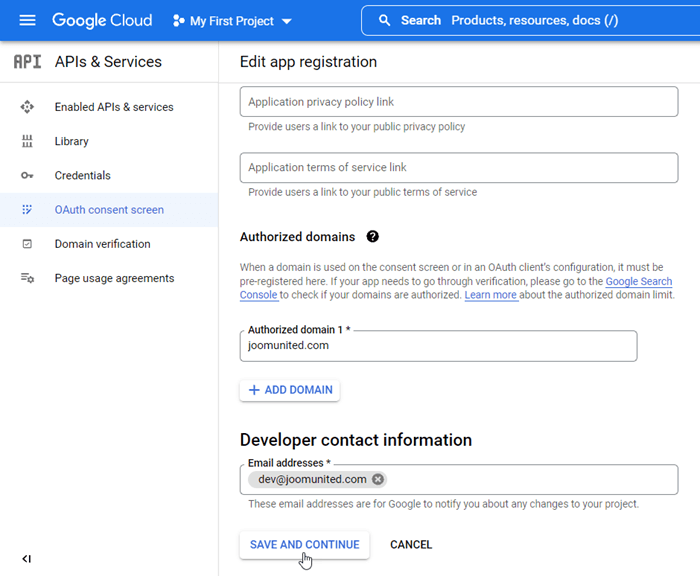
Note: if this warning appears: "To create an OAuth client ID, you must first set a product name on the consent screen" you should click on Configure consent screen button or go to APIs & Services >> OAuth consent screen, then add your domain name at Authorized domains.
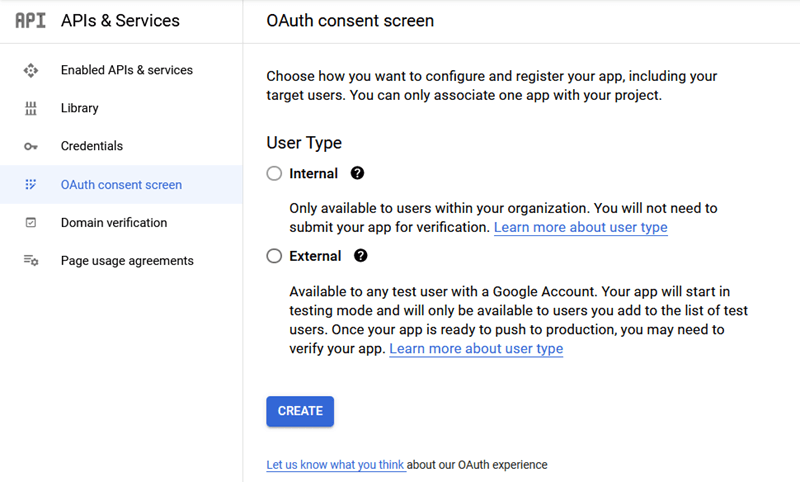
First, you need to select User Type.
- Internal: your app is limited to Google Workspace users within your organization. You will not need to submit your app for verification
- External: your app will be available to any user with a Google account. Once your app is ready to publish, you may need to verify your app.
Then, fill your authorized domains and continue with the following steps to finish the app registration. Now you can be back to the previous step: Select “Web application” to create the credentials.
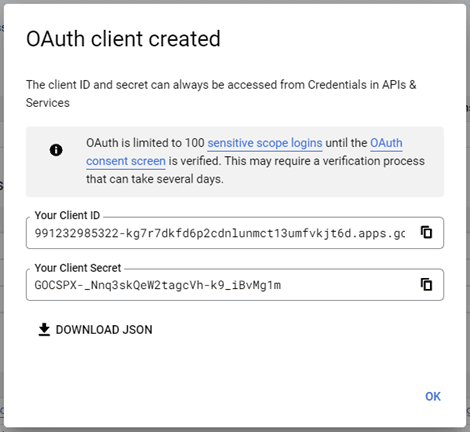
Then… voilà! You got your ID and Secret to add in WP Media Folder's configuration.
Create a bucket
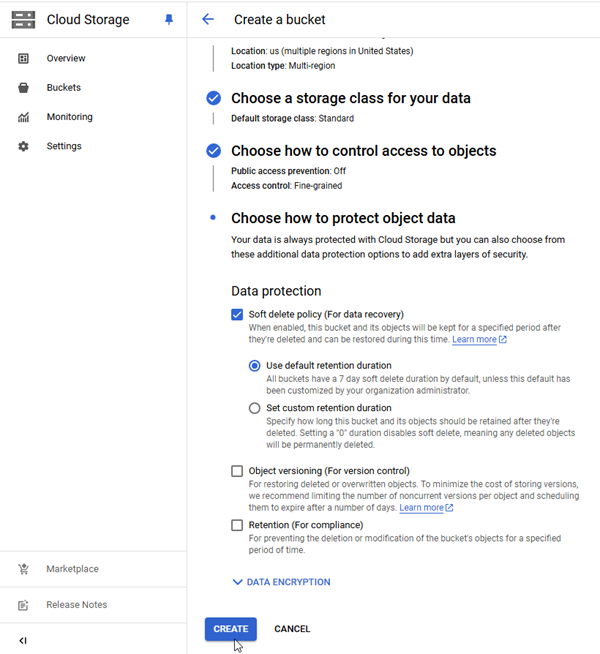
In order to use Google Cloud, you should create a new bucket. Please go to the bucket area: Cloud Storage Buckets. Then click on Create button.
Next, you should fill the options below:
- Input bucket name
- Choose where to store your data
- Choose storage class for your data
- Choose a default storage class for your data
- Choose how to control access to objects (Public access prevention: Off, Access control: Fine-grained)
- Choose how to protect object data
After that, click on the Create button. A few seconds after loading, then you can see the bucket detail information:
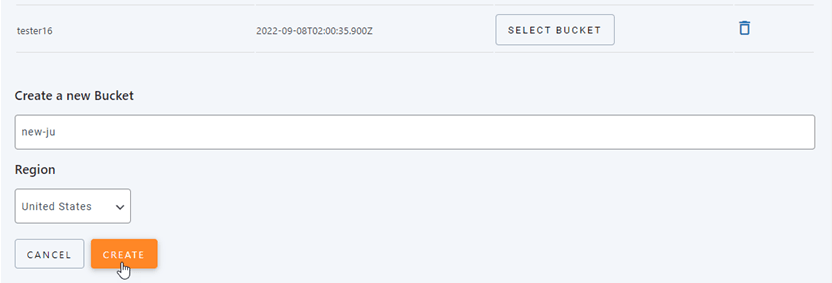
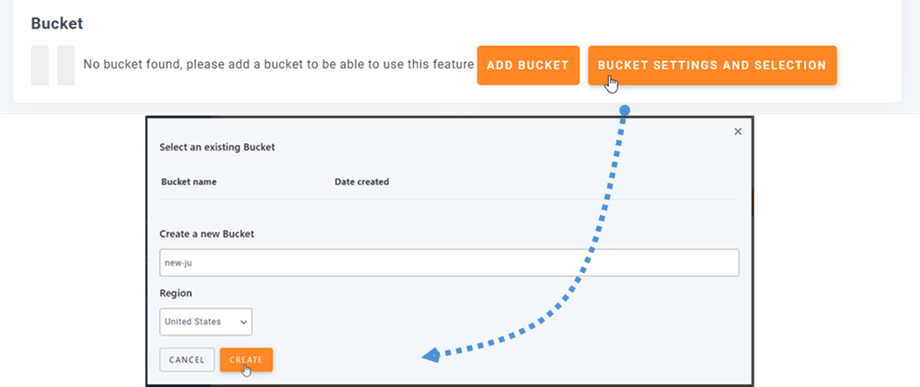
Or you can create s new bucket in WP Media Folder settings. Navigate to menu Settings > WP Media Folder > Cloud > Offload Media > Google Cloud Storage, click on Bucket settings and selection button. At the bottom of the popup, input the bucket name and click on Create button.
2. Login to Google Cloud Storage from WP Media Folder
Return to the WordPress dashboard and click on the menu Settings > WP Media Folder > Cloud & Media offload. Next, click the Change button at Google Cloud Storage section.
Then, paste the following into the form fields:
- Access Key ID
- Secret Access Key
- Project ID
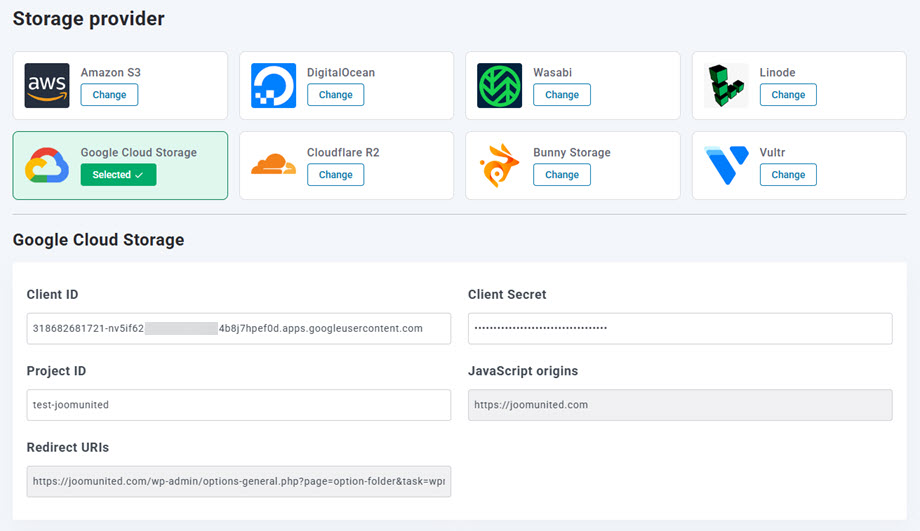
After that, save the settings and the connection should be a success. Please go to the next step to discover Google Cloud Storage features.
3. How does it work? What can I do with Google Cloud?
How does it work?
Once you've connected WP Media Folder with Google Cloud Storage, and please select a bucket or create a new one where all your data will be stored.
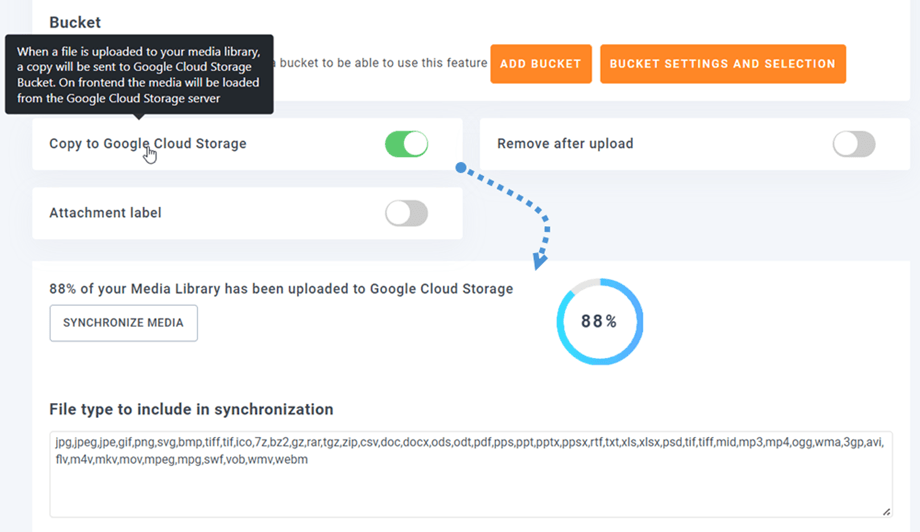
And you can enable Copy to Google Cloud Storage option, all your new media uploaded will be sent to Google Cloud.
And if you want to sync your uploaded media before using Google Cloud Storage integration, click on Synchronize with Google Cloud Storage button. Then it will send all your existing media library to your Google Cloud bucket.
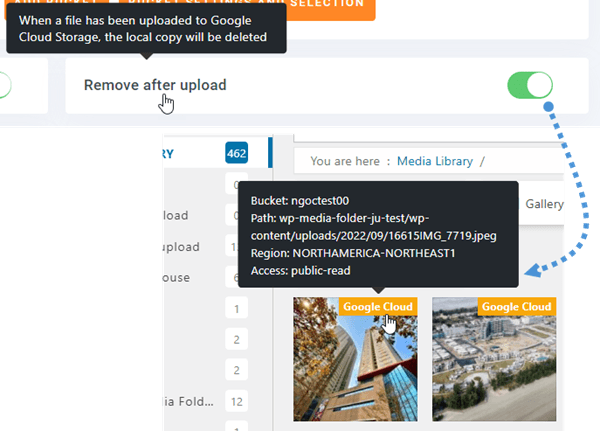
In order to offload the media on your site, you should enable Remove after upload option, your media library will be completely stored on Google Cloud instead of your server.
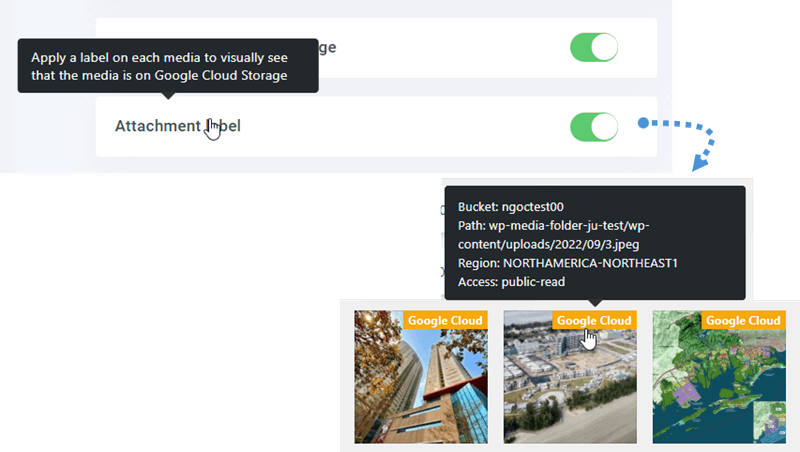
By enabling the Attachment label option, the information on each media will be displayed when you hover on the Google Cloud label on the top right.
When you want to change your media location or remove the plugin, click on Retrieve Google Cloud Storage Media button, then all your media will be copied from Google Cloud Storage to your media library. All former link added in your content will remain in place (no broken link).
How to connect CDN?
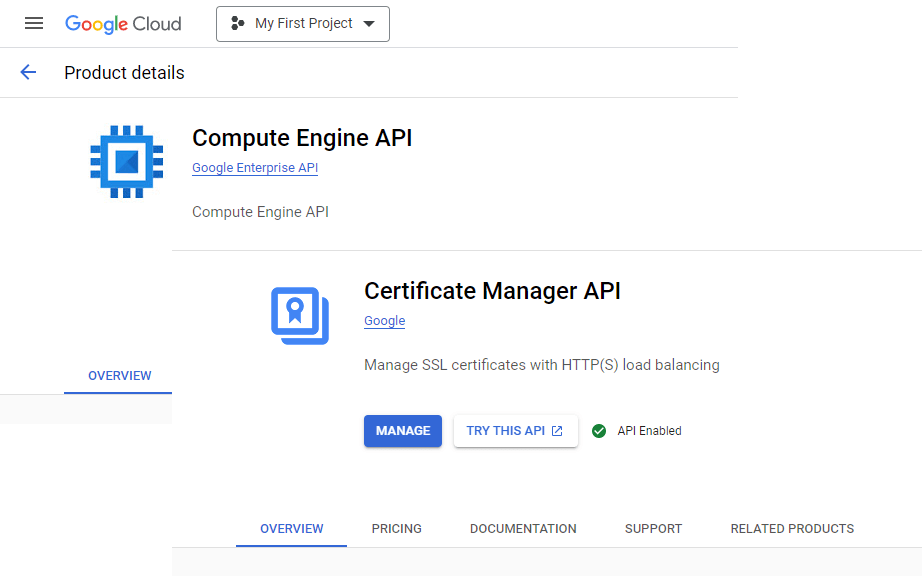
Google Cloud CDN is integrated with our plugin. In order to create a custom domain (CNAME), firstly, you should enable Compute Engine API and Certificate Manager API in Library section.
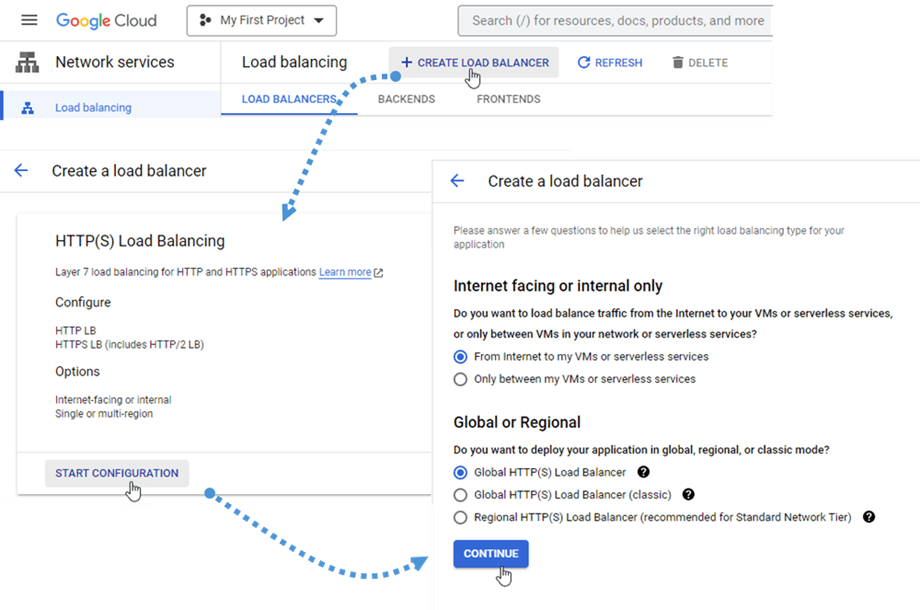
After that, navigate to Load balancing under Network services section or go to this link. Next, click on Create Load Balancer button, and select Start Configuration button. Then click on Continue button.
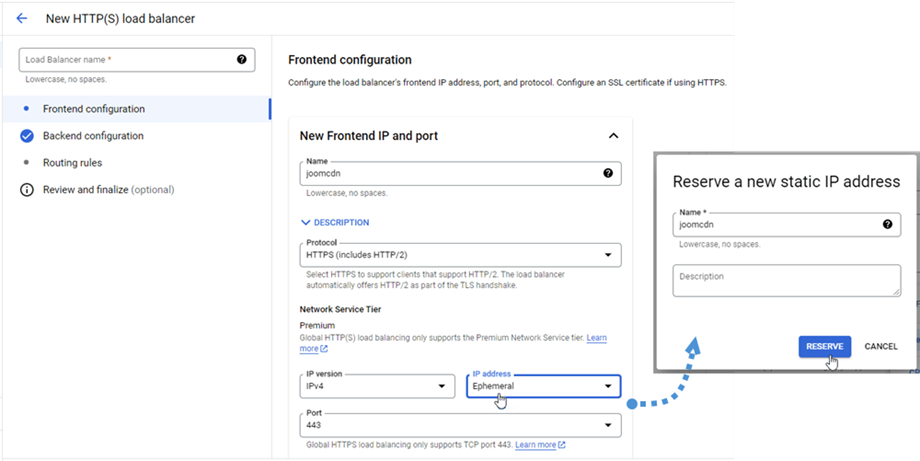
At Frontend configuration, Input text on the Name field (Lowercase, no spaces). Select HTTPS (includes HTTP/2) option in Protocol field. Then click on IP Address field > Create IP Address.
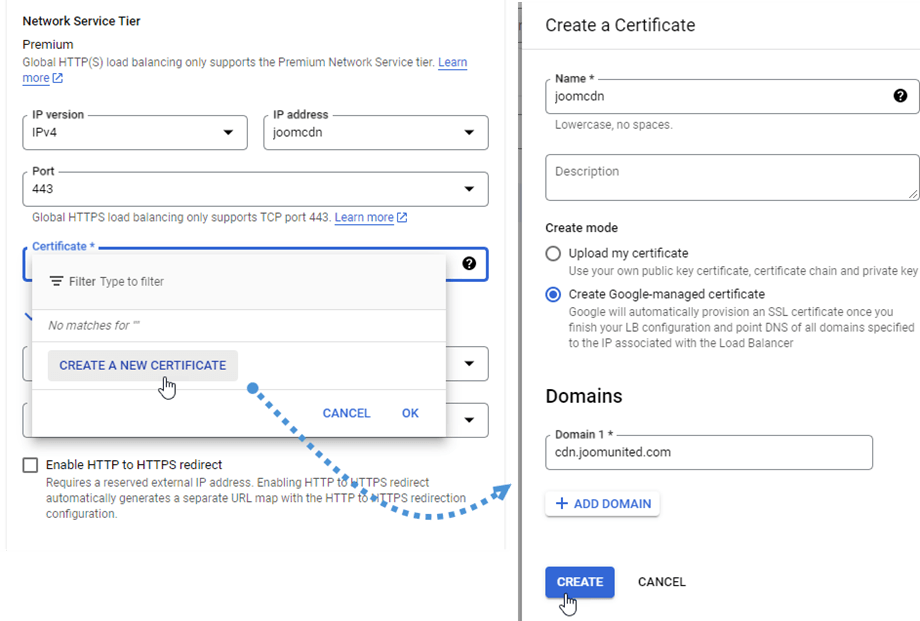
Then click on Certificate field > Create a new certificate. On the popup "Create a certificate", input text on Name field, choose "Create Google-managed certificate" in Create mode. Next, input your domain on the Domains field. e.g: "cdn.joomunited.com". After all, click on Done button.
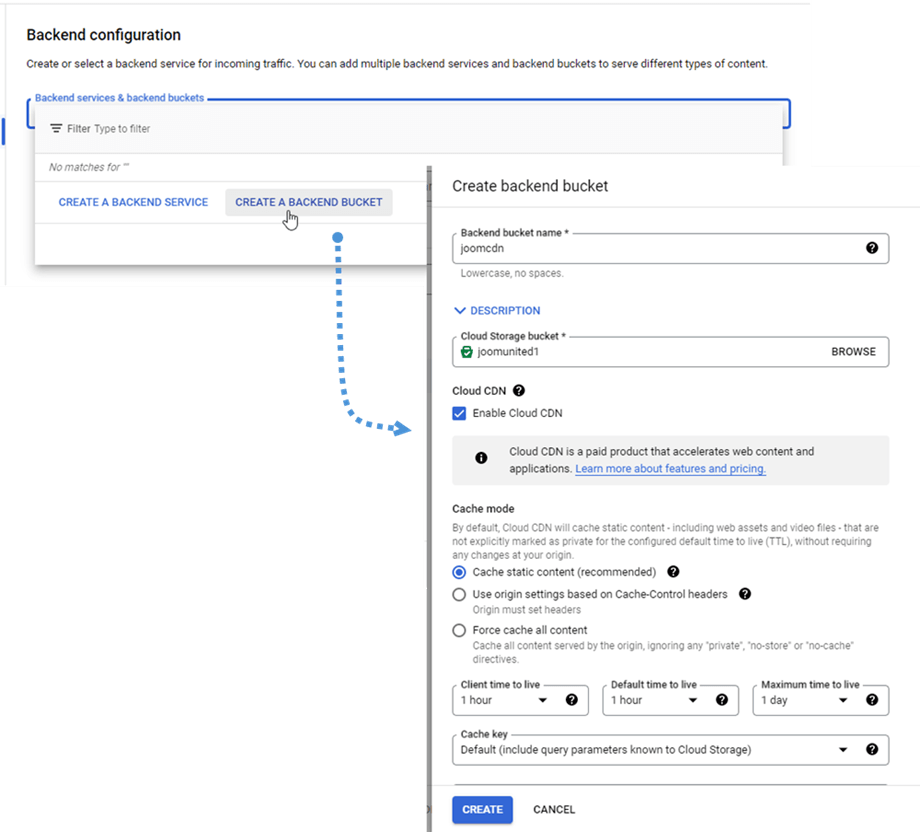
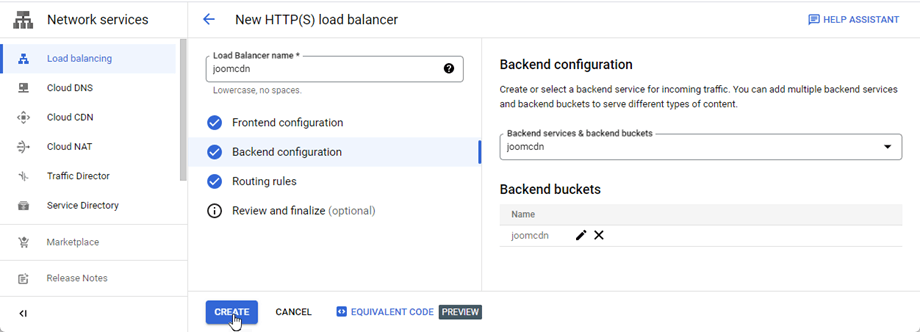
Next, we will navigate to Backend configuration section, click on Backend services & backend buckets > Create a backend bucket. Then on the popup, fill Backend bucket name field, select a bucket at Cloud Storage bucket field. Then click on Create button.
After all, click on Create button.
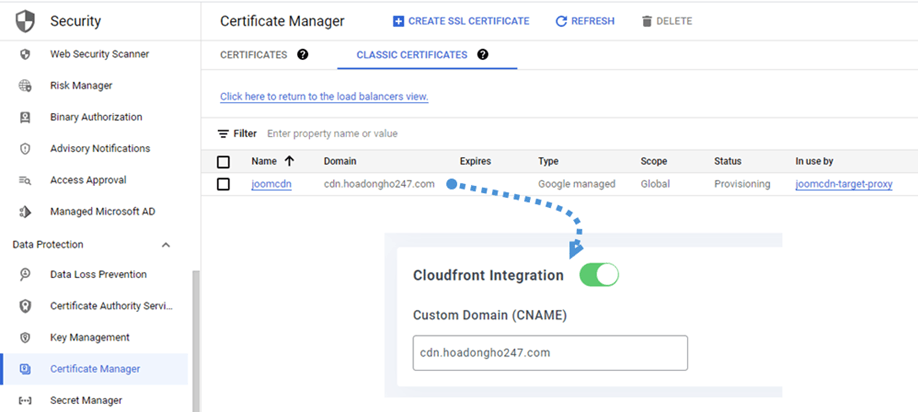
Then navigate to Security > Certificate Manager > Classic Certificates tab, copy the Domain field, and paste it to the Custom Domain (CNAME) field on Google Cloud Storage setting. For example in this case: "cdn.hoadongho247.com".
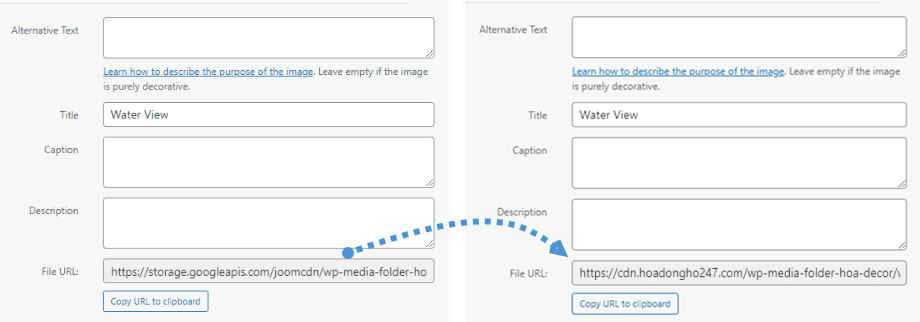
Finally, you can see the changes in File URL field in each image.
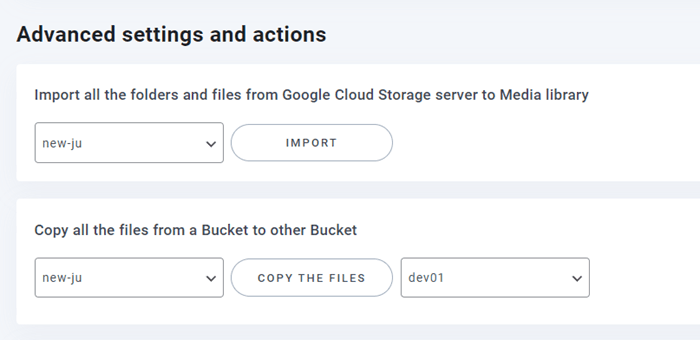
Advanced settings and actions
You can select a bucket to import folders and files from Google Cloud Storage server to your Media library. Or copy all files from one bucket to another one.
