WP Media Folder Gallery Addon: Common Use
1. Add a gallery to a post or page
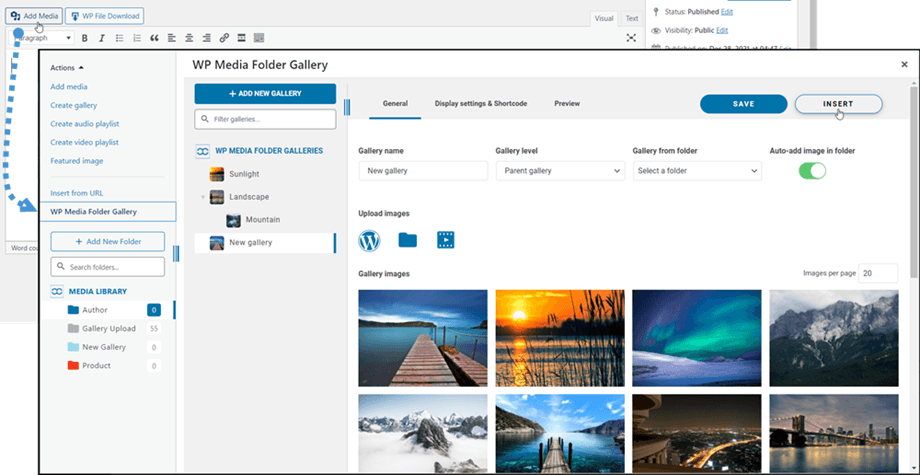
In order to add galleries to a post or page, you need to click the Add Media button in the Editor. The WP Media Folder Gallery's main view appears, from where you can choose the gallery. Next, press the Insert button.
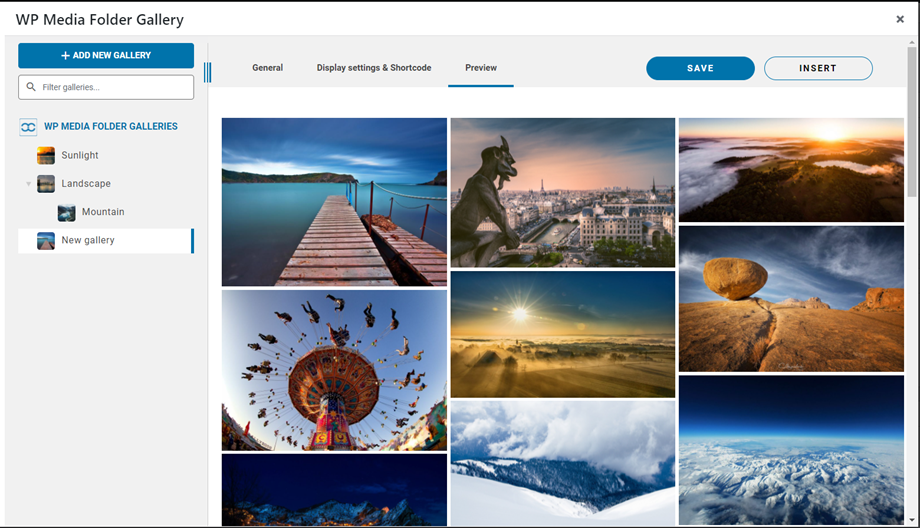
Then you can take a look at the gallery by navigating to Preview tab before inserting the gallery into your post/page.
The gallery will be shown in the editor as a dark grey area.
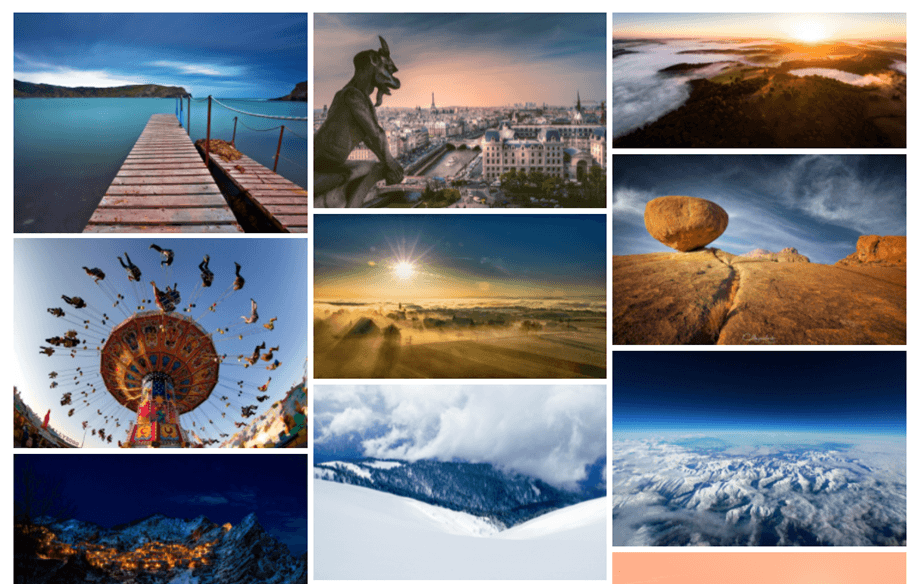
Save your content and the gallery should be displayed on the public part.
The first time you insert your gallery in your content, you need to save your content.
If you click on WP Media Folder Gallery's dark grey area in your editor, then click again the Edit button, you’ll simply open back your gallery for further changes.
Then save your page or post... and you're done - you've added a gallery!
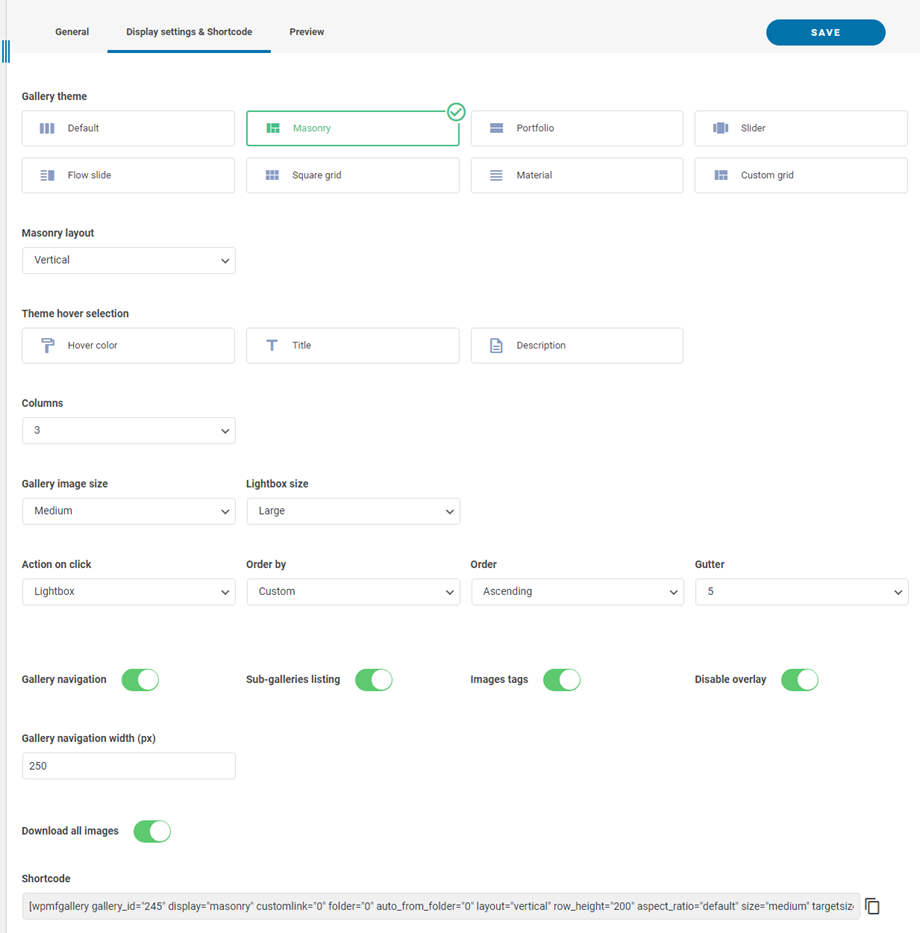
There are several options below while inserting a gallery:
- Gallery navigation: Load gallery tree navigation
- Sub-galleries listing: This gallery will only list its sub-galleries, using the galleries covers as image.
- Images tags: Display image tags as display filter
- Disable overlay: Disable mouse hover background color on image thumbnail
- Gallery navigation width: Set with (px)
- Download all images: Download all pictures in gallery
You can download single images on frontend if you enable 'Download icon' option in Galleries Addon > Default settings tab.
2. Add a new gallery
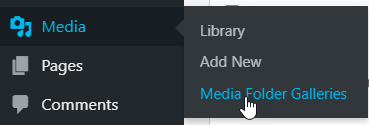
You can access the galleries from the menu Media > Media Folder Galleries.
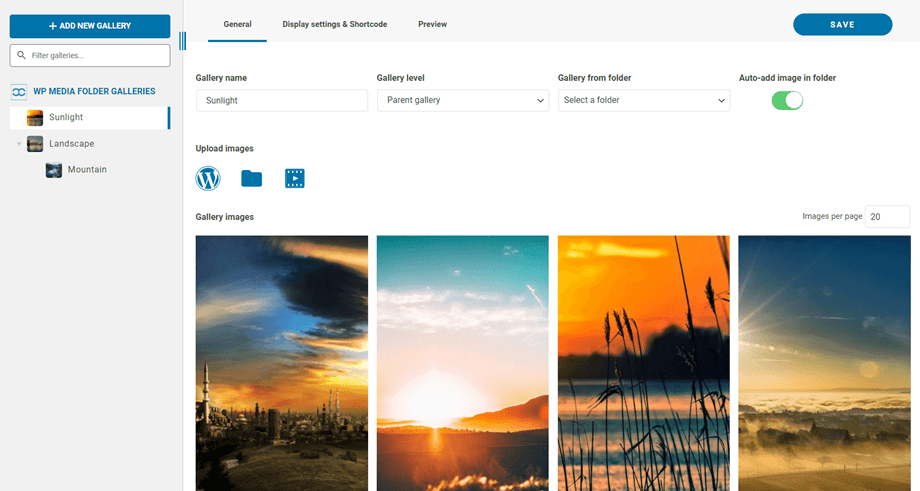
The main view of WP Media Folder Gallery will appear.
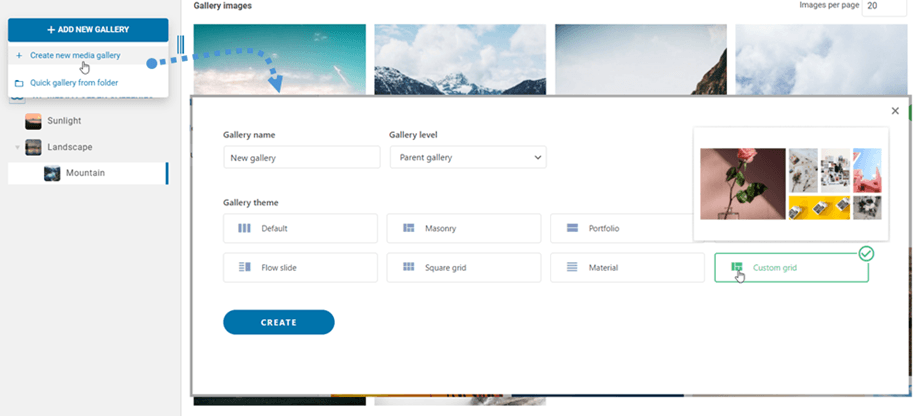
From here you can add a new gallery by clicking on Add New Gallery > Create new media gallery button. Then filling the gallery name and select gallery level and theme for it, click on Create button. The images themselves can be imported directly from WordPress, drag'n drop or uploaded from your computer.
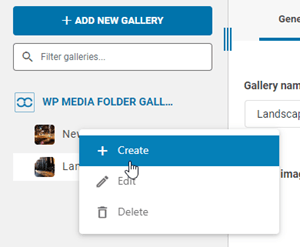
Or you can right-click on the left tree panel and select "+ Create" option.
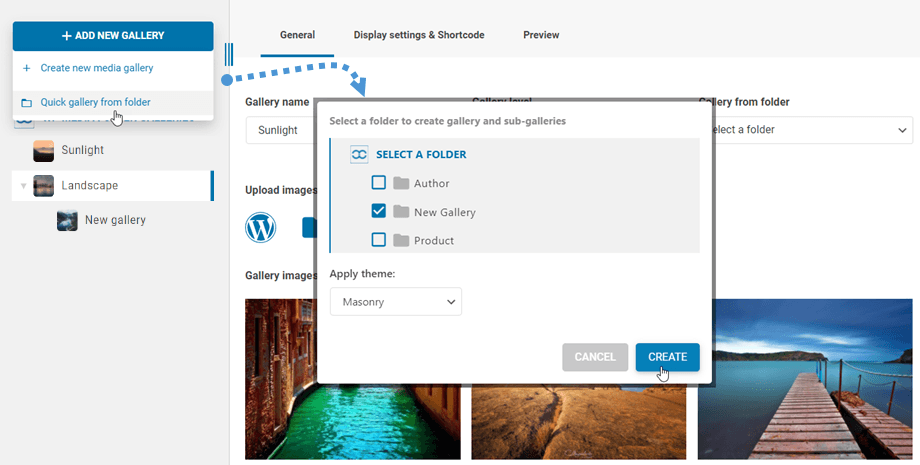
Alternatively, create a gallery from a folder in WP Media Folder. To do this, click the Add New Gallery > Quick Gallery From Folder button, then choose the folder in the Media library and theme for it and press the Create button.
After creating a gallery from a folder, a Auto-Add Image in Folder option is enabled. That means your new images from that folder will be updated automatically to the gallery.
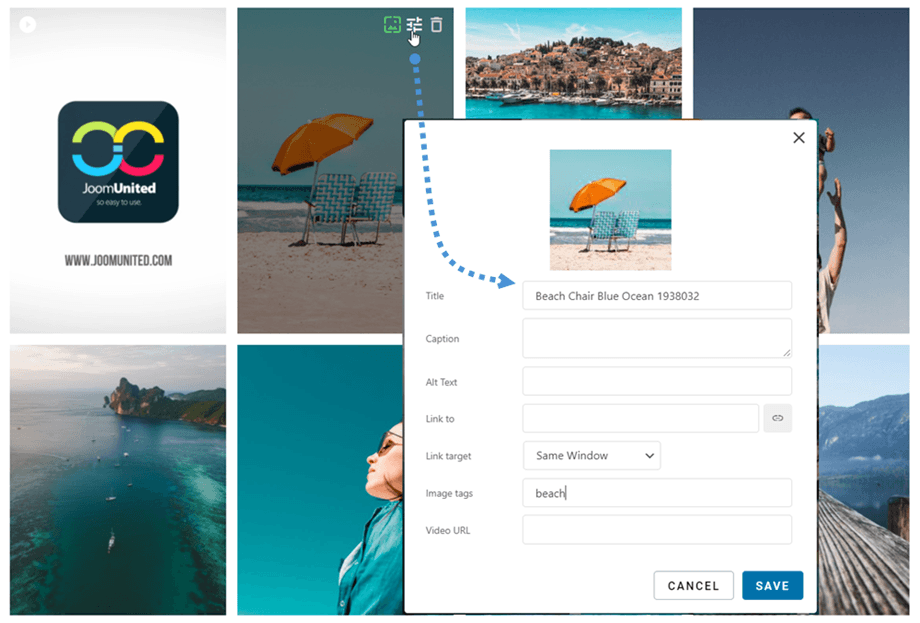
You can edit image information from the gallery, including WordPress SEO information. You can also define specific internal or external links along with image tags.
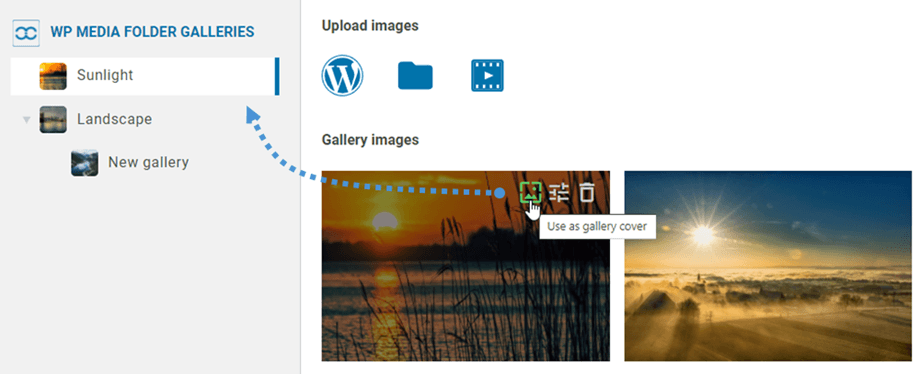
Once the gallery is created, you can set an image as the gallery cover by clicking on the icon. You will see it while hovering on an image in the gallery.
3. Gallery block in Gutenberg
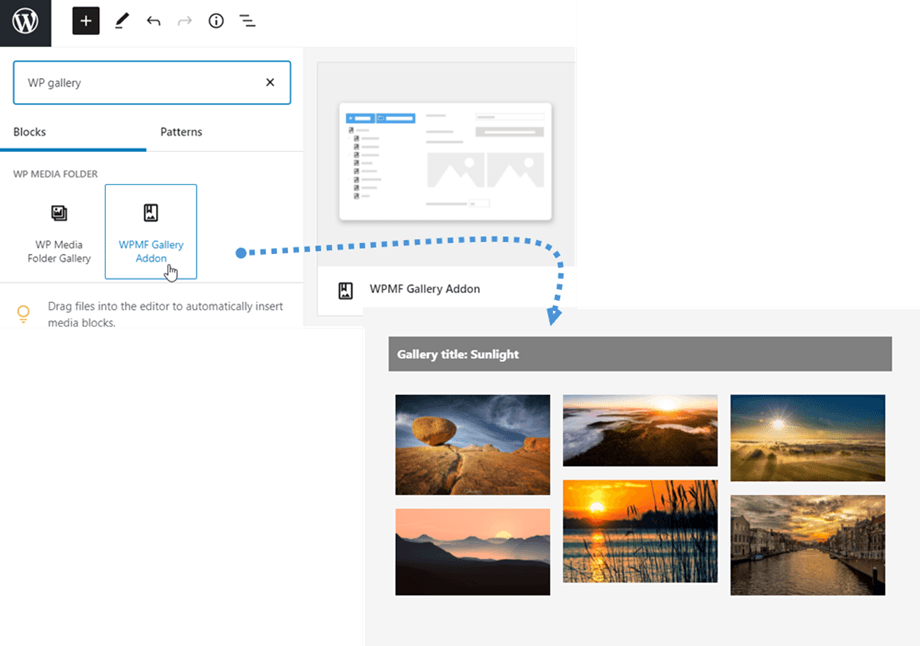
You can show your galleries in Gutenberg editor now.
In order to display a gallery in Gutenberg editor, clicking on the WPMF Gallery Addon block in the WP Media Folder category. Then you can click on Select or Create gallery button and pick a Gallery.
4. Add a video to gallery
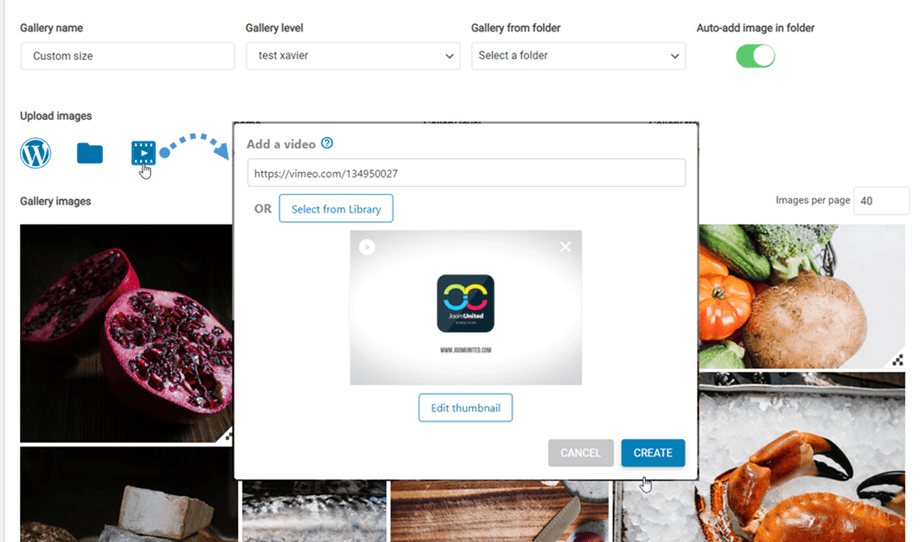
You can add a new video to a gallery clicking on the Video icon then paste or input the link of your video to the field, then click on Create button.
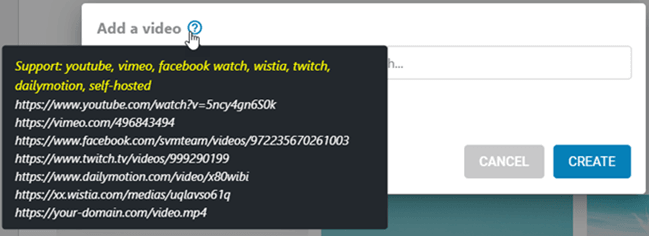
We currently support : youtube, vimeo, facebook watch, wistia, twitch, dailymotion, self-hosted: https://your-domain.com/video.mp4
The Preview tab allows you to view your video content before publishing.
5. Add a new photographer gallery
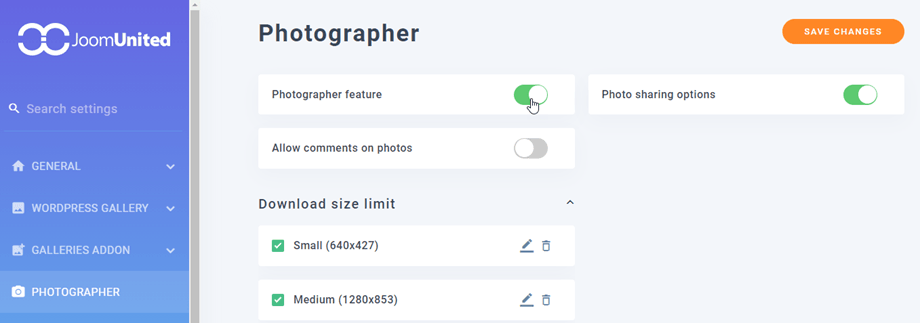
First, in order to create new photographer galleries, you should enable Photographer feature option at Media Folder settings > Photographer tab.
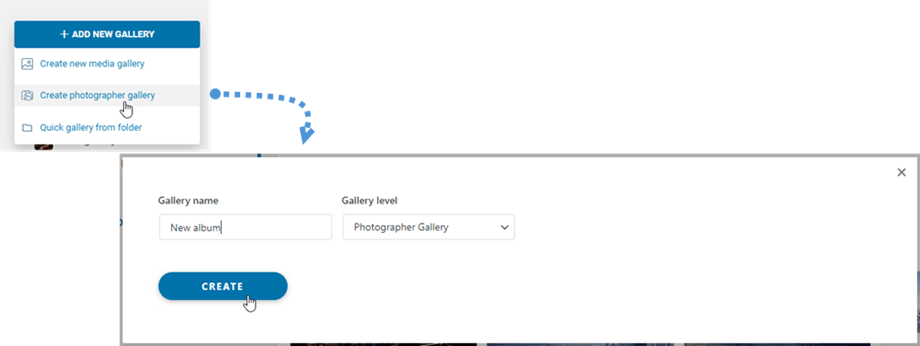
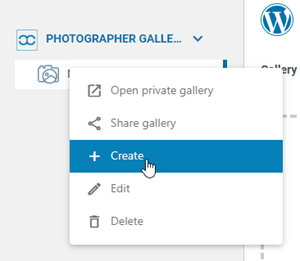
Then at Media Folder Galleries dashboard, navigate to the top-left corner, and click on Add new gallery > Create photographer gallery button.
Or you can right-click on the left tree panel and select "+ Create" option.
After that, you can drag 'n drop your images into the new gallery.
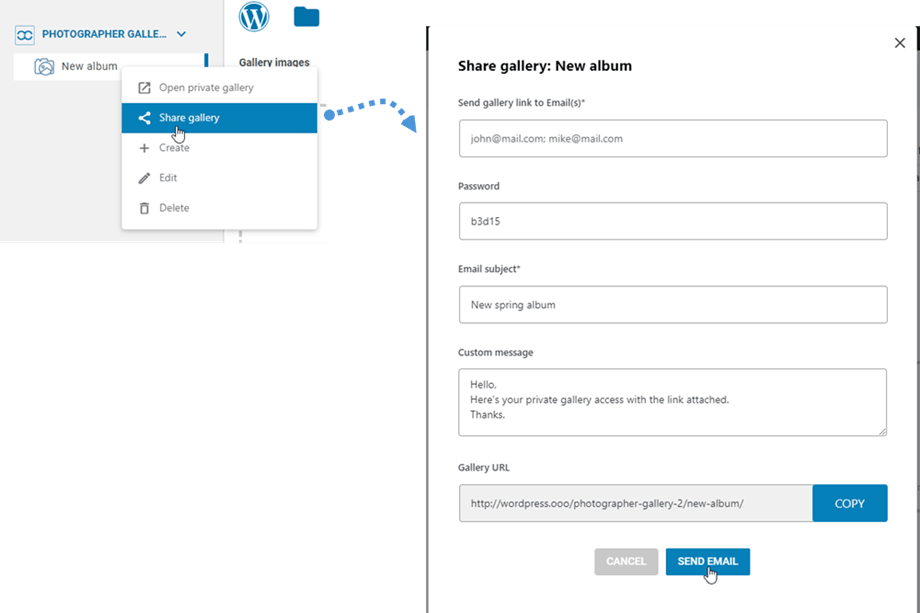
To share the gallery with your friends, simply right-click on the "Share gallery" button and a popup window will appear. Fill in the necessary information such as email addresses, password, email subject, and custom message, and then click on the "Send Email" button
6. Add a new gallery from Google Photos
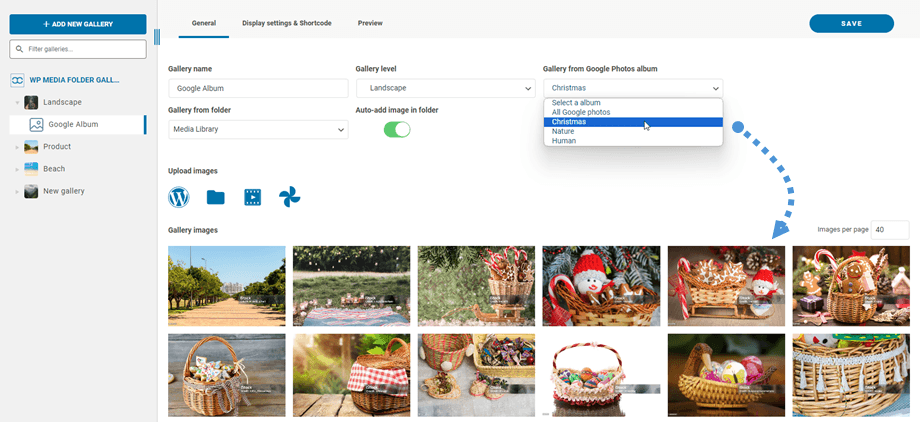
After creating a new gallery in the dashboard, select your album from Google Photos. Then your images will be displayed in the gallery.
7. Archive galleries
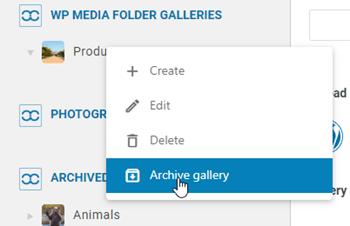
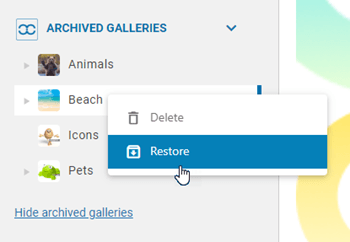
To relocate your unused galleries, you can right-click on the gallery and choose the "Archive gallery" option.
Afterward, you can access the "Archived Galleries" section to either restore or permanently delete them. Simply right-click on the gallery and select the "Delete" or "Restore" option as needed.
8. Filter galleries
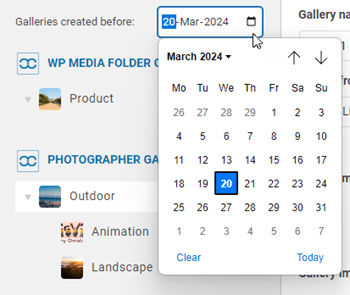
To swiftly locate galleries created before a particular day, you can utilize the filter date option. Simply click on the calendar icon and choose the desired date from the calendar. This feature is applied to both regular galleries and Photographer galleries.
