SEO Glossary: Common Use
1. Create a glossary
The SEO Glossary content is organized with glossaries that contain definitions entries. Glossaries are multilingual and unlimited regarding definitions.
In order to add a glossary just go on Component > SEO Glossary then click on Manage Glossaries.
You’ll find some standard Joomla control buttons, hit New to add a new glossary.
Several elements can be edited like:
- The glossary title and alias (used in URL of the glossary and its entries)
- The Entry icon: select icon for the glossary
- The description: can be displayed as an option
- The language: Uses Joomla multilingual native system
- The alphabet: Can be any alphabet, including numbers and special characters
- The publication status
You have now the possibility to add a custom alphabet to each glossary. It means that for example you can have an alphabet with only numbers and one with only 3 letters. Finally, of you have several glossaries, they can be listed on a single page or be separated on different pages on frontend.
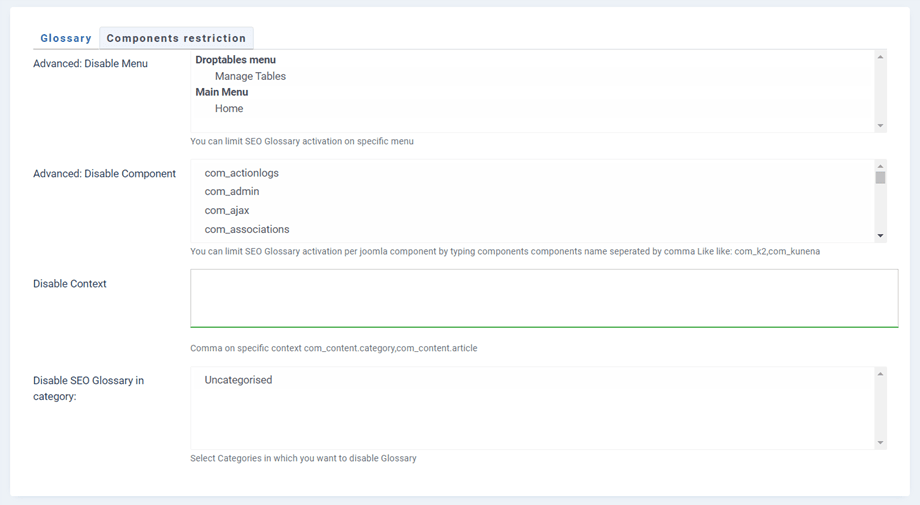
You can also set the limitation for the glossary at the Components restriction tab.
2. Add definitions entries
In order to add definition terms in your glossary, on the panel click on “Manage Entries”
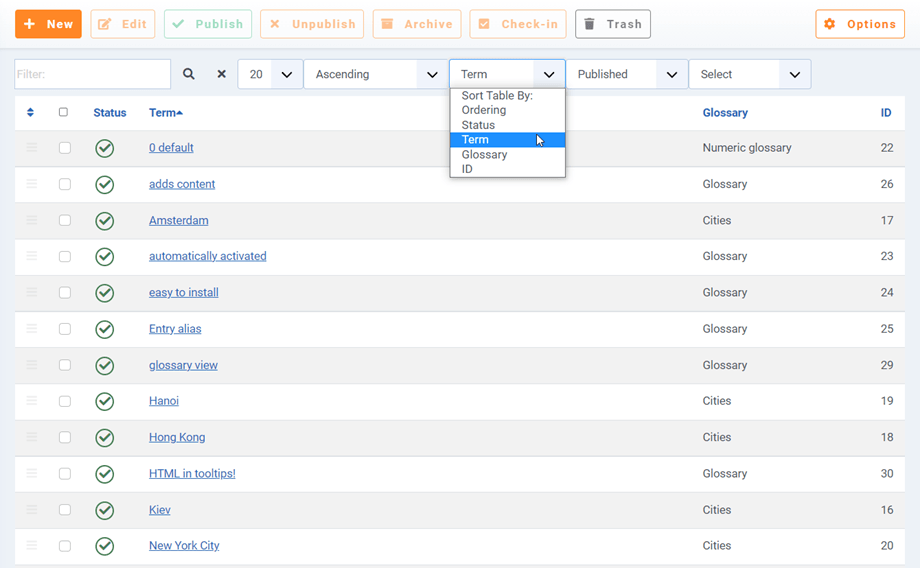
You’ll be redirected to the definitions terms listing. You can use 2 tools to filter your entries if they’re numerous: the Search & the Sort tools.
To add a new definition, use the standard Joomla button New on the top left of your screen.
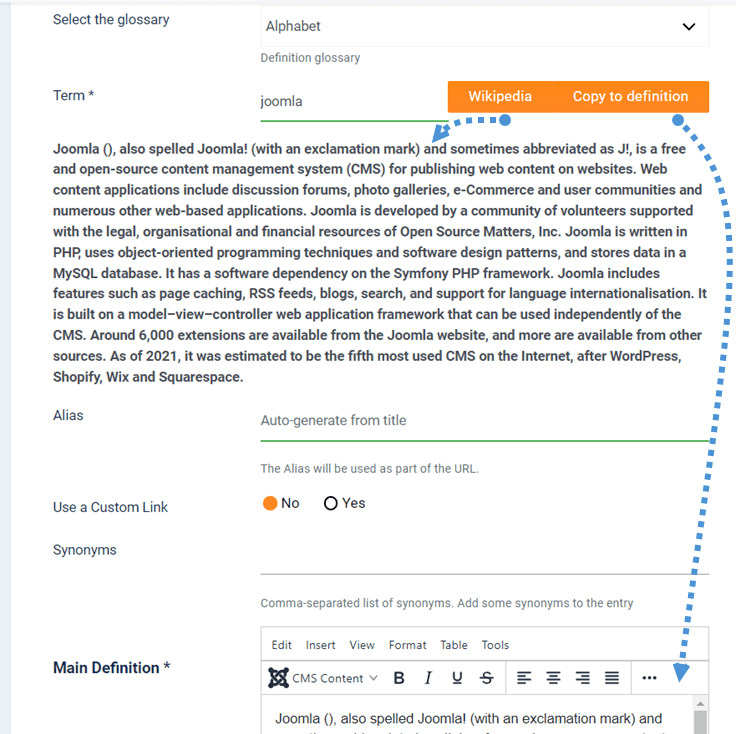
The definition fields are the following:
- The glossary: which the definition belong
- The definition term (title): use the Wikipedia button to get the definition and Copy to definition button to paste in Main Definition below.
- The definition alias: used in the URL of the definition page
- Use a Custom Link: override the link to the detail of the location by a custom URL
- Custom Link: if enabling, it could link to a Link, Menu or K2 link.
- The synonyms: comma-separated list of synonyms. Add some synonyms to the entry
- The definition itself and read more field
Then on the right side you can edit additional settings:
- Entry icon: used to identify an entry by an image
- Hits: If set to Show, the number of Hits on a particular Article will be displayed.
- Rel No Follow: Set rel no follow to block search engines from following links
- URL Target window: When opening a link from your content, chose the target (same window or new window)
- Meta description and keywords: Meta information used by search engine in the definition page
Finally, at the bottom right you can setup:
- The definition tags: Use the Joomla native tag system but on definitions: as an option can be used on frontend
- The definition author
- The author name override: as an option can be displayed on frontend
- The publication status and dates
Now your definition is automatically detected and, by default, a link to its definition and a tooltip is added.


