DropEditor: Advanced Edition Tools
1. Bullet list
 The bullet list is not just a basic list, you’ll be able to create your own bullet list style, store it and reuse it later. Usually, styles are defined in your template and should be reused all over your website.
The button will open a dialog box.
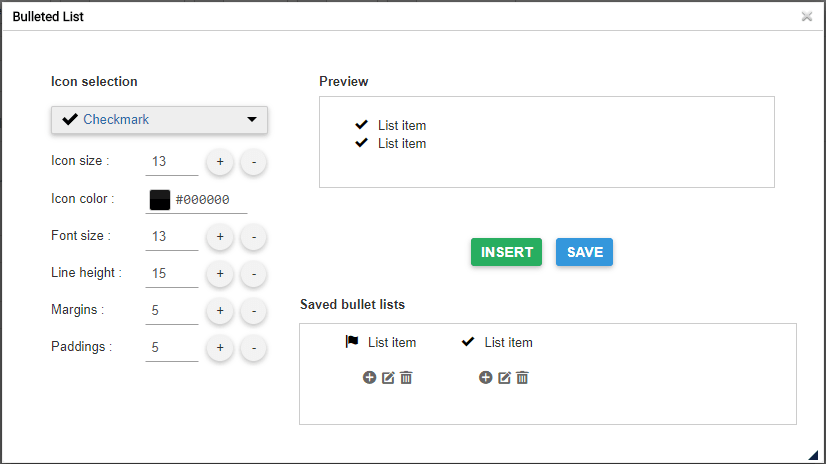
On the left part you can set icon and style of your bullet list, a preview is available on the right part.
If you insert your list directly in your content with Insert button, without saving you’ll “lose” your style (not saved).

The save button will store the bullet list in the database and you will be able to edit it later. To edit a bullet you have the option to click on the pen inside the lightbox. Plus button will insert the list and trash will delete it.

You can also use the right-click right on your content.

2. Column manager
The column manager is a tool to create a column layout in your content. Clicking on the button will show a menu with a quick column layout selection.
- 2 columns
- 3 columns
- 4 columns
- 1/4 - 3/4 layout
- 3/4 - 1/4 layout

Here is an example of a 3 columns layout quick link insertion in an article.

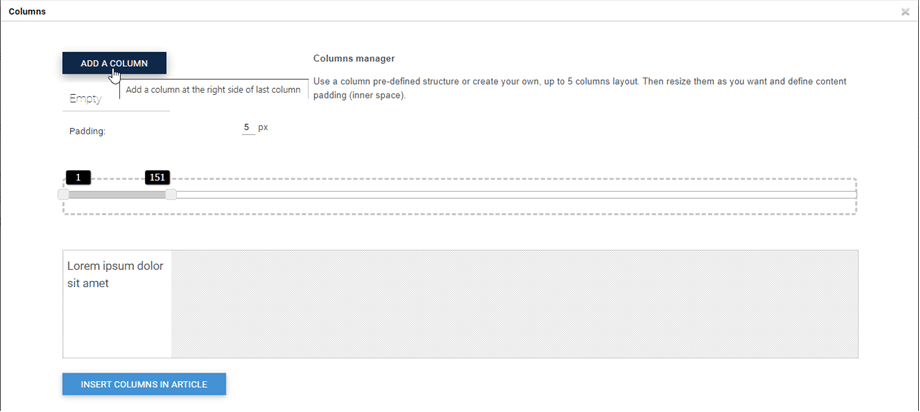
It’s also possible to define a custom layout for your columns with the Custom button.
Columns can be created by using drag’n drop to create or delete it. Then, you can set custom sizes for each column. Finally, click on Insert Columns in Article button to add your layout.
A green menu list is here to reset your layout and apply a predefined one.
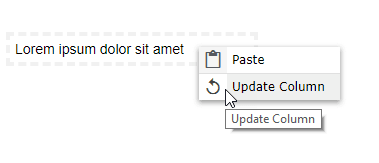
After these columns are inserted in your article, you can edit by right-clicking on them and pressing on Update Column button. Then you can change the columns width.
3. Button editor
 The button manager will allow you to create your own button style, store it and reuse it later. Usually, buttons are defined in your template and should be reused all over your website.
The button editor is quite similar to the Bullet list interface, you’ll be able to create a style using the left side window tool then Insert/Save/Edit it.

You have option to define background, border styles and mouse hover effect. To insert a button into content, you have option to click on Insert button or + symbol of a saved button.

You can also edit and save an existing style, just click on the pen and change parameters or do a right-click in the editor.

Finally, you can define a custom link for the button or make a quick link to a menu or an article.

4. Article summary
 The summary tool can generate an automatic summary of all your content based on titles in your content. You can also update automatically summary.
To use it, add titles in your article then click on the summary tool.

A summary will be added with anchor to your content. You can also update it with a right-click to regenerate it.

5. Template tool
 The template tool will let you save all the layout of your content (HTML structure) in order to load it later.
Click on the button to save/load a layout.

You can define a template name, save it. To load a template click on his name on the bottom zone.
6. Link manager
 A link manager is available with an interface that allows you to make quick links to Joomla content, article and menus
In the dialog box, you have option to make link to custom URL or load a Joomla content. Just select a content, the URL will be generated and click on Insert button.

7. Anchor tool
 A simple anchor tool to load a page in a particular point is also available.
You can add an anchor name, then validate

An anchor will be added in your content.

Then to make a link to this anchor, just select some text, click back on the anchor tool button and select the anchor previously created.

8. Google font
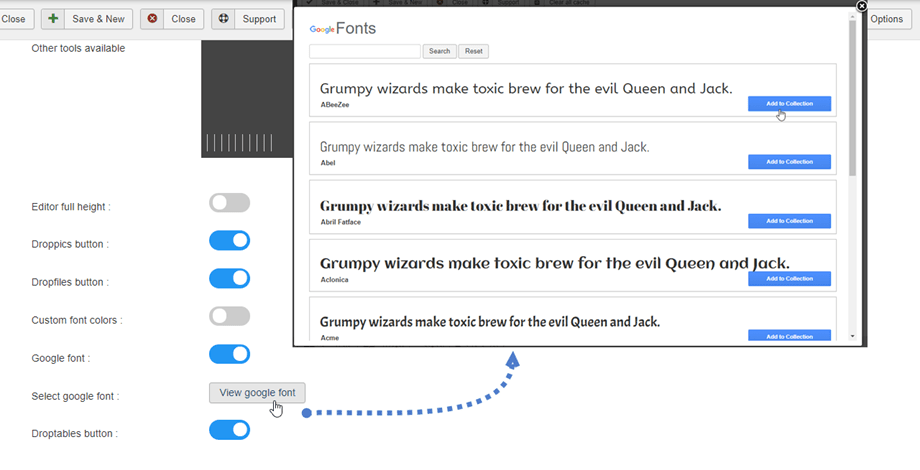
First, you need to enable Google font parameter in Profiles > Default (Your profiles) > Editor tools tab. Next, click View google font button, then the selected font will appear in the editor.
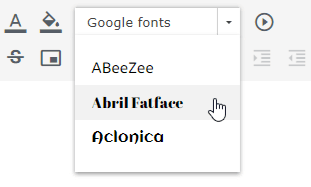
Finally, you will see the fonts in editor tool.
9. Insert Media
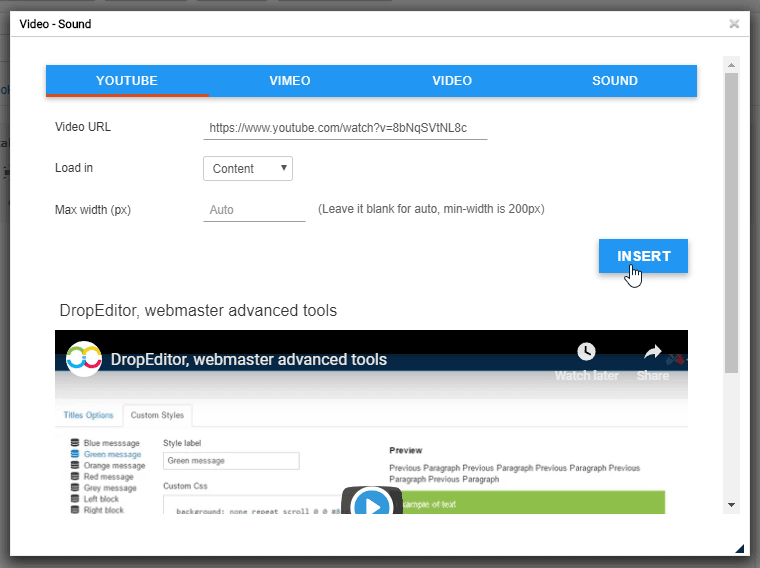
 You can insert media files from your server or Youtube, Vimeo. First, you click on the Insert Media button on Editor tool.
After that, a popup window appears, you can add the link at Youtube or Vimeo tab. Then click Insert button.
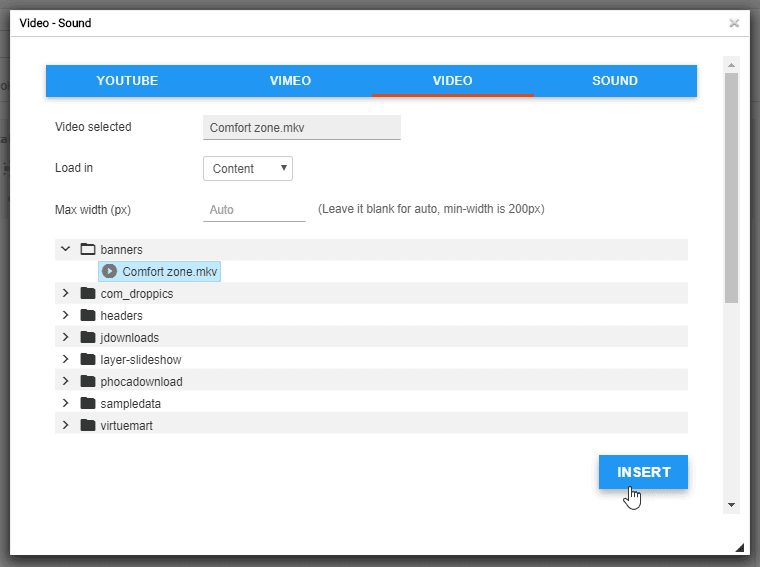
Moreover, you can pick a video or sound file from your server at Video or Sound tab.
10. Non-breakable spaces
You can also insert non-breakable spaces character by clicking on the icon  on the editor tool.
