WP File Download Addon: Amazon S3 Integration
1. Login to Amazon S3 in WP File Download
Return to the WordPress dashboard and click on the menu WP File Download Configuration > Cloud Connection > Amazon S3 tab. Paste the following into the form fields:
- Access Key ID
- Secret Access Key
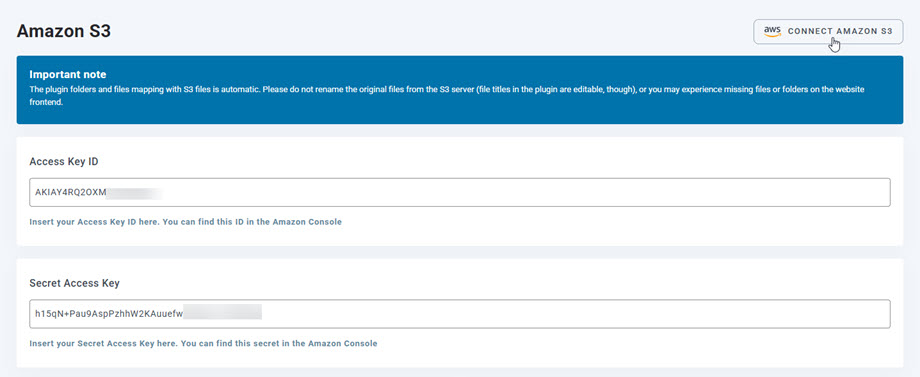
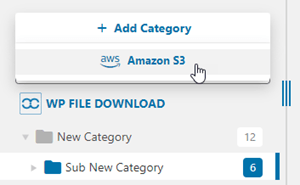
After that, save the settings and the connection should be a success. Now you can create new S3 categories in WP File Download dashboard.
2. How it works? What can I do with Amazon S3?
How does it work?
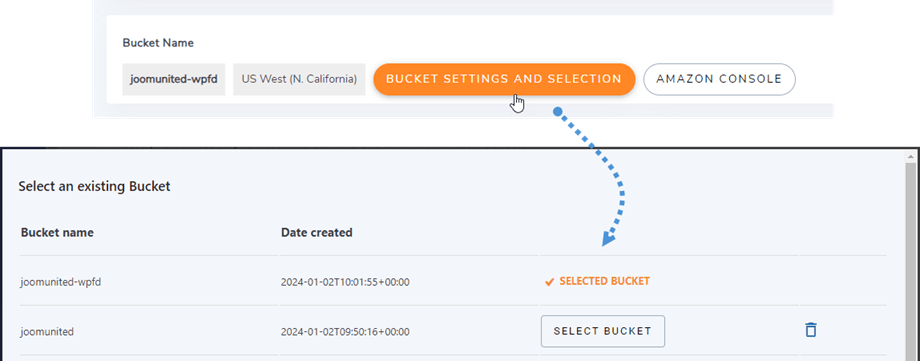
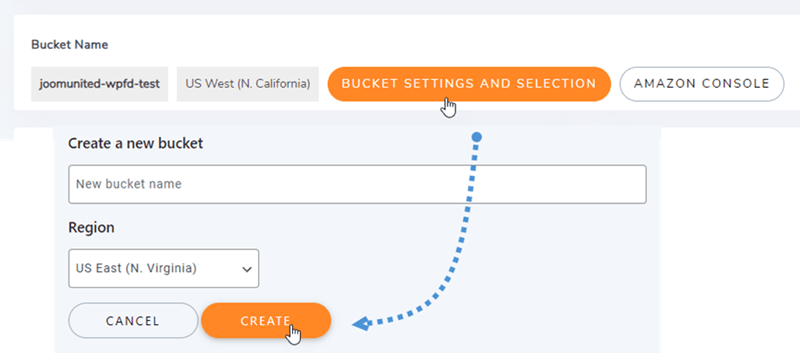
Once you've connected WP File Download with Amazon S3 and please select a bucket or create a new one where all your data will be stored.
What are the sync directions?
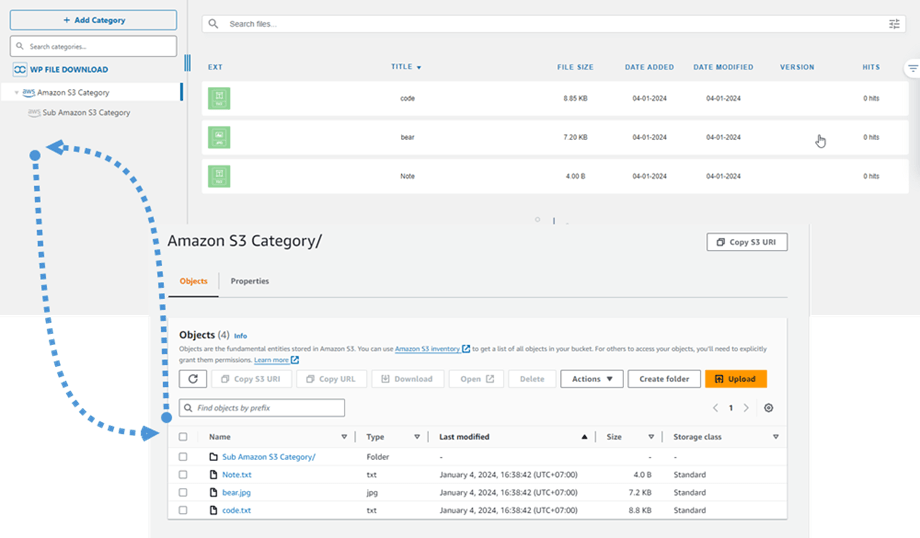
It works in both directions! You can add a file from Amazon S3 and see it in WP File Download or add a file in WP File Download and see it in Amazon S3. That’s crazy! Yes we know ☺
3. Create an IAM user
The Amazon S3 integration with WP File Download is included in the Add-on. You need to install this add-on (plugin) in addition to WP File Download. The addon includes integration for Google Drive, Dropbox and OneDrive too.
First, you need login to Amazon Console or sign up if you don't have a AWS S3 account.
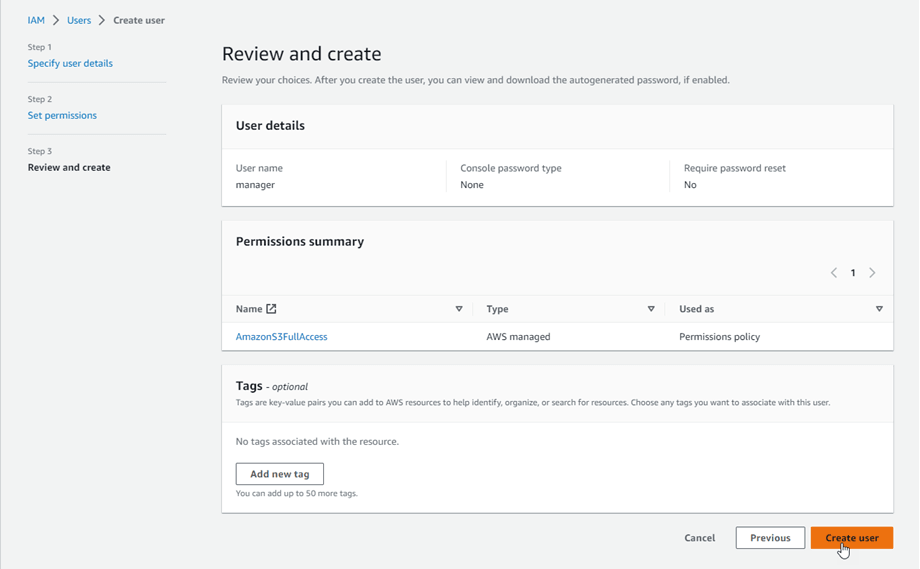
Once you have logged into the console, you will need to create a new IAM user. Then go to the IAM Users page in the AWS Console, and click the Add user button.
Step 1: enter a name for the user, then click the Next button.
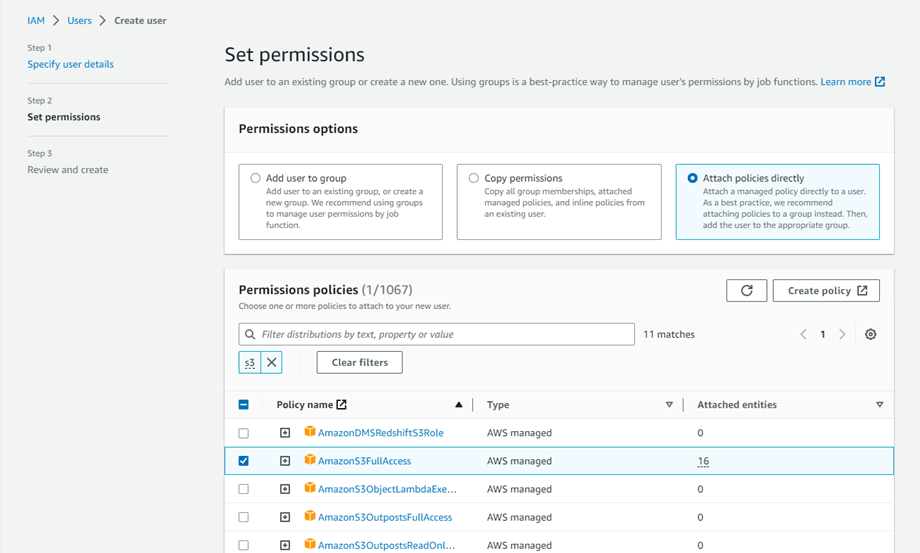
Step 2: To allow the new user to manage buckets and objects in the S3 service, you need to grant specific permissions. Select the “Attach policies directly” option, and then enter “S3” in the filter policies input box. Choose the “AmazonS3FullAccess” policy, then click the Next button.
Step 3: If everything looks good, click the Create user button.
Create an access key
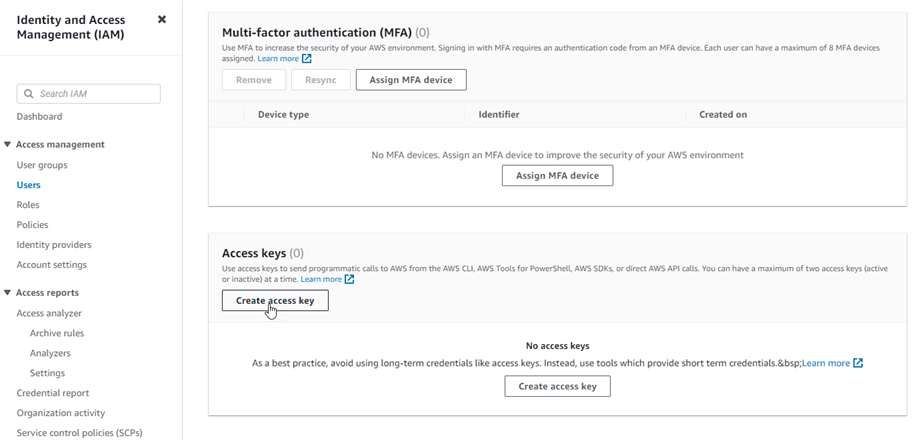
After creating successfully a new user, you should navigate to Access Management> Users > {select a user} > Security credentials tab.
Then scroll down at Access keys section, and click on Create access key button.
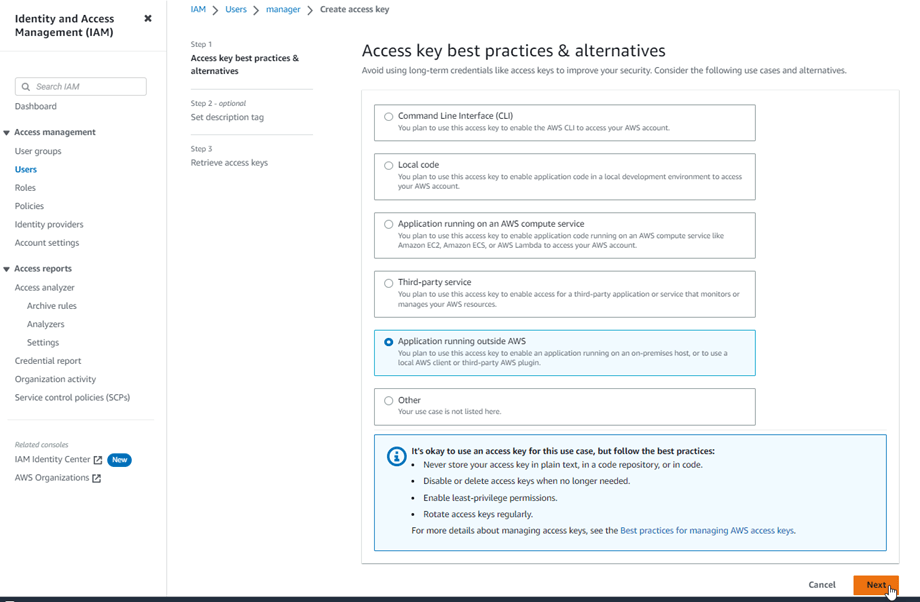
In Step 1: Access key best practices & alternatives, and select Application running outside AWS option. Then click on Next button.
Next Step 2: name the description on the field. Then, click on Create access key button.
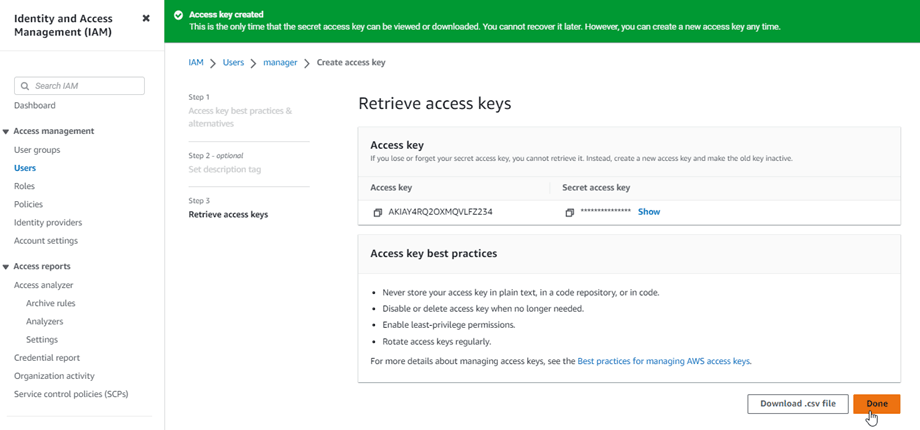
Finally, a retrieve access keys screen will be displayed with security credentials for the user, which consist of an Access Key ID and a Secret Access Key. Amazon will not show these again so please download them as a .csv and also copy them somewhere safe. If you lose them, you can always create a new set of keys from the console but you cannot retrieve the secret key again later.
Create a bucket
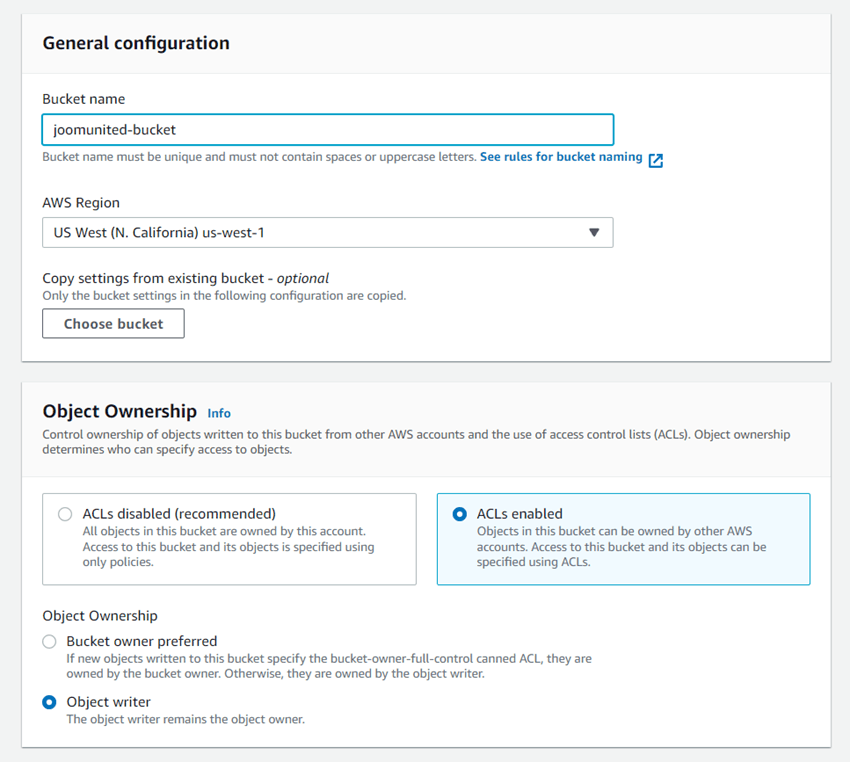
To use Amazon S3, you should create a new bucket. Please go to the bucket area: https://s3.console.aws.amazon.com/s3/buckets. Then click on Create bucket button.
In the General configuration, input the bucket name, select an AWS Region, and in Object Ownership section, select ACLs enabled > Object writer option.
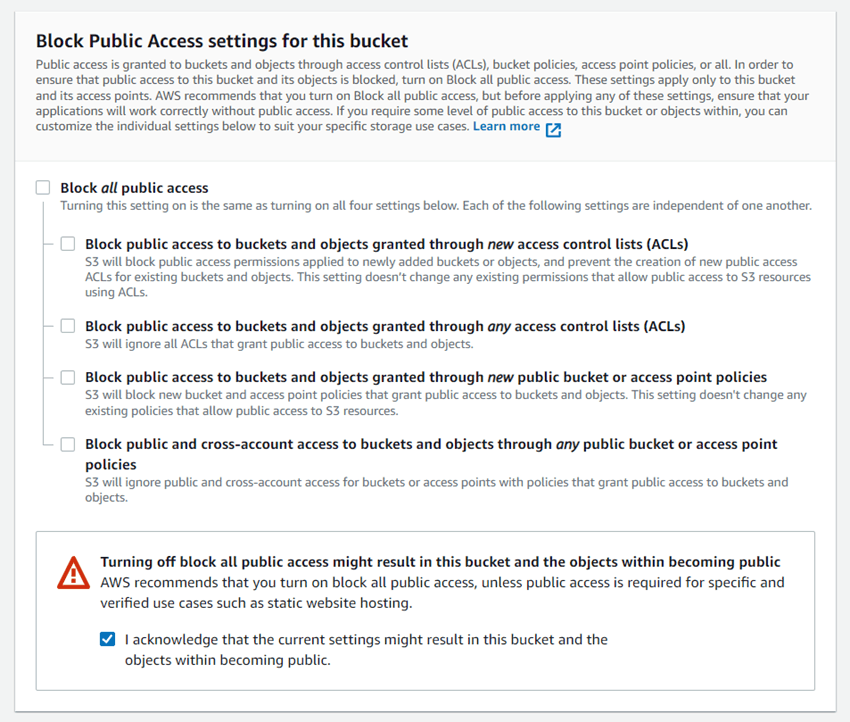
In the Block Public Access settings for this bucket section, untick the option: "Block all public access" and tick on the option: "I acknowledge that the current..." as in the image below.
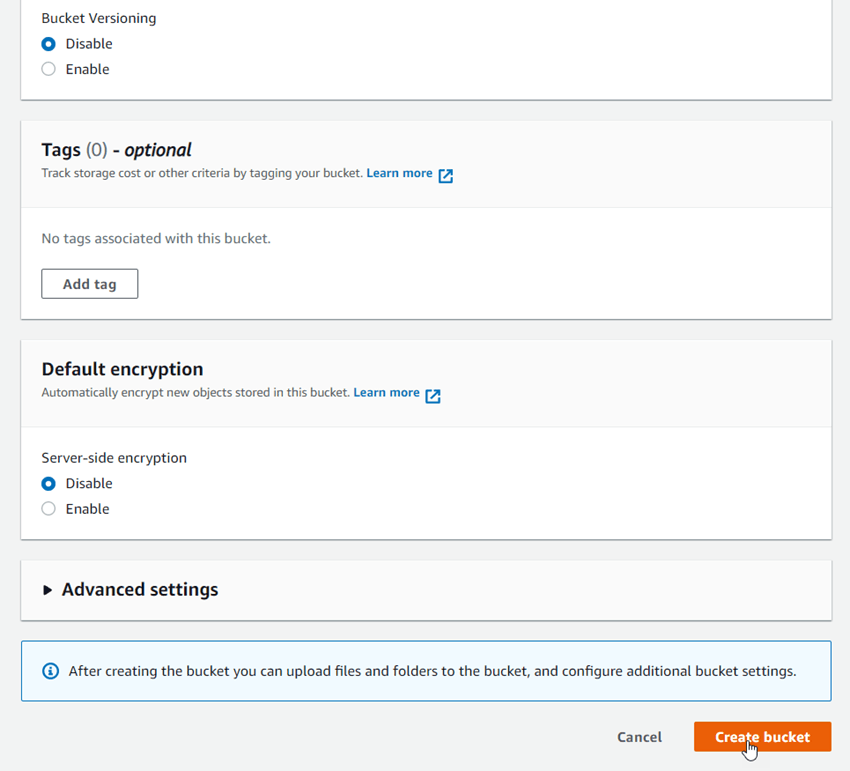
Then let all the rest options as default, and click on Create bucket button.
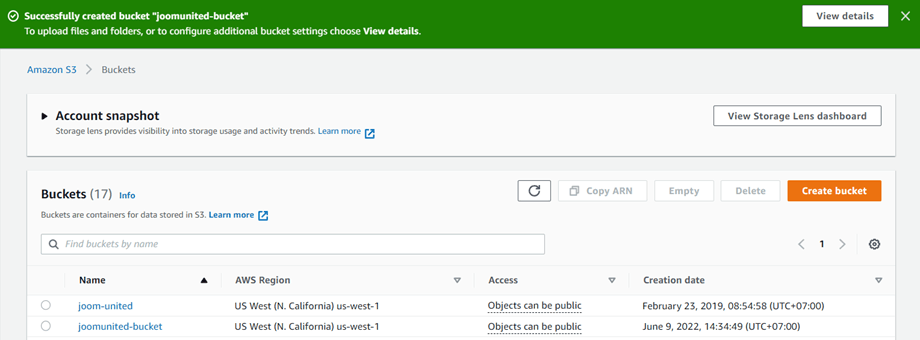
Finally, a new bucket should be created successfully with the status of Access column: "Objects can be public".
Or you can create s new bucket in WP File Download settings. Navigate to menu WP File Download > Cloud Connection > Amazon S3, click on Bucket settings and selection button. At the bottom of the popup, input the bucket name and click on Create button.
