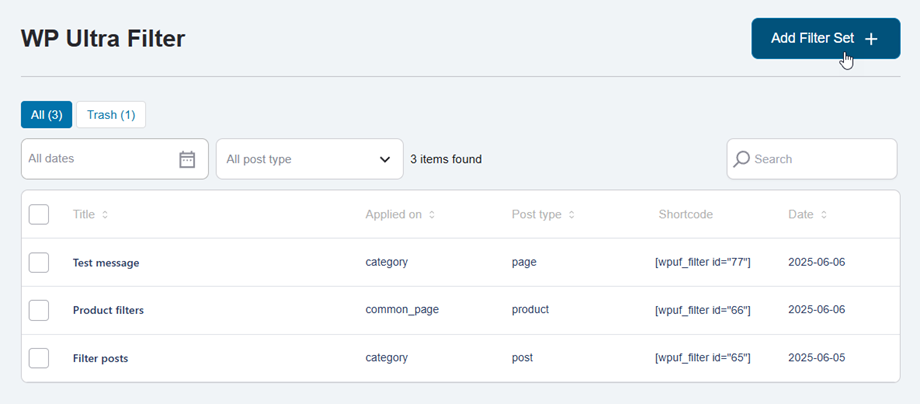
1. Filter sets
In order to create a new filter set, navigate WP Ultra Filter left menu > Filter Sets, click on Add Filter Set button.
Filter set tab
It turns to Filter Set page, input and choose option in the corresponding fields.
What would you like to filter?
- Filter set title: input name.
- Post type to filter: post, page, product, ...
Where the filters will be loaded?
- Apply filter set to: Posts, Pages, Products, ...
- Select post/page: Any Post Page
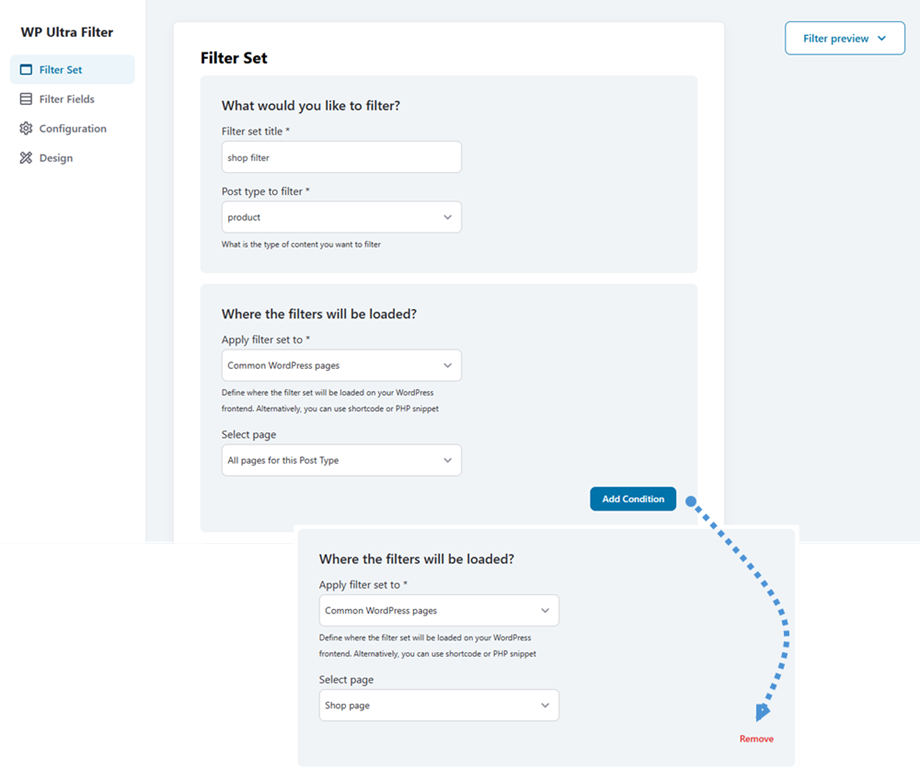
Filters can be applied in multiple scenarios to refine your results. Click the Add Condition button to create new filter criteria. Each added condition will display with its own Remove button, allowing you to easily delete specific conditions as needed.
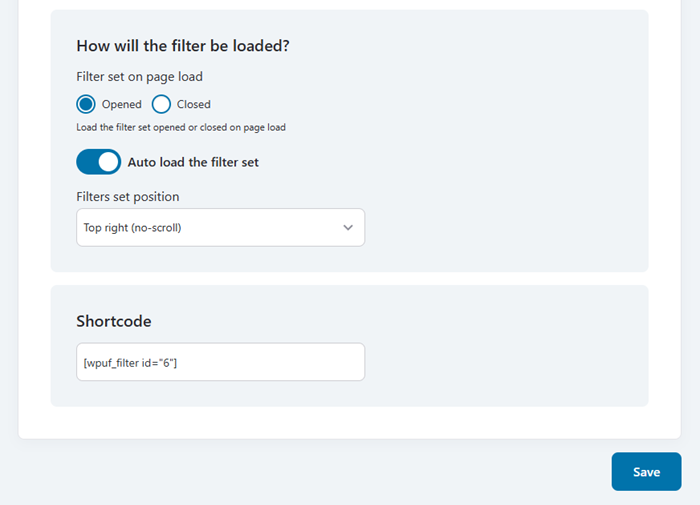
How will the filter be loaded?
- Filter set on page load: Load the filter set opened or closed on page load
- Auto load the filter set: You can set position once it's enabled
- Filters set position: Top right, Bottom left, ...
Shortcode
e.g: [wpuf_filter id="6"]
Once you've completed your configuration, click the Save button to apply all changes and ensure your settings are preserved.
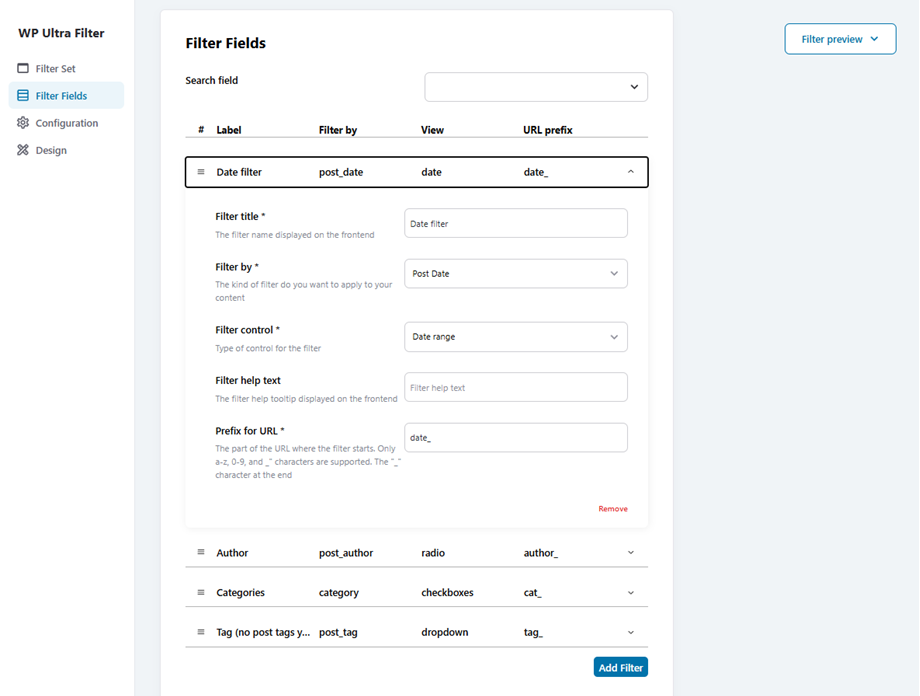
Filter fields tab
Then move to Filter Fields tab, here you can add new filters. For example: Date filter, Author, Categories, Tags,...
Once you've completed your configuration, click the Save button to apply all changes and ensure your settings are preserved.
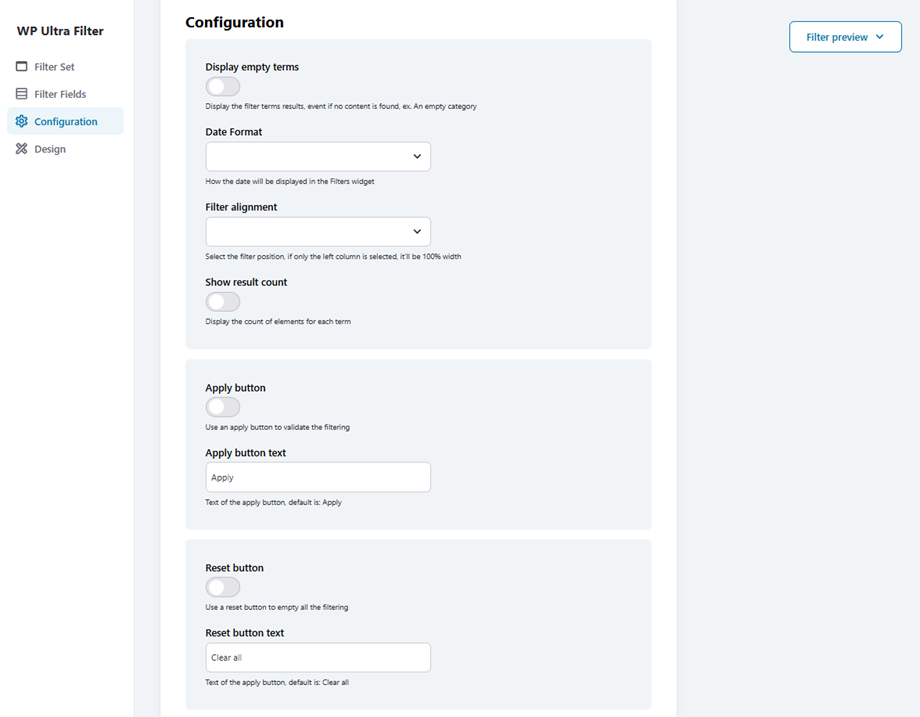
Configuration tab
If you want to customize or adjust your filter to fit your theme, please navigate to Configuration tab.
- Display empty terms: Display the filter terms results, event if no content is found, ex. An empty category
- Date Format: How the date will be displayed in the Filters widget
- Filter alignment: Select the filter position, if only the left column is selected, it’ll be 100% width
- Show result count: Display the count of elements for each term
Apply button
- Apply button: Use an apply button to validate the filtering
- Apply button text: Text of the apply button, default is: Apply
Reset button
- Reset button: Use a reset button to empty all the filtering
- Reset button text: Text of the apply button, default is: Clear all
Once you've completed your configuration, click the Save button to apply all changes and ensure your settings are preserved.
Design tab
And Design tab, you can adjust these options below:
- Filter set width: Force the layout to be 100% width, depending on the device
- Number of columns: Set how many columns the content should be divided into
- Background color of filter: Set the background color for the entire filter block or area. Useful for visual separation from content
- Text color: Text font color
- Text size: Text font size
- Filter title size: Label font size
- Ranger color: Color of the ranger
Submit button
- Submit button background: Submit button background color
- Submit font color: Submit button font color
- Submit font size
- Submit border radius
Reset button
- Reset button background
- Reset font color
- Reset font size
- Reset border radius
Once you've completed your configuration, click the Save button to apply all changes and ensure your settings are preserved.
2. General settings
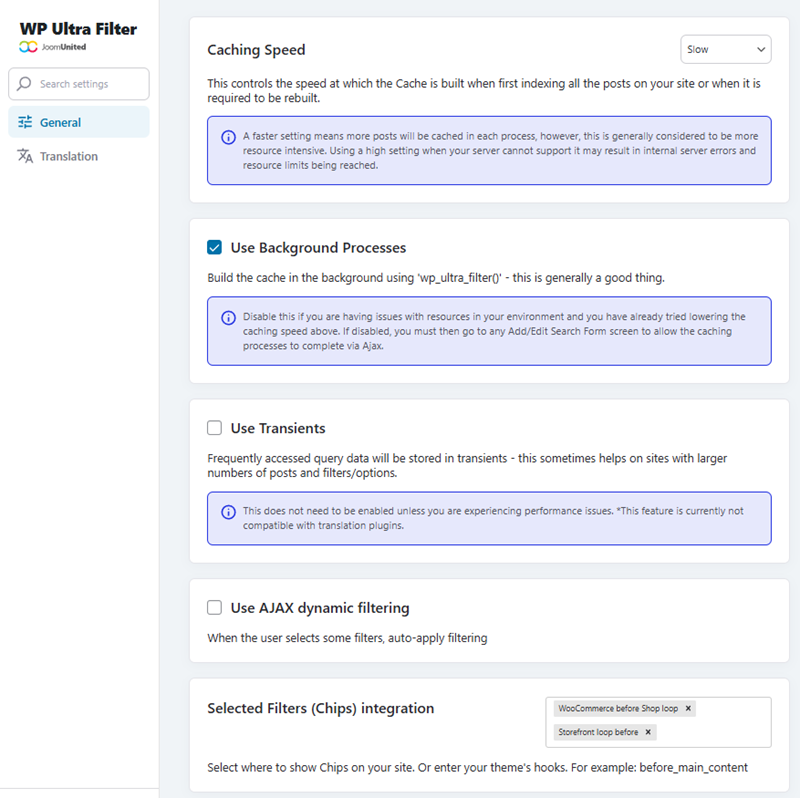
You can customize WP Ultra Filter's advanced settings by accessing General Settings > General. Here's what each option controls:
- Caching Speed: This controls the speed at which the Cache is built when first indexing all the posts on your site or when it is required to be rebuilt.
- Use Background Processes: Build the cache in the background using 'wp_ultra_filter()' - this is generally a good thing.
- Use Transients: Frequently accessed query data will be stored in transients - this sometimes helps on sites with larger numbers of posts and filters/options.
- Use AJAX dynamic filtering: When the user selects some filters, auto-apply filtering.
- Selected Filters (Chips) integration: Select where to show Chips on your site. Or enter your theme's hooks. For example: before_main_content.
Once you've completed your configuration, click the Save Settings button to apply all changes and ensure your settings are preserved.


