Important organizations have important Microsoft Excel files, and important Excel files deserve to be displayed professionally. This post evaluates all the options you have available on WordPress to display your tables in a manner that is consistent with your WordPress website's theme, sending a professional message to your website's customers.
WP Table Manager is the perfect way to create spreadsheets and display aesthetically-pleasing tables in a professional setting. While the plugin has many tools to create spreadsheets on WordPress, you might not have waited for WP Table Manager to start tabulating data. If all your company's spreadsheets are stored in Microsoft Excel files, then don't worry: one of WP Table Manager's tools allows you to import your Excel files into WordPress.
Thanks to WP Table Manager, you won't have to re-create all your spreadsheets on WordPress manually. Instead, you can use WP Table Manager's import tool to copy your spreadsheets into your WordPress table manager. Best of all, you can import tables in a few simple steps: copy your files onto your server, and make a few clicks. Keep reading to learn more about how to import your Microsoft Excel spreadsheets into WordPress.
Looking for a robust table management solution for client websites?
From pricing tables to product comparisons, this plugin offers powerful features to present data in a clear and user-friendly manner.
Get the competitive edge now!
Importing Excel files into WordPress is not a nightmare. On the contrary, WP Table Manager makes it effortless to start working with Microsoft Excel files in the table manager. Let's dive in!
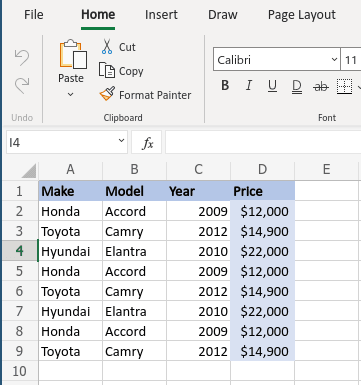
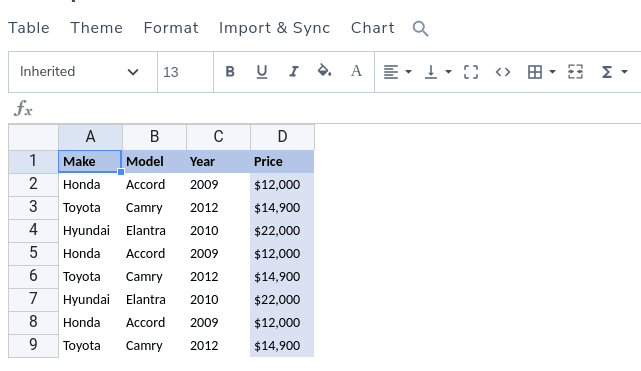
For this post, we are going to use a Microsoft Excel file containing some car-related expenses, aptly called "Expenses". The spreadsheet's data looks like the following.
As you can see, it's not just an Excel file: it also has styling and other customization options. Don't remove any styling options because you can still work with them on WordPress.
There are two ways of importing spreadsheets. The first one requires that you copy and paste the Excel file anywhere on your server. For the sake of this example, we are going to create a folder called "Excel-Files" and paste the Excel file there.
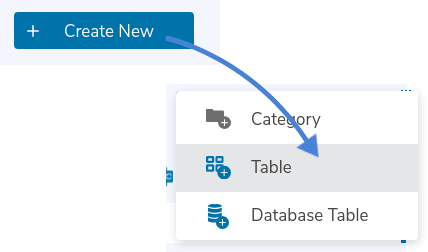
Now that you have created a copy of the Excel file, head to Tables Manager and click on the button that says Create New and then choose Table. This button will lead you to a new, empty table, which is the container that will soon have the imported Excel spreadsheet. Name the new table "Expenses", like the local Microsoft Excel file.
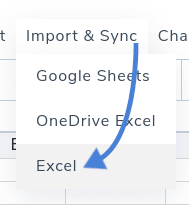
With the newly-created table, click on the Import & Sync item in the menu and choose Excel.
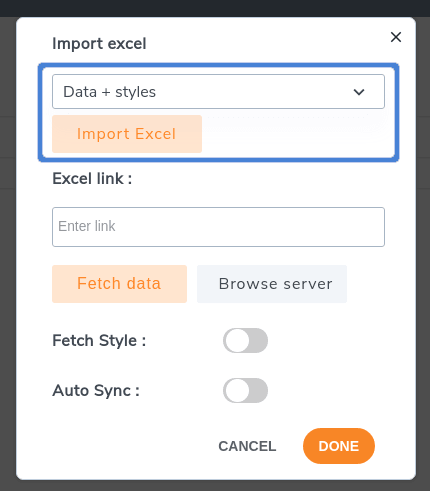
You should now see a pop-up window. If you have a direct link to the spreadsheet, you can insert the link directly under Excel link. Otherwise, click on Browse server to look for the Excel file that you copied onto your server.
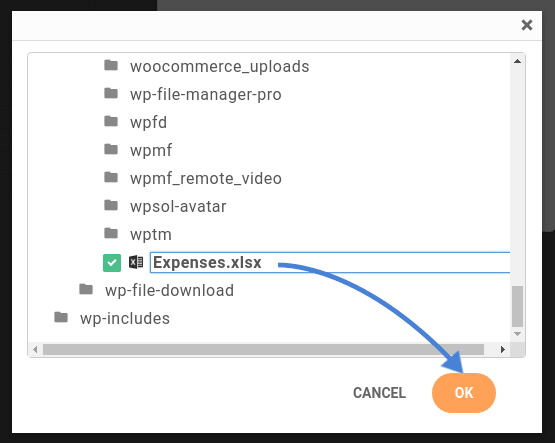
When you click on the Browse server button, you will see a pop-up window, listing all the folders on your server. Navigate through the tree to the file's location. In our case, the path is wp-content > Excel-Files > Expenses.xlsx. Select the file and click on OK.
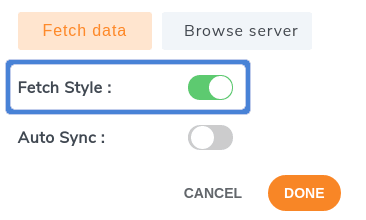
Before importing, there is one last option that you might want to toggle: Fetch Style. This option lets you import the style from the spreadsheet in addition to the data. For example, our spreadsheet had its own style, so we toggled the switch to avoid having to replicate the style on WordPress.
Click on Fetch data and WP Table Manager will import the data as well as the style if you also ticked the Fetch Style option. Once the pop-up disappears, you should see your data and style in your WordPress table manager.
There is also a second, slightly quicker option to import Excel spreadsheets. From Import & Sync again choose Excel. This time, however, don't click on Browse Server, but click on Import Excel to upload the table. Remember to choose whether you want to import the data only or the style too from the first dropdown.
As you can see, it is really easy to import Excel spreadsheets into WordPress. Now, you can work on the table as you would with any other table created in WP Table Manager, which also means embedding the spreadsheet in any WordPress post or page.
The next step after importing the table is to synchronize the Excel spreadsheet with WP Table Manager. In other words, if we edit the table in WP Table Manager, we want the file to change, and vice-versa. The best part is that this is even easier than importing the file, if such a thing is even possible!
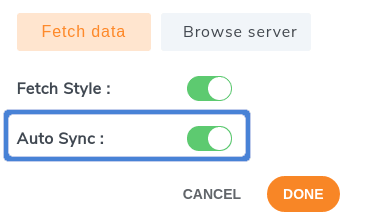
To set up the synchronization, head to Tables Manager again, and open the table that you just imported. Now that you are in the table manager, again open the Excel option from the Import & Sync menu just like before and look for the synchronization option, Auto Sync.
Like before, if you want to synchronize the style, make sure to tick the Fetch Style option. Finally, you can select the sync periodicity, or how often WP Table Manager will attempt to synchronize the WordPress table with the Microsoft Excel file.
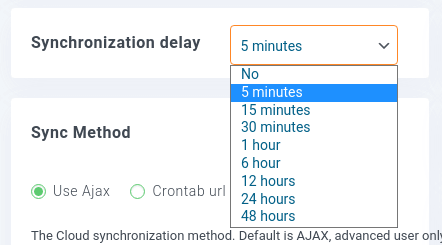
To set the synchronization periodicity, go to Tables Manager > Configuration. Under the Main Settings tab, click on the dropdown next to Synchronization delay and choose a time. For example, if you choose 5 minutes, WP Table Manager will synchronize the WordPress table with the file on the server every five minutes. Choose No for instant synchronization.
Finally, click on Save settings to conclude the synchronization process. WP Table Manager will handle synchronization behind the scenes, making sure that your WordPress table and Excel file are always aligned.
That's it! We have now converted our Excel file to a WordPress table in just a few simple steps. More importantly, you don't have to go back and forth between the WordPress table and your Excel file copying changes. Neither do you have to waste time copying the styling options because WP Table Manager does all the work for you. A day's work in just a few minutes.
Nowadays, you don't have to use Microsoft Office to create or edit spreadsheets. It's becoming more and more common to use cloud services, like Microsoft's own Office 365. If you do use Office 365 to collaborate on your spreadsheets, there's good news: WP Table Manager also supports Office 365 spreadsheets.
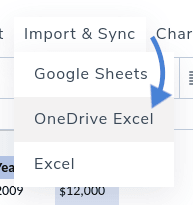
The process to import a OneDrive Excel spreadsheet is largely the same. This time, from the Import & Sync menu, choose OneDrive Excel instead of Excel. The biggest difference is that now you do not need to copy and paste the Office 365 spreadsheet onto your server.
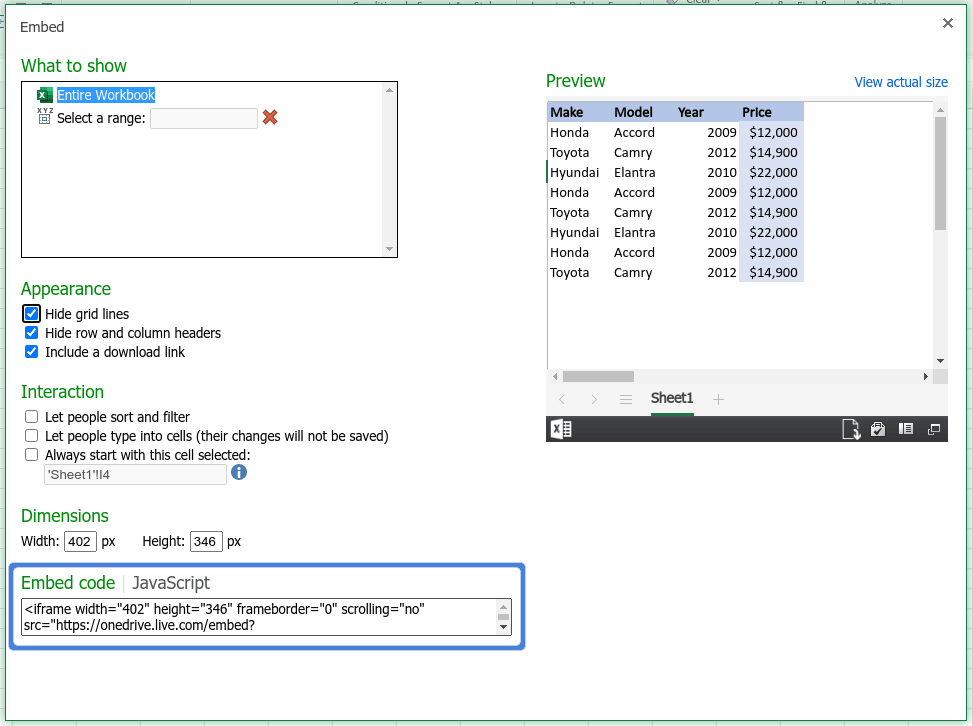
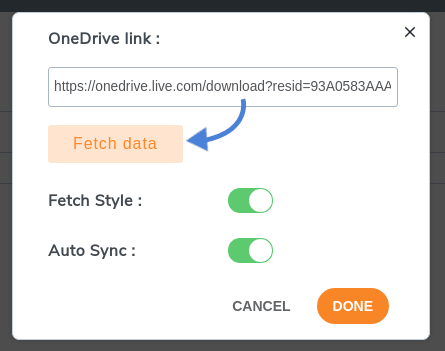
Instead, now you just link the OneDrive spreadsheet with WP Table Manager. From Office 365, click on File > Share > Embed and find the Embed code from the bottom of the pop-up window. Copy this link into WP Table Manager and then click on Fetch data.
You will be able to use the awesome themes that WP Table Manager offers after importing your tables!
Calling all webmasters!
Enhance your client websites with WP Table Manager. Easily manage and customize tables, charts, and spreadsheets, providing clients with dynamic and engaging data visualizations.
Upgrade your web design services today!
There are many other awesome features that WP Table Manager offers and you can also manage the tables directly from Gutenberg!manage the tables directly from Gutenberg! What are you waiting for? Start saving valuable time that you can spend on another, more productive job. Purchase your membership from here!
When you subscribe to the blog, we will send you an e-mail when there are new updates on the site so you wouldn't miss them.