Jak przesłać obraz WordPress z frontendu za pomocą wtyczki

Przesyłanie zdjęć jest jedną z najważniejszych rzeczy, gdy mówimy o stronie internetowej, ponieważ zdjęcia są zasadniczo tym, co nadaje styl stronie bez zdjęć, strona mogłaby wyglądać na zbyt starą lub mogłaby nie uzyskać liczby klientów/użytkowników, których chcielibyśmy uzyskać.
Oprócz tego, umożliwienie użytkownikom przesyłania obrazów z frontendu może dać Ci wiele korzyści, takich jak umożliwienie im pobierania dokumentów lub dowolnego zdjęcia, które chcieliby użyć, na przykład, do profilu.
W tym poście będziemy oceniać kilka wtyczek, które pozwalają nam osiągnąć to, co chcemy zrobić.
Żegnaj z zabałaganionym magazynem multimediów.
WP Media Folder pozwala kategoryzować pliki, synchronizować foldery z chmurą, tworzyć niesamowite galerie i nawet zastępować obrazy bez łamania linków.
Zoptymalizuj swój przepływ pracy multimedialnej już dziś
Spis treści
Jak przesłać obraz WordPress z frontendu za pomocą wtyczki
Tutaj omówimy kilka sposobów przesyłania obrazów WordPress za pomocą kilku typów wtyczek.
Prześlij pliki z poziomu frontendu za pomocą wtyczki formularza
Jednym z najszybszych i najbardziej dostępnych sposobów jest użycie wtyczki formularza, co jest przydatne, gdy musimy utworzyć, na przykład, formularz kontaktowy, w którym potrzebujemy, aby użytkownik przesłał dokument lub dowolne przydatne informacje za pomocą obrazu.
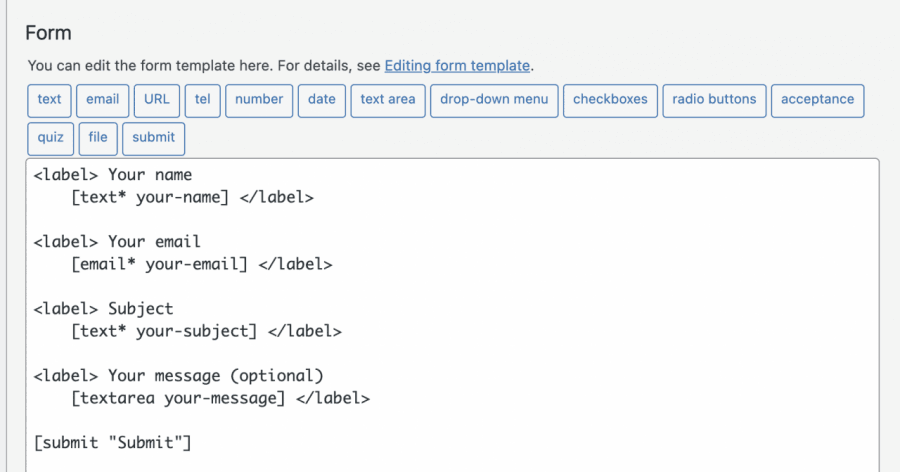
Istnieje wiele wtyczek, które pozwalają tworzyć formularze z polem do przesyłania plików, jedną z nich jest Contact Form 7, który pozwala na przesyłanie plików na Twoją stronę na froncie za darmo.
Aby więc umożliwić użytkownikom przesyłanie plików w interfejsie użytkownika za pomocą formularzy, najpierw musimy utworzyć formularz. W tym celu po zainstalowaniu wtyczki przechodzimy do Kontakt > Dodaj nowy.

Na tym ekranie będziesz mieć kilka tagów HTML z krótkim kodem dla każdego pola wewnątrz, domyślnie formularz jest tworzony z podstawowymi polami.
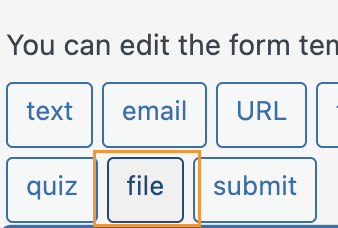
Ponieważ chcemy dodać pole przesyłania pliku, kliknij w miejscu, w którym chcesz dodać pole, a następnie kliknij plik w dostępnych przyciskach/opcjach.
Spowoduje to otwarcie wyskakującego okienka, w którym możesz ustawić limity przesyłanego pliku, dodać wszystkie limity, które chcesz, i na koniec kliknąć dodaj tag.
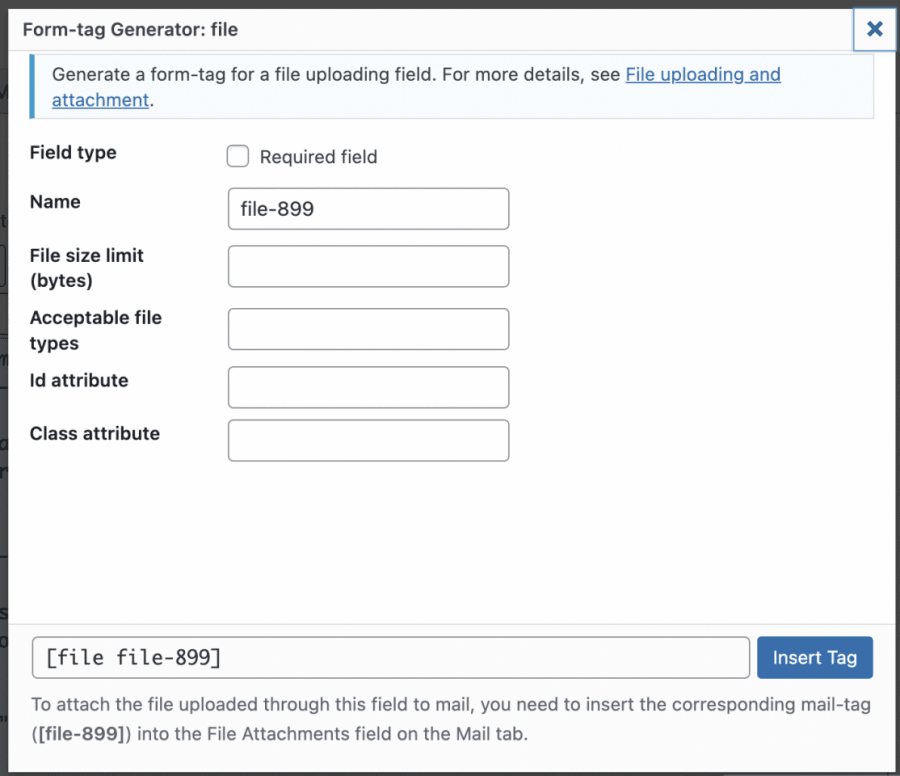
To doda shortcode dla pola w treści formularza.
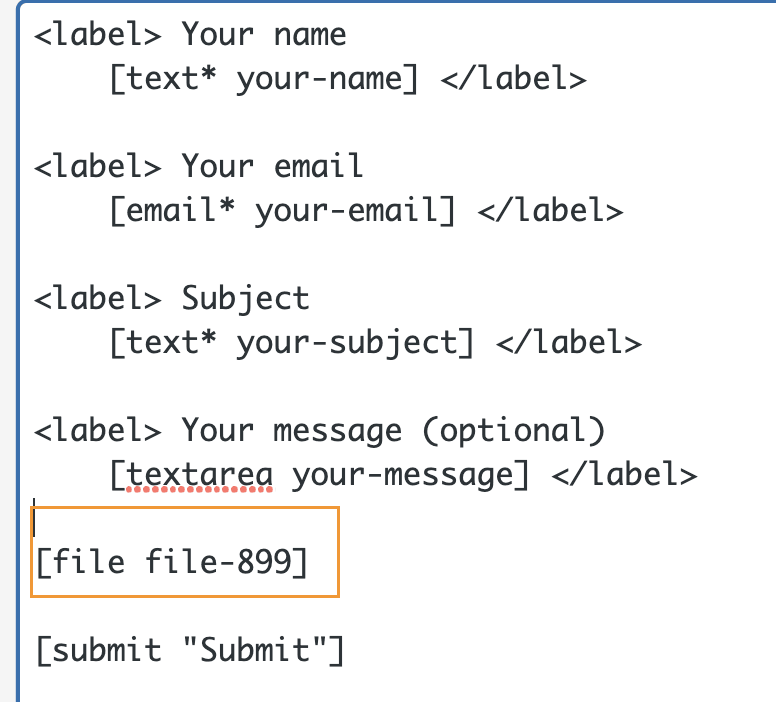
Teraz możesz dostosować swój formularz tak bardzo, jak chcesz, dodać inne pola lub dodać HTML, a także CSS, jeśli chcesz, ponieważ formularz dopuszcza wszystkie tego rodzaju dostosowania.
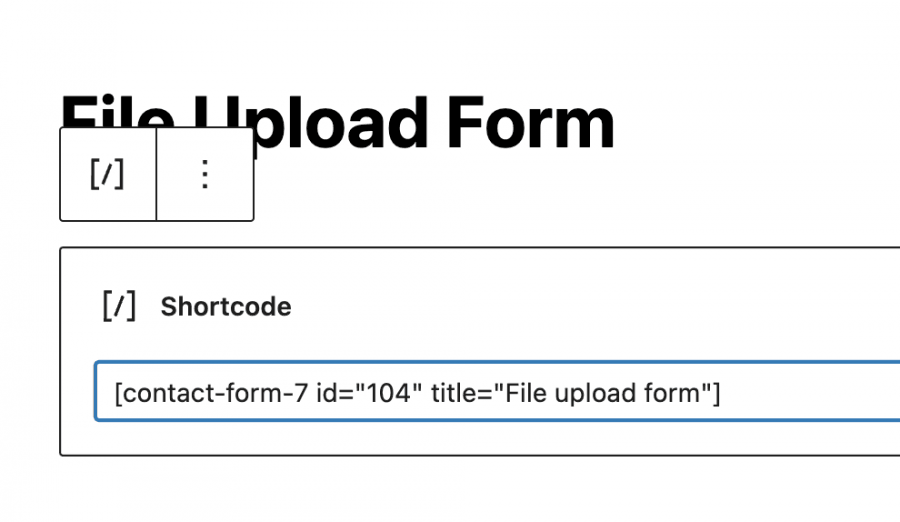
Gdy wszystko będzie gotowe, możesz dodać tytuł i kliknąć Zapisz.

To wygeneruje shortcode, który możesz użyć do osadzenia formularza w swoim poście lub stronie, skopiuj i użyj bloku dostępnego w edytorze strony do dodawania shortcode, w tym przypadku zobaczymy, jak dodać go za pomocą edytora Gutenberg.
Teraz musisz to opublikować i będziesz mógł zobaczyć formularz z polami, które dodałeś, oraz przycisk do przesyłania plików.
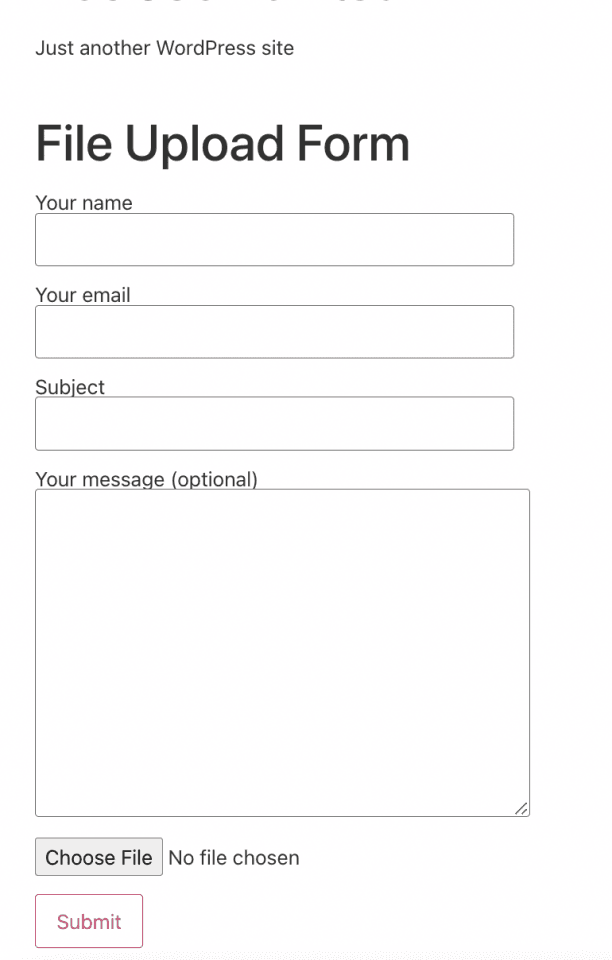
Wszystko, co musisz zrobić, to kliknąć na Wybierz plik i wybrać plik, w tym przypadku obraz, z folderów na twoim komputerze.
Po kliknięciu na wyślij, powinno to być zrobione i obraz powinien być teraz na twojej stronie.
W ten sposób twoi użytkownicy będą mogli przesyłać obrazy na twoją stronę, wraz z innymi informacjami, których możemy potrzebować, takimi jak imię lub adres e-mail osoby, która przesłała formularz, naprawdę proste i funkcjonalne.
Korzystanie z wtyczki WordPress File Upload
Teraz, gdy zobaczyliśmy normalny "stary" sposób, zobaczmy jak przesłać obraz, ale używając tego pluginu, który pozwoli nam osadzić opcję przesyłania plików na dowolnym poście lub stronie bez konieczności wypełniania innych informacji lub tworzenia formularza w ogóle.
Przede wszystkim musimy mieć zainstalowany plugin "WordPress File Upload", ponieważ zapewni nam wszystkie opcje potrzebne do stworzenia opcji przesyłania plików.
Po aktywowaniu tego pluginu na naszej stronie, powinniśmy być w stanie zobaczyć dostępną opcję menu, aby sprawdzić wszystkie pliki, które przesyłamy za jego pomocą.
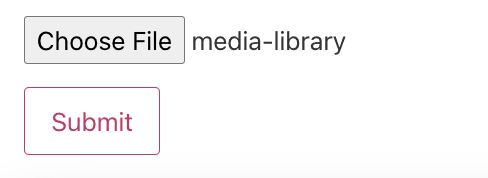
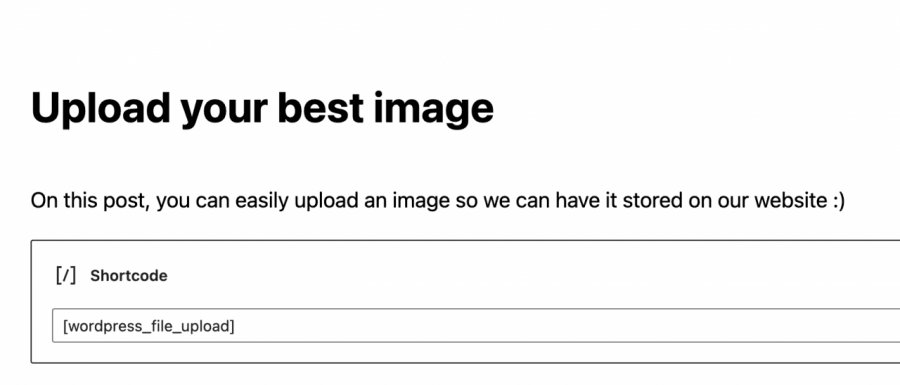
Aby użyć tego pluginu, wystarczy dodać krótki kod [wordpress_file_upload] tam, gdzie chcemy go wyświetlić, w tym przypadku mamy przygotowany post z pewnymi informacjami, gdzie dodaliśmy krótki kod, aby można było sprawdzić, jak to będzie wyglądać w edytorze Gutenberg i na froncie.
Edytor Gutenberg
Frontend
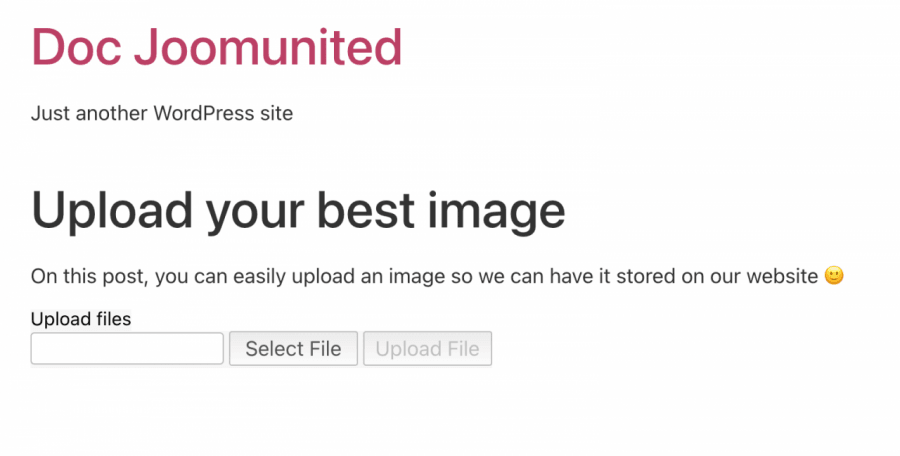
Teraz, gdy nasz formularz przesyłania jest dodany, wszystko, co musisz zrobić, to kliknąć na "Wybierz plik", aby przejrzeć pliki na swoim komputerze, a na końcu kliknąć na Prześlij plik.
Kliknięcie na ten przycisk pozwoli użytkownikowi przesłać obraz lub plik na Twoją stronę, a najlepszą częścią tego jest to, że możemy wybrać gdzie na serwerze chcemy przesłać obraz bezpośrednio w ustawieniach pluginu, a także jak to wygląda i wiele innych ustawień dla formularza.
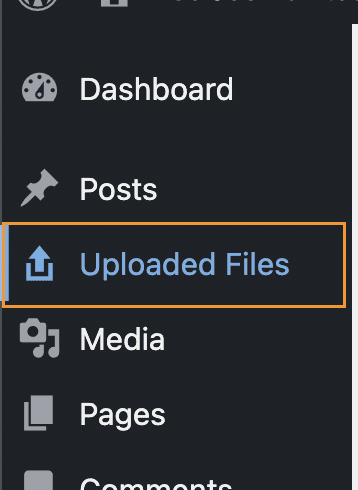
Główne miejsce, gdzie możemy sprawdzić przesyłane pliki, będzie w opcji "Prześlij pliki" w lewym menu z kokpitu administratora, to jest główna strona dla pluginu, gdzie są wyświetlane wszystkie przesłane pliki.

Jak widać, jest to łatwy i funkcjonalny plugin, który pozwoli nam uzyskać obrazy od naszych użytkowników bez większych niedogodności, poza wklejeniem krótkiego kodu w zapleczu i czekaniem na przesłanie pliku przez użytkowników.
Zarządzaj mediami według roli użytkownika za pomocą WP Media Folder
Jak widzimy, istnieje wiele sposobów, aby umożliwić naszym użytkownikom przesyłanie obrazów i plików z poziomu interfejsu frontend, ale problem w tych przypadkach polega na tym, że obrazy mogą być przesyłane "losowo" i nie mamy dokładnej kontroli nad miejscem, w którym są one przesyłane, ale nie ma się czym martwić! WP Media Folder na ratunek.
WP Media Folder ma specjalne narzędzie dedykowane do zarządzania dostępem do biblioteki multimediów, co może być naprawdę pomocne, gdy chcesz kontrolować, kto przesyła obrazy i gdzie, a także jeśli chcesz pozwolić użytkownikom zarządzać własnymi mediami bezpośrednio w bibliotece multimediów bez możliwości zobaczenia innych ról/użytkowników mediów.
Przede wszystkim musimy mieć zainstalowany WP Media Folder, to jest wtyczka, która pozwoli nam korzystać ze wszystkich dostępnych funkcji, aby to zadziałało.
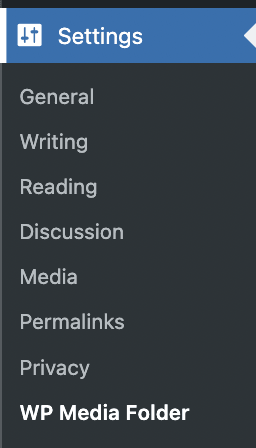
Teraz, gdy już zainstalowaliśmy WP Media Folder, musimy włączyć opcję ograniczania dostępu. W tym celu przechodzimy do Ustawienia > WP Media Folder. Następnie zobaczymy WP Media Folder .
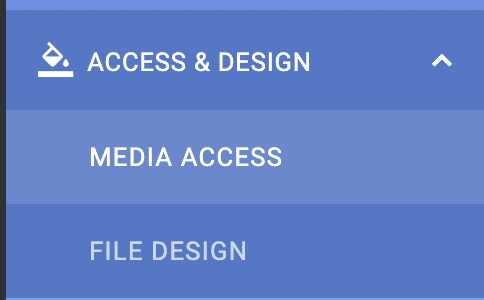
W tej sekcji przejdź do Dostęp i projektowanie > Dostęp do multimediów.
W tej sekcji, aby ograniczyć media dla każdej roli użytkownika i automatycznie wygenerować folder dedykowany dla każdej roli użytkownika, wybierzemy Dostęp do mediów według użytkownika lub Rola użytkownika i Role użytkownika.

Mamy również więcej opcji, takich jak wybór folderu ścieżki lub umożliwienie roli/użytkownikowi zobaczenia wszystkich innych mediów użytkowników/rol.
Teraz, gdy włączyliśmy opcję zezwalającą tylko roli użytkownika na edycję własnych mediów, powiedzmy, że mamy rolę edytora i chcemy, aby wszyscy użytkownicy pod tą rolą mogli zobaczyć i zarządzać swoimi mediami dla postów i stron.
Z opcjami, które wybraliśmy, wszystko to powinno być możliwe, więc zobaczmy, że do tego celu wystarczy zalogować się jako edytor i przesłać multimedia, tak jak to zwykle robią.
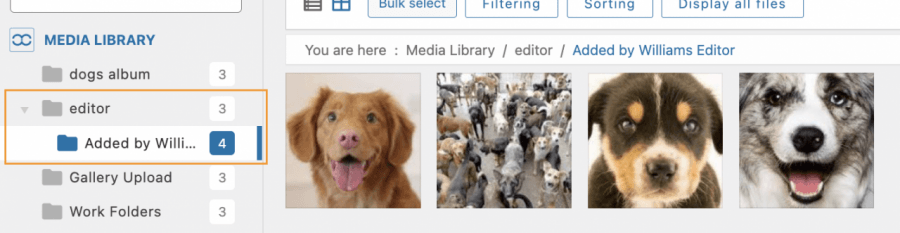
Po zalogowaniu jako edytor będzie można zobaczyć bibliotekę multimediów w ten sposób.
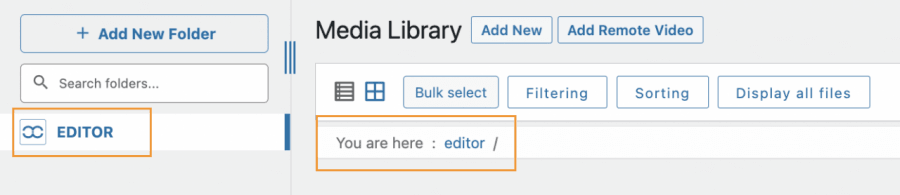
Jak widać, są dwie sekcje, w których biblioteka multimediów informuje, że znajdujemy się w folderze o nazwie „edytor”, więc prześlijmy multimedia, aby sprawdzić, jak to będzie działać.
Proces przesyłania byłby dokładnie taki sam, jak zwykle, mógłbyś użyć narzędzia do przesyłania z poziomu frontendu lub po prostu użyć Biblioteki Mediów, wszystko, co ta rola użytkownika przesyła, będzie automatycznie ograniczone dla roli użytkownika.
Jedną z zalet używania WP Media Folder jest to, że ta rola (i wszystkie inne z dostępem do wp-admin) będzie mogła tworzyć foldery za pomocą +Dodaj nowy folder przycisku.
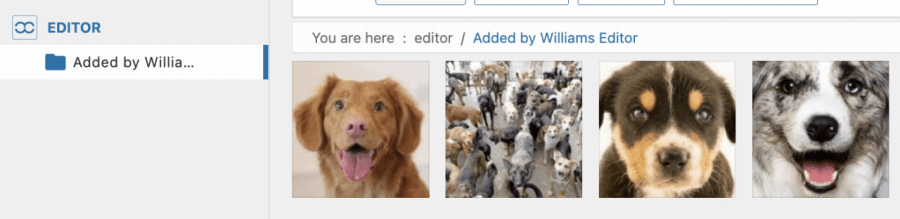
Możemy potwierdzić, że w bibliotece mediów został utworzony Edytor folder, a wewnątrz znajduje się folder, który utworzyliśmy przy użyciu roli Edytor, i było to tak proste jak kliknięcie przycisku!
Teraz, gdy włączyliśmy opcję dostępu do mediów , zostanie utworzony folder dla każdej roli, która uzyskuje dostęp do Twojej Biblioteki Mediów i przesyła obraz, i będzie mogła udostępniać lub nie media innym użytkownikom o tej samej roli, w zależności od wybranych ustawień, możesz również móc mieć większą kontrolę nad swoimi mediami za pomocą filtrów
Co za wspaniała funkcja i naprawdę łatwa w użyciu! Czyż nie?
Zezwól użytkownikom na przesyłanie plików w najbardziej profesjonalny sposób
W tym poście pokazaliśmy, jak umożliwić naszym użytkownikom przesyłanie zdjęć w najbardziej profesjonalny sposób i dostosować naszą stronę do każdego przypadku, na przykład po prostu przesyłając formularz, lub pozwalając naszym redaktorom na utworzenie współdzielonego folderu, który tylko oni będą mogli zobaczyć w Bibliotece Mediów. To nie wszystko! Dzięki WP Media Folder będziesz mógł robić więcej, na przykład łączyć swoją Bibliotekę Mediów z usługą w chmurze. Niesamowite! Prawda?
Sprawdź więcej o WP Media Folder i ograniczeniu dostępu tutaj!
Gdy zapiszesz się do bloga, będziemy wysyłać Ci e-mail, gdy pojawią się nowe aktualizacje na stronie, abyś ich nie przegapił.


Komentarze