WP Media Folder Addon: DigitalOcean Integration
1. How to create a new API key in DigitalOcean?
First, you should login your DigitalOcean account on the site. Then go here or navigate to API section on the left menu, click on Generate New Key button.

After that, input the key name, and click on green tick button.

Finally, key ID and secret key will be displayed there. Keep it for the next step to login in WP Media Folder.

Create a new space
A new space can be created on DigitalOcean or WP Media Folder plugin.
The first way is to create on the DigitalOcean site, and click on Create button > Spaces in the upper-right corner of the dashboard.
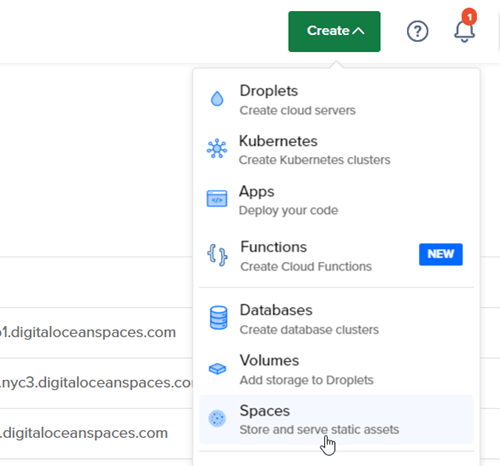
Choose a datacenter region, and input the name for space. Click on Create a space button.

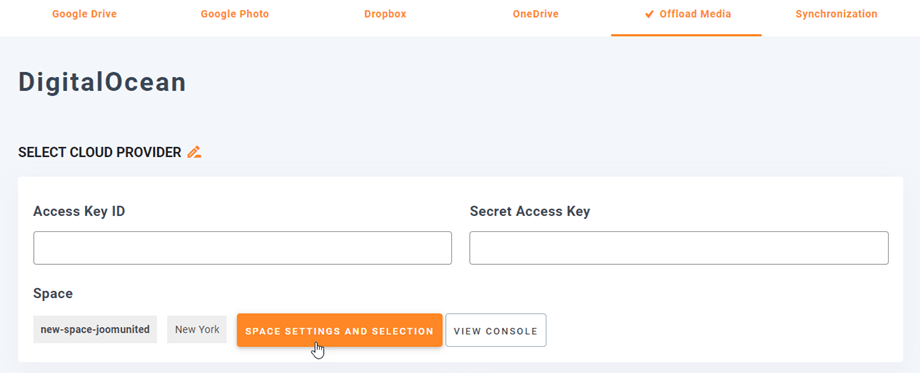
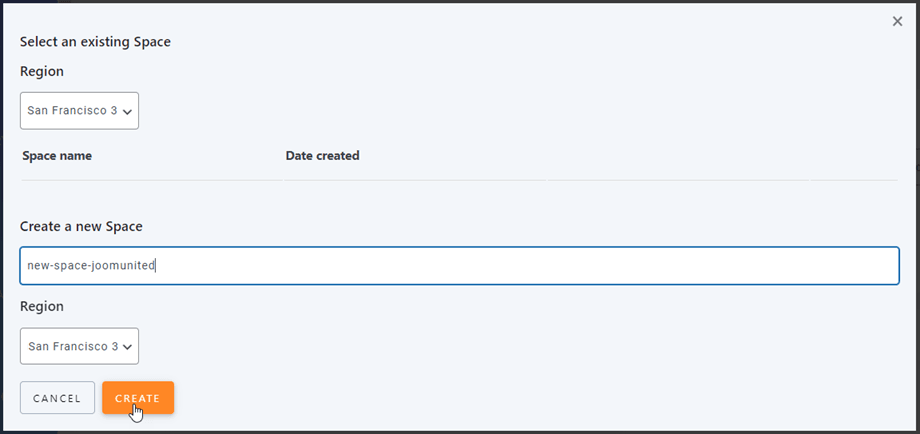
The second way is to create on WP Media Folder settings. Navigate to menu Settings > WP Media Folder > Cloud > Offload Media > DigitalOcean, click on Space settings and selection button.
Then select Region and name for the space.
2. Login to DigitalOcean from WP Media Folder
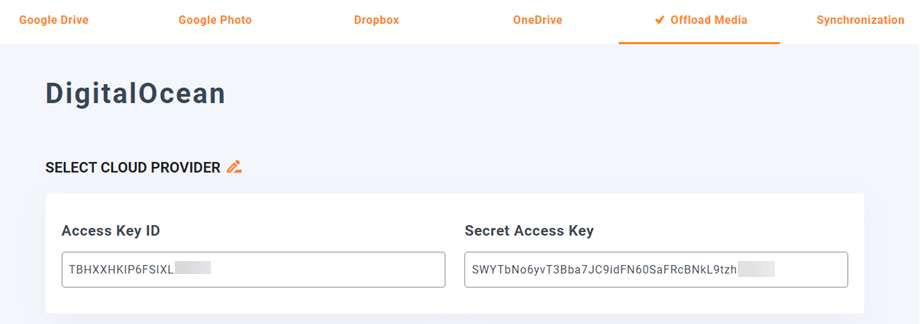
Return to the WordPress dashboard and click on the menu Settings > WP Media Folder > Cloud > Offload Media > DigitalOcean. Paste the following into the form fields:
- Access Key ID
- Secret Access Key
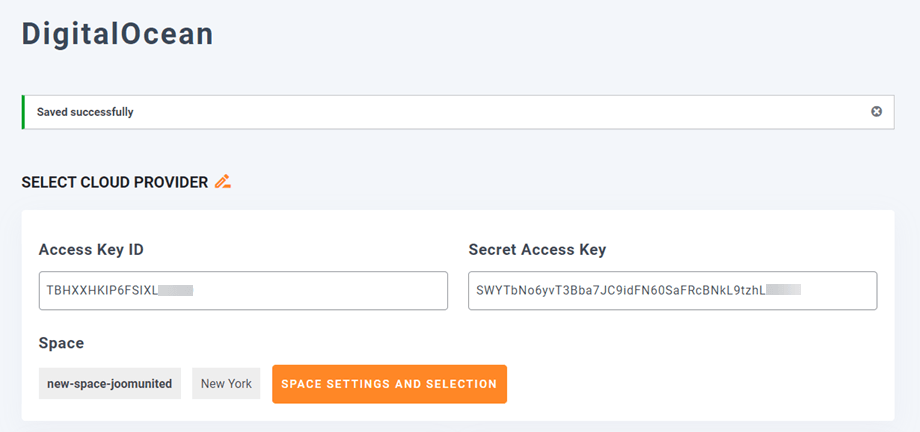
After that, save the settings and the connection should be a success. Then click on Space settings and selection button to select a space or create a new one. Please go to the next step to discover DigitalOcean features.
3. How does it work? What can I do with DigitalOcean?
How does it work?
Once you've connected WP Media Folder with DigitalOcean and enable Copy to DigitalOcean option, all your new media uploaded will be sent to DigitalOcean .
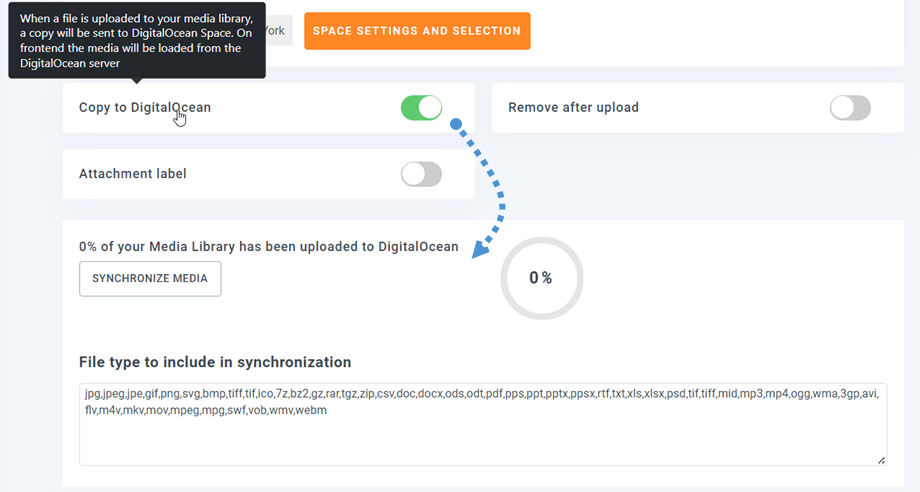
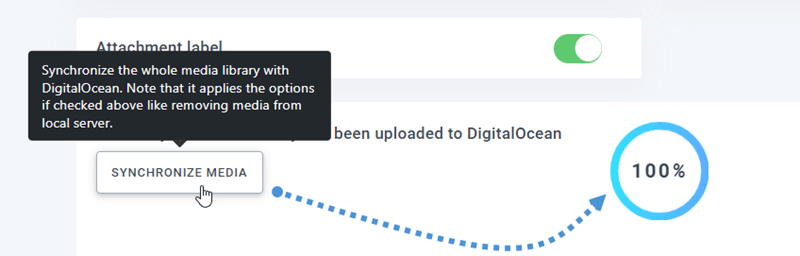
Remember to create and select a space where all your data will be stored. And if you want to sync your uploaded media before using DigitalOcean integration, click on Synchronize with DigitalOcean button. Then it will send all your existing media library to your DigitalOcean space.
In order to offload the media on your site, you should enable Remove after upload option, your media library will be completely stored on DigitalOcean instead of your server.
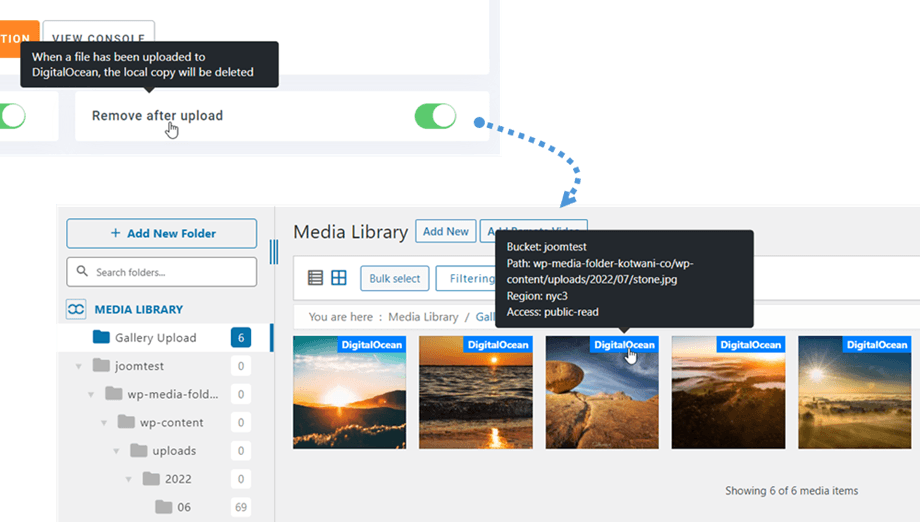
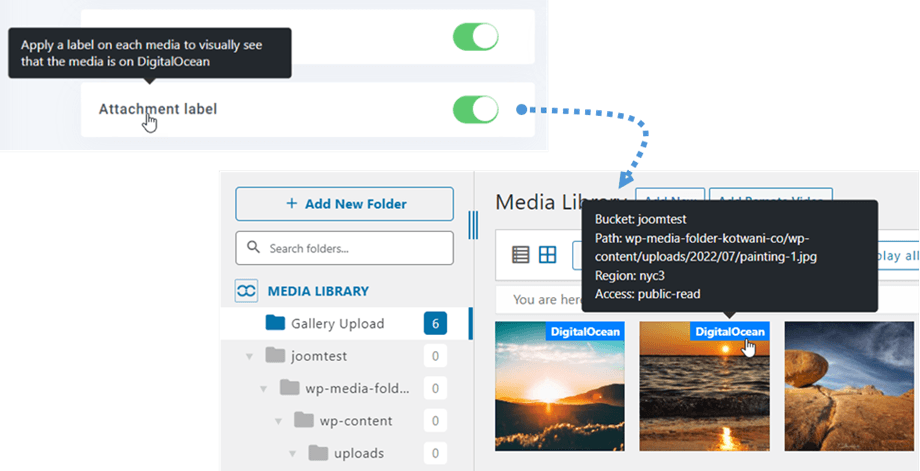
By enabling Attachment label option, the information on each media will be displayed when you hover on the DigitalOcean label on the top right.
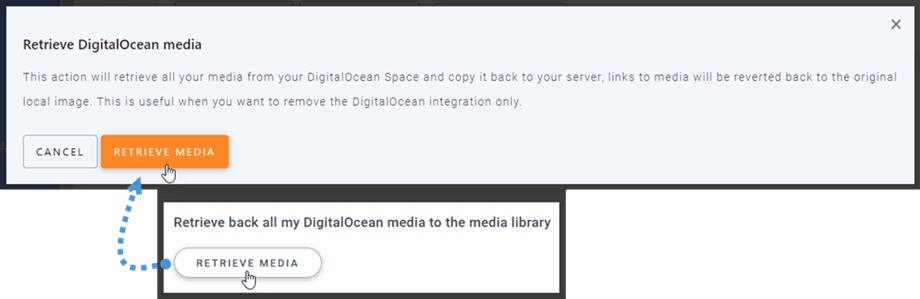
When you want to change your media location or remove the plugin, click on Retrieve Media button, then all your media will be copied from DigitalOcean to your media library. All former links added to your content will remain in place (no broken link).
How to connect CloudFront?
Cloudfront is integrated with our plugin. DigitalOcean provides two methods to establish a connection with CloudFront. One is by using Amazon S3, and the other is through DigitalOcean's default method.
Let's get started with DigitalOcean's default.
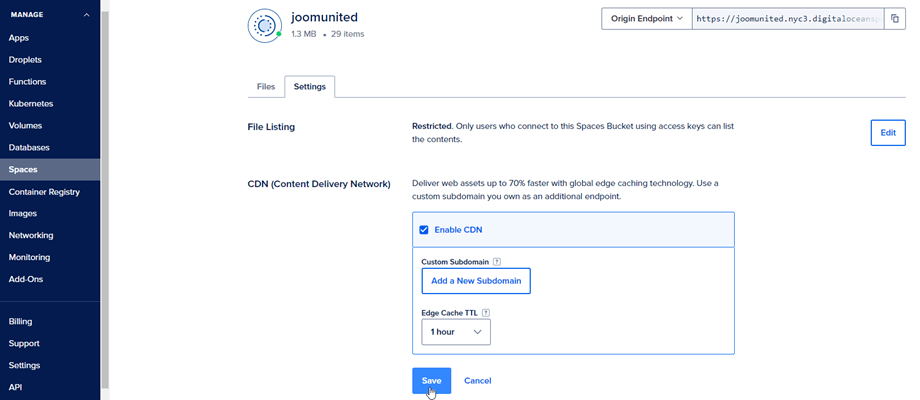
First, you should go to your Spaces on DigitalOcean and select the bucket you connected to your site. Then navigate to Settings tab.
At CDN (Content Delivery Network) option, click on Edit button, then tick Enable CDN option. And click on Save button.
A notification popup shows CDN has been enabled after a few seconds of loading. On the right corner, select CDN Endpoint option then copy the URL and paste it to Custom Domain (CNAME) field.

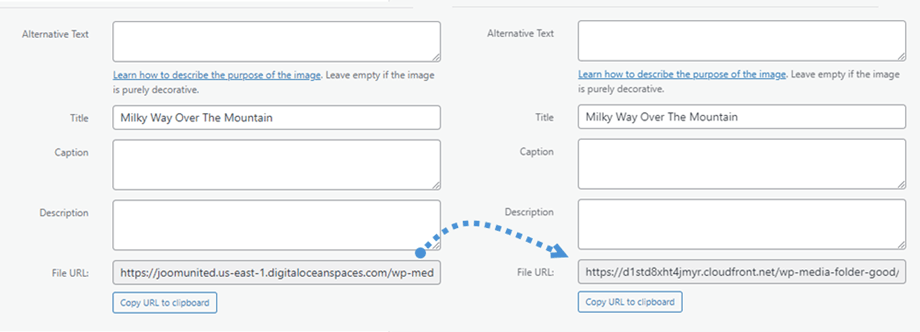
Finally, you can see the changes in File URL field in each image.

And the second way, you can use Amazon S3 Cloudfront. Firstly, at the Amazon dashboard, navigate to Services > CloudFront or go to this link.
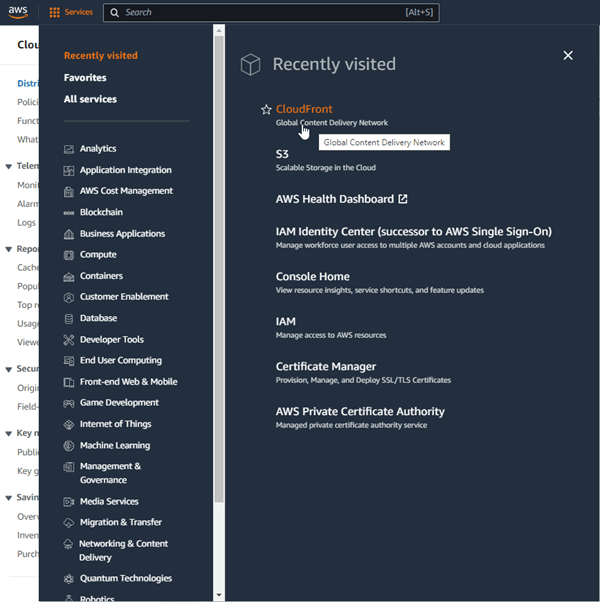
From here, click on Create Distribution button in the right corner.

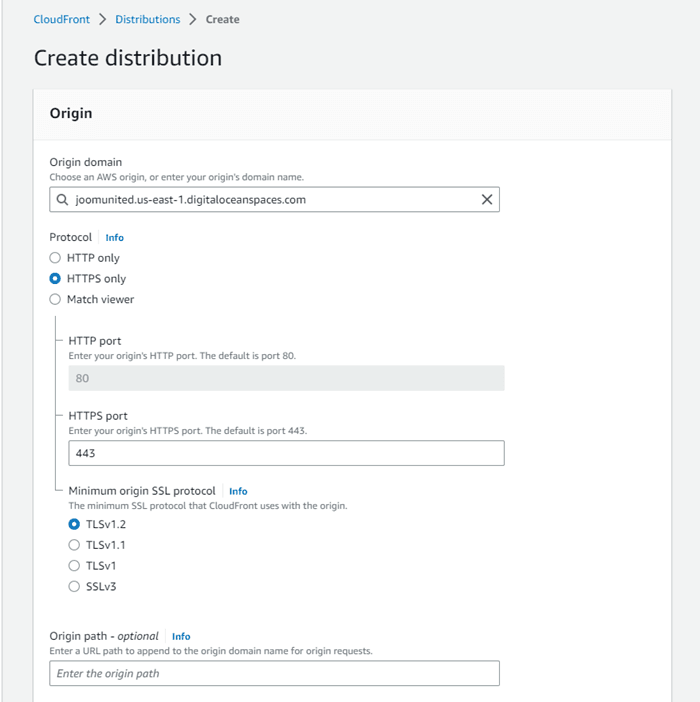
Then paste your domain on the Origin domain field. E.g: "https://joomunited.us-east-1.digitaloceanspaces.com"
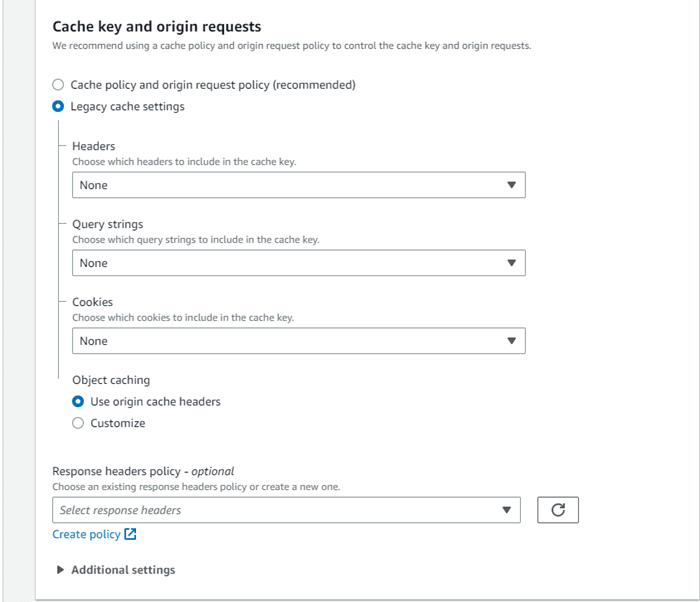
At Default cache behaviour > Cache key and origin requests section, select Legacy cache settings option.
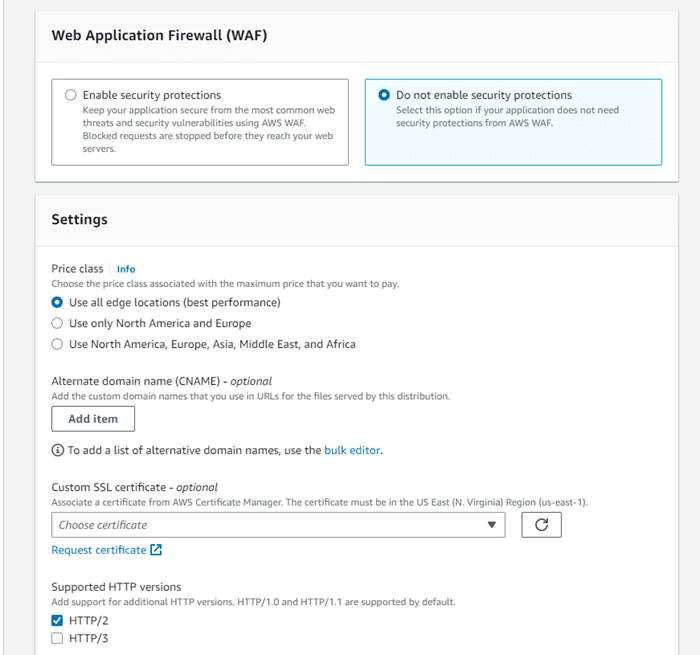
Next, scroll down to Web Application Firewall (WAF) section, and select "Do not enable security protections" option. After all, scroll down to the bottom and click on Create Distribution button.
Then it turns to Distribution details, copy the distribution domain name. And go to Amazon setting in WP Media Folder, and paste it to the Custom Domain (CNAME) field.
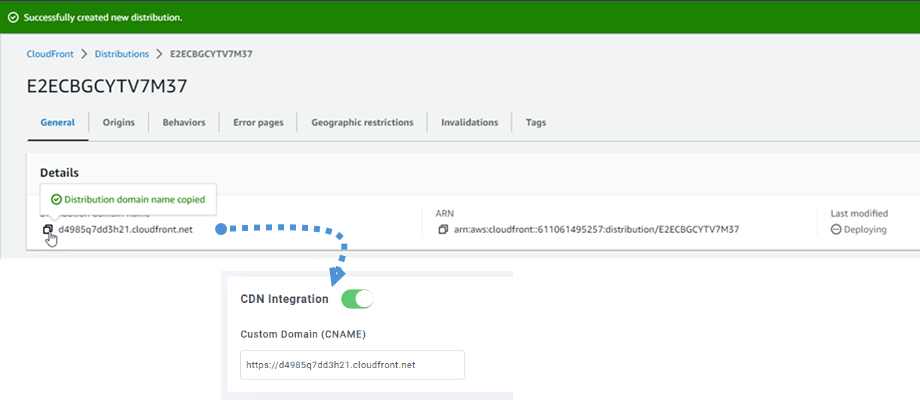
Please wait for a few minutes for the image to load fully when the Last modified field change from "Deploying" to the current date time.
Finally, you can see the changes in File URL field at each image.
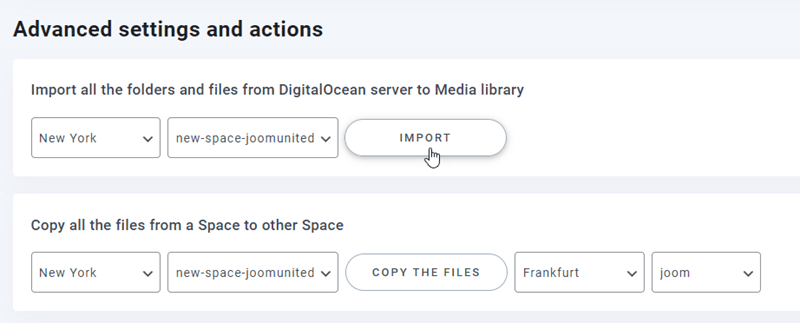
Advanced settings and actions
You can select a space to import folders and files from DigitalOcean server to your Media library. Or copy all files from one space to another one.