WP File Download: Files and Categories
- 1. First step in the file manager
- 2. Manage file categories
- 3. Manage file download
- 4. Add a file download category in your content
- 5. Manage single file
- 6. Update a file from WordPress admin
- 7. File access and management limitation
- 8. File download statistics
- 9. File upload form for frontend users
- 10. Shortcode generator for file listing
- 11. Blocks in Gutenberg
1. First step in the file manager
First things first: you can manage all files from the WP File Download WordPress side menu in your admin dashboard on WordPress, or by using the text editor button. WP File Download has also dedicated integration with page builders : Elementor, DIVI, WPBakery, Avada fusion builder and of course Gutenberg editor.
There is no difference, except for the fact that using the side menu gives you more space to work because the interface uses the full width.
Gutenberg is the default editor on WordPress now, so you can take refer to 11. Blocks in Gutenberg.

Click on the WP File Download button to open the file manager in a lightbox.
The interface is the same as in the WP File Download's side menu view. The only difference is that the interface occupies less space.
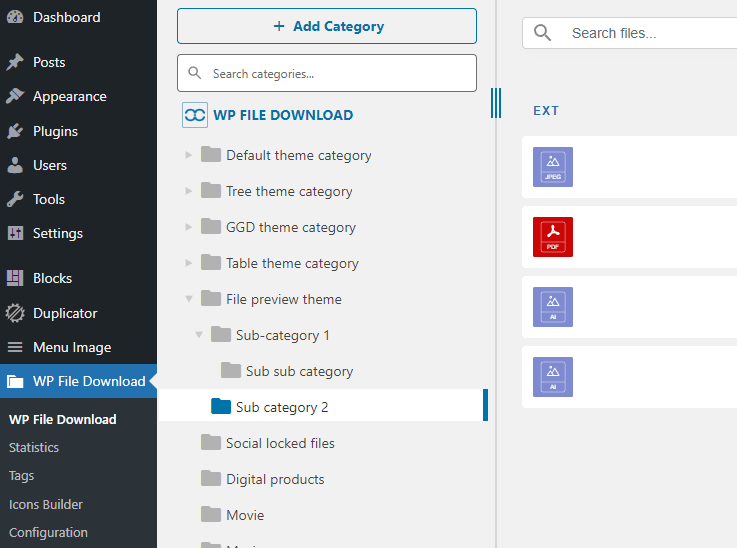
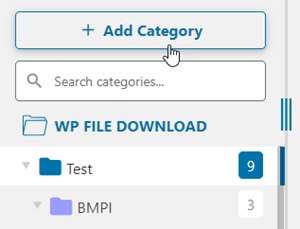
2. Manage file categories
In order to create a category, click on the "+ New" button in the top-left of your file editor.
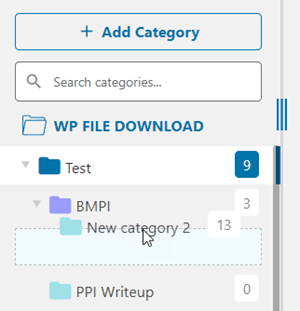
To order categories, you need to hover your mouse over the folder icon. Drag and drop vertically to define the ordering, and horizontally to define the level. This is exactly like in the native WordPress menu system.
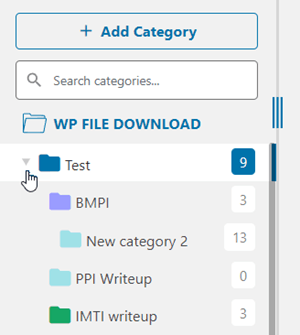
You can expand the category like an accordion. Global parameters can be used to set the default state: either all expanded or all collapsed. Look for the close categories option in WP File Download's configuration. To change the state from the editor you can click on the arrow buttons on the left side of each category.
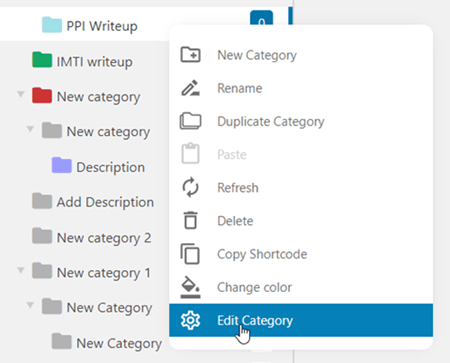
Category context menu
By right-clicking on a category in the left category tree, you can see the context menu of the category. From here you can:
- New Category: add a new category
- Rename: rename category, it can be done by double left-clicking on the category
- Duplicate Category: copy that category including its sub-categories but the files.
- Paste: paste the file to the category
- Refresh: refresh the category
- Delete: remove the selected category
- Copy Shortcode: shortcode is copied after clicking
- Change color: set color for the category icon
- Edit Category: go to category settings
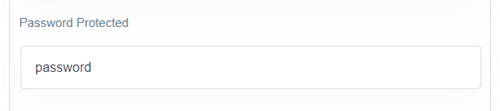
Password protected file category
In the category settings, you can set a password for that category in the "Password Protected" field. Do not forget to click on Save settings button.
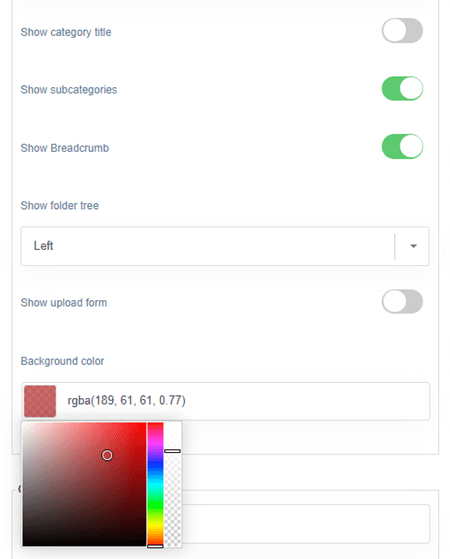
Category layout
Some category layout options can be adjusted in the category settings:
- Show category title: show/hide category title
- Show subcategories: show/hide sub-categories
- Show breadcrumb: show/hide breadcrumb
- Show folder tree: select position for folder tree: Left, Top, Right, or Bottom
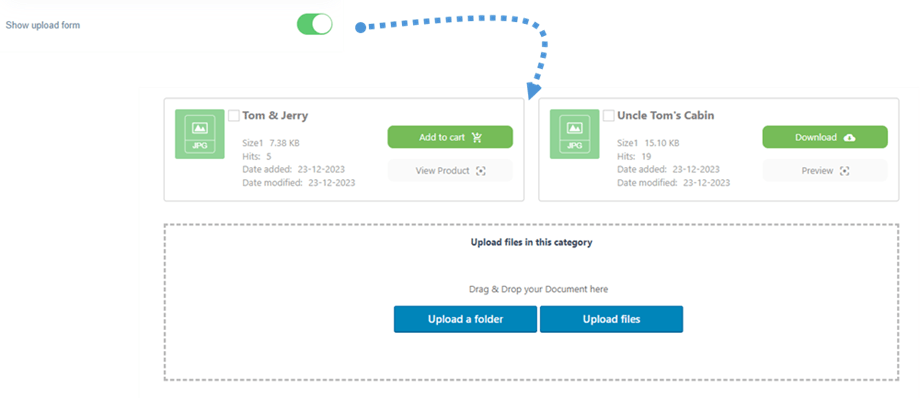
- Show upload form: show/hide upload form
- Background color: pick up a color for the category background
3. Manage file download
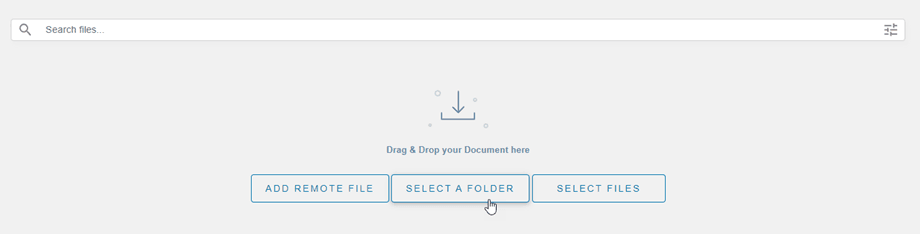
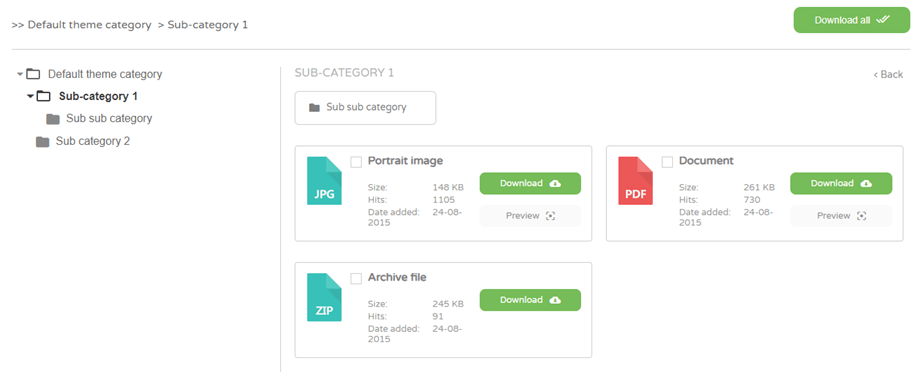
To add files to a category, choose a category and then drag and drop files in the middle. You can also click on the Select Files button instead.

Either way, select one or more files to upload. The uploader is HTML5 powered, so you can even send big files, which will be uploaded normally. The only limit you have is defined by your server's configuration.
You can do the same if you want to upload a folder to WP File Download plugin. Or you can click on the Select A Folder button instead.
Apart from using drag and drop to upload, you can also use this behavior to reorder files. WP File Download saves changes automatically!
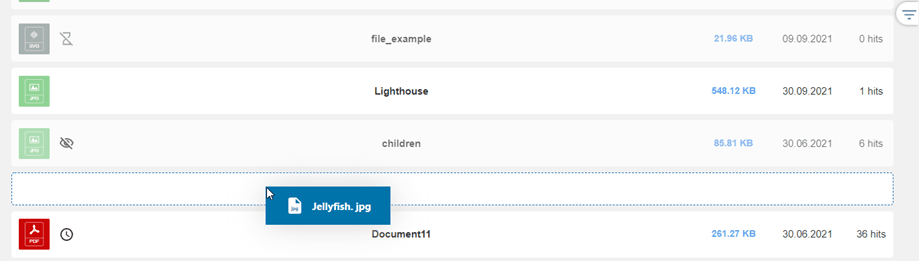
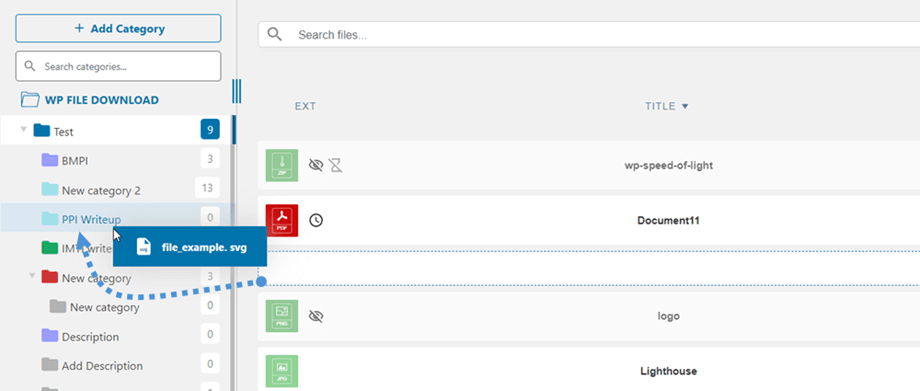
Once a file has been uploaded to WP File Download, you can make single and multiple file selections by clicking on files. You can select several files by pressing and holding Ctrl (on Windows) or Command (on Mac). The first method to move or copy files is to again use drag and drop. Drag and drop alone will move the files, and drag-and drop while pressing and holding Ctrl (on Windows) or Command (on Mac) will copy the files.
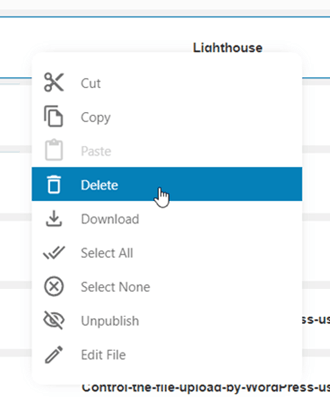
You can use the context menu by right-clicking on the file to manage, such as cutting, copying, and pasting. From this context, you can also download files and quickly Unpublish/Publish the file. By double-clicking on the file, you can directly go to the file setting beside entering through the context menu.
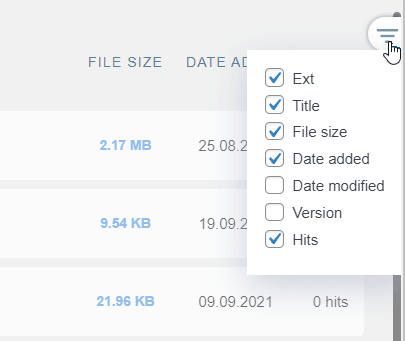
- Type
- Title
- File size
- Date added
- Date modified
- Version
- Hits
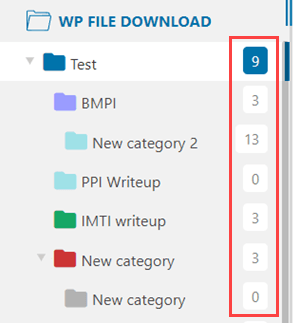
Display file counts in categories on admin
To display file counts in categories, you first need to enable the File count option in WP File Download > Configuration > Main setting > Admin tab.

After that, you can see the number of files in categories on the right.
File download multicategories
When you choose or edit a file, you can use the Multi category field in the right panel to add it to multiple categories. Use this option to better organize files that can belong to multiple categories.

File search engine on admin dashboard
You can navigate quickly to a specific file or a bunch of files by using the Search tool at the header. The details options will be dropped down after clicking on the icon.
There are several options you can set to filter while searching:
- File types
- Category
- Creation date
- Updated date
- Weight (from - to)
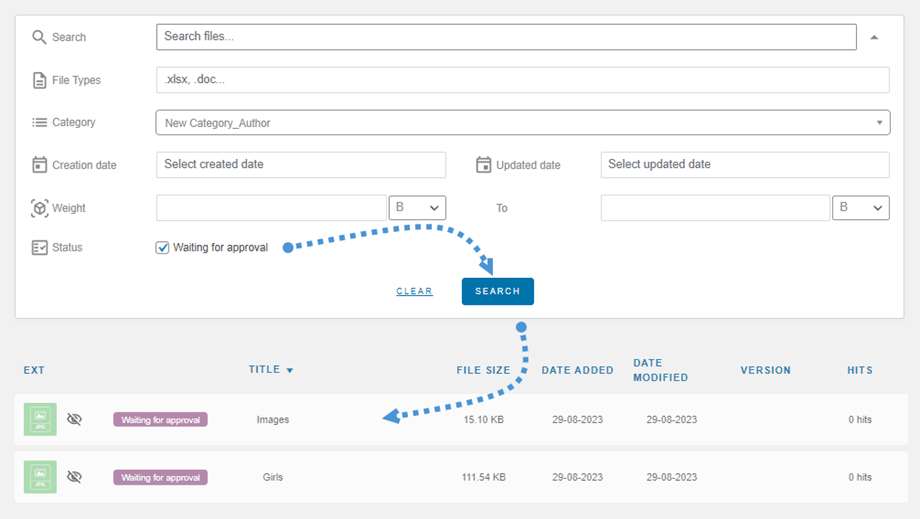
- Status: Waiting for approval
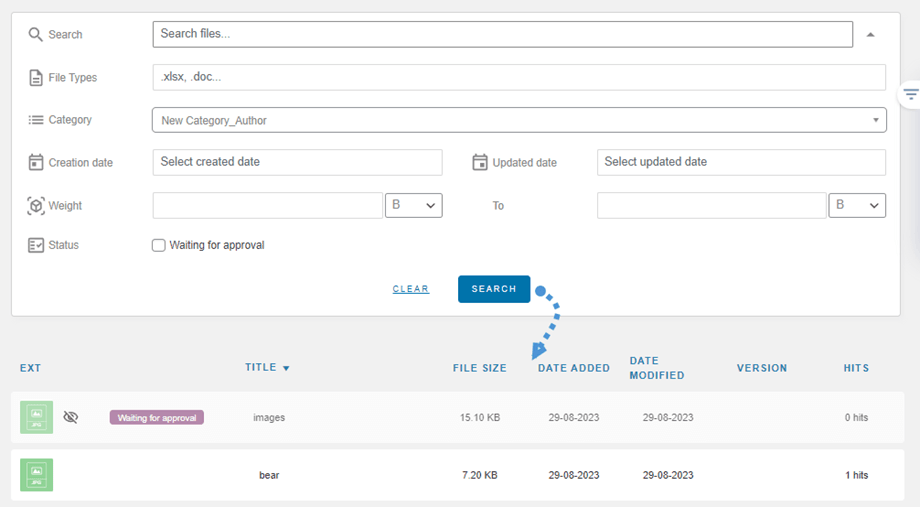
After entering the name and setting the desired filters, click the 'Search' button. The results will appear below the search engine. If you wish to reset your search criteria, simply click the 'Clear' button.
File frontend upload with approval
In a few cases, if a user has only "Upload files on frontend" access right activated, neither "Edit categories" nor the "Edit own categories" then the files he uploaded are in the status "Waiting for approval" in the backend Dashboard.
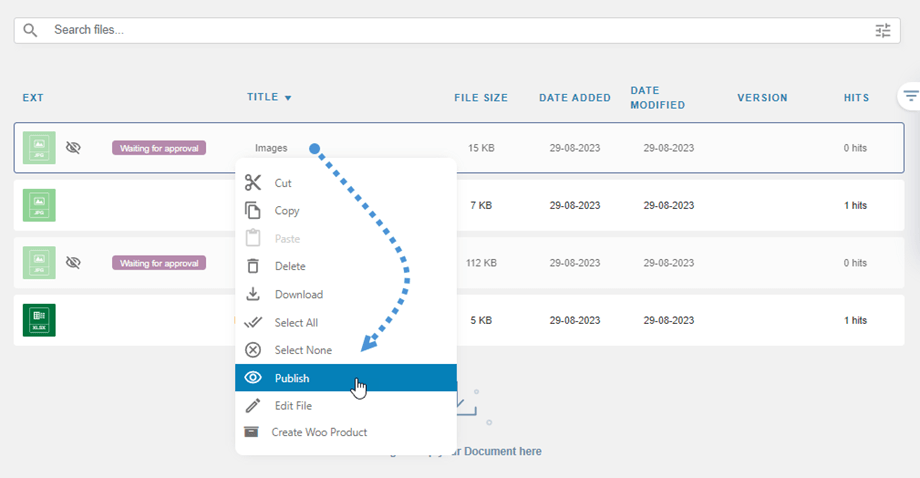
The admin can then use the filter on the dashboard to select one or multiple files. After selection, simply click the 'Publish' button at the top to publish those files all at once.
4. Add a file download category in your content
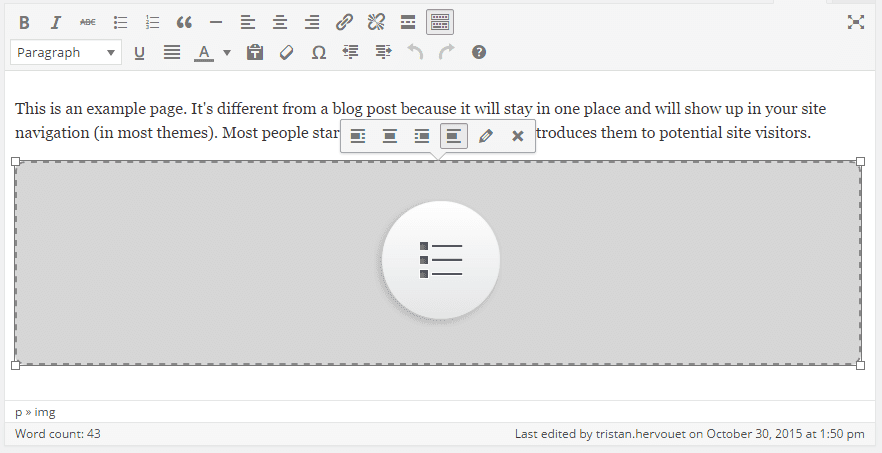
To insert a file category into your content, open a page, post or any other WordPress content and click on the WP File Download button. You can select a category from the field that appears.
Click on the Insert this category button in the right column.
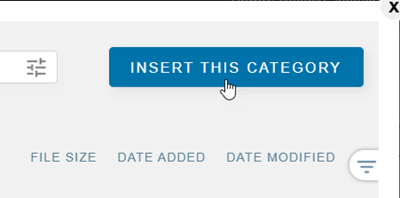
The file category will appear in your post or page instead of the grey area.
Save your content and it should be displayed in the public-facing frontend.
The first time you insert your category in your content, you need to save the page and post. However, you can then manage the category's files or subcategories without having to refresh or save the content.
If you click back on the WP File Download grey area in your content, and then on the WP File Download button, you’ll simply reopen your file category so you can choose a new one.
Save your page or post and you're done: you have successfully added a category of files and its subcategories to your WordPress content.
Please go here if you are using the Gutenberg editor.
Upload form in category view
By enabling "Show upload form" option in the category settings, a user can upload files if his role is allowed.
Other display options
You also have the option of inserting a category of files or a single file into your WordPress content using a shortcode. In order to use shortcodes for categories, you have to enable this feature from the Main setting > Admin tab: look for the Display shortcode in category option.

You can get your shortcodes from WP File Download, either from the category view or the file view from the right sidebar.

Pagination for file listing
Additional options are available, like file pagination. If you have a massive amount of files you can add pagination so that your WordPress content loads faster and is easier to digest for your readers.
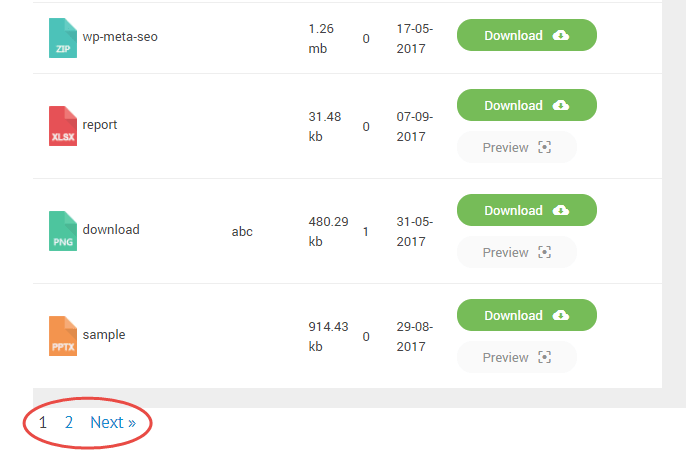
File pagination can be enabled and configured from the Main setting > Frontend tab.
Open PDF in browser
Finally, you also have an option to open the PDF in a new tab instead of previewing it as a lightbox. You can find this option in the Frontend tab too.

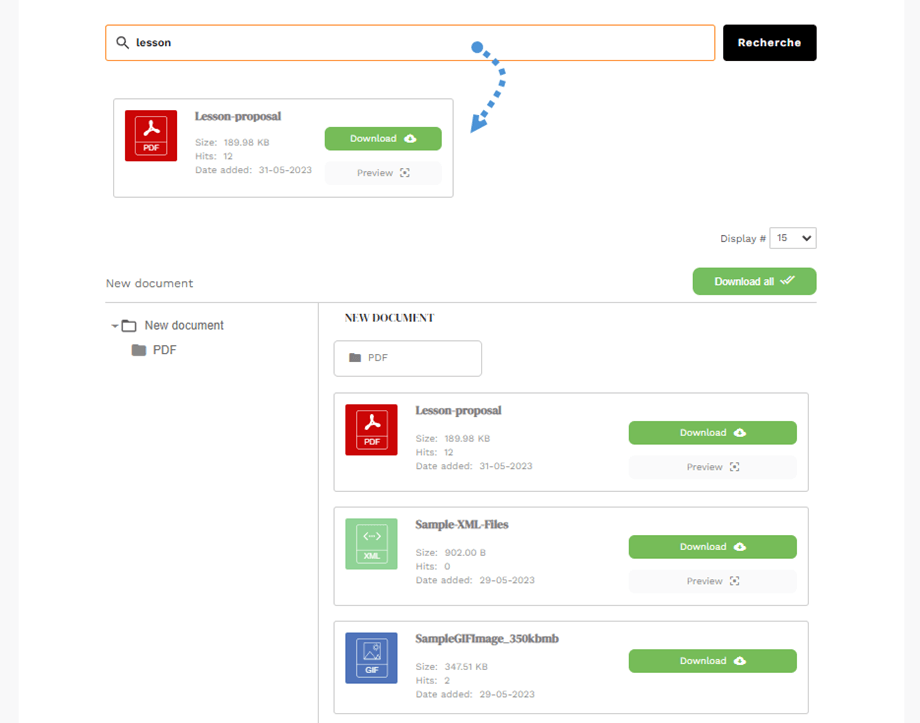
Display search bar in category view
In order to display the search field above file category listing view, navigate to category settings, scroll down and enable Display file search option. The result will be shown below the search bar.
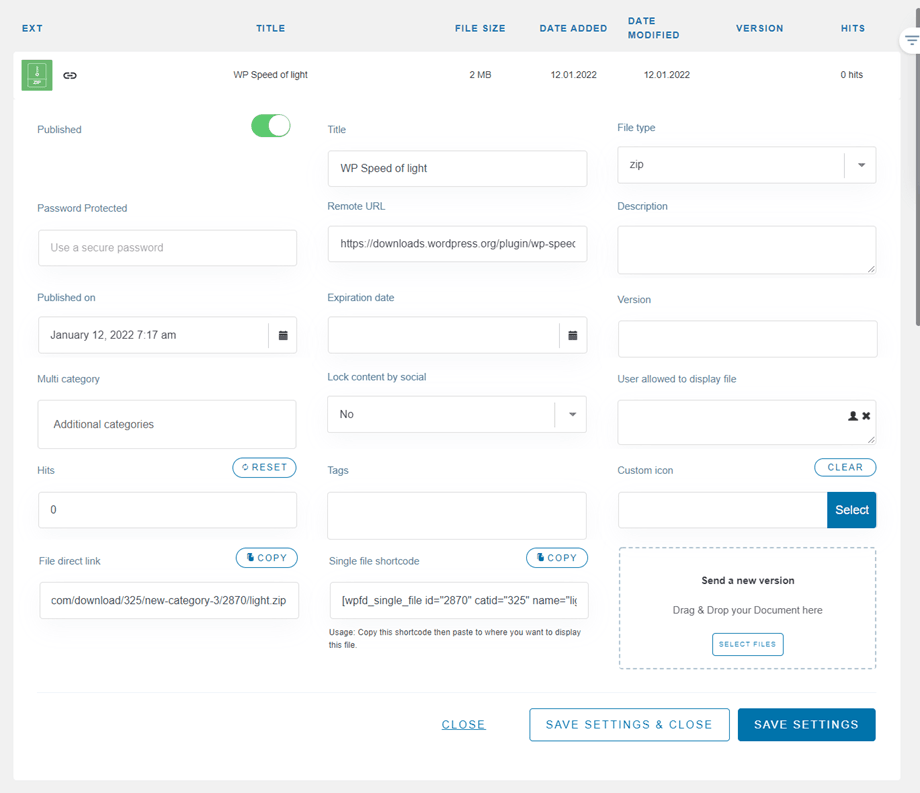
5. Manage single file
Managing single files has never been so simple. With a single click of a button, you can set up the file options and insert files into your WordPress posts or pages.
WP File Download allows you to define the following for each file, you can see it by double-clicking on the file.
- Title
- File type
- Password Protected
- Remote URL (for the remote file only)
- Description
- Published on
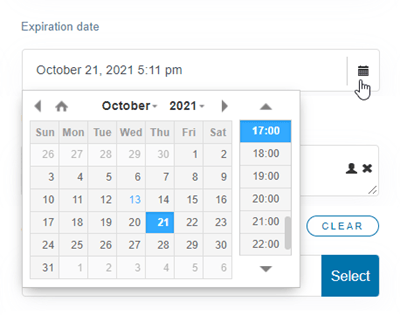
- Expiration date
- Version
- Multicategory
- Lock content by social
- User allowed to display file
- Hits
- Tags (for the file search engine)
- Custom icon
- File direct link
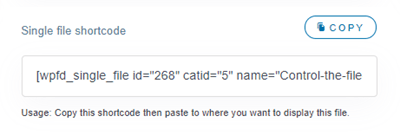
- Single file shortcode
- Button colors (configurable from the Icons Builder > Single file tab in WP File Download's configuration)
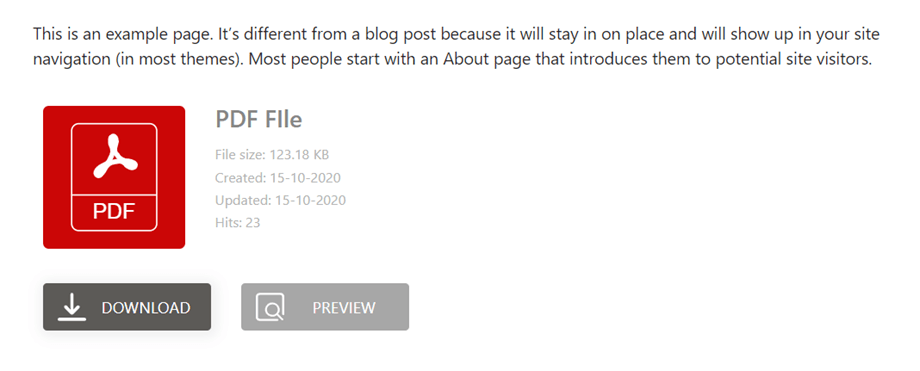
The file will appear in your content with a single file icon.
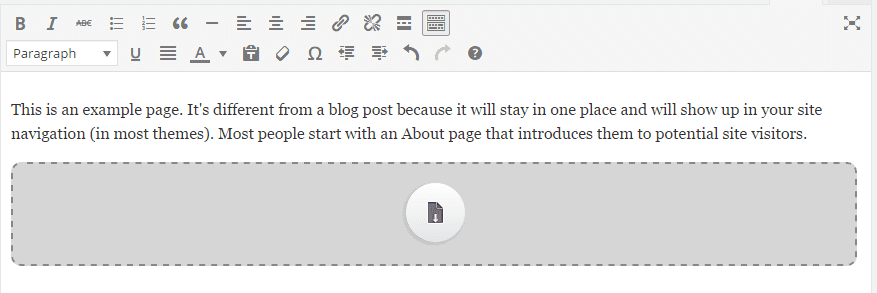
A file is added as a button in your content:
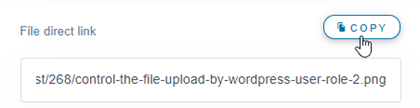
Moreover, each file has its own direct link, which you can use to share more easily. You can find the URL at the bottom of the right panel.
Please visit here for more information about the single file block design.
Define a file download expiration date
You can set the expiration date for a file, which means that the file will not visible on the frontend (as a single file or a file in a category) after that day.
Password-protected file download
In the file settings, you can set a password for that file in the "Password Protected" field. Do not forget to click on Save settings button.

6. Update a file from WordPress admin
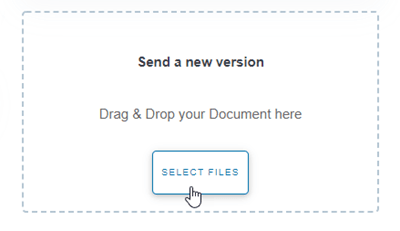
In order to update a file, just open WP File Download, click on the file of your choice and use the Send a new version button in the right column to replace the file.
You can change the file format, size or anything else. WP File Download detects every single change and replaces the file The plugin includes a versioning system, so that each time you update a file, the old version is stored and listed above.
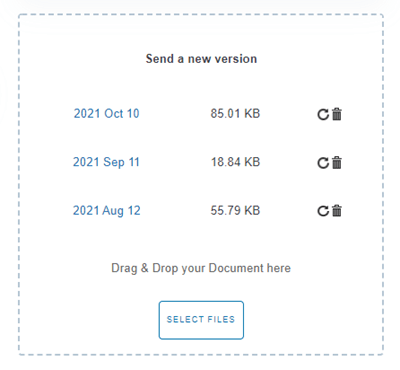
You can use this feature to restore a previous file version or to delete old file versions.
7. File access and management limitation
8. File download statistics
WP File Download comes with a dashboard showing download statistics, accessible from the WP File Download > Statistics menu.

The dashboard will help you to get download details about the files available on your website. From the top, there's a chart and you can filter by
- File category: include one or several categories
- Single file: include files one by one in the statistics calculation
- Download per users: select users who downloaded files
- Filter by date range (date when files have been downloaded)
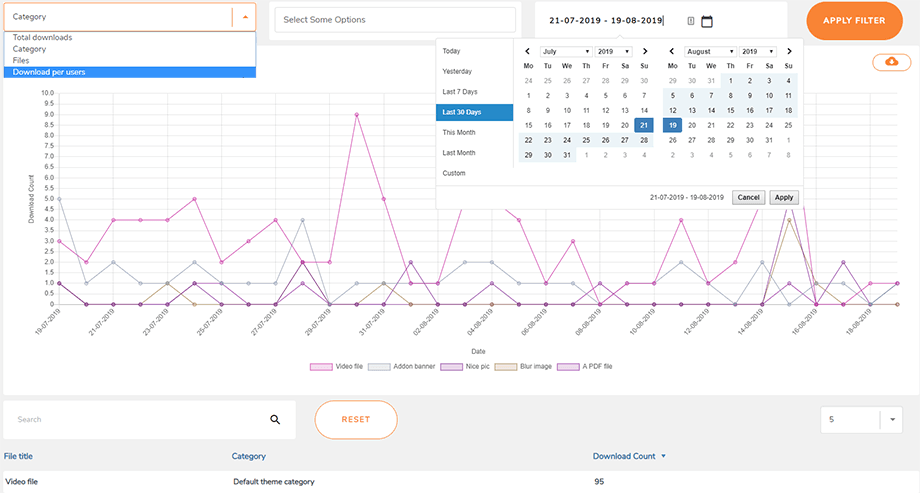
At the bottom of the page, you can also view details about downloaded files or use the search engine to filter the results.
Furthermore, you can export the download statistics as a .csv file by clicking on the Download icon below the Apply Filter button.
Note: It will not be counted with cloud files.
9. File upload form for frontend users
From the public side of your WordPress website, you can allow users to upload files into a pre-defined category. To set this up, first access WP File Download > Configuration > Shortcodes and choose a category where you want users to upload files.
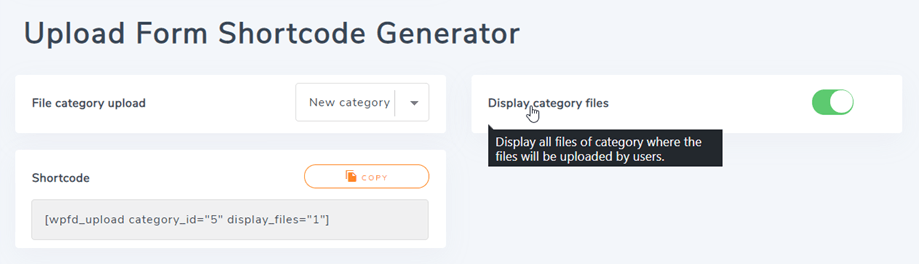
Copy and paste the shortcode displayed at the bottom of this page into your WordPress editor where you want the upload form to show on the frontend.
The files in that category will display below the upload form if the Display category files option is enabled.

Users should login to be able to upload their files. If users do not login, a login form will appear, prompting them sign in before uploading files.

If the visibility of the category is already public, you're done!
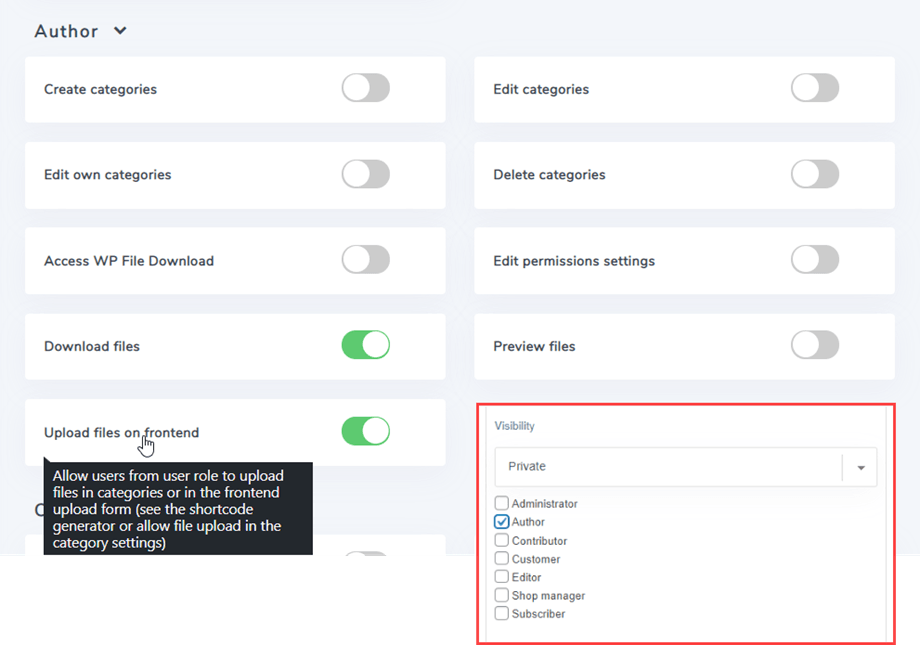
However, if you want to choose some selected user groups to upload files on the frontend, you should set two permissions for them. Here is one for the "Author" role, for example:
- Visibility: for the selected category, choose "Private > Author".
- User roles: in Author section, enable the "Upload files on frontend" option.
10. Shortcode generator for file listing
You will find the Category Shortcode Generator in the WP File Download > Configuration > Shortcodes tab.
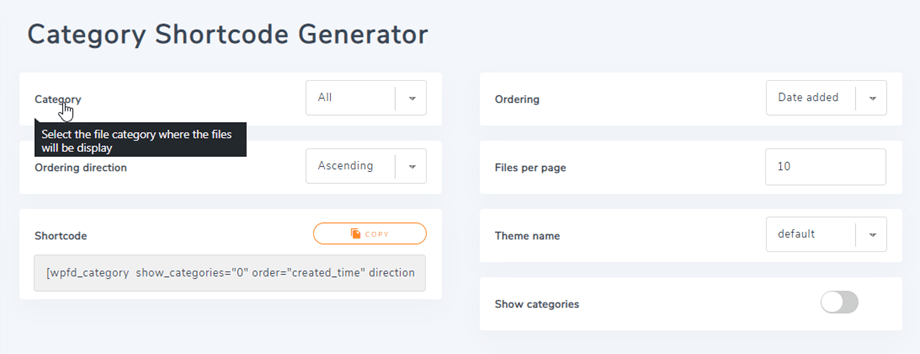
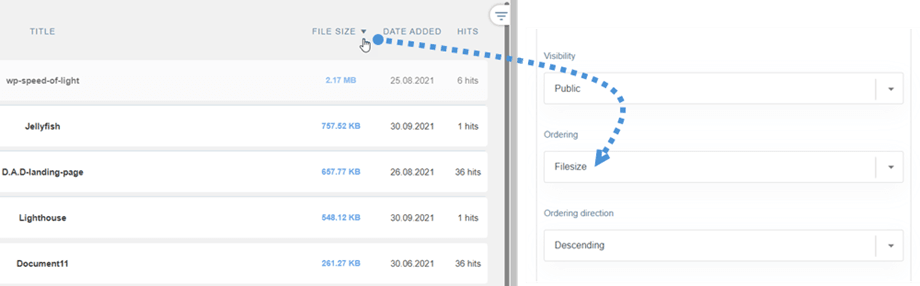
A shortcode generator is available to load a custom selection of files. The available shortcode options and filters are:
- Category: select one or all categories
- Ordering: ordering, type, title or description, size, version, date or hits
- Ordering direction: Ascending/Descending
- Files per page: Set a maximum number of files on a page
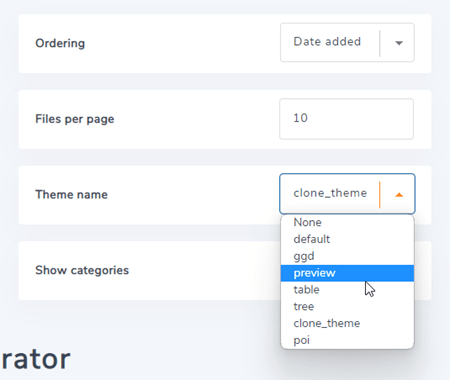
- Theme name: Choose an existing theme to category shortcode
- Show categories
After choosing those options, the shortcode should be, for example: [wpfd_category show_categories="1" order="created_time" direction="asc" number="10" ]
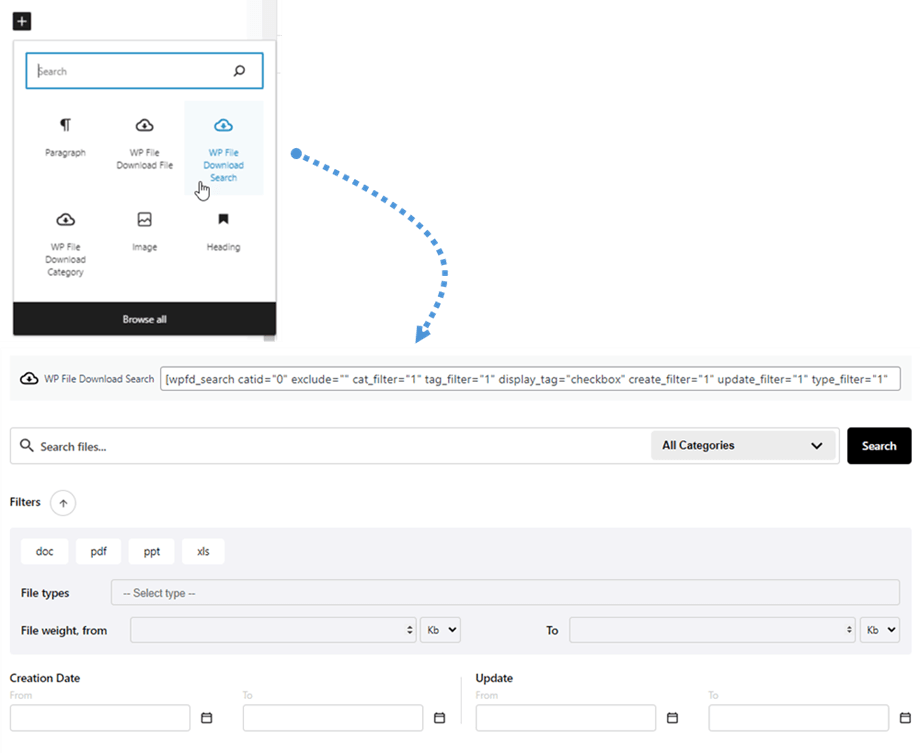
11. Blocks in Gutenberg
To showcase your files, categories, or search engine within the Gutenberg editor, utilize the three available WP File Download blocks: 'WP File Download Category', 'WP File Download File', and 'WP File Download Search'.
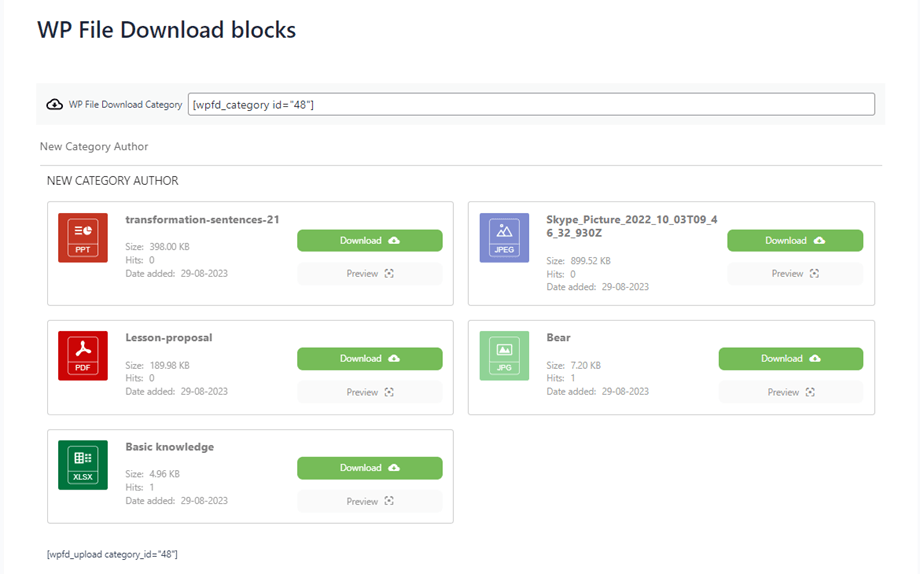
WP File Download Category block
In order to display a file category in the Gutenberg editor, navigate to the Widgets section and click on the 'WP File Download Category' button. This will present a dropdown menu where you can choose the desired category for display on the frontend.
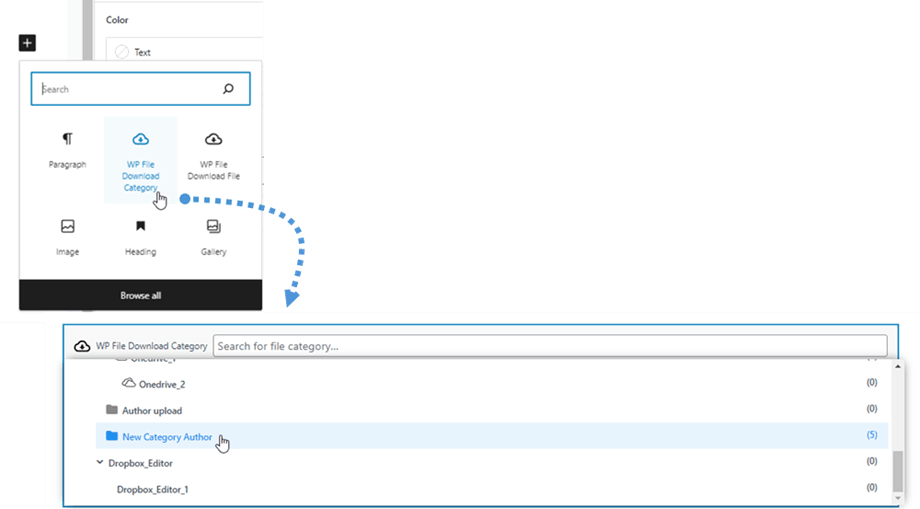
Once selected, a preview of the category will appear below.
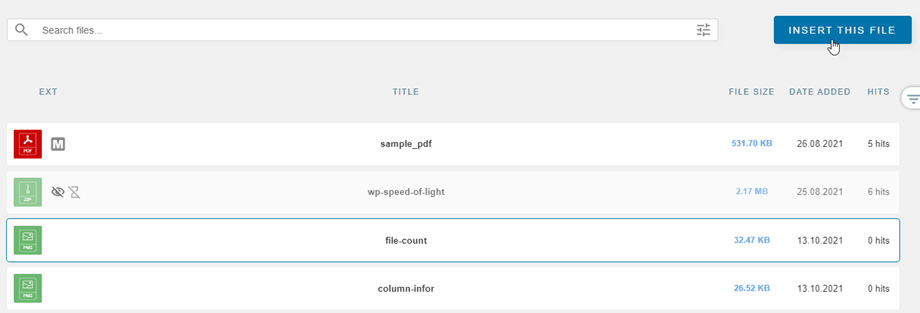
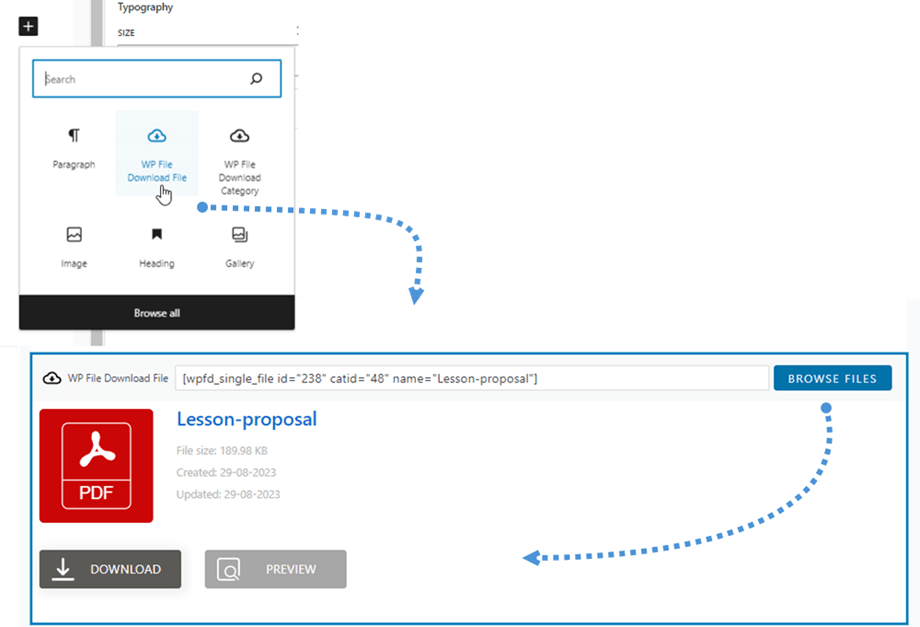
WP File Download File block
To display a single file design, follow a similar workflow. Navigate to the Widgets section and click on the 'WP File Download File' button. Next, click the 'Browse Files' button to select the desired file. After selection, a preview of the file will be displayed below.
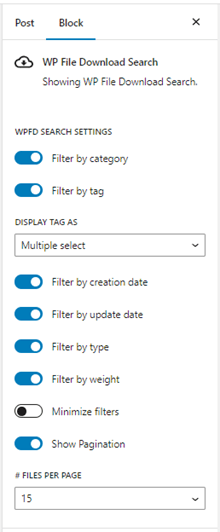
WP File Download Search block