


The easiest file manager for WordPress

As you may know, having a file repository is, usually, a must in a website as we could need to offer downloads for many reasons such as providing invoices, documents as a service, or maybe digital products.
The bad thing of having a file repository is that it could be difficult to manage it and sometimes requires too complex settings to be able to provide files as downloads, and also could get messed everything on your media library between normal media and downloads but don't worry, wP File Downloads offers a solution ;)
WP File Download has many options to make easier the process of creating downloadable files, as easy as just dropping a file in the category where you want to add it, and the process of insertion is as easy as using a shortcode or one of the multiple dedicated blocks available in all major page builders.
In this post, we're going to show you how easy it is to work in the WP File Manager Interface.
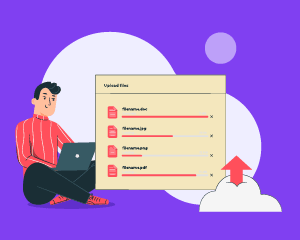
Looking for a powerful file management solution for client websites?
WP File Download is the answer. With advanced features like file categories, access
restrictions, and intuitive UI.
Impress your clients with top-notch file organization!
Learning how to create downloadable files in WordPress
So let's see how easy it is to create downloadable files, first of all, you should have already installed WP File Download as that's the plugin we're going to use in this tutorial.
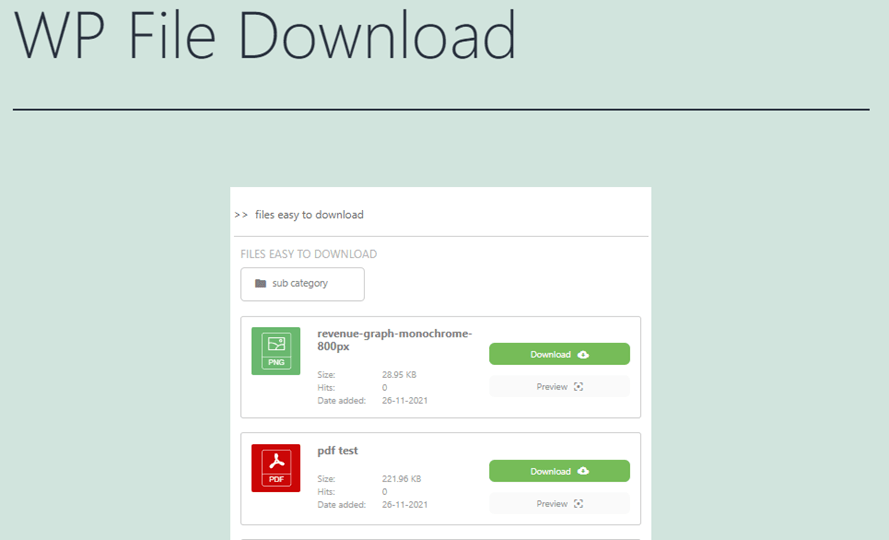
Now that we have it installed, let's create a category to keep things organized. We're going to call it files easy to download, for this, go to WP File Download > WP File Download and click on +Add Category.
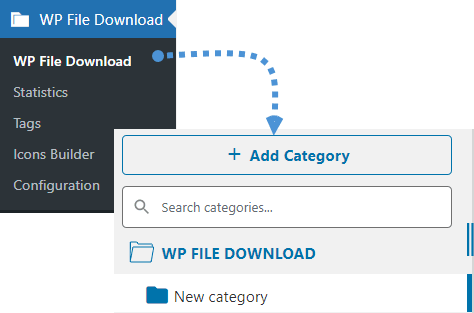
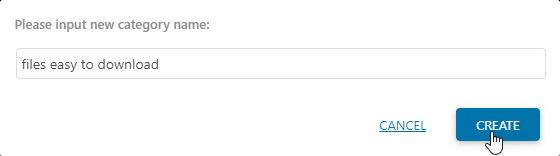
A box will be opened where you can type the new category name, type it and then, click on Create.
And done! Category created, you'll be able to see it in the left panel.
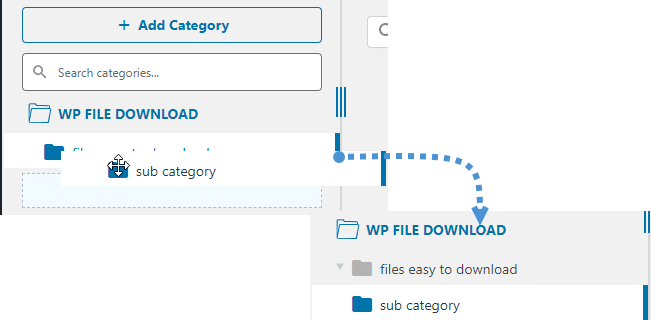
You can easily create subcategories by creating a new category and placing it a little to the right of the parent category.
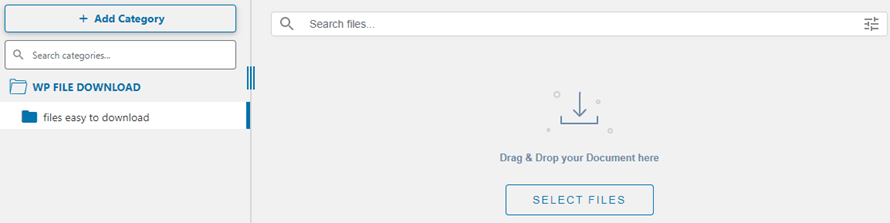
Now that we have created the category, let's start adding files so we can insert them into a post or a page.
In order to add files, you only need to drag the files from the folder and drop them in the category.
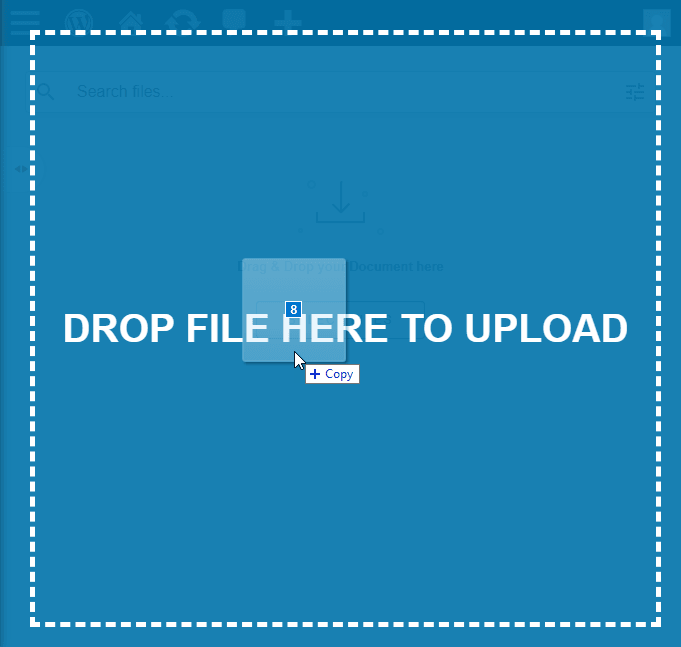
You'll see the pop ups loading the files with the uploading process and after all, it's done, you'll have the files in your category ready to be inserted ;)
There are multiple things that you can set up for the categories and the files but first, we'll see how to insert the category on your post/page using the Gutenberg editor, for this, go to your page/post and click on + type WP File Download in the search bar and you'll see the blocks available to insert your files, we'll use the WP File Download Category block.
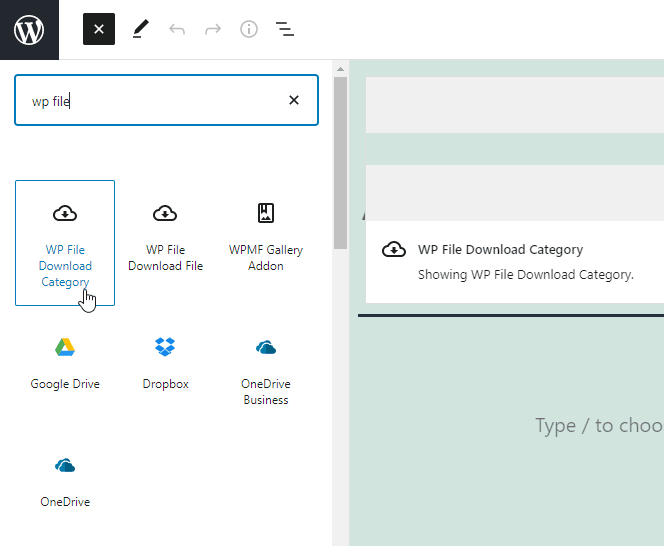
This will insert a search box where you can start typing the category name and select it.
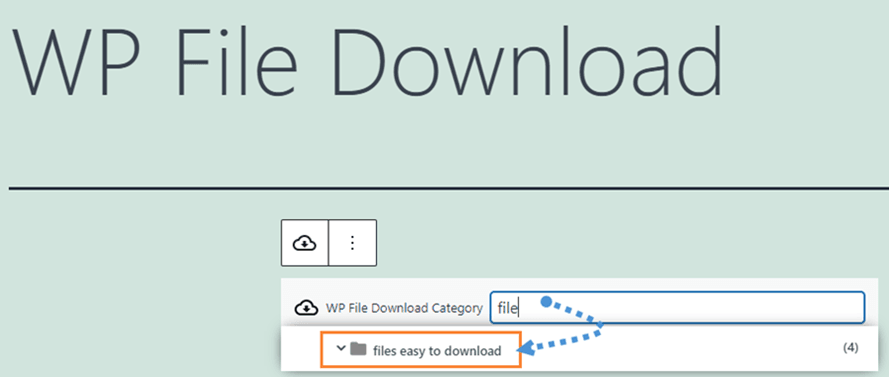
Clicking it will insert the category and that's all, you only need to publish it, it's as easy as creating the category, adding files and finally, publishing the category.
Manage the Downloadable Files from your WordPress Website
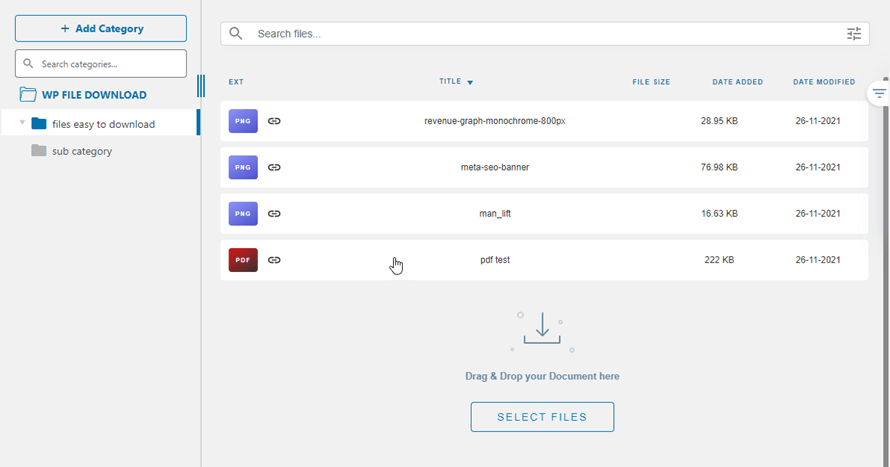
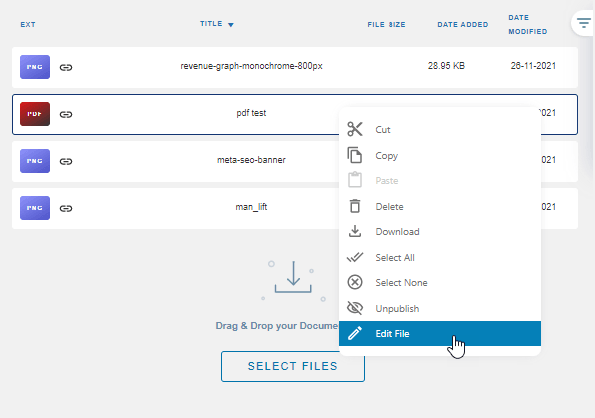
Now that we know how to insert the categories in our content, let's see how easy it is to manage the files directly from the WP File Download dashboard.
First of all, go to WP File Download > WP File Download and click the category that you want to manage, in this case, we'll manage the category that we created for this tutorial, files easy to download, let's split this section of the post in two, first, manage files, and the second part, manage categories.
Manage Files
If you were thinking that WP File Download only allows you to insert the categories as we explained before, well it's not all this can do as you have a really big amount of tools that will allow you to make the categories and files fit your content and business.
From the WP File Download dashboard, you will have, basically, a file manager just like the one you have on your PC, as you have the option to, for example, copy files, paste them, download them directly from the admin, delete them, and also set them to be Unpublished.
Apart from this, you can also edit the file itself with the many options offered by this awesome plugin, in order to see the files option, go to the files that you want to manage, do a right-click, and then click on Edit file.
A section will be opened with all the available options for the file, many options will be shown, between those, you have the password protection, Description, Hits, Custom Icon, and Update the File.
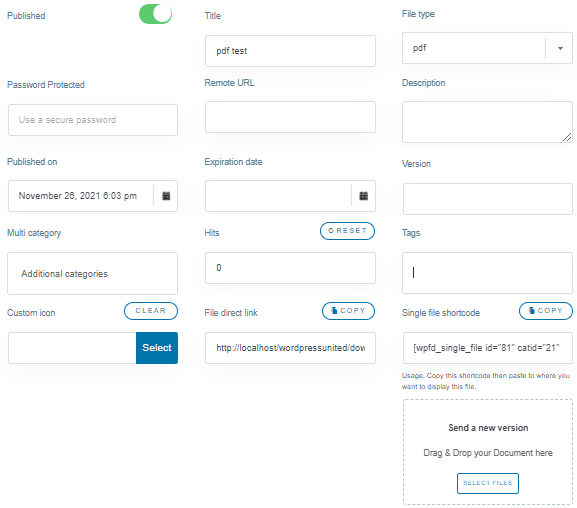
On this section, as you can see, are all the options that you would like to add to a file from the most common that are the title and description, to other more complex like set an expiration date, update to a new version, password protect it and also, the ability to add the same file in multiple categories with the Multi Category option.
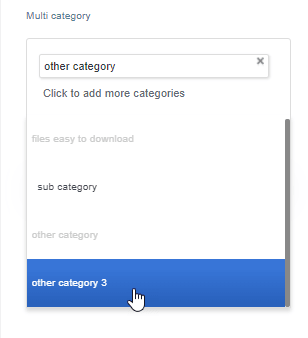
You can select all the categories and subcategories if you want to.
This is really useful if, for example, you want to keep all PDFs per author or in a single category for PDFs to organize them but you want to insert them in the frontend using a different category, you could, for example, create bundles :)
Manage Categories
From the WP File Download dashboard, you will also be able to find the options to manage the categories by doing a right-click, you have the option to:
Rename: Change the category names.
Duplicate categories: It Will create an exact copy of the current category(with the settings as well).
Refresh: In case you have it connected to, for example, your server files.
Delete: Will remove the categories with the files inside.
Copy Shortcode: so you can easily go to your post and paste the shortcode.
Change Color: You can change the category color in order to be able to easily differentiate them.
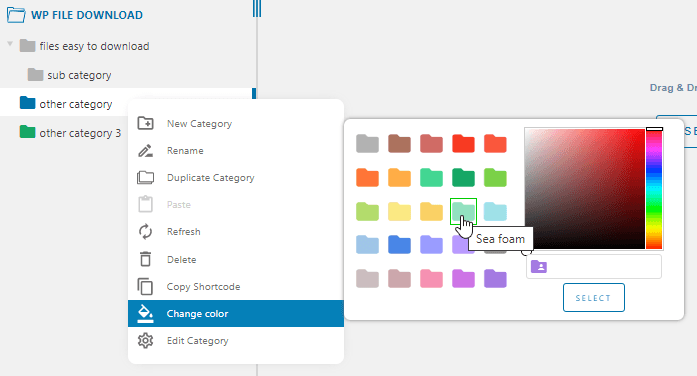
Edit Category: This option will allow you to change the category settings(like the Edit File option).
From this section, you can change any settings from the category, you'll see the option to add a description to the category, rename it directly from here, and many other things that we'll describe here.
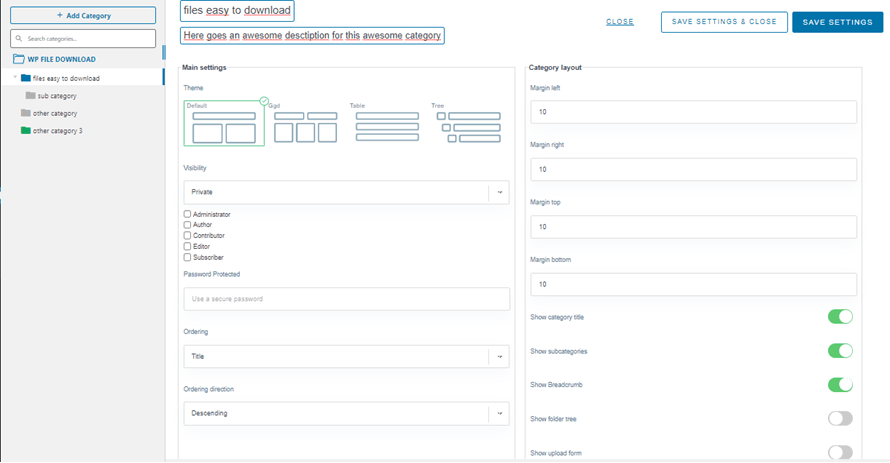
In the first column, you have the main settings that include:
Theme: You can choose between the themes that you have, by default, there are 4 themes.
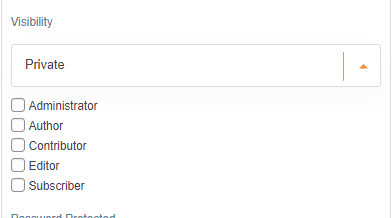
Visibility: With this option, you can set a category to be available for the public or only for a specific User Role.
Password Protected: This is another option that can be used to set a category private so instead of available for a specific user role, this will be available to those who have the password.
Ordering: This option will allow you to set a default order for your files, you can choose between Title, Type, Description, File Size, Date added, Date modified, Versio and Hits.
Ordering direction: This is to define the direction of the order, you can choose between ascending and descending.
On the second column, you can find the basic category layout options, on this section you can define:
Margins: This option will allow you to define the margins of each side of the category in the frontend.
Show or hide: In this section you have the option hide or show the following things: Category title, subcategories, Breadcumb, folder tree and the upload form.
This would be the first part of the category options, then we have another section with two columns and more options to set up our category.
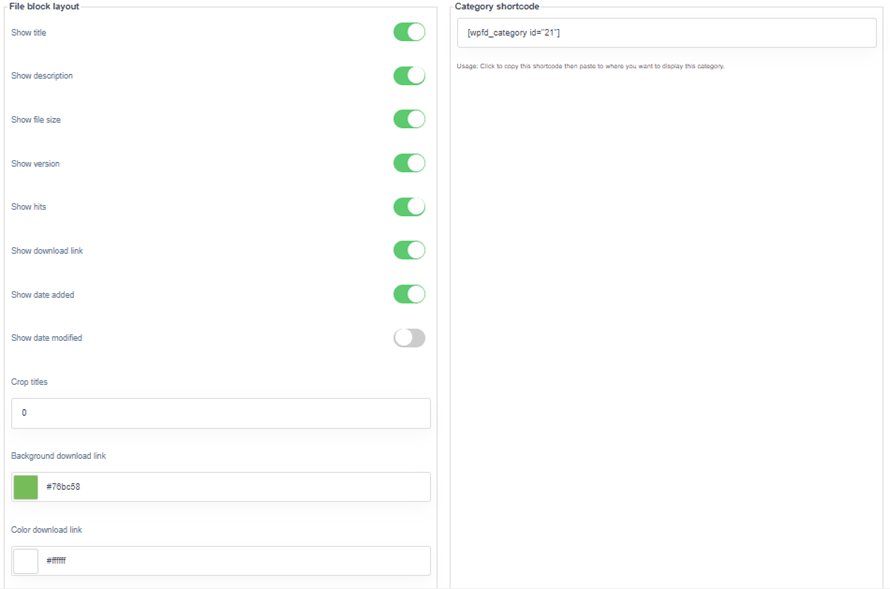
On the first column of this section we have the basic file layout options:
Hide or show: This first part will allow you to show or hide many aspects of your files: title, description, file size, version, hits, download link, date added and date modified.
Crop titles: Define a default number of characters to cut the titles after that character amount.
Background Download link: The color of the button "Download" background.
Color Download link: The color of the text for the download button.
These would be the options for the first column on this section while on the second column we have the shortcode available to copy it in case we want to insert it into any post or page after finishing the category setup.
This would complete the files and categories options for managing, as you can see it is as easy as doing everything directly in the categories dashboard from WP File Downloads and you have all the options to make your categories fit your content :)
Calling all webmasters!
Enhance your client websites with WP File Download. Create secure and customizable file
repositories, allowing clients
to easily access and manage their files.
Upgrade your web design services today!
Start using WordPress as a File Manager
As you can see, converting your WordPress website into a professional File Manager is as easy as install WP File Download ;) and that's not all we can do, there are other awesome features like cloud connection with services like Dropbox, OneDrive, and Google Drive to save your server storage, awesome! Isn't it? So what are you waiting for? Go here and get your membership now! :)
When you subscribe to the blog, we will send you an e-mail when there are new updates on the site so you wouldn't miss them.

Comments