


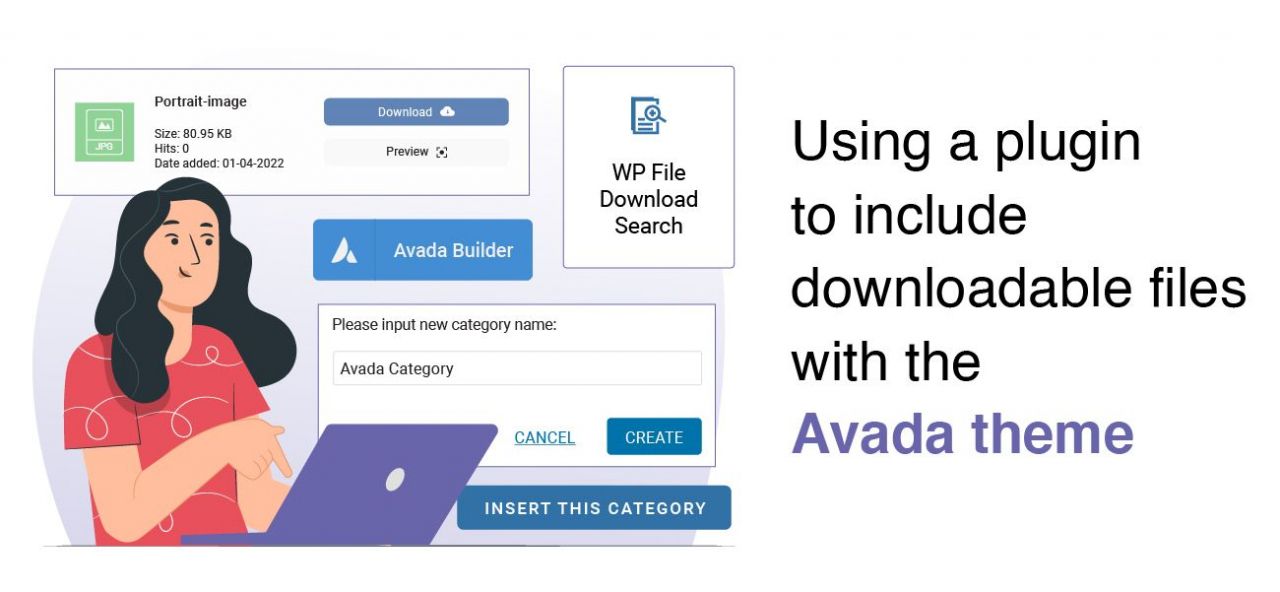
Using a plugin to include downloadable files with the Avada theme
The Avada theme is one of the most powerful themes available as it comes directly with a page builder and many options to customize your site, but it could not have enough tools when creating a downloadable files page, and here is when WP File Downloads improve everything!
WP File Downloads come with many tools that will allow you to get the most professional file repository available to download for your users and the best part is that it is really easy to use and is compatible with Avada and all major themes and page builders.
You will be able to use WP File Downloads with Avada in the frontend and backend builders, saving you a lot of time and work with a lot of quick options to customize and make it fit your frontend pages.
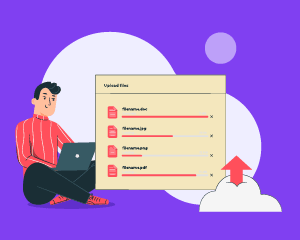
Looking for a powerful file management solution for client websites?
WP File Download is the answer. With advanced features like file categories, access
restrictions, and intuitive UI.
Impress your clients with top-notch file organization!
Creating a file repository using the Avada theme builder
This tutorial was made using the Avada theme, the Avada Builder, and WP File Downloads so these are necessary to be able to follow the steps described here.
Okay now that we have all the necessary tools, we can go ahead and start managing our files directly from the Avada Page Builder, for this go to the page/post that you want to edit and select the Avada Builder option.

This will load the backend Avada builder, in this section you can add a container as you normally do, and then, click on + Element.

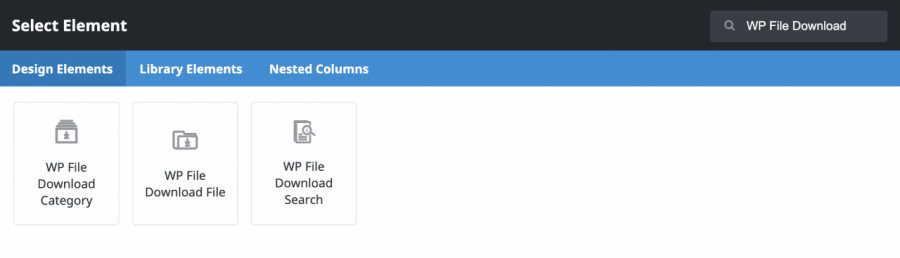
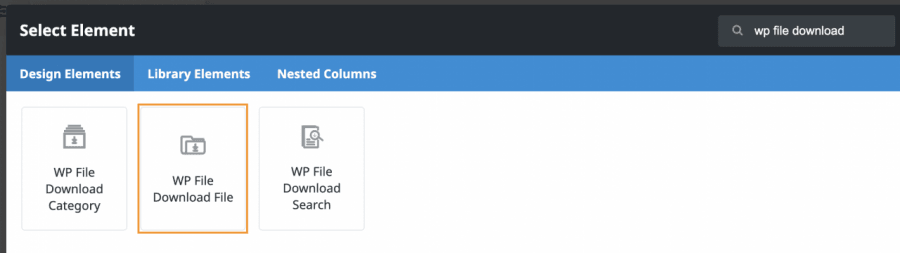
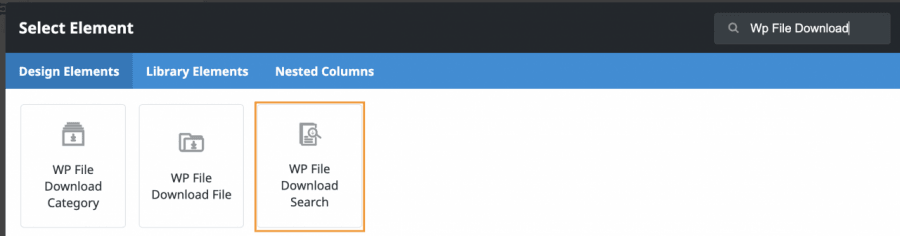
Now that the Elements library opened, you can type WP File Download and check the widgets available.

There will be 3 widgets available:
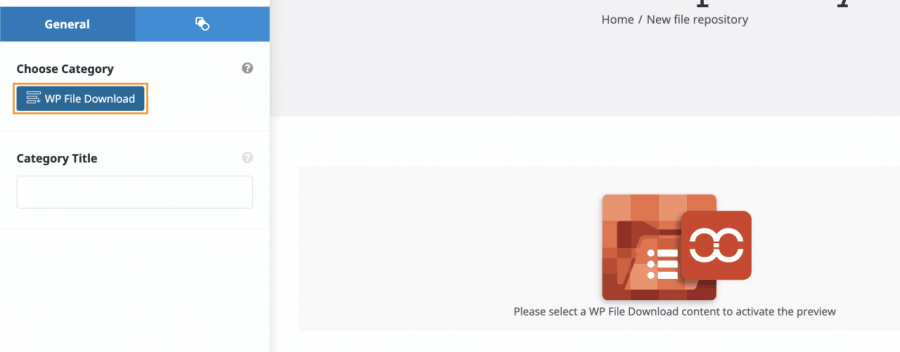
WP File Download Category: this will allow you to insert an entire in your pages and posts, in order to use it, click the element, this will show you another screen where you can select the category, and click on the WP File Download button.

Clicking the button will load the entire WP File Download dashboard in an embedded pop-up on this screen you will be able to see all you already created categories/subcategories, you can edit them and also create a new one.
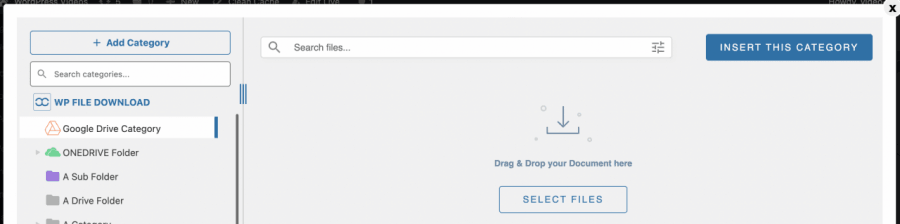
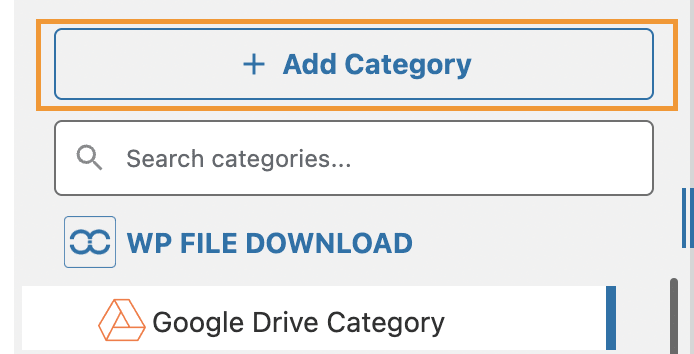
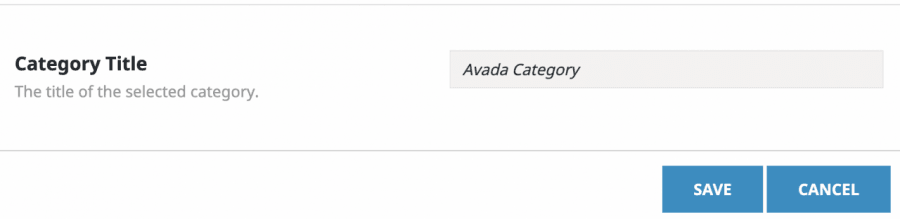
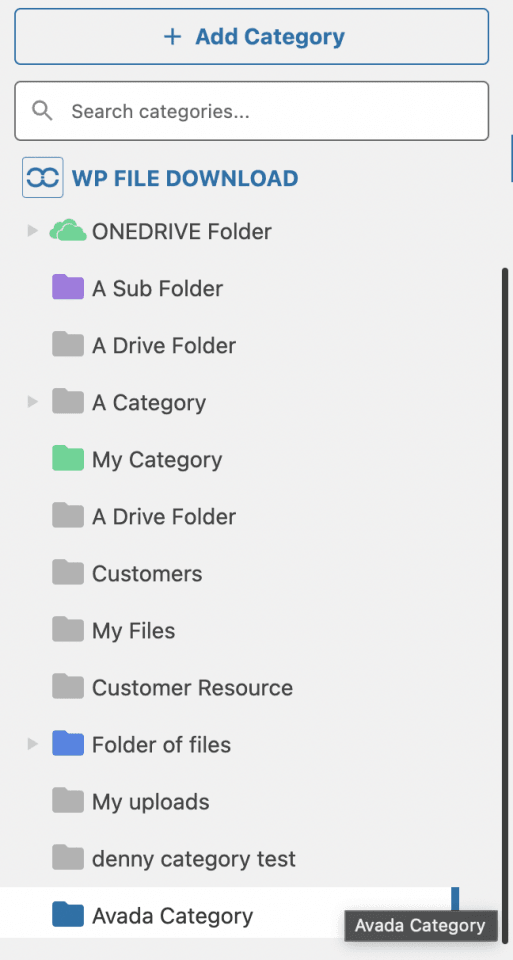
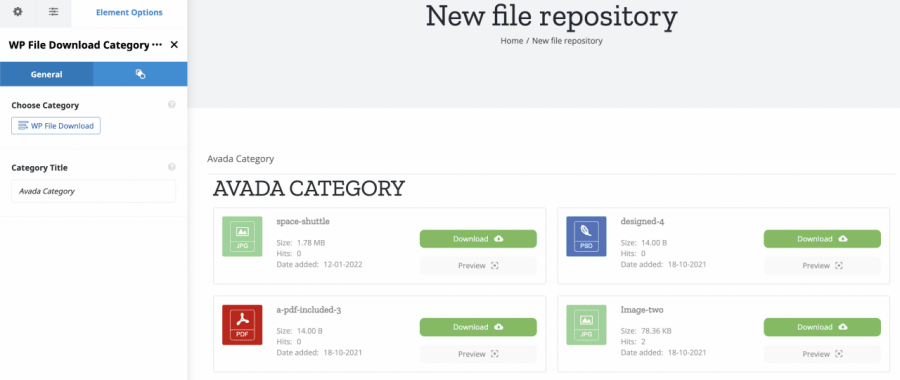
As you can see, you can easily manage all your files and categories, we are going to create a new category for this tutorial, for this, click on + Add Category.
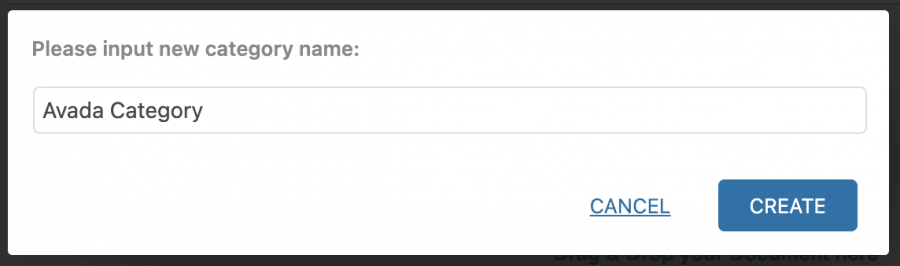
This will show a pop-up where we can type the category name, for this tutorial we are going to call it "Avada Category" so give it a name and then, click on Create.
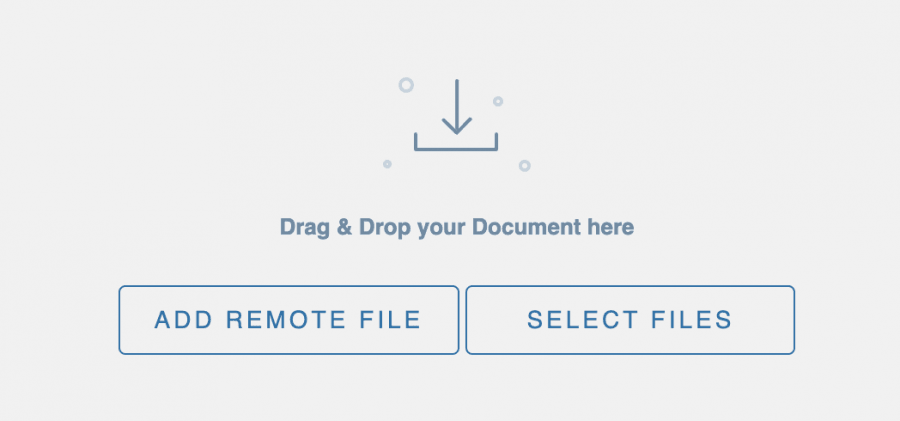
Now we will have this category available in our dashboard, we can add files inside by dragging and dropping or using the file explorer by clicking on "Select Files".
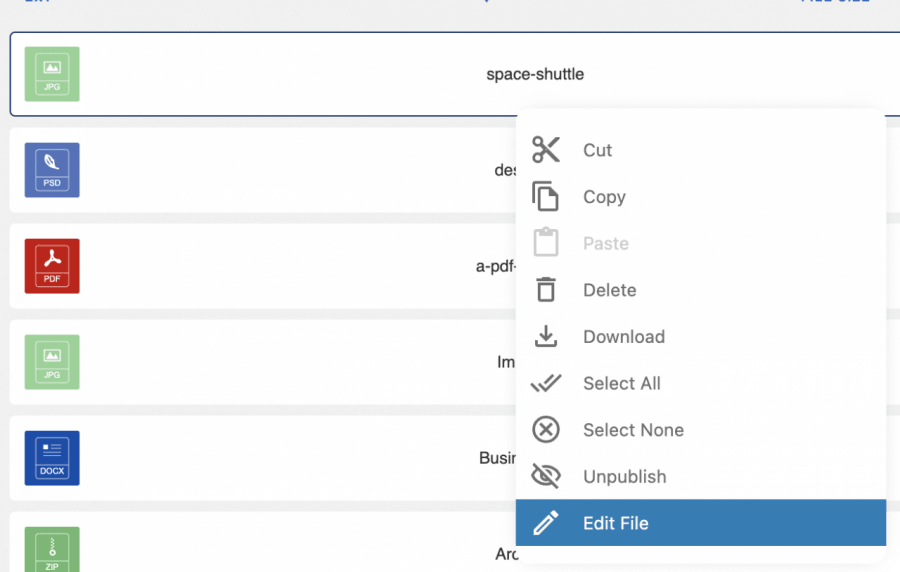
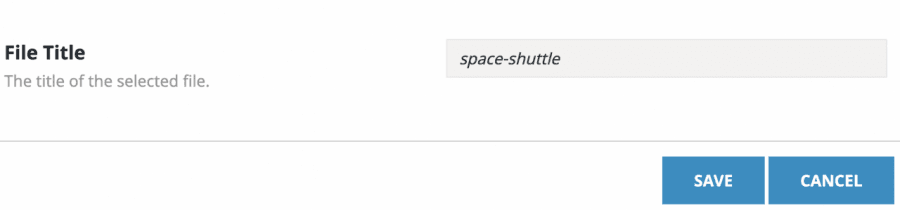
After filling your category, you can edit your files by doing a right-click on your file and then selecting Edit File.
From this section, you can edit multiple things like the file title, add a password, edit the description, the published date, add an expiration date, set a version, add it to multiple categories, and many other things like adding a custom icon, everything just in hand! :)
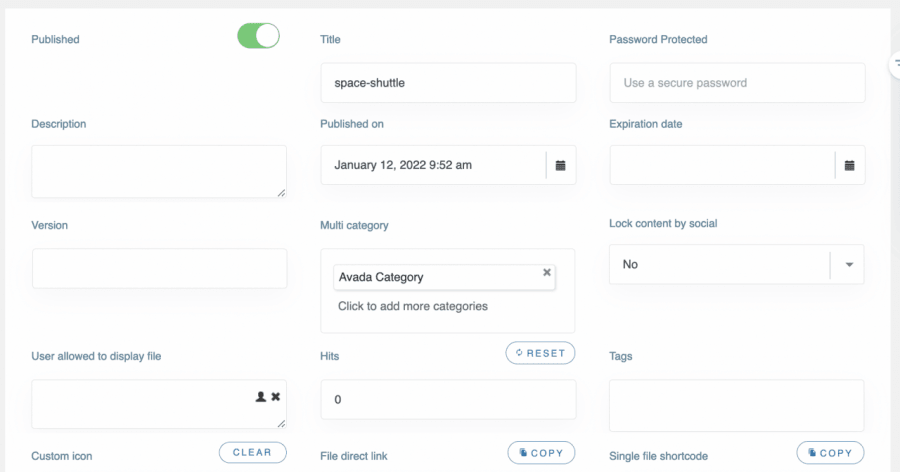
You can edit each file and make it work just how you want it to and also customize it to make it fit your content.
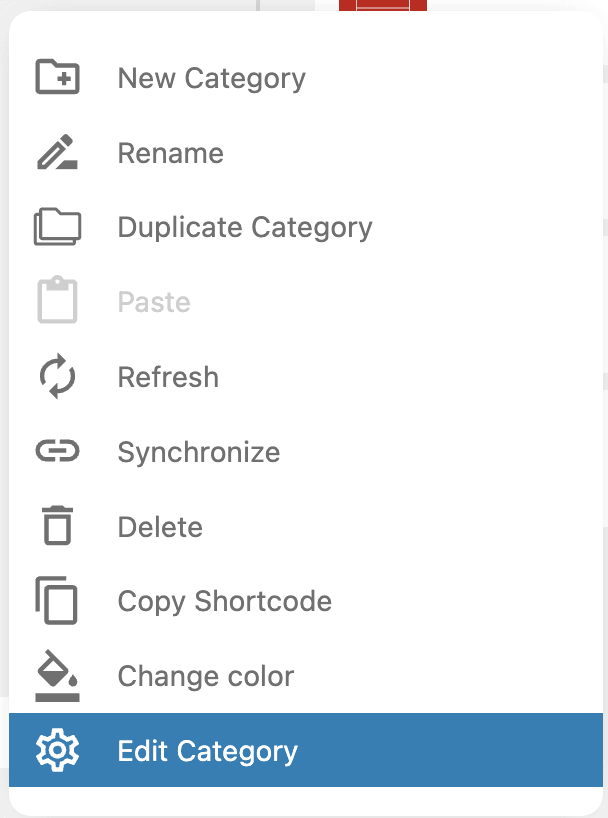
The other big option that we have available in this dashboard is the option to edit the category settings, for this, do a right-click on the category name > Edit category.
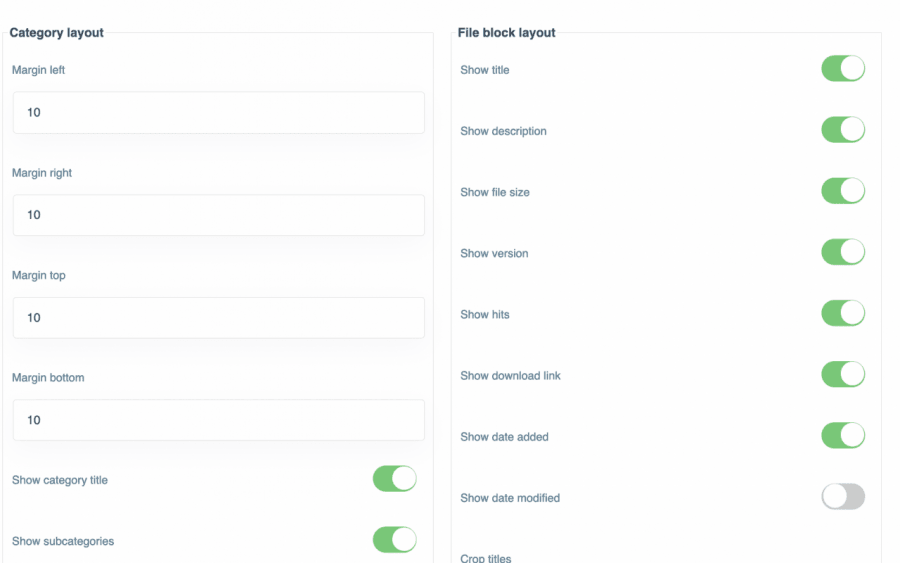
This will open a complete dashboard in the right section where you can add multiple settings to your category and also edit to make it fit your content, between the settings you can find, a description, add security options like who can see the category in the frontend or also set password protection, and design options like the theme, the order, margins, hide or show things and also change the colors of the buttons.
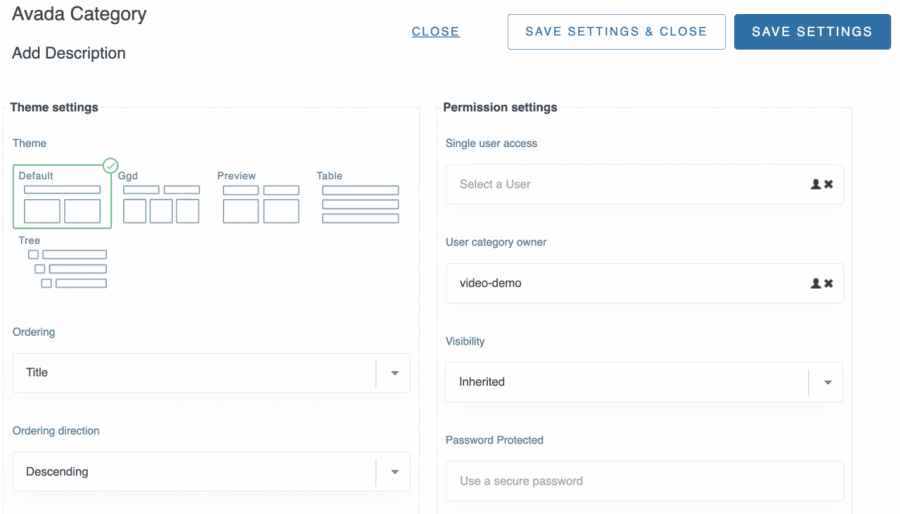
As you can see the options are really handy as you can select, for example, the theme with just a few clicks as well as the show/hide options:
In the last section, we will be able to see the options to change the button and background colors, or also if you want to add an upload form to allow your users to upload files on the front of your site.
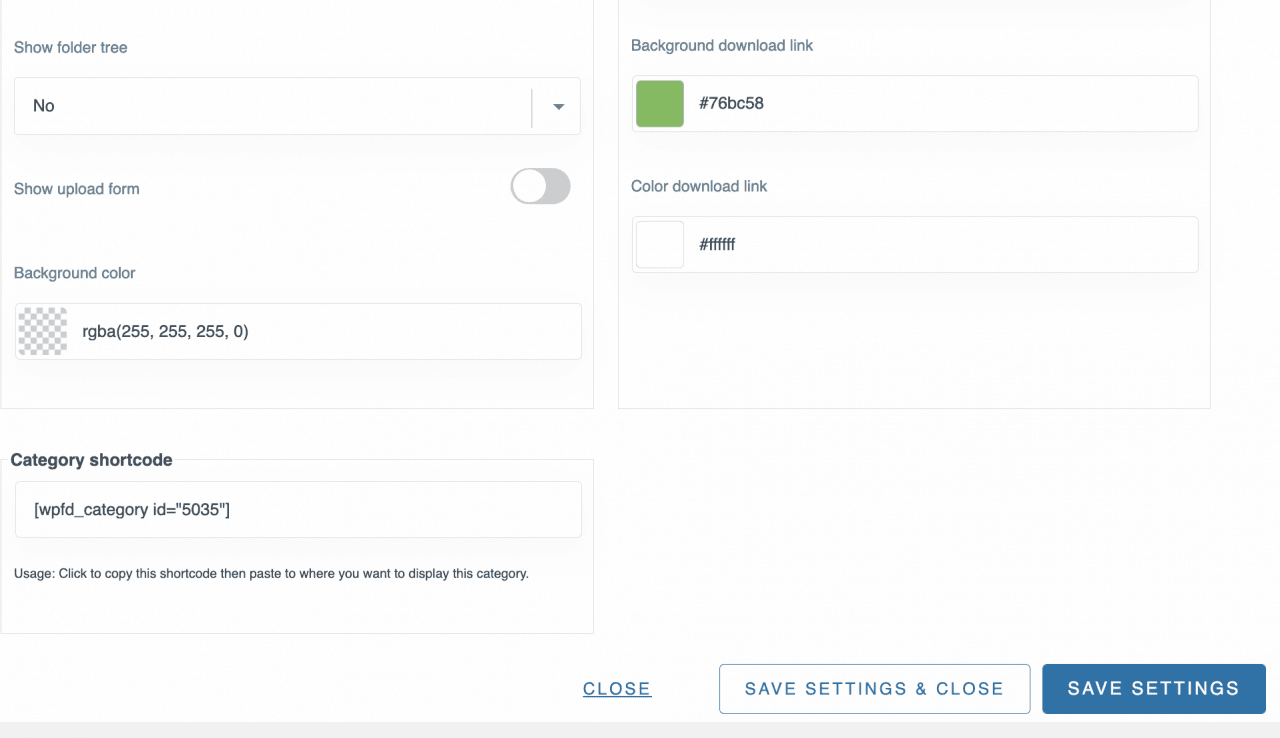
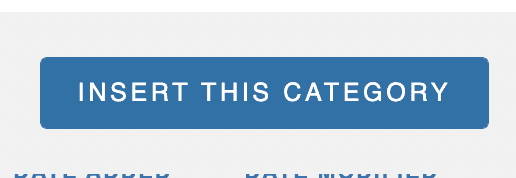
When you finish the settings, all you need is to click on "Save settings" and finally, click on Insert this category at the top right after selecting the category.
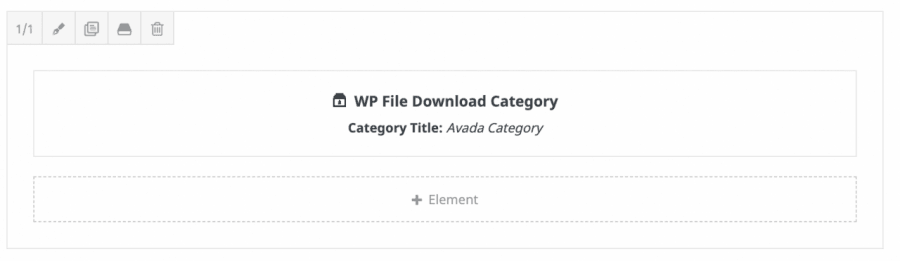
When a category is added, you can confirm that it was successfully added because the title of this will appear in the Avada Element.
All you need to do now is click on Save and the element will be successfully added to your page and the element preview will look like this:
Now all you need to do is publish your page/post and enjoy the results!
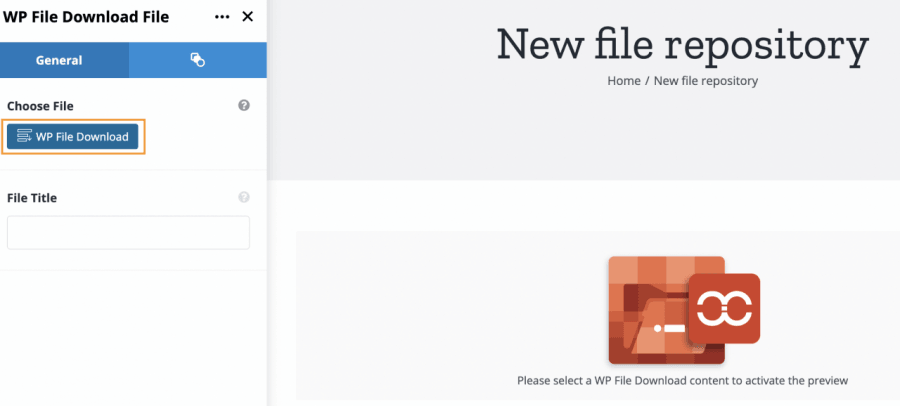
WP File Download File: this is the second widget that we can find in the available elements for the Avada Builder and will allow us to insert a single file.

Clicking on this widget will open a screen where you can click on WP File Download to load the WP File Download dashboard.

On this dashboard, you can easily go into your categories, and select the one where is your file, or you can also create a new category and add a new file.
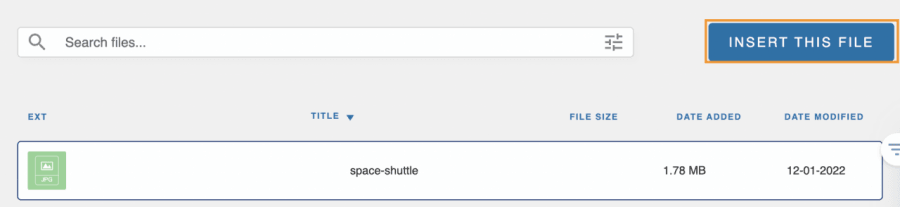
We'll select a file that we uploaded previously under "Avada Category", so look into your files, select the one you want to add, and this will make an "Insert File" button at the top right so select your file and then, click on Insert this File.
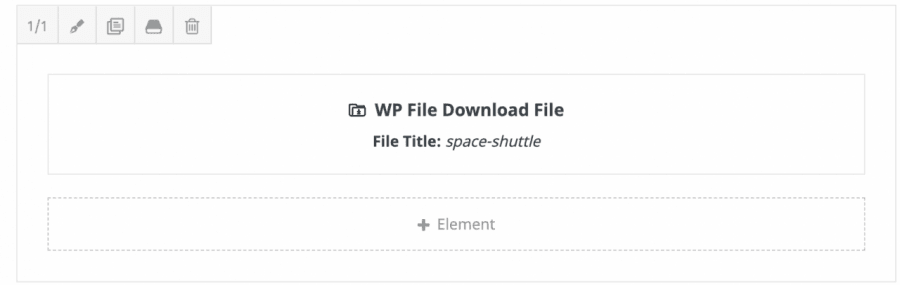
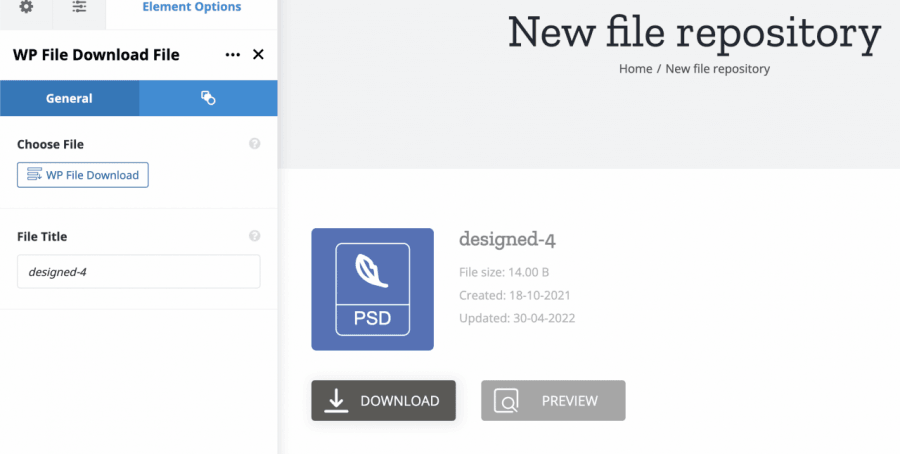
You will know that it was successfully added because the Avada Element will show the file title.
If everything is okay, you can click on Save and it will add the file to your content :), you will see the element in the page builder like this:
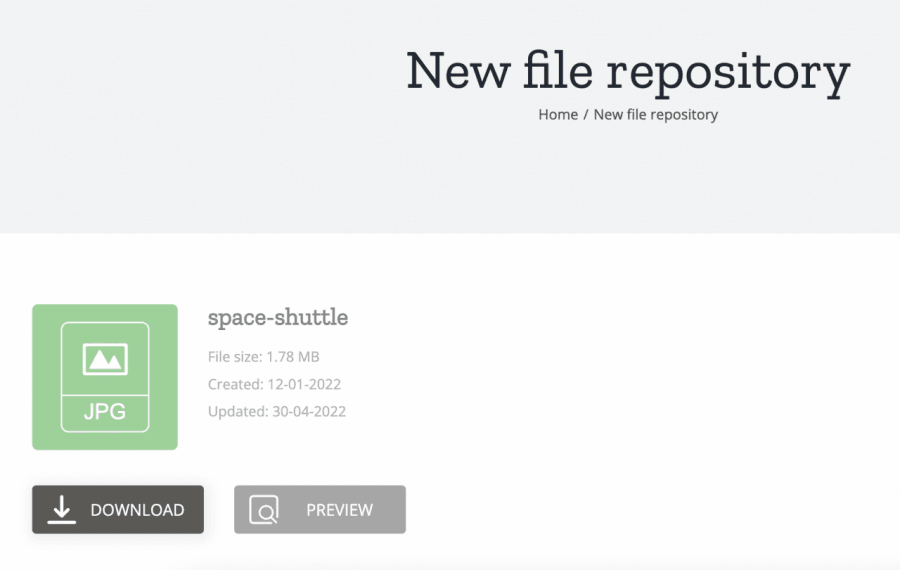
Now all you need to do is publish your post/page and everything will be done ;)
You can add as many files as you want to your content using this widget ;)
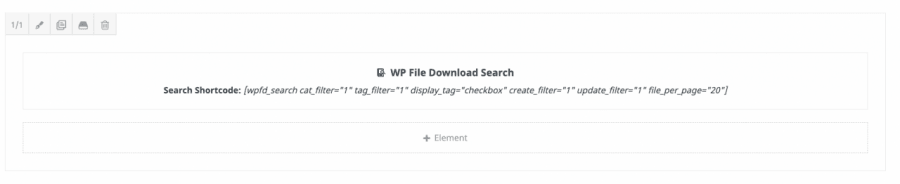
WP File Download Search: this is the third widget that we will be able to use, and this will allow us to create a search engine that could contain all the categories and files available in our WP File Download.

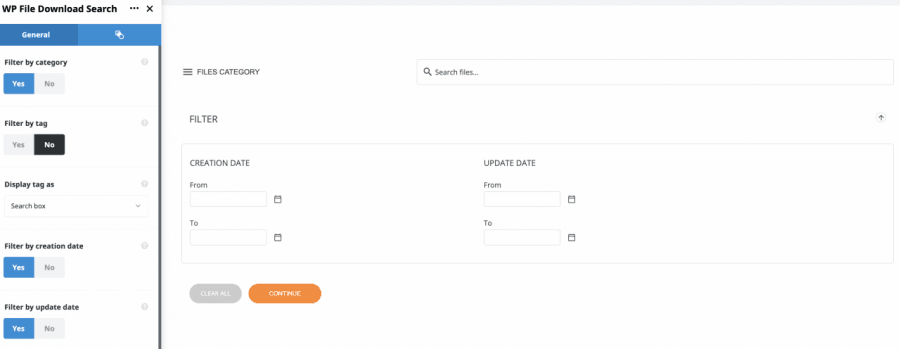
By selecting this widget, you will be able to see all the available options for this element so this can be easily set directly in the widget options, there are available options like adding many filters and changing how to display your tags.
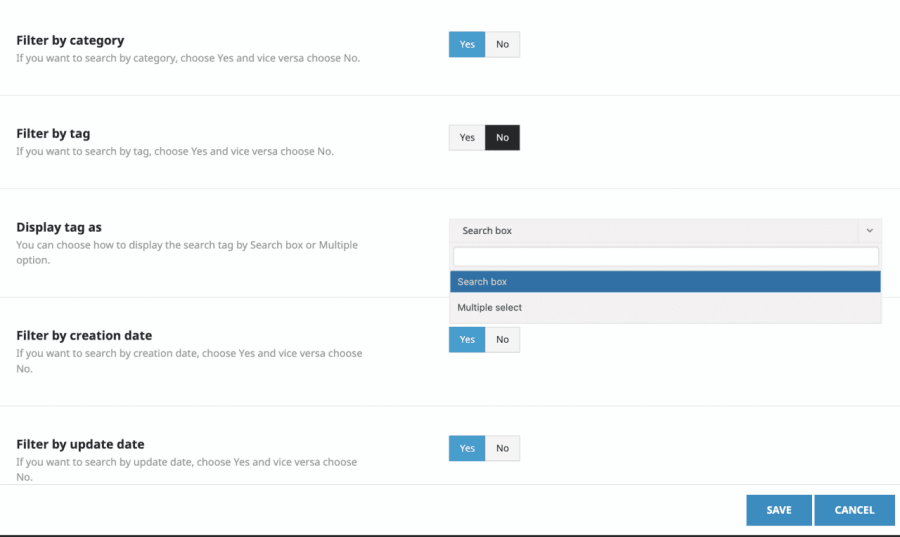
All you need to do is configure your widget and finally, click on Save, you'll be able to see the element added.
All you need to do now is publish your post or page and the search engine will be available.

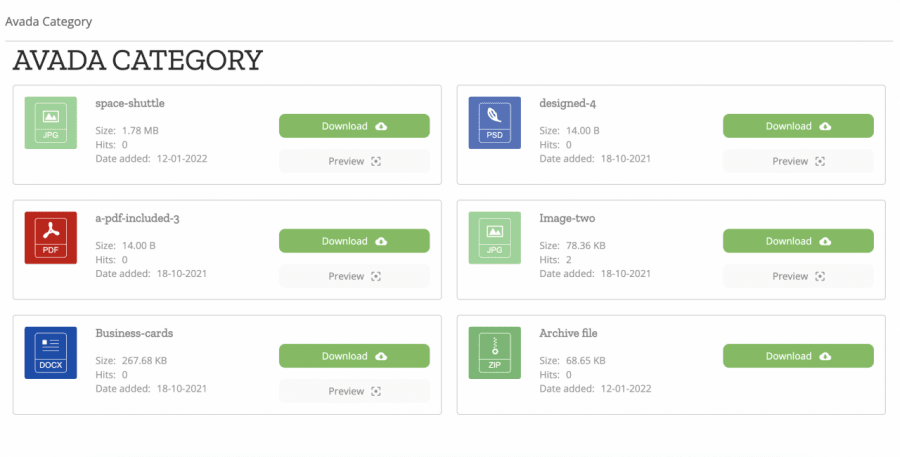
As you can see there are multiple tools that you can use like select the tags, type the file that you want to search, or also select a specific category/subcategory to search there directly, let's look for the file called space-shuttle.
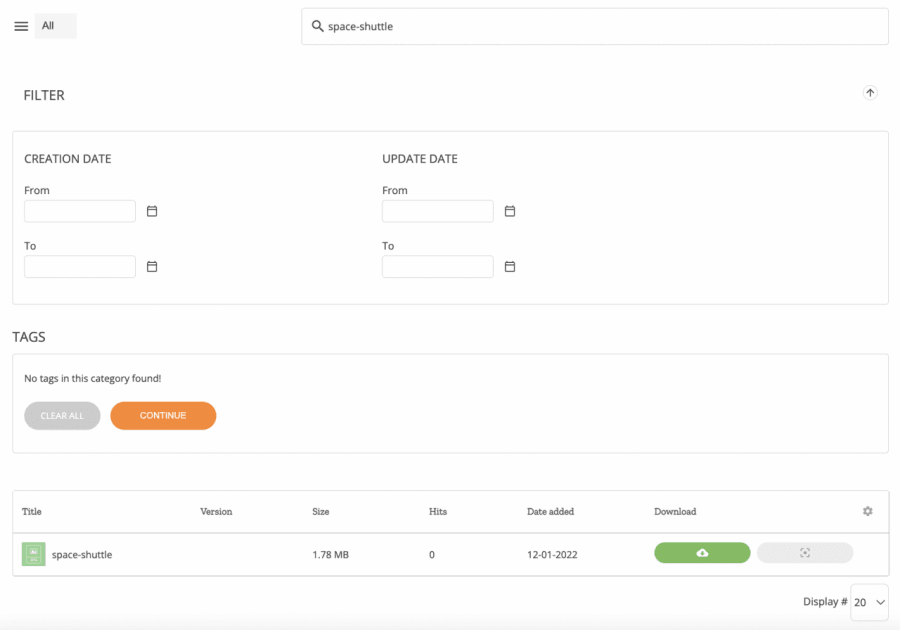
As you can see it is as easy as typing the file name and clicking on Continue, really easy, isn't it? :)
Using the Avada frontend builder to create your File Repository
Now you are maybe thinking, okay, really good that it works really awesome in the backend but… What about the live builder?
We have good news because it also works with the live builder, you can create and manage your categories as well as add/remove files, everything directly in the live builder.
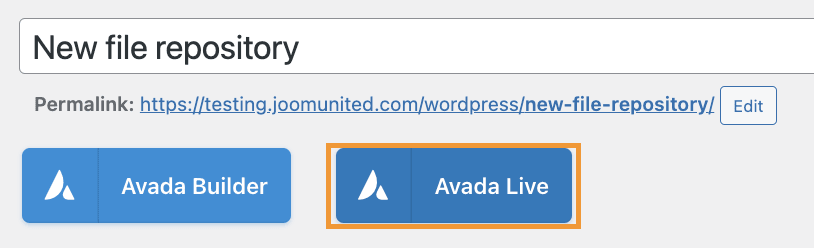
First of all, go to the Avada Live builder by clicking on Avada Live.
This will load the Avada Live builder so we need to click on Add Element and then type WP File Download in the search box.
You can see that the 3 widgets are also available on the Avada live builder so all you need is to click the one you need to use and proceed with the configuration, the widgets available are:
WP File Download Category: This widget will allow you to insert an entire category in your content.

Using this widget will allow you to load the WP File Download embedded in a popup as explained before so you will have the same options to create/manage categories and upload/manage your files as well allowing you to make your category fit your frontend view, all you need to do is click the WP File Download button that will appear on the left section after selecting the widget.
This will load the WP File Download embedded so you can manage your category as explained before with the backend page builder and finally, add it, you'll be able to see the category preview right away!
As easy as clicking a few buttons!
WP File Download File: This will allow you to select and display a single file in your content so you don't need to add an entire category.
By clicking the widget a left panel will be opened, this will allow you to pop up the WP File Download dashboard to select the file between your existing categories or add a new file.
You can, just like in the backend builder, manage your categories and select the file that you want to insert by selecting the file and clicking the top right button Insert This File.
A preview of the file will be shown when you insert it into your content.
So all you need to do now is do the changes you want to do like change the button colors or change the icon and make it fit your page, all of this in your live builder.
WP File Download Search: The third widget available will allow you to show a file engine that will allow your users to search between your categories by using multiple filters based on the tags, categories, and also the date where a file was created.
By selecting this widget, multiple options will be available in the left panel so you can enable as many filters as you want and change how the search engine shows the tags.
As easy as selecting your settings in the left panel and checking them in the right panel.
As you were able to see in this post, this is as easy as clicking a few buttons and enabling the options that we want to show to make WP File Download fit our content, there is simply no better way to save time and work than using this awesome integration.
Calling all webmasters!
Enhance your client websites with WP File Download. Create secure and customizable file
repositories, allowing clients
to easily access and manage their files.
Upgrade your web design services today!
Start using the perfect Avada File Repository
As easy as clicking a few things and showing the content that you want to show and hiding the content you want to hide based on your users to improve their experience and make your site look more professional, no other way to describe this integration, and it is not all, of course, there are many other tools that you can use from WP File Download like the cloud connection for services like Google Drive, the shortcode generator, and many others! So what are you waiting for? Go here and get your membership!
When you subscribe to the blog, we will send you an e-mail when there are new updates on the site so you wouldn't miss them.


Comments