كيفية استخدام صور جوجل مع WP Media Folder والإضافة المعرض

ربط موقع ووردبريس الخاص بك بخدمات السحابة هو خيار جيد عندما تريد إدارة جميع ملفاتك بأسرع ما يمكن، واحدة من أفضل الخدمات للسحابة هي خدمة تسمى "صور جوجل"، خدمة مثيرة حقًا ستسمح لنا بالقيام بالكثير من الأشياء بصورنا.
صور جوجل هي خدمة مهمة حقًا تتيح لك القيام بالكثير من الأشياء مثل حفظ الوسائط من هاتفك أو الكمبيوتر مباشرة إلى السحابة وإنشاء ألبومات أو كولاجات تلقائيًا بناءً على الصور التي تقوم بحفظها.
ستتمكن من ربط موقع ووردبريس الخاص بك ب صور جوجل فقط باتباع خطوات بسيطة مع WP Media Folder حتى تتمكن من استيراد ملفاتك من صور جوجل بنقرة واحدة فقط.
جدول المحتويات
تكامل صور Google في الفيديو
قل وداعًا لمكتبة الوسائط الفوضوية.
WP Media Folder يتيح لك تصنيف الملفات ومزامنة المجلدات مع التخزين السحابي وإنشاء معارض مذهلة واستبدال الصور دون كسر الروابط.
قم بتحسين سير عمل الوسائط الخاص بك اليوم
إنشاء ألبوم صور جوجل ووردبريس
هذا مفيد حقًا إذا، على سبيل المثال، كان لديك وكيل وسائط يستخدم هاتفًا ذكيًا لالتقاط الصور من أجل تحميلها إلى موقع ووردبريس الخاص بك، سيتم تحميل الصورة تلقائيًا إلى حساب صور جوجل ومن ثم سيتم تحميلها تلقائيًا إلى موقع ووردبريس الخاص بك.
لهذا المثال، سنقوم بإنشاء معرض باستخدام WP Media Folder وإضافة المعرض التي تساعدنا كثيرًا عند إنشاء المعارض وكل هذا مباشرة من حساب صور جوجل.
هذا هو حساب صور جوجل الذي سنستخدمه:
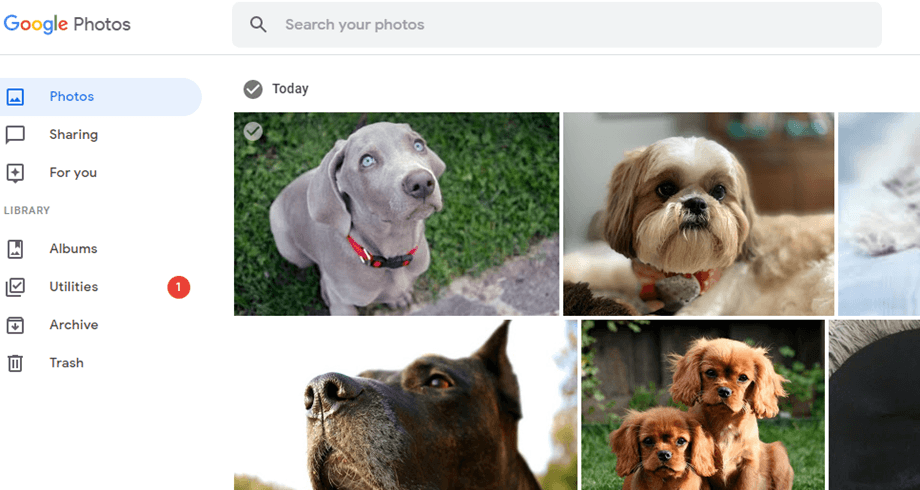
وهنا مكتبة الوسائط الفارغة الخاصة بنا مع تثبيت WP Media Folder :
![]()
أولاً وقبل كل شيء ، سنقوم بربط موقع ووردبريس الخاص بنا بـ جوجل فوتو باستخدام إضافة السحابة من WP Media Folder، الأمر في غاية السهولة! هناك طريقتان للربط بين ووردبريس وجوجل فوتو. الأول هو باستخدام تطبيق جوجل الجاهز من JoomUnited لإنشاء الاتصال ، والذي لن يستغرق أكثر من دقيقة. الخيار الثاني هو إنشاء التطبيق الخاص بك.
إنشاء اتصال تلقائي بين صور جوجل و ووردبريس

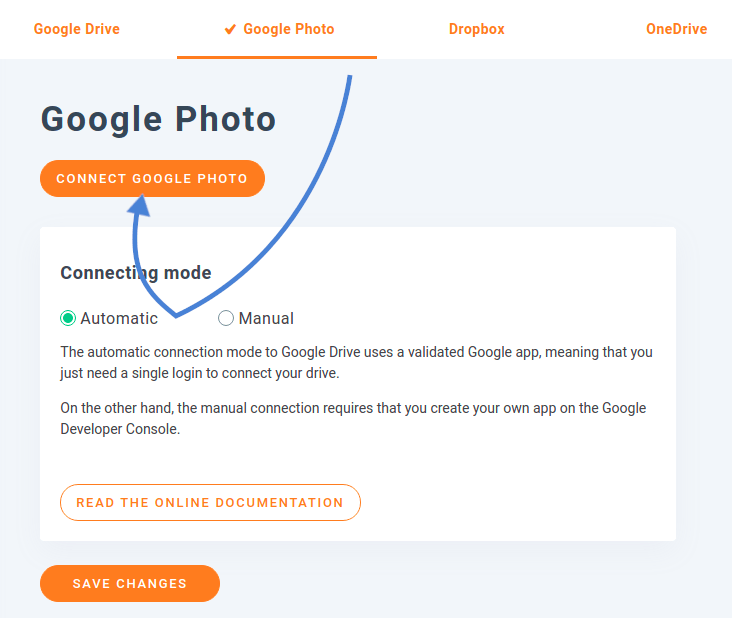
أسهل طريقة لمزامنة صور جوجل مع ووردبريس هي استخدام خيار المزامنة التلقائية. للعثور على هذا الخيار، انتقل إلى WP Media Folderإعدادات "السحابة" ، وابحث عن صور جوجل . انقر على "تلقائي" لاستخدام تطبيق جوجل الخاص بـ JoomUnited.

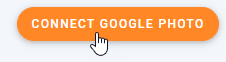
لربط صور جوجل بوردبريس واستخدام صورك وألبوماتك السحابية على مدونتك، تحتاج إلى الموافقة على شرطين. للبدء، انقر على ربط صور جوجل الزر. أول ملاحظة يجب عليك الموافقة عليها هي إخلاء مسؤولية يشرح سبب طلب JoomUnited الإذن للوصول إلى محتوى صور جوجل الخاص بك.

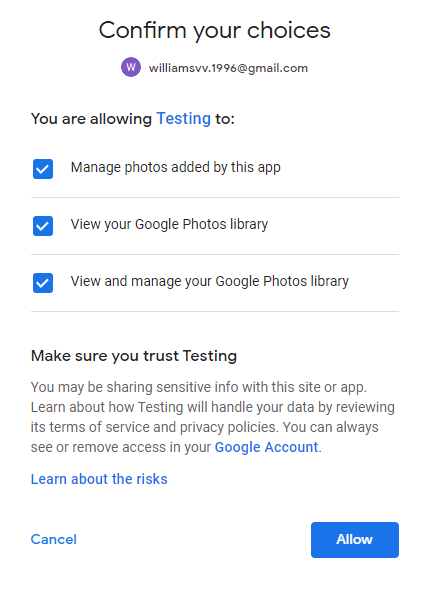
بعد الموافقة على إخلاء المسؤولية الأول، سيتم أخذك إلى جوجل لاختيار الحساب الذي تريد ربطه. هنا أيضًا، ستظهر لك نافذة منبثقة تخبرك بالوصول الذي ستقدمه جوجل لتطبيق JoomUnited الجاهز: وهو الوصول إلى حساب صور جوجل الخاص بك. اقبل هذا لإنهاء وبدء استخدام الاتصال بين صور جوجل ووردبريس.
إنشاء اتصال يدوي بين صور جوجل و ووردبريس باستخدام تطبيق مخصص
البديل لاستخدام تطبيق جوجل الخاص بـ JoomUnited هو إنشاء تطبيقك الخاص. للقيام بذلك، حدد "يدوي" بدلاً من "تلقائي" في الإعدادات. بعد ذلك، ستحتاج إلى إنشاء تطبيق مطور جوجل لربطه بموقعك، انتقل إلى هنا لإنشاء واحد.
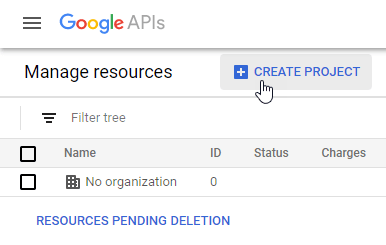
بعد النقر على "إنشاء مشروع" ستتمكن من اختيار اسم المشروع ثم انقر على "إنشاء".
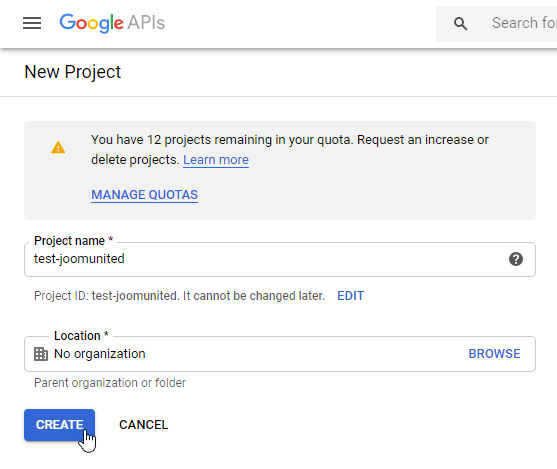
انتظر بضع ثوانٍ لإنشاء المشروع ثم انتقل إلى المشروع بالنقر على الإشعار.

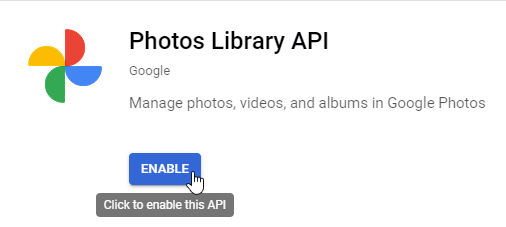
إذا كانت هذه هي المرة الأولى التي تستخدم فيها واجهة برمجة تطبيقات مكتبة الصور، فسيتعين عليك تمكينها، وللقيام بذلك انتقل إلى واجهات برمجة التطبيقات والخدمات > المكتبة وابحث عن "واجهة برمجة تطبيقات مكتبة الصور"، وحددها وانقر على "تمكين".
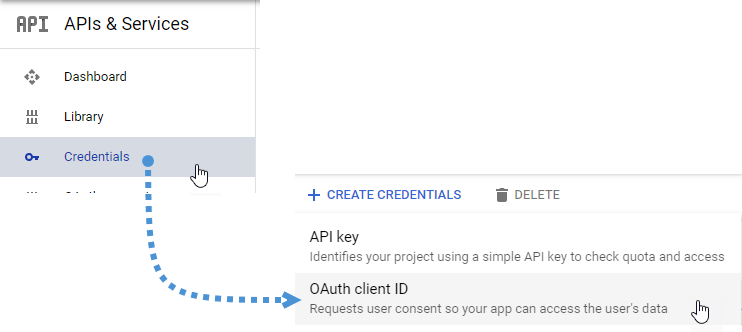
من القائمة اليسرى، انقر على واجهات برمجة التطبيقات والخدمات، ثم في القائمة اليسرى انتقل إلى بيانات الاعتماد > إنشاء بيانات الاعتماد > معرف عميل OAuth.
إذا كانت هذه هي المرة الأولى، انقر على "تكوين شاشة الموافقة" وحدد نوع المستخدم.
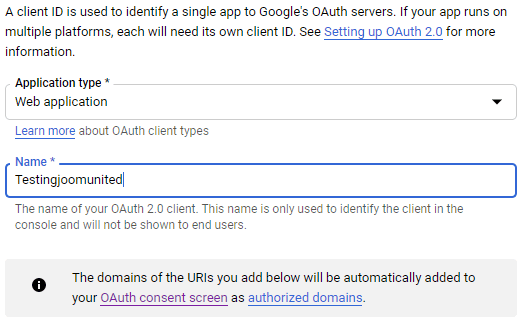
الآن يأتي الخطوة الأكثر أهمية:
أولاً، انقر على "تطبيق ويب" واختر اسمًا.
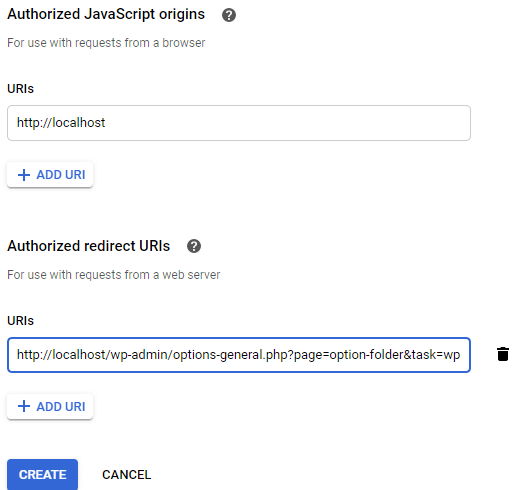
انقر الآن على "إضافة URI" في قسم "مصادر JavaScript المعتمدة" وأضف: https://your-domain.com (استبدل باسم نطاقك، بدون شرطة مائلة في النهاية).
ثم انقر على "إضافة URI" في قسم "عناوين إعادة التوجيه المعتمدة" وأضف: https://your-domain.com/wp-admin/options-general.php?page=option-folder&task=wpmf&function=wpmf_google_photo_authenticated (استبدل "your-domain" باسم نطاقك).
انقر على "إنشاء".
لقد قامت جوجل بتغيير سياستها مؤخرًا، لذا عليك ملء نطاقاتك المعتمدة في علامة تبويب شاشة موافقة OAuth > تحرير التطبيق.
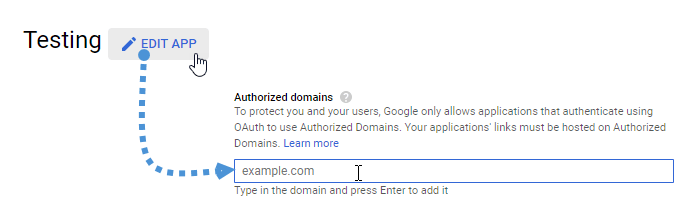
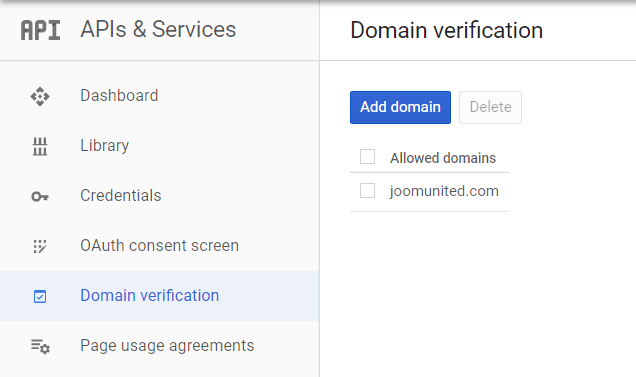
علاوةً على ذلك، ينبغي إضافة نطاقك إلى علامة التبويب التحقق من النطاق. يرجى النقر على زر "إضافة نطاق" واتباع التعليمات.
الآن يمكنك العودة إلى الخطوة السابقة لإنشاء بيانات الاعتماد.
وأخيراً... ها قد حصلت على المعرف والسرية لإضافتهما في تكوين WP Media Folder.
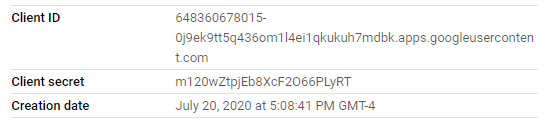
انتقل الآن إلى الإعدادات > WP Media Folder > علامة التبويب السحابية > صور جوجل ، وانسخ/ألصق معرف العميل وسر العميل من تطبيق مطوري جوجل الخاص بك إلى WP Media Folder ، ثم انقر فوق "حفظ".
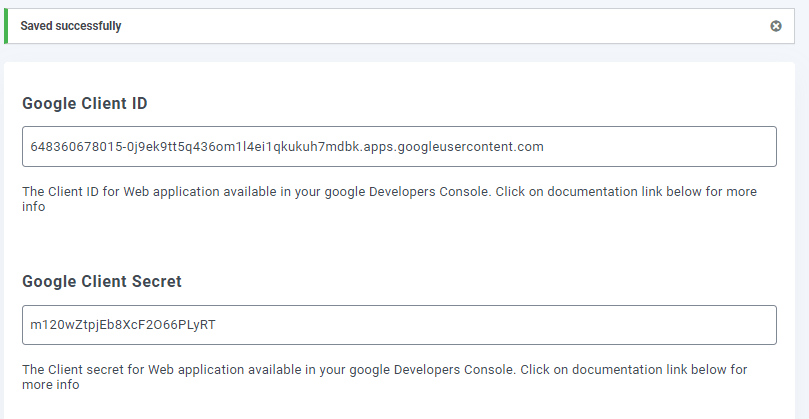
سيتم حفظ البيانات، أخيراً انقر على "ربط صور جوجل"، ثم سجل الدخول إلى حساب جوجل الخاص بك (الحساب الذي يحتوي على صور جوجل التي تريد استخدامها).
السماح بجميع الأذونات.
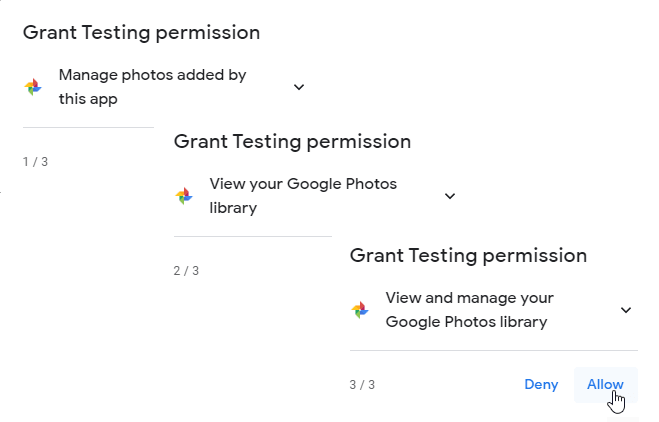
تأكيد اختياراتك وسيتم كل شيء.
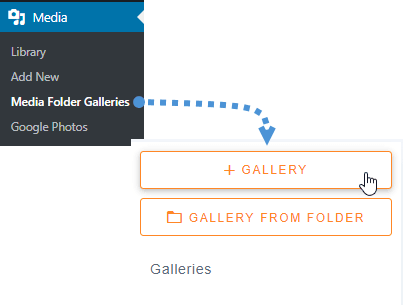
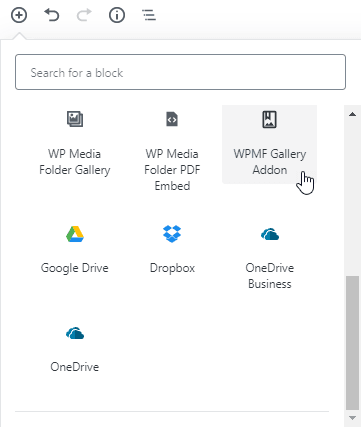
بعد كل هذه الأمور، سنكون قد جهزنا كل شيء، فلنقم بإنشاء معرض يعتمد على وسائط صور جوجل، وللقيام بذلك، انتقل إلى الوسائط > معارض مجلد الوسائط > +معرض.
سيتعين علينا كتابة اسم ، وتحديد سمة ، والنقر على “إنشاء”.
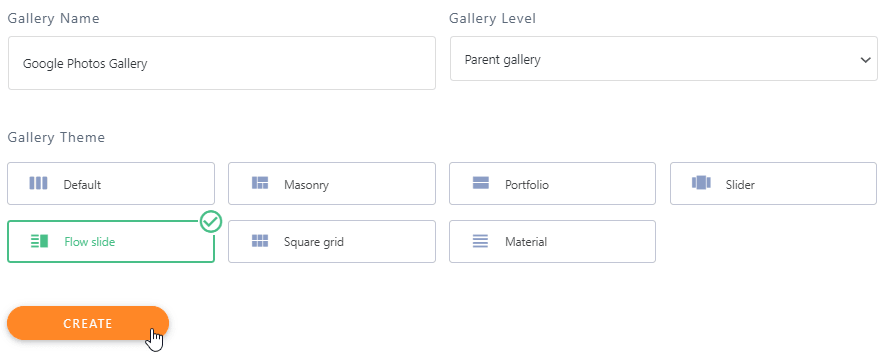
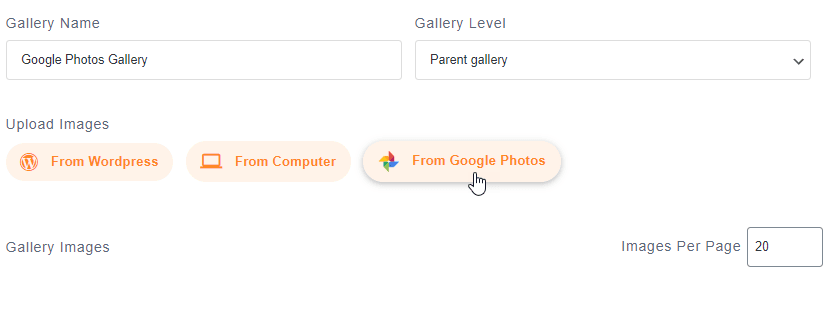
الخطوة التالية في إنشاء المعرض هي إضافة الوسائط للمعرض ، وسيكون لدينا صور Google كخيار ، حدده.
الآن ، ستتمكن من رؤية مجلدات صور Google على الجانب الأيسر والصور على علامة التبويب الرئيسية. سنختار الكل ثم ننقر على “استيراد التحديد”.
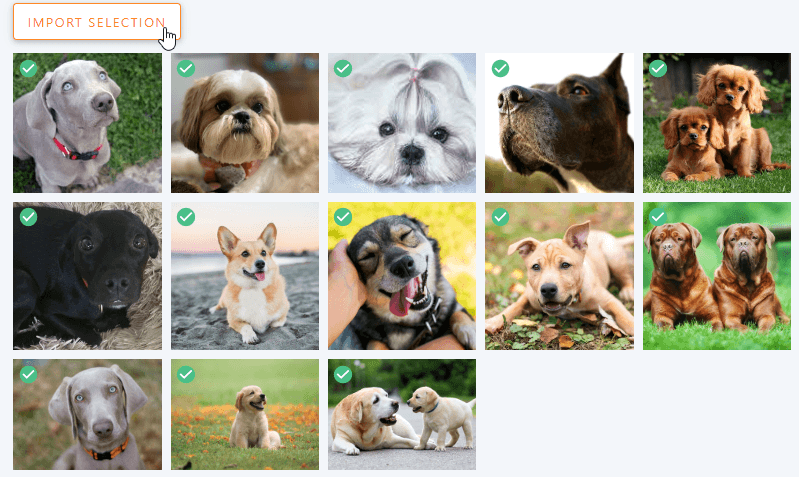
سيقوم تلقائيًا باستيراد اختيارك.

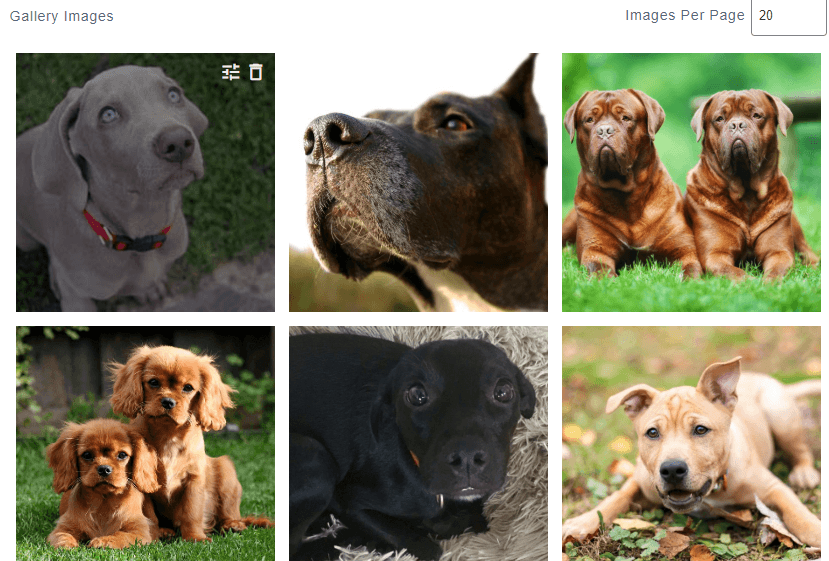
جميع الصور ستكون متاحة على لوحة التحكم حتى تتمكن من نقل صورة، إزالتها، أو تحرير أشياء مثل حقول البيانات الوصفية.
بعد تحرير المعرض كما تريد، انقر على "حفظ".
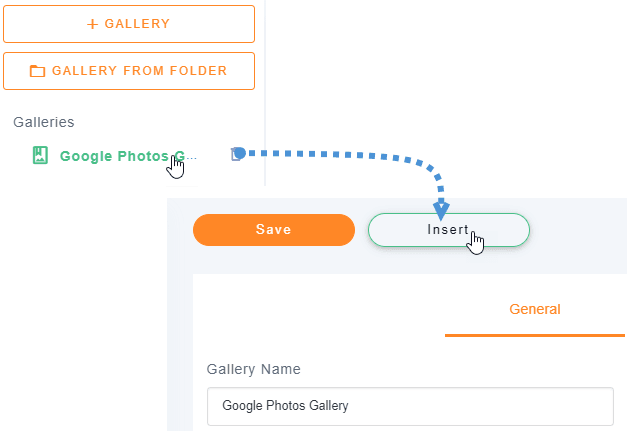
الآن وقد انتهينا من كل شيء يتعلق بإنشاء المعرض، انتقل إلى المنشور/الصفحة التي تريد إضافة المعرض إليها، سنضيفه إلى منشور، لذا دعنا نذهب إلى منشور > إضافة جديد.
انقر على + > WP Media Folder > كتلة إضافة معرض ووردبريس.
انقر على "اختيار أو إنشاء معرض" (نعم، يمكننا أيضًا إنشاء المعرض مباشرة من إنشاء المنشور)، اختر المعرض الذي أنشأناه من قبل وانقر على "إدراج".
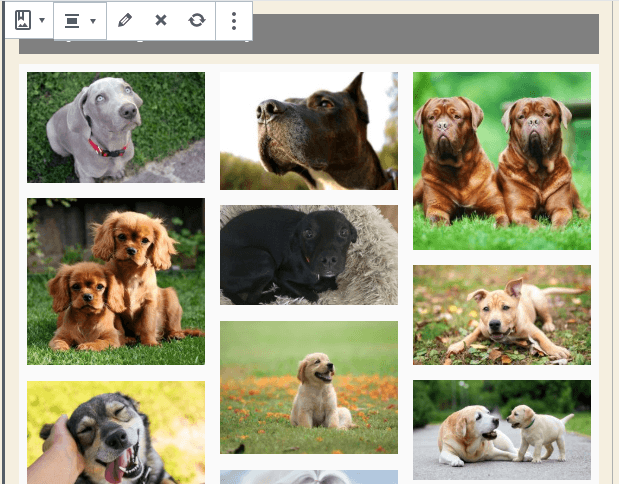
ستتمكن من رؤية معاينة المعرض الخاص بك في محرر الكتلة، وهناك الكثير من الخيارات في القسم الأيمن حيث يمكنك تغيير خيار السمة حتى نتمكن من تخصيص معرضنا مباشرة في ذلك القسم إذا لم يعجبك مظهره.
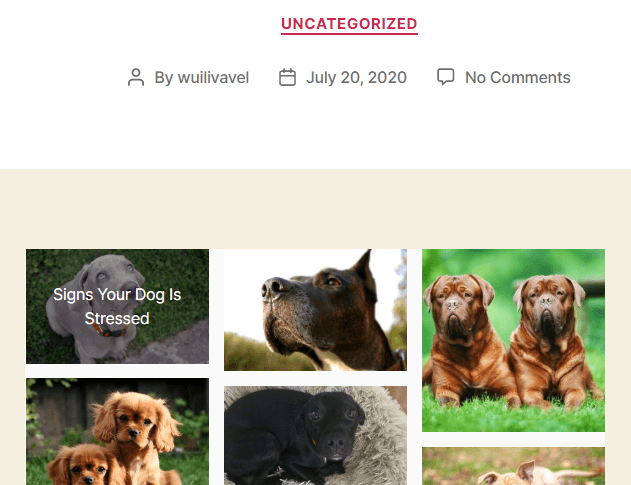
أخيرًا، انقر على نشر وسيتم كل شيء.
كما ترون، كان الأمر سهلًا حقًا لأن WP Media Folders تجعل كل شيء أسهل.
نداء لجميع مشرفي المواقع!
وفر الوقت وارفع الإنتاجية مع WP Media Folder. قم بتنظيم ملفات الوسائط للعملاء بسهولة، وإنشاء معارض مخصصة، وتوفير تجربة مستخدم سلسة.
قم بترقية مشاريع موقعك الآن!
استخدم هذا البرنامج الإضافي لصور جوجل ووردبريس لتسريع جميع العمليات
كما ترون، WP Media Folder سهل الاستخدام حقًا ويعطيك الكثير من الخيارات عند استخدام صور Google، وستكون عملية إنشاء معرض بناءً على صور Google أسرع بكثير.
الأفضل من كل شيء هو أن هذه واحدة من جميع الأدوات التي لدى WP Media Folder ، هناك الكثير من الخيارات مثل الاتصال السحابي لتوفير مساحة التخزين وإنشاء مجلدات أو معارض بناءً على المجلدات فماذا تنتظر؟ اذهب هنا وخذ عضويتك الخاصة 😉.
عندما تشترك في المدونة، سنرسل لك رسالة بريد إلكتروني عند وجود تحديثات جديدة على الموقع حتى لا تفوتك.


